
Today we’ll talk about the initial setup of the Firefox browser, which I use myself and recommend to others. Recently I talked about what choice of browsers we have today, both for desktop and mobile platforms.
🖐️Hey!
Subscribe to our Telegram channel @r4ven_me📱, so you don’t miss new posts on the website 😉. If you have questions or just want to chat about the topic, feel free to join the Raven chat at @r4ven_me_chat🧐.
A brief digression.
The browser from Mozilla is one of the first browsers to appear in the world, at the dawn of the internet’s spread. And the fact that it managed to survive and remain competitive to this day says a lot. This corporation not only develops its own web browser, but also participates in, and even actively organizes, numerous events related to the development of modern web technologies and internet standards. In short, Mozilla has been an active player in the IT industry for many years.
By the way, this browser had a huge impact on the popularization of open-source software, having opened its source code back in the day, thereby giving the whole world the opportunity to study in detail the cutting-edge web developments that existed at the time.
So, let’s return to the topic of this note. I don’t think anyone will have trouble installing the Firefox browser on Windows; on Linux systems, this browser is preinstalled and the default browser in 95% of cases.
Let me warn you right away that all these settings are just my preferences, not strict recommendations. Except, probably, for the ad blocker.
What we’ll do:
- Change the start page;
- Change the default search engine;
- Disable telemetry sending;
- Install an ad blocker (without it, there’s no point in using the browser at all);
- Install an extension that checks spelling and helps find synonyms for words;
- Configure the menu bar;
- Disable shutting down the browser after closing the last tab;
- Make the tabs compact.
So let’s get started.
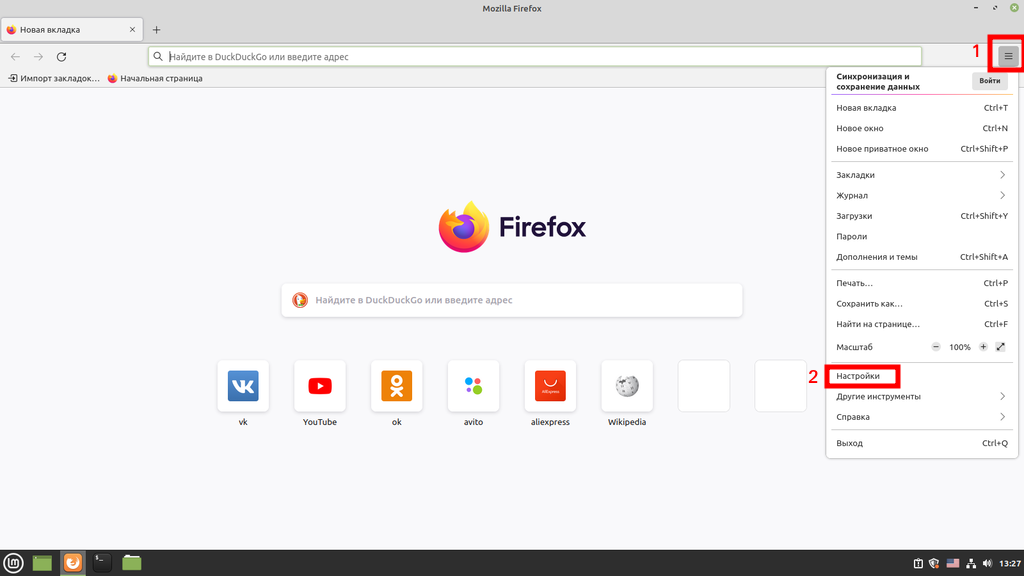
Go into settings:
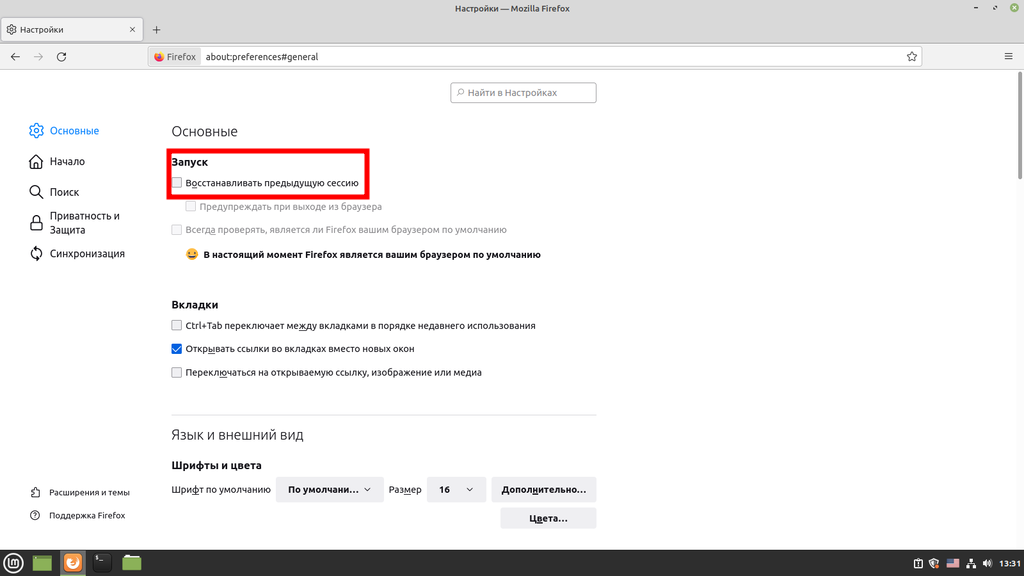
In the “General” section, uncheck “Restore previous session”:
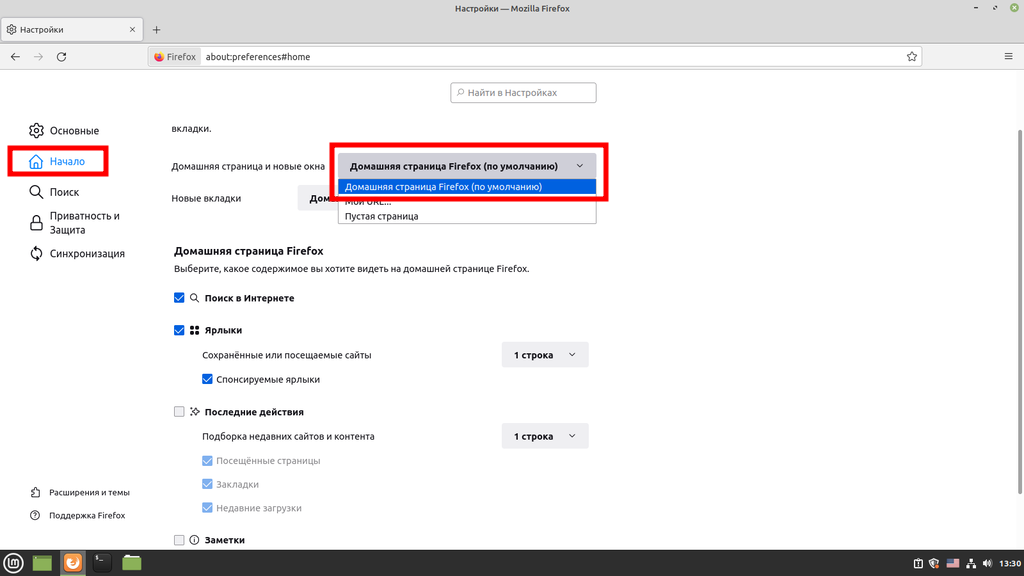
Next, go to the “Home” section and choose the home page for new windows:
Go to the “Search” section and choose the search engine we need:
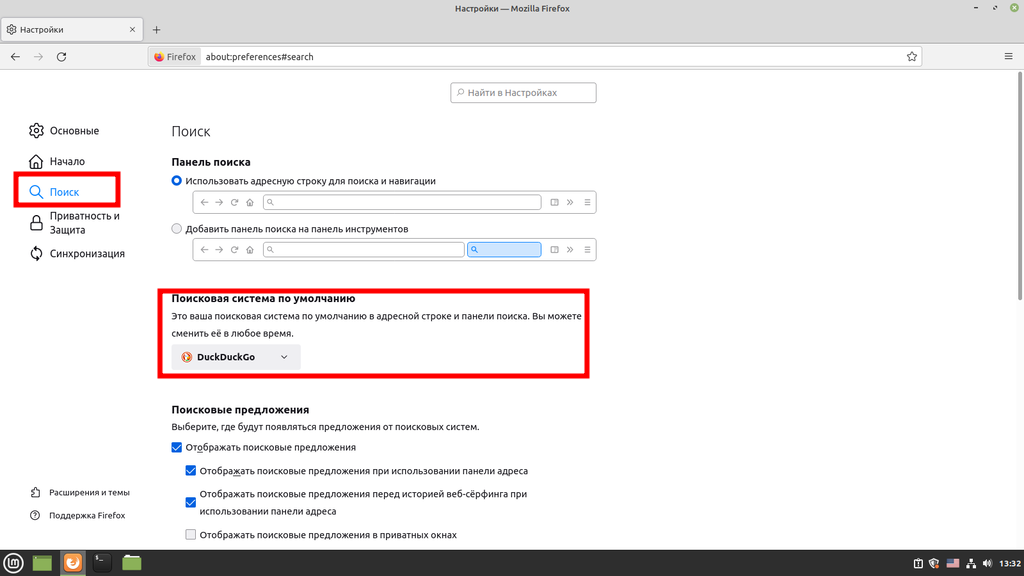
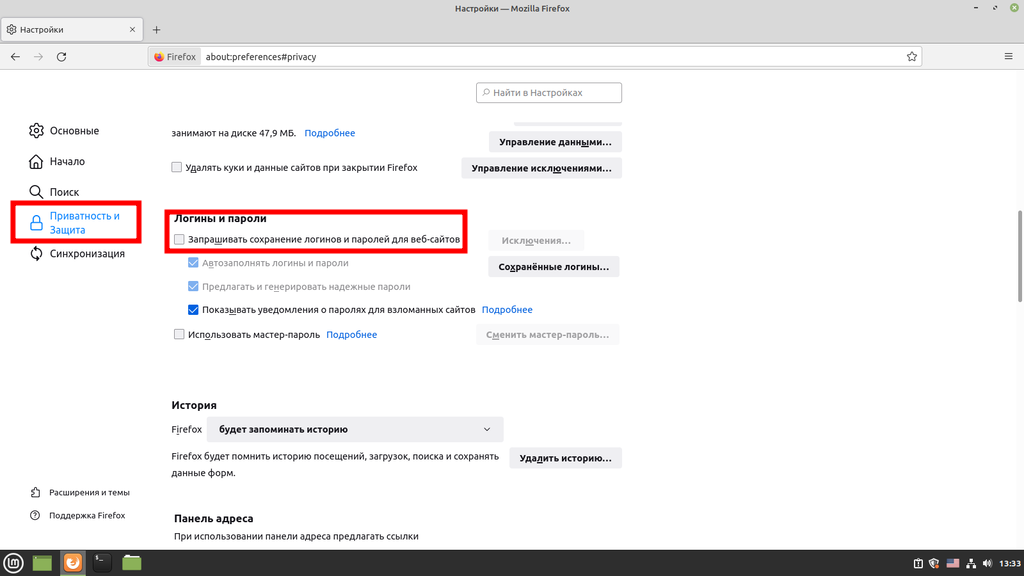
Next up is the “Privacy & Security” section. Here we disable prompts to save logins and passwords for websites.
I keep all my logins and passwords in a separate place, there will be a separate note about this.
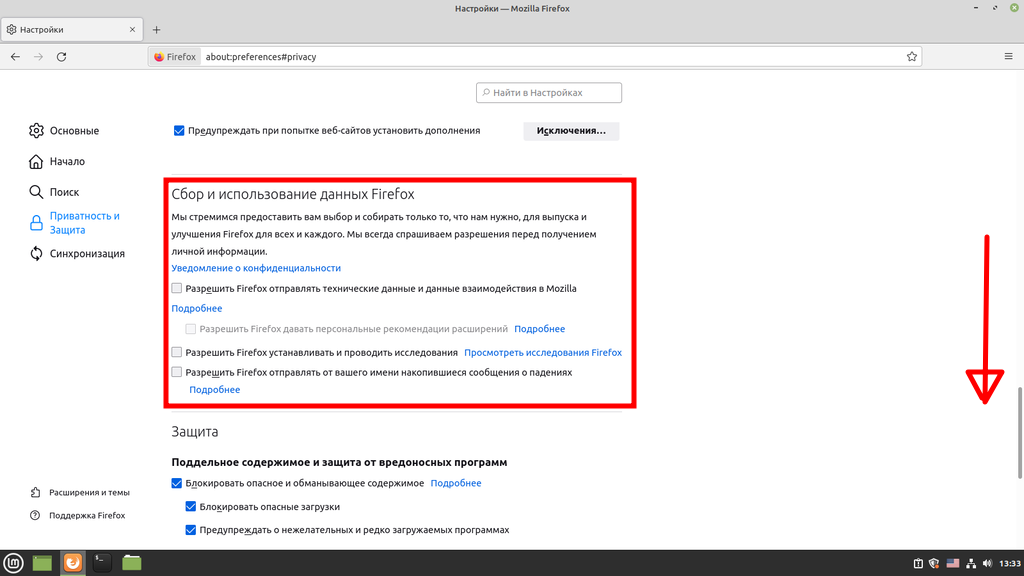
We also disable telemetry collection and sending. Even though Firefox developers claim they collect data that doesn’t allow identifying the user, I still prefer to disable this option:
Now let’s go to the extensions section:
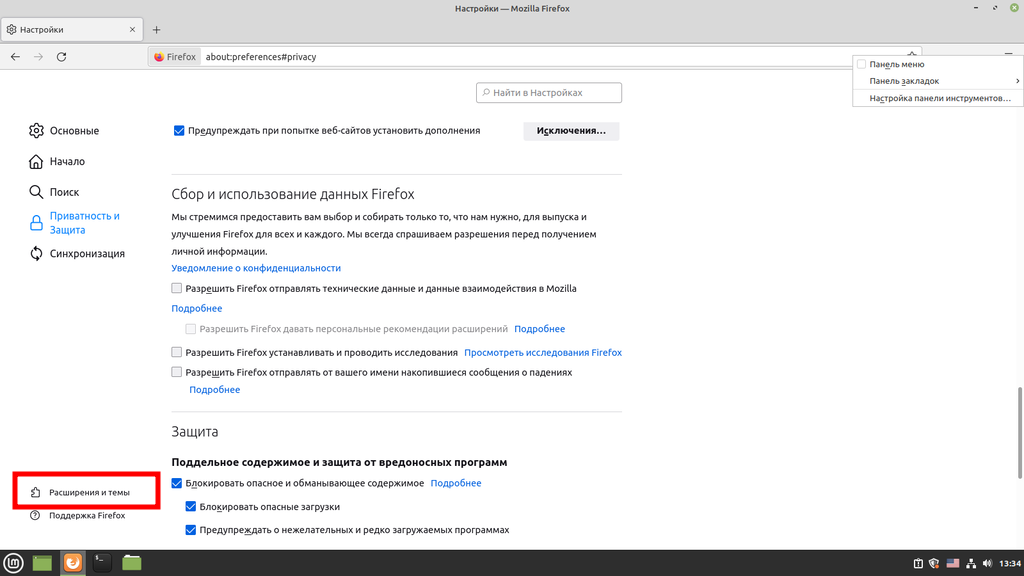
For a basic setup, I usually install two plugins: an ad blocker and a spell-checking plugin. I also enable synonym lookup on double-clicking a selected word while typing, for the latter plugin:
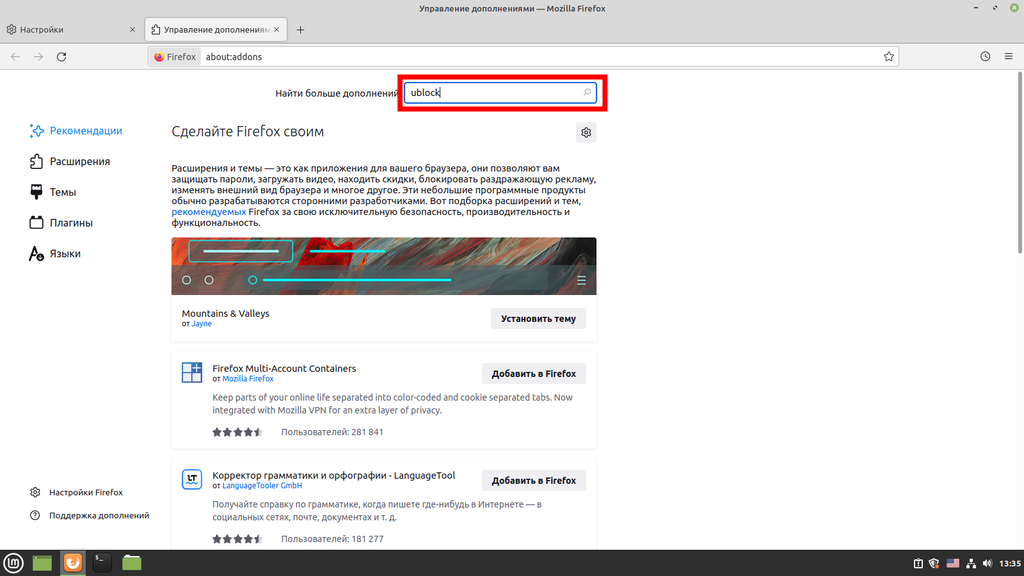
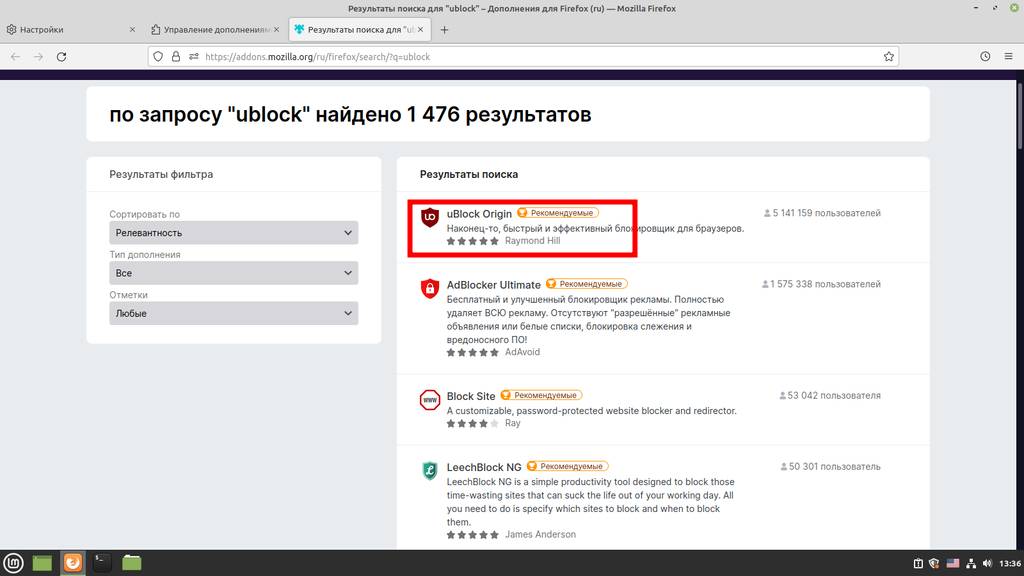
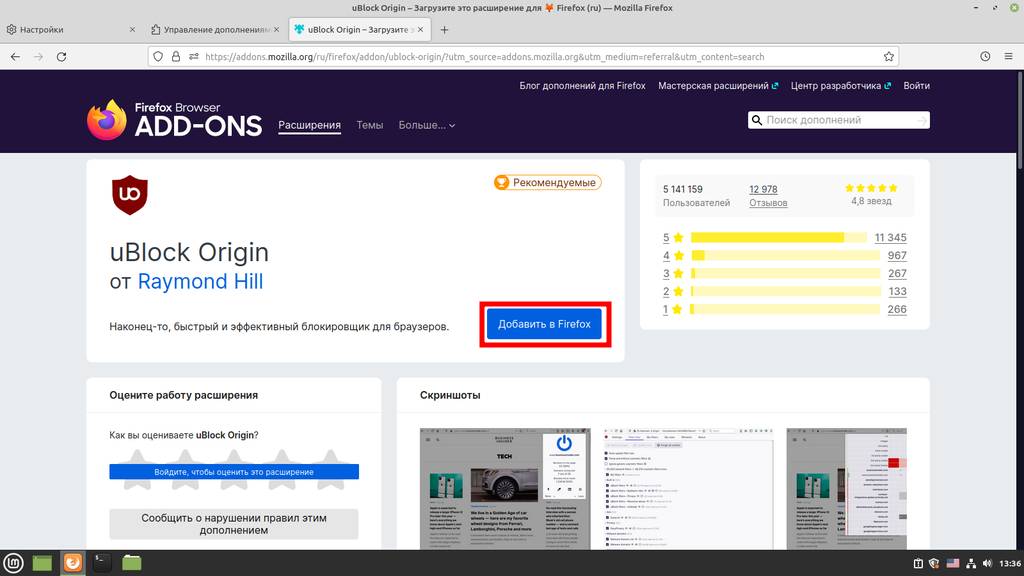
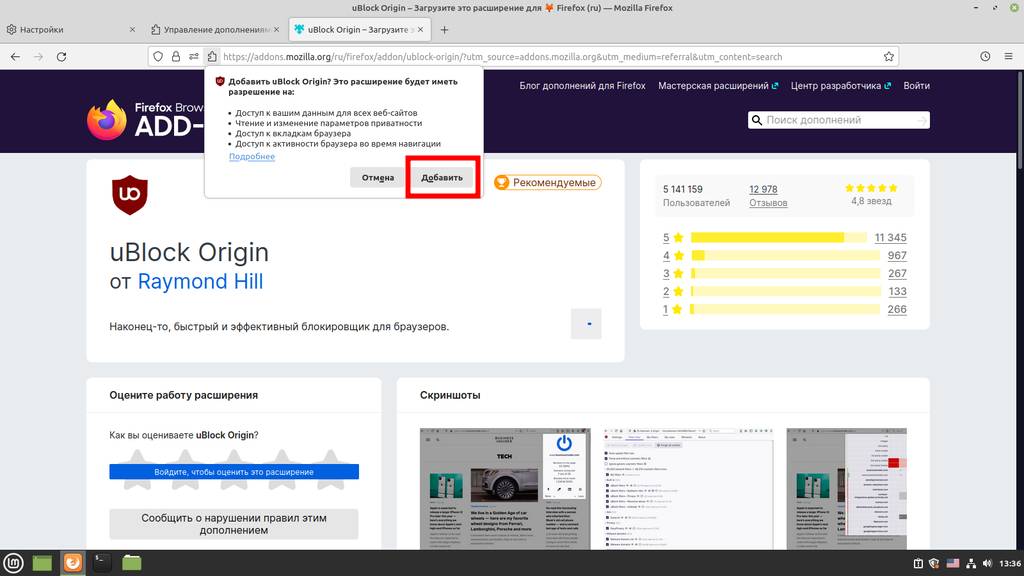
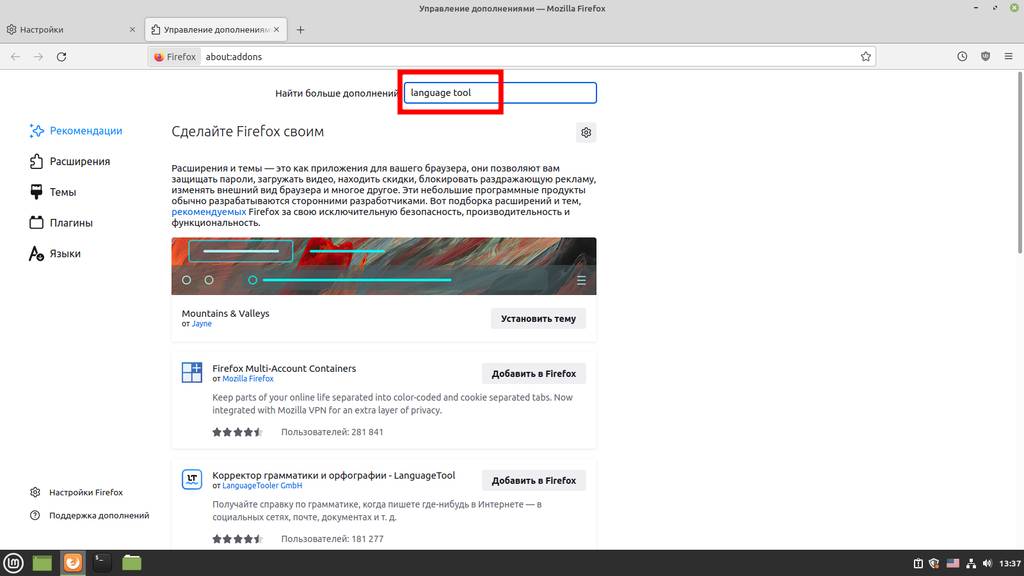
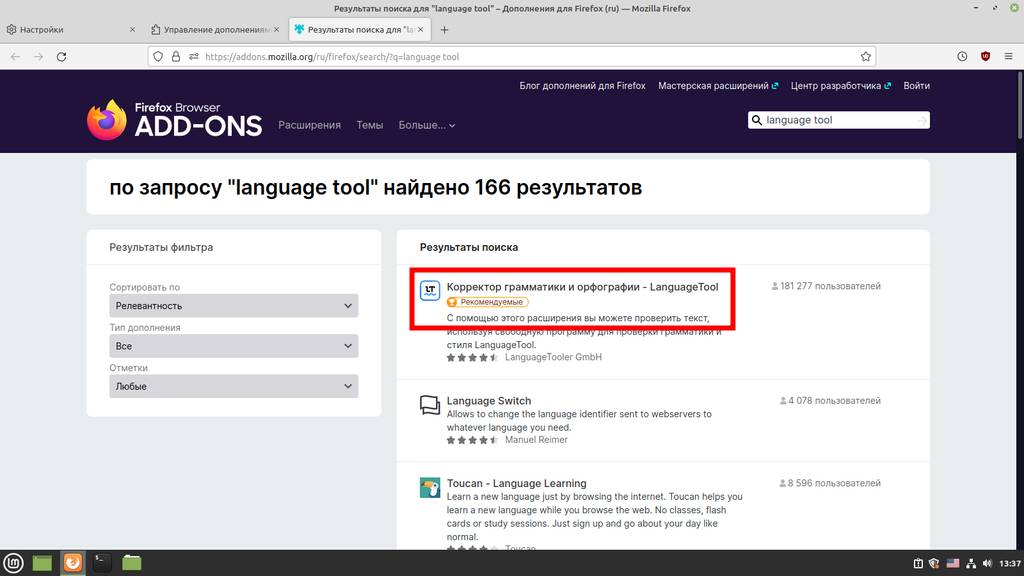
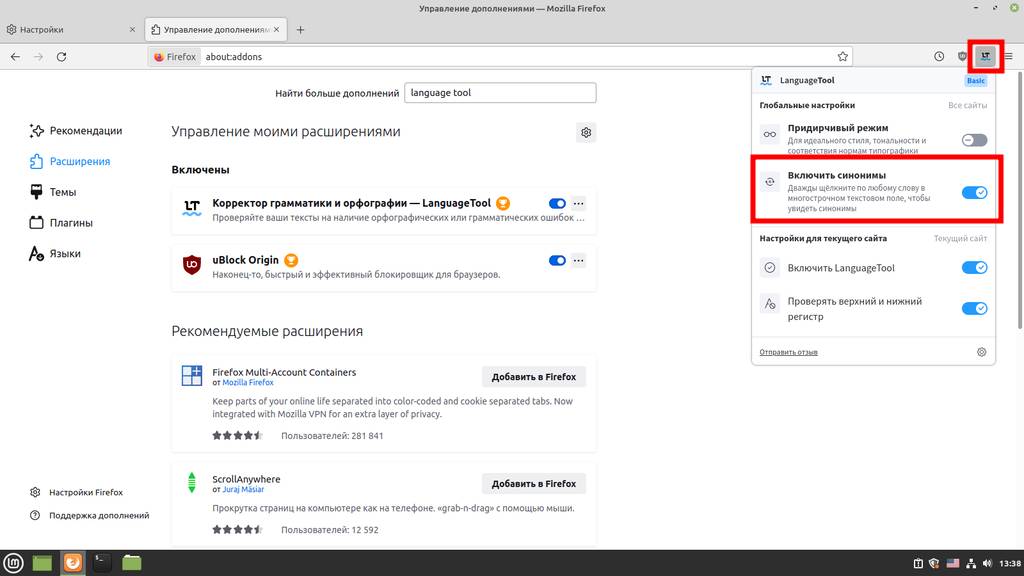
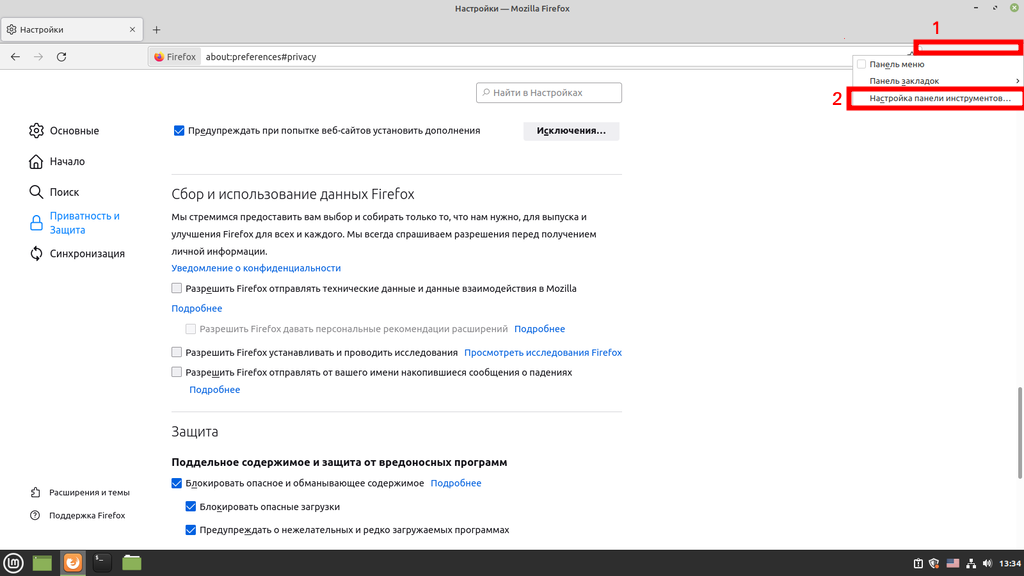
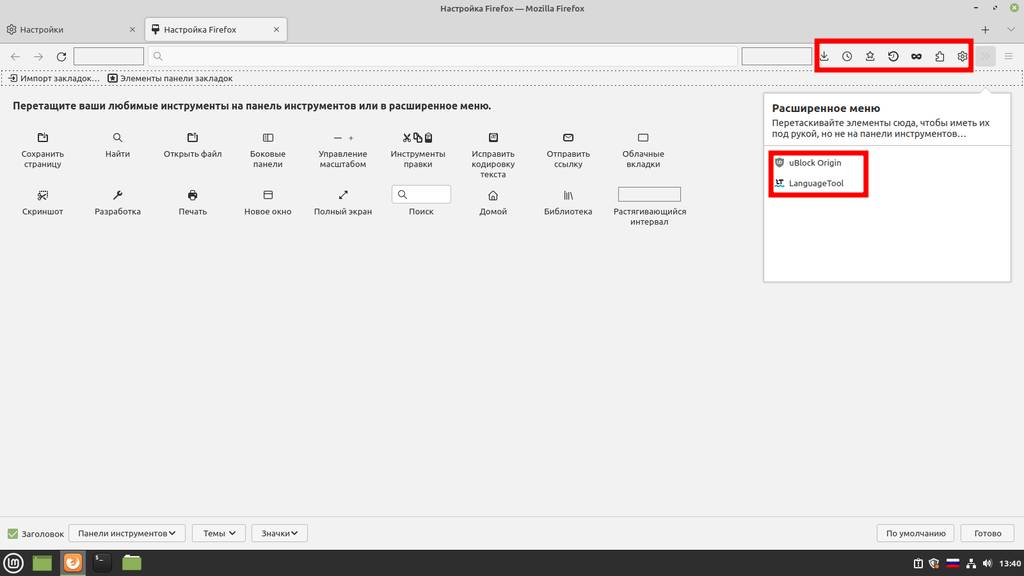
Now let’s set up the menu bar. To do this, right-click on the panel in the top right corner and select “Customize Toolbar”. Then drag the plugin icons into the “Overflow Menu” so they don’t clutter the view, and drag the icons of basic functions from the bottom left onto the right-hand panel. I usually leave the following buttons: downloads, history, bookmarks, a quick history-clearing button, private window, extensions section, and settings.
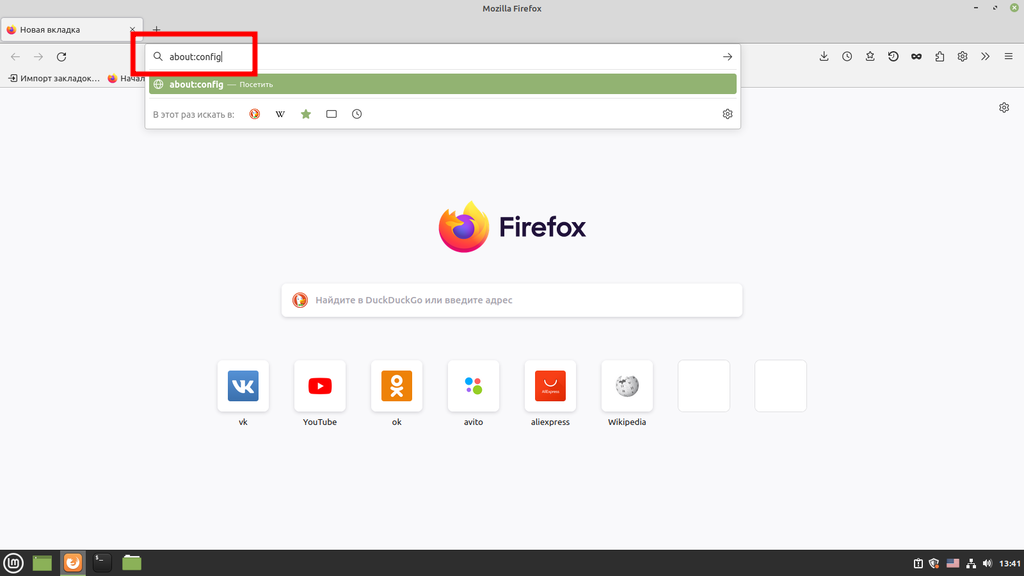
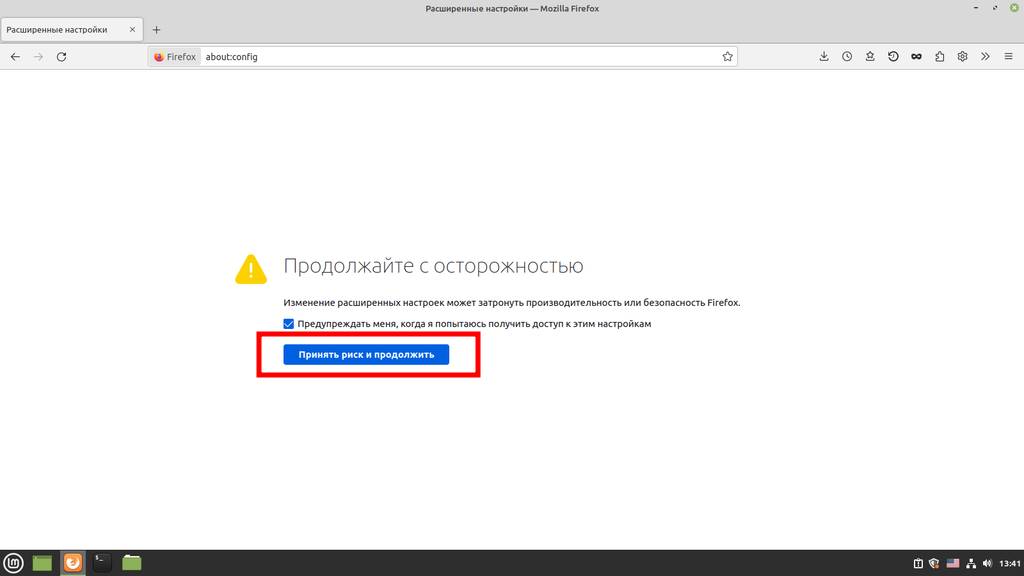
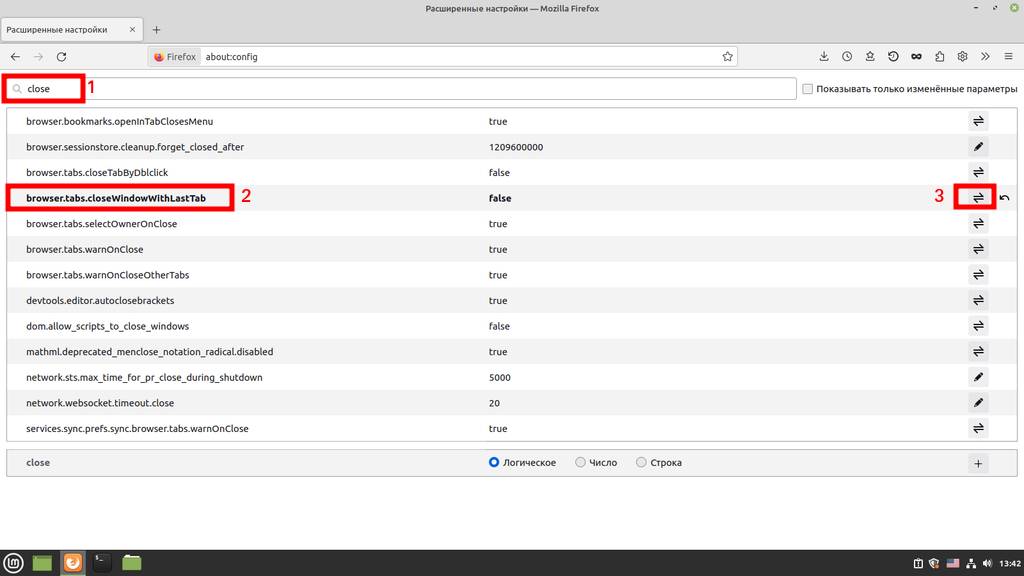
Next, we disable Firefox shutting down after closing the last tab. To do this, type about:config in the search bar, then search for the “closeWindowWithLastTab” entry and click the toggle from true to false:
Without closing the current window, let’s enable compact tabs. Search for compactmode.show and change the value from false to true. Then go into the toolbar editing mode as we did above and enable compact mode (it says “not supported” there, but it’s actually fully supported):
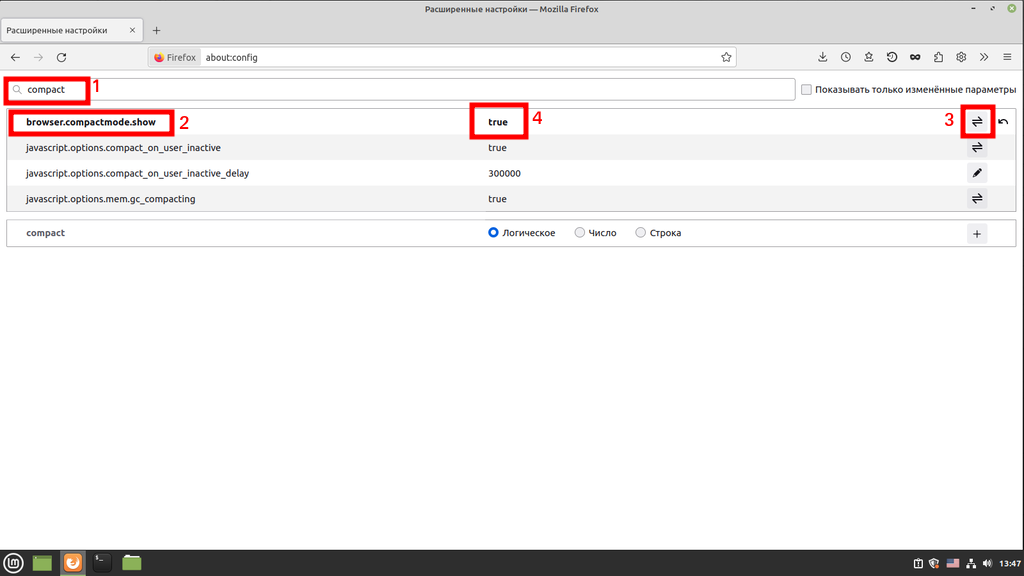
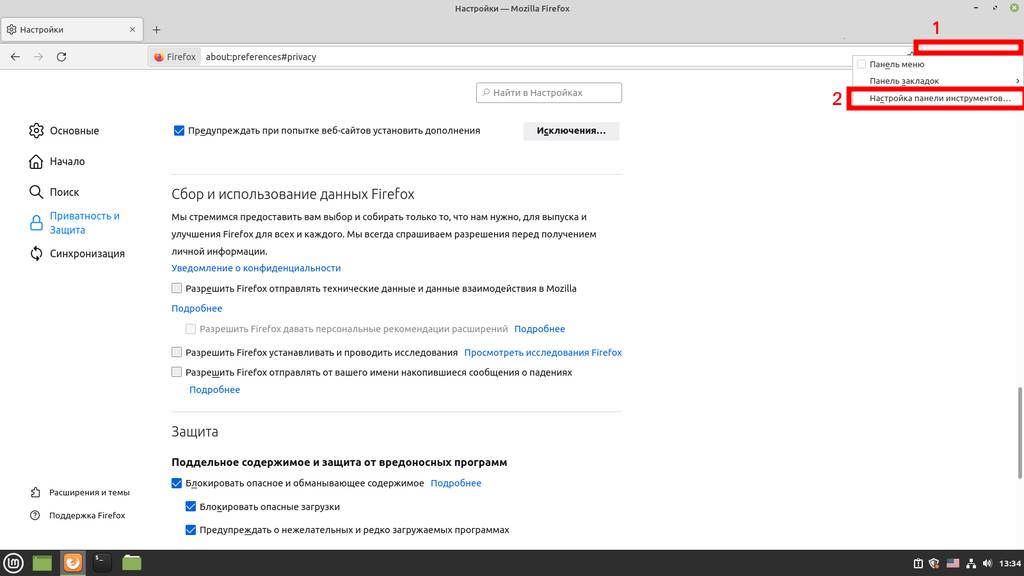
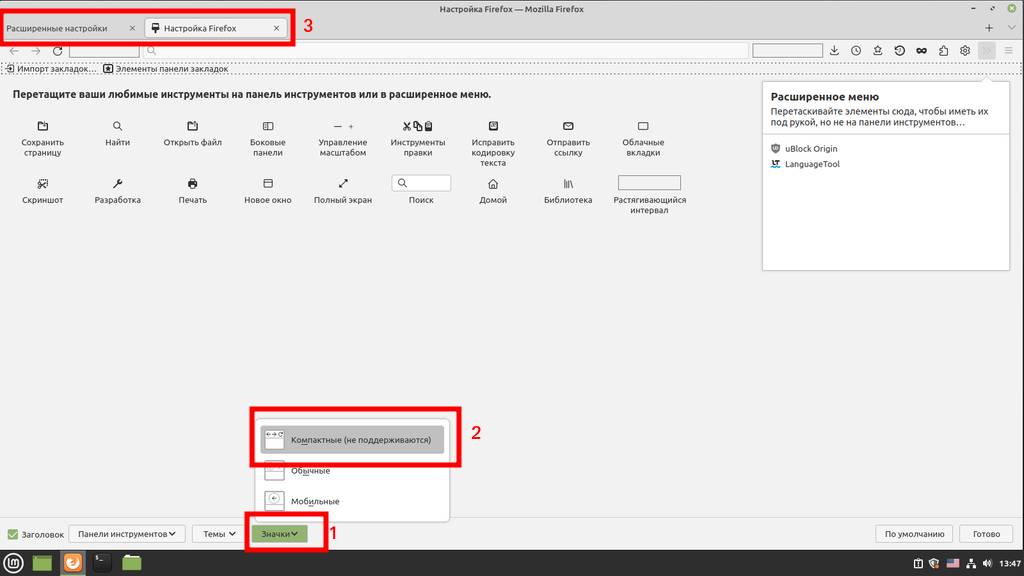
All that’s left is to disable the bookmarks bar (if you don’t use it), and the initial setup of the Firefox browser is complete:
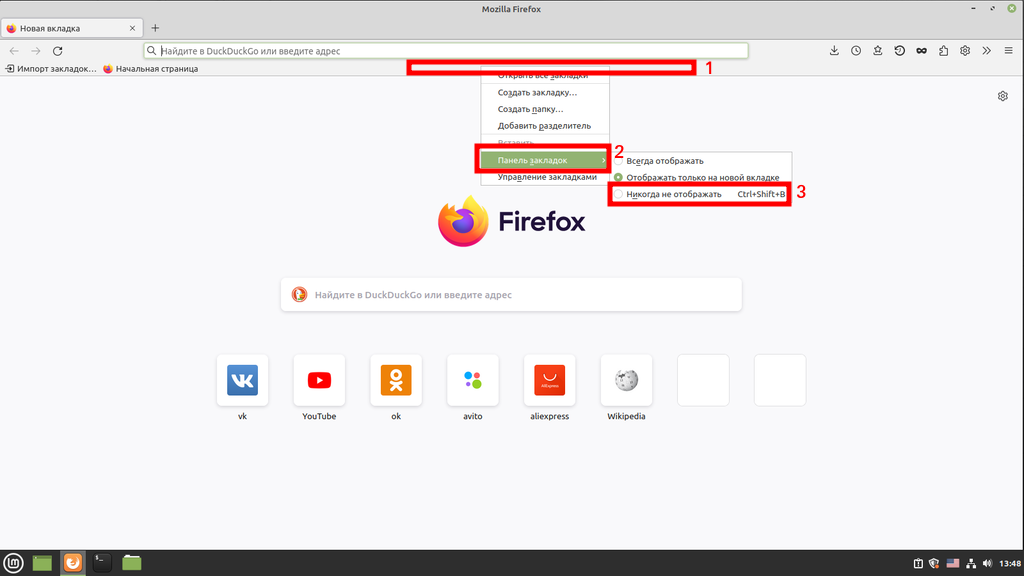
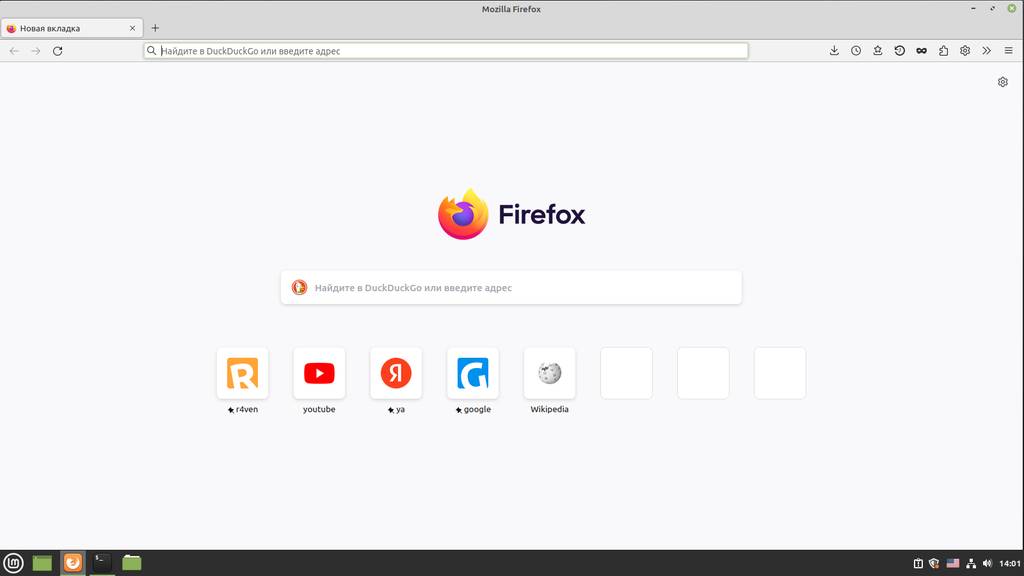
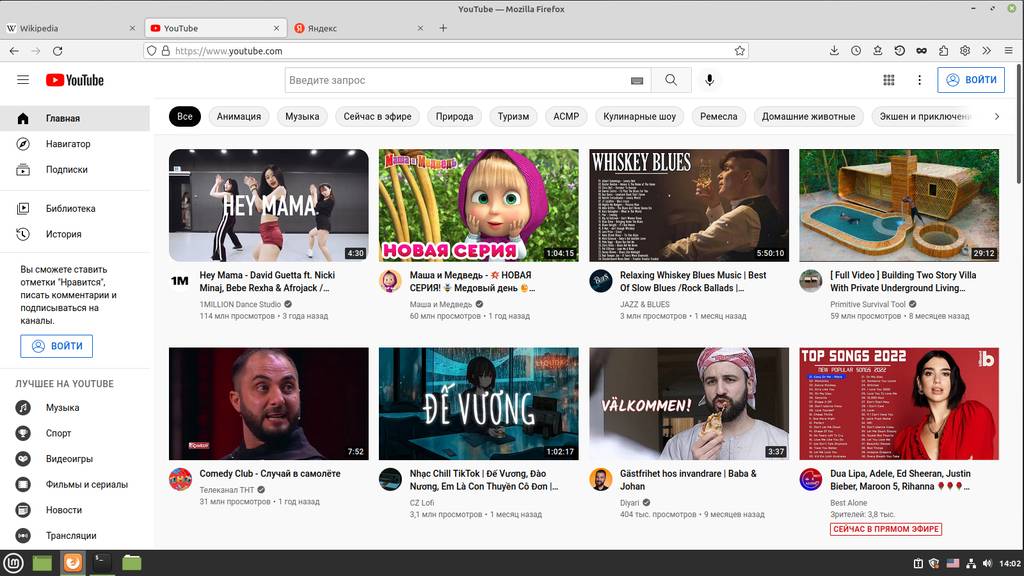
Now you can browse the internet in peace, ad-free, with a convenient browser interface.
In the next note, I’ll explain how to customize the browser’s home page completely to your own preferences.
Thanks for reading 😉
👨💻And…
Don’t forget about our Telegram channel 📱 and chat
Or maybe you want to become a co-author? Then click here🔗
💬 All the best ✌️
That should be it. If not, check the logs 🙂

Comments