In this note, we will import a previously prepared OS image in qcow2 format into Proxmox as a VM template using QEMU console commands.
All examples from the article were performed in the Proxmox 9 hypervisor environment (Debian 13).
🖐️Hey!
Subscribe to our Telegram channel @r4ven_me📱, so you don’t miss new posts on the website 😉. If you have questions or just want to chat about the topic, feel free to join the Raven chat at @r4ven_me_chat🧐.
1️⃣ Connect to the Proxmox server via SSH:
ssh root@proxmox.home.lan⚠️ПWarning
In my example, I connect over SSH as the root user. This is justified for test labs. For production work, I strongly recommend connecting as a regular user and using sudo.
2️⃣ Resize the disk (specify a suitable value for your case):
qemu-img resize ./debian-13-generic-amd64.qcow2 20G3️⃣ Create a new virtual machine with any name, for example debian13-k8s-template, an ID, for example 7777, and basic settings (adjust them for your environment):
qm create 7777 --name "debian13-k8s-template" \
--memory 2048 --cores 2 --net0 virtio,bridge=vmbr04️⃣ Import the debian-13-generic-amd64.qcow2 disk image into the storage storage (replace it with your own) and attach it to the VM with ID 7777:
qm importdisk 7777 ./debian-13-generic-amd64.qcow2 storage --format qcow2
5️⃣ Set the SCSI controller and add the imported disk as scsi0:
qm set 7777 --scsihw virtio-scsi-single \
    --scsi0 storage:7777/vm-7777-disk-0.qcow2
6️⃣ Set the boot order, specifying scsi0 as the first boot disk:
qm set 7777 --boot order=scsi0
7️⃣ Add a cloud-init disk to the virtual machine as ide0 (for automatic configuration on first boot):
qm set 7777 --ide0 storage:cloudinit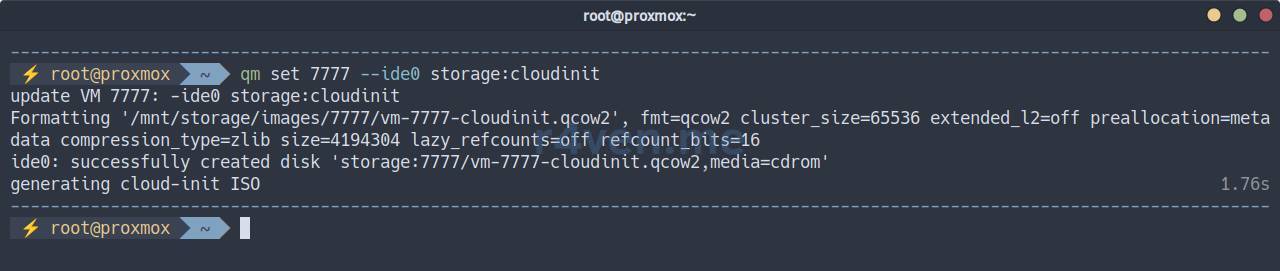
8️⃣ Configure the user, password, and SSH for cloud-init:
# User creation
qm set 7777 --ciuser ivan
qm set 7777 --cipassword $(openssl passwd -6)

# IP configuration
qm set 7777 --ipconfig0 ip=dhcp
# or static
qm set 7777 --ipconfig0 ip=192.168.1.100/24,gw=192.168.1.1

# Adding an SSH key
qm set 7777 --sshkeys ~/.ssh/id_ed25519.pub💡 If necessary, create an SSH key with the command:
ssh-keygen -t ed25519 -f ~/.ssh/id_ed25519
More about cloud-init scenarios
To use all cloud-init capabilities, you need to use an external scenario file in yaml format.
You can attach it with this command:
qm set 7777 --cicustom "user=storage:snippets/cloud_init.yml"Note that the specified storage (in my example, storage) must have the Snippets content type enabled in Proxmox: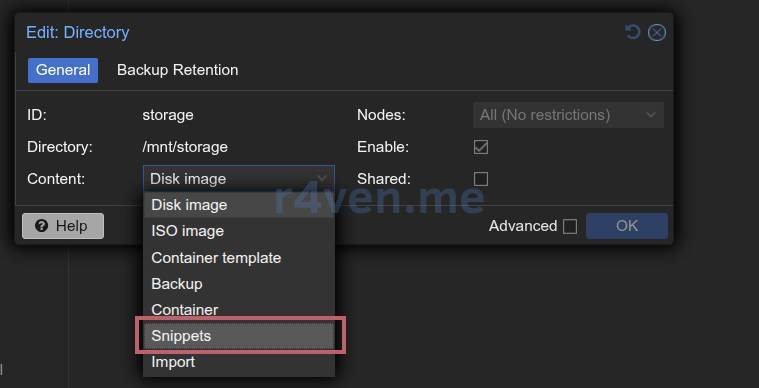
Example cloud_init.yml:
hostname: debian-13-k8s
manage_etc_hosts: true
users:
  - name: ivan
    groups: sudo
    shell: /usr/bin/bash
    sudo: ['ALL=(ALL) NOPASSWD:ALL']
    ssh_authorized_keys:
      - ssh-ed25519 AAAAC3NzaC1lZDI1NTE5AAAAIL8aS3Z5q70yiRgZkJbknB2ROiTl9vo+HGGF9Pgc9eF9 root@proxmox
chpasswd:
  list: |
    ivan:MySecretPassword123
  expire: false
package_update: true
package_upgrade: true
packages:
  - apt-transport-https
  - ca-certificates
  - curl
  - containerd
  - gpg
runcmd:
  - echo "overlay" > /etc/modules-load.d/k8s.conf
  - echo "br_netfilter" >> /etc/modules-load.d/k8s.conf
  - modprobe overlay && modprobe br_netfilter
  - containerd config default > /etc/containerd/config.toml
  - sed -i '/SystemdCgroup/s/false/true/' /etc/containerd/config.toml
- systemctl restart containerd9️⃣ Configure the serial port for the console and the video adapter linked to it:
qm set 7777 --serial0 socket --vga serial0
🔟 Enable QEMU Guest Agent for interaction between the host and the guest system:
qm set 7777 --agent enabled=1
1️⃣1️⃣ Convert the virtual machine into a template (for cloning and quick deployment):
qm template 77771️⃣2️⃣ Rescan the virtual machine configuration (may be useful after making changes):
qm rescan --vmid 77771️⃣3️⃣ View the full configuration of our virtual machine template:
qm config 7777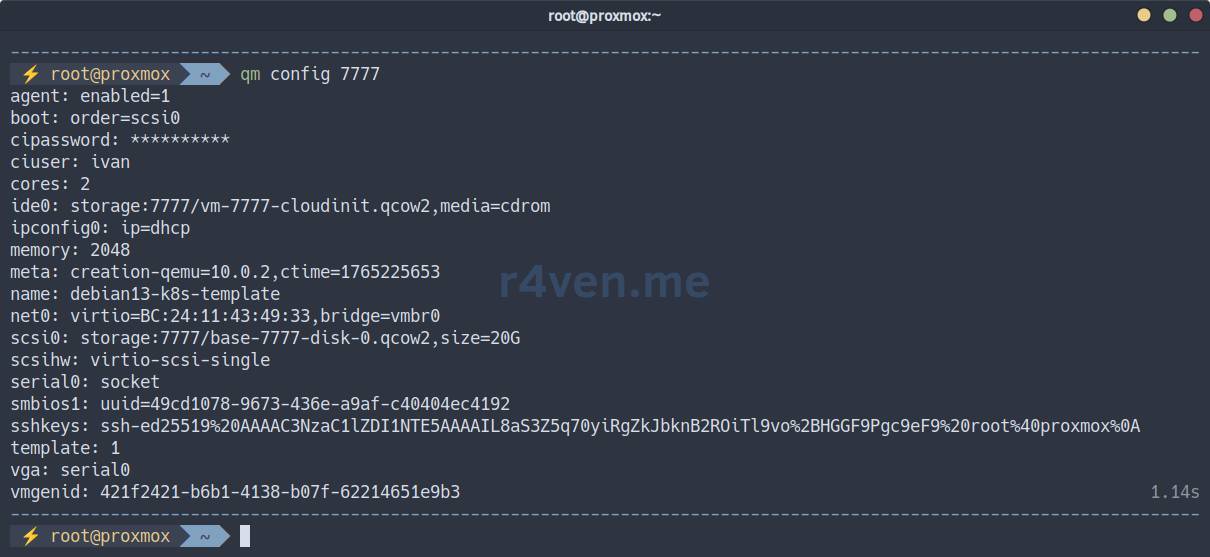
1️⃣4️⃣ Check the list of files in the VM directory (storage storage), in my case this is: /mnt/storage/images/7777/:
ls -l /mnt/storage/images/7777/
We can see the image itself and the cloud-init disk👌.
❗️ Caution
If you need to destroy the VM template, use the command:
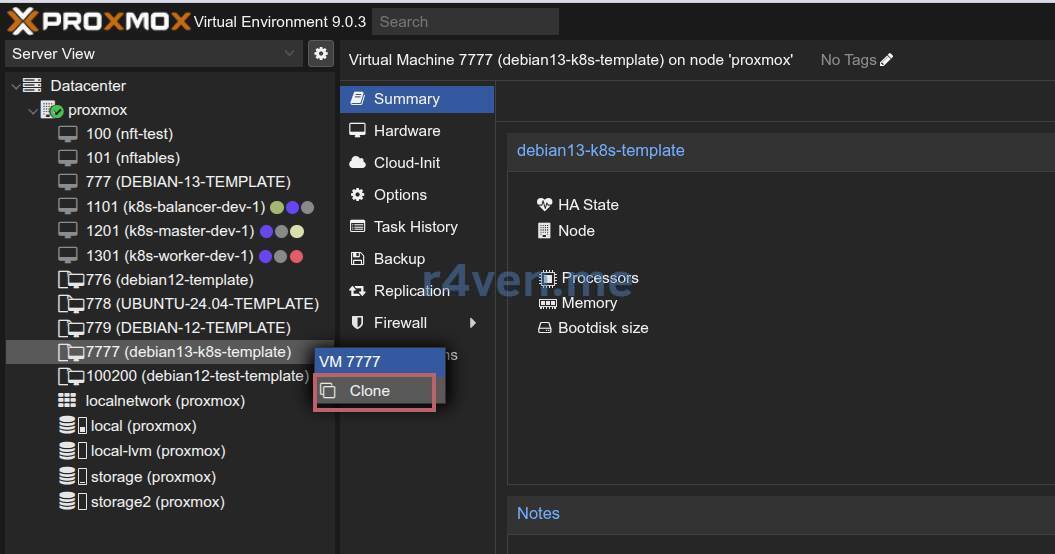
qm destroy 77771️⃣5️⃣ Now calmly clone your template into a new virtual machine in Proxmox:
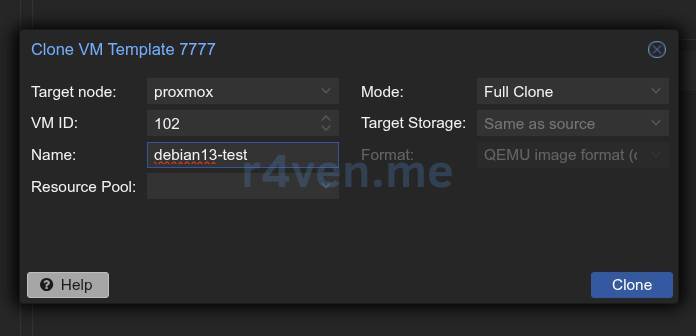
1️⃣6️⃣ After startup, check access to the new VM console by password:
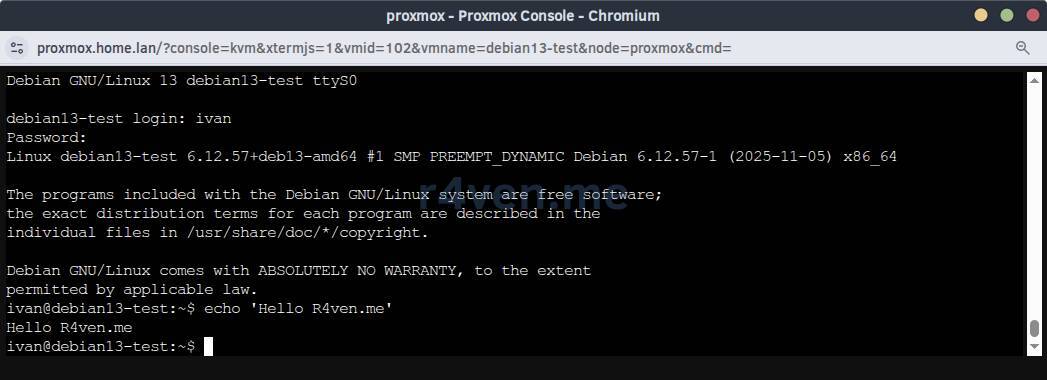
1️⃣7️⃣ Check SSH key connection:
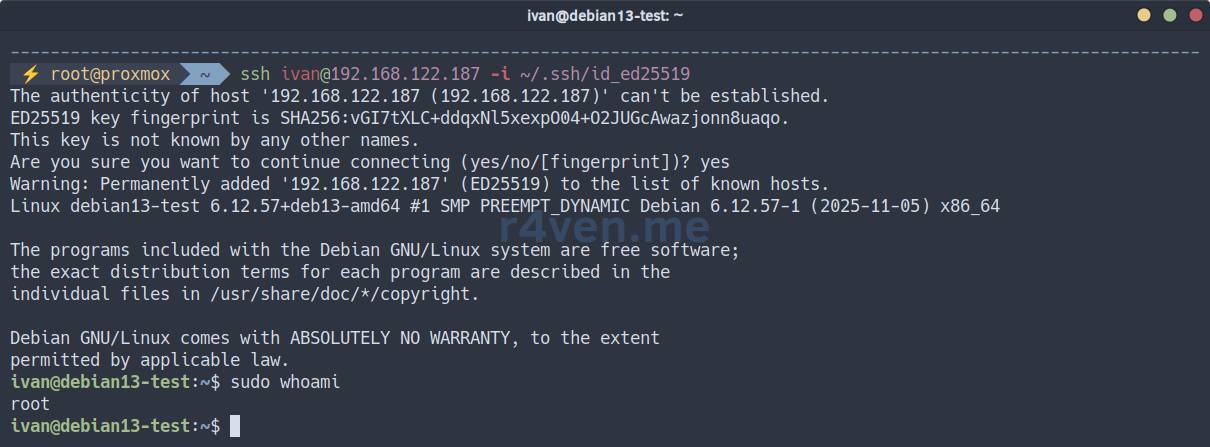
Everything works!
In the next article, we will automate infrastructure deployment in Proxmox using Terraform/OpenTofu. Do not miss it👨💻.
Thank you for reading! Good luck😉.
👨💻Ну и…
Don’t forget about our Telegram channel 📱 and chat 💬 All the best ✌️
That should be it. If not, check the logs 🙂