

At the request of some subscribers from our raven’s chat, today we’ll build the OpenConnect VPN server, also known as ocserv, latest version — 1.3, from open source code, on the Debian 12 distribution. We’ll also create a Docker image based on the same distribution.
If you’re not sure what kind of beast this is, I recommend reading my other article: Setting up an OpenConnect SSL VPN server (ocserv) in Docker for internal projects
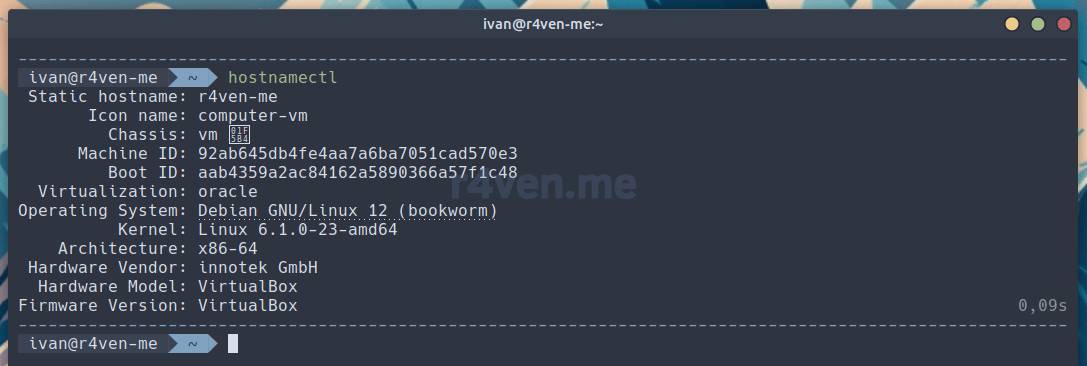
All actions in this article will be performed in the following configuration:
🖐️Hey!
Subscribe to our Telegram channel @r4ven_me📱, so you don’t miss new posts on the website 😉. If you have questions or just want to chat about the topic, feel free to join the Raven chat at @r4ven_me_chat🧐.
Let’s go 🙃
Building ocserv from source
First, let’s update our current system to the latest version with this command:
sudo apt update && sudo apt upgrade -y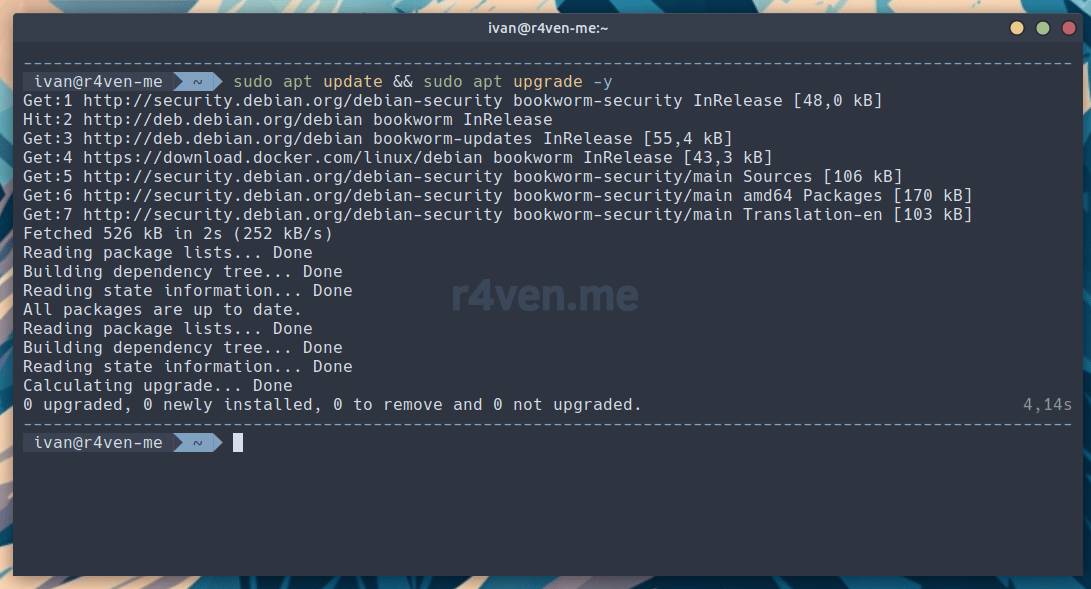
Next, we add the Debian Sid repository — the “unstable” packages repository of the distribution, since it contains the library versions we need. Afterward, be sure to update the cache to apply the changes:
echo "deb http://deb.debian.org/debian sid main" | sudo tee -a /etc/apt/sources.list

sudo apt update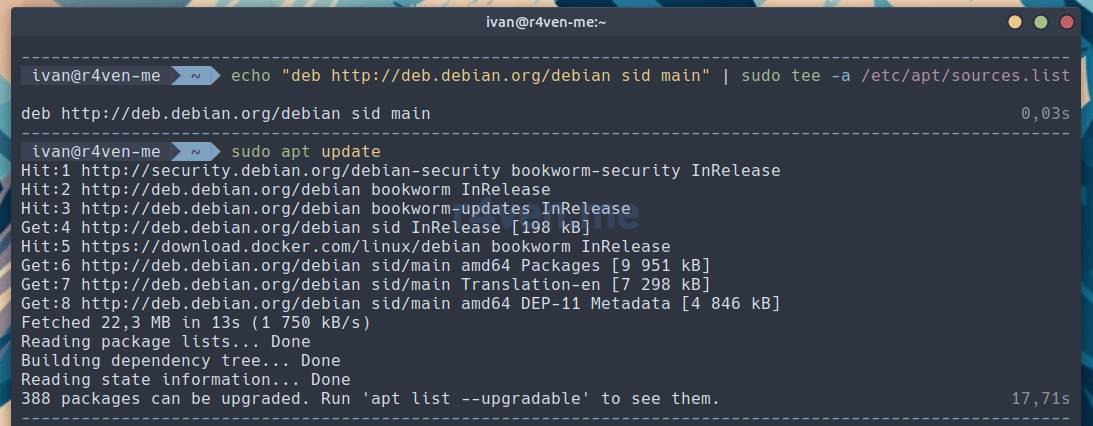
The tee command takes input data and writes it to a file, while also printing it to standard output (stdout). The -a (append) flag means append the received content to the file, rather than overwriting it entirely.
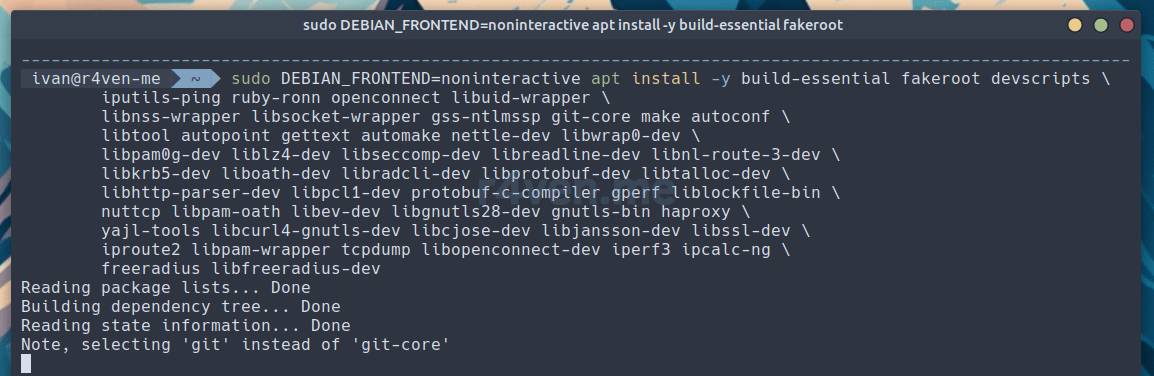
Next, we need to install a large list of dependencies 😳 Make sure you have free space on your disk for this.
sudo DEBIAN_FRONTEND=noninteractive apt install -y build-essential fakeroot devscripts \
        iputils-ping ruby-ronn openconnect libuid-wrapper \
        libnss-wrapper libsocket-wrapper gss-ntlmssp git-core make autoconf \
        libtool autopoint gettext automake nettle-dev libwrap0-dev \
        libpam0g-dev liblz4-dev libseccomp-dev libreadline-dev libnl-route-3-dev \
        libkrb5-dev liboath-dev libradcli-dev libprotobuf-dev libtalloc-dev \
        libhttp-parser-dev libpcl1-dev protobuf-c-compiler gperf liblockfile-bin \
        nuttcp libpam-oath libev-dev libgnutls28-dev gnutls-bin haproxy \
        yajl-tools libcurl4-gnutls-dev libcjose-dev libjansson-dev libssl-dev \
        iproute2 libpam-wrapper tcpdump libopenconnect-dev iperf3 ipcalc-ng \
freeradius libfreeradius-devThe
DEBIAN_FRONTEND=noninteractivevariable tells the apt package manager to perform the installation without user interaction. That is, when resolving conflicts during installation, apt will apply the default action. Remember that you’re doing all of this at your own risk and responsibility.
After installing all the necessary packages, we download the ocserv source archive using the curl utility. Then we extract the archive using the tar archiver:
curl -fLO https://www.infradead.org/ocserv/download/ocserv-1.3.0.tar.xz

ls

tar -xvf ./ocserv-1.3.0.tar.xzFlags used with tar:
-x— eXtract, obviously the extraction itself;-v— Verbose, detailed output of the extraction process;-f— File, followed by the archive file name.
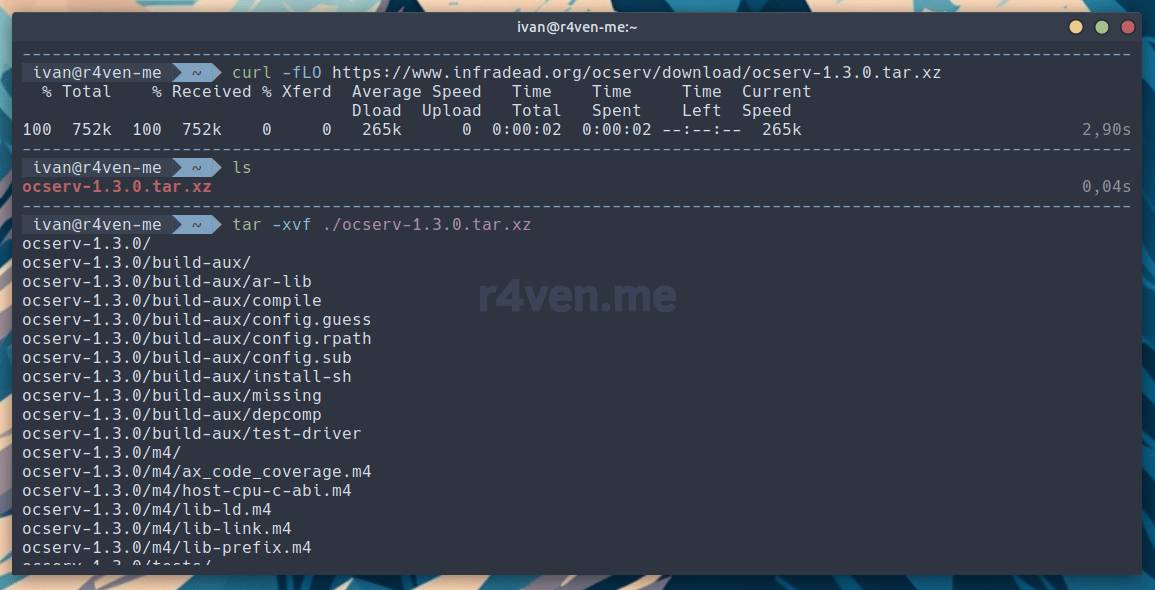
After extraction, we go into the created source directory and run the build, as well as the check, for ocserv, all as root:
cd ./ocserv-1.3.0

sudo sh -c './configure --enable-oidc-auth && make && make check'Using the construct
sh -c 'commands', we combined several commands into one. This way, it’s easier to run them by specifyingsudoonly once.And the
--enable-oidc-authparameter in theconfigurecommand tells it to build with OpenID Connect support.
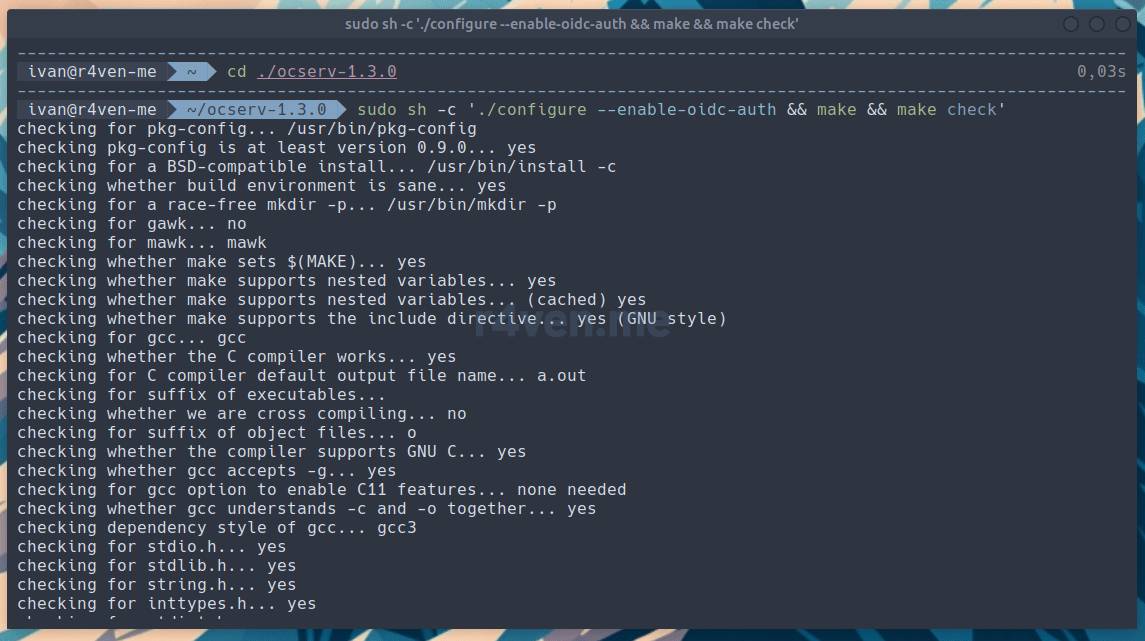
As a result, a build with an almost default configuration will be performed:
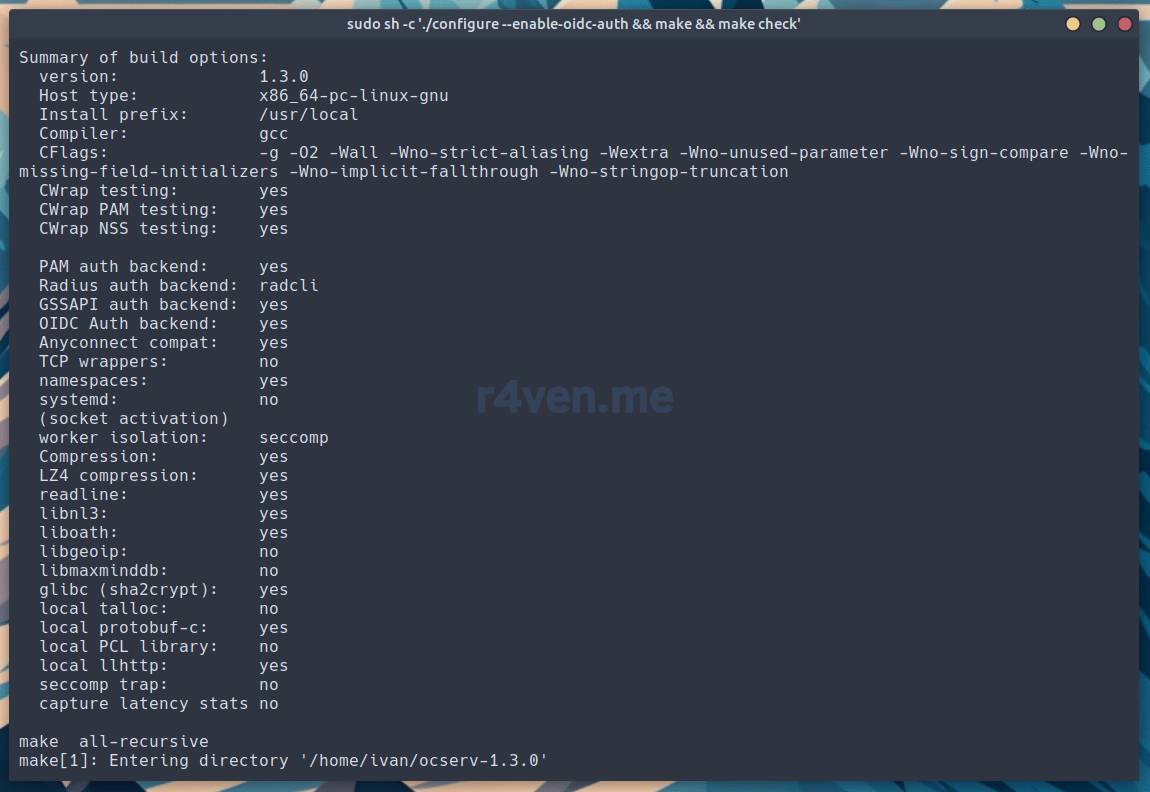
The process can take a long time, depending on your hardware and compiler configuration.
So the build is complete, but… there are 2 failed tests visible:
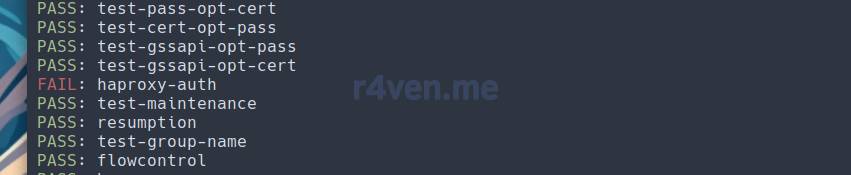
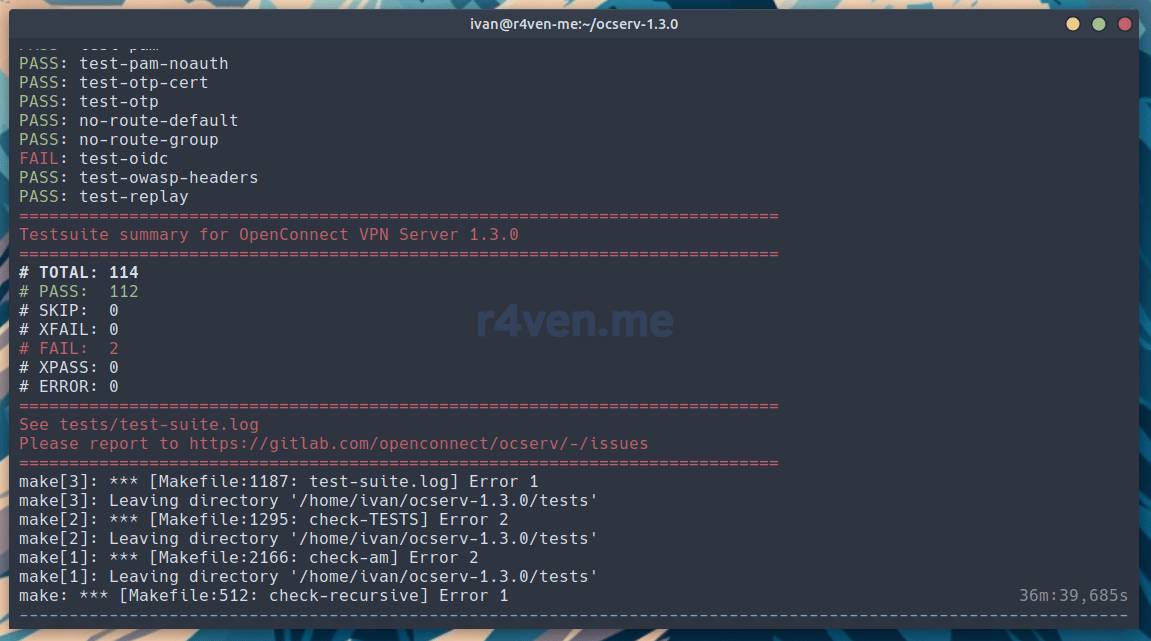
- haproxy-auth — after investigating, I concluded that the problem is haproxy accessing address 127.0.0.2 during the test, when building inside a virtual machine. This is a known issue and doesn’t seem to affect anything. More details in the issue on the official GitLab and the test script itself, also there.
- test-oidc — because it requires an OpenID auth token for verification.
Installing and running ocserv
To install the built files onto your system, run:
sudo make install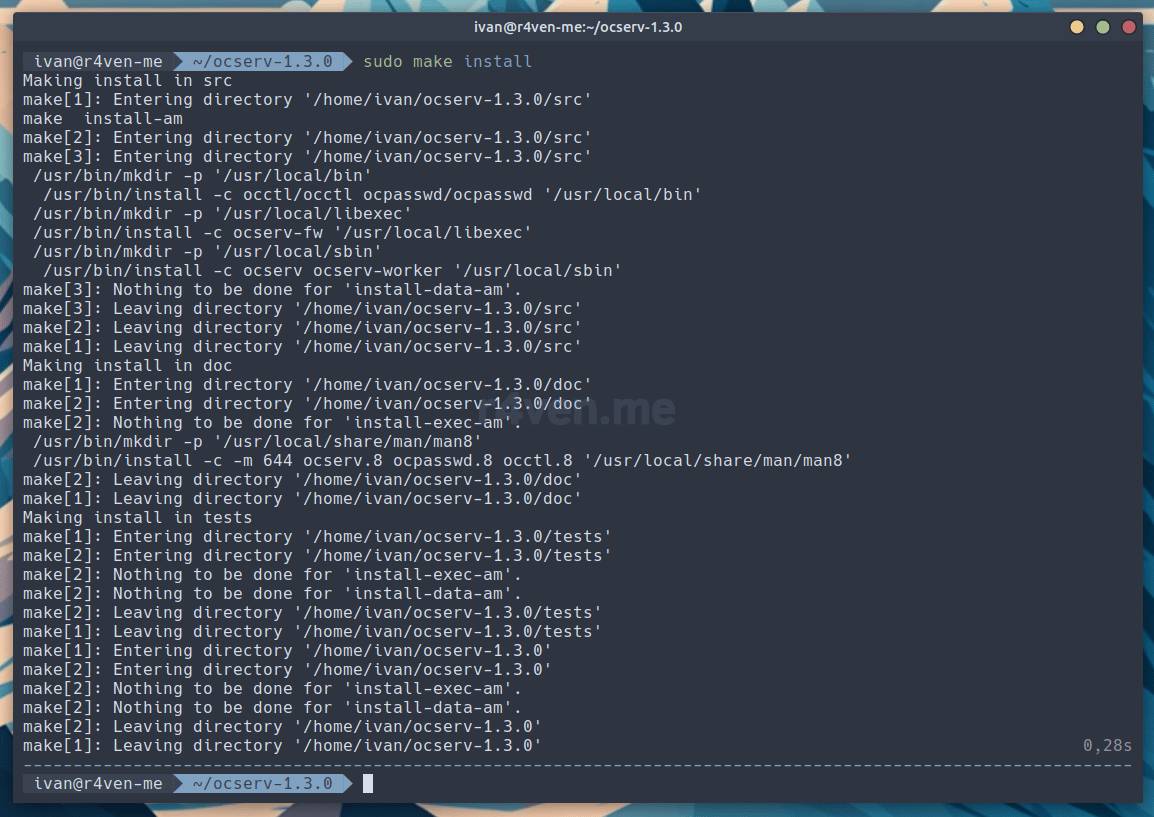
Here you’ll see what was installed/copied and where.
Now let’s check:
whereis ocserv

sudo ocserv --version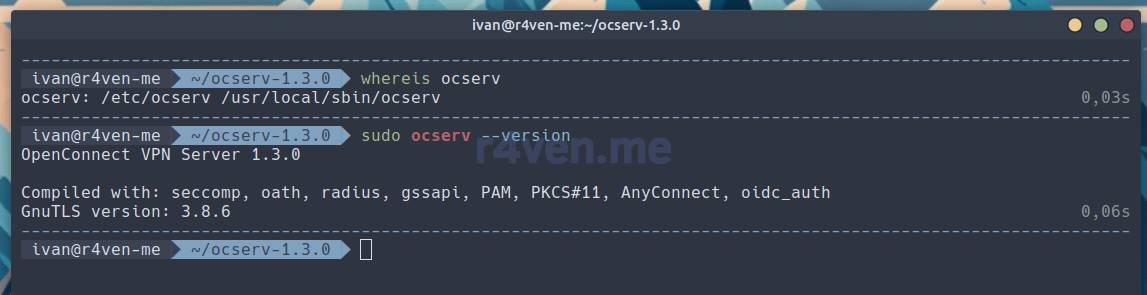
Note that ocserv is installed to /usr/local/sbin by default.
I won’t describe in full detail what’s needed to run ocserv 😐 Otherwise the article would get too long, and that’s not its purpose anyway. For ease of setup, you can use my ready-made bash script, which I made for running ocserv in Docker in the previous article.
To do this, you need to download it from my GitHub and run it as follows:
sudo mkdir /etc/ocserv

curl -fLO https://raw.githubusercontent.com/r4ven-me/openconnect/main/src/server/v1.3/ocserv.sh

chmod +x ./ocserv.sh

sudo ./ocserv.sh ocserv --foregroundOn the first run, the script will generate all the necessary certificates with default values. If needed, edit them at the beginning of the
ocserv.shscript.
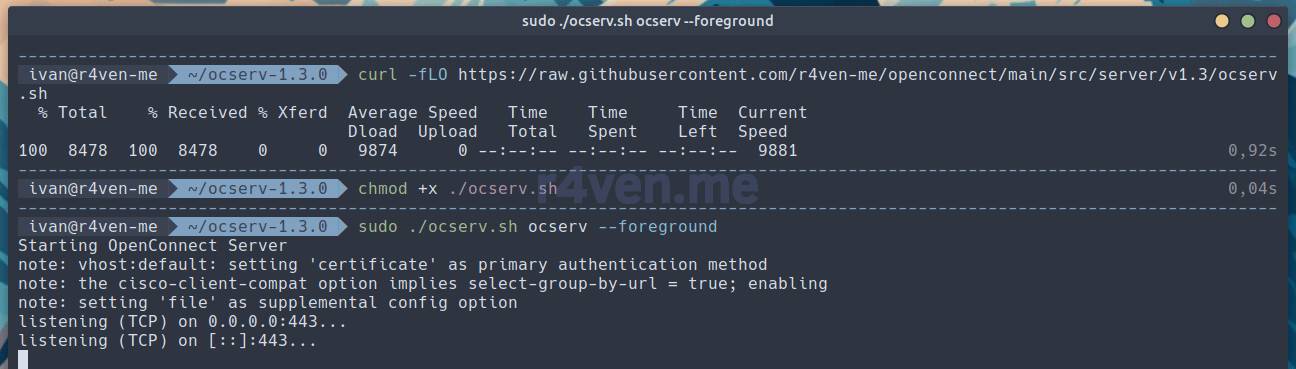
Checking it in a neighboring tab:
ss -tulnap | grep 443

curl --insecure https://localhost:443The
ssutility lets you view the OS’s network activity. The--insecureparameter incurllets you make requests while ignoring warnings about self-signed SSL certificates.
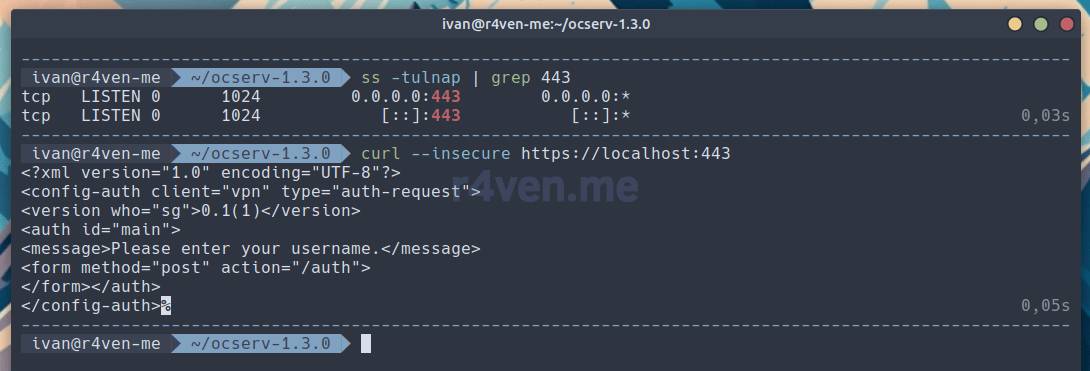
Excellent, everything’s working. To exit, press Ctrl+c in the main tab.
Building from source inside Docker
Now something a bit more interesting 😌
My subscribers know that I prefer to deploy personal services in Docker. This greatly simplifies their maintenance, scalability, and portability.
So now, we’ll build ocserv 1.3 in one Docker container with Debian 12, and in another, identical one, install a couple of dependencies and simply copy the ready-made executable files from the build image, so that the final one ends up small in size.
Essentially, it’s all the same as what we did before, just inside containers without cluttering up the main system.
To build it, we’ll need Docker engine installed. If that’s not done yet, I recommend my article: Installing Docker Engine on a Linux Server Running Debian.
Creating a Docker image for building ocserv 1.3
So, we create a new directory and copy the Docker file describing the build container from my GitHub into it:
mkdir ~/ocserv && cd ~/ocserv/

curl -fLO https://raw.githubusercontent.com/r4ven-me/openconnect/main/src/server/v1.3/Dockerfile_build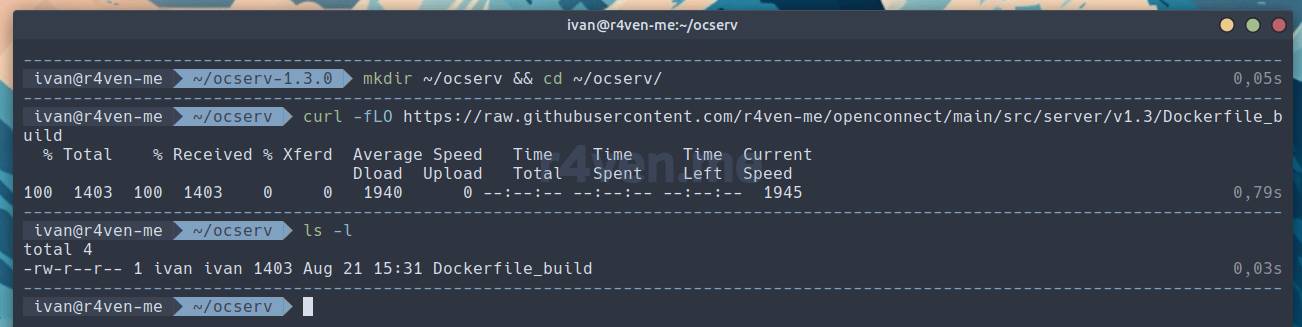
Contents of Dockerfile_build:
FROM debian:12

LABEL maintainer="Ivan Cherniy <kar-kar@r4ven.me>"

ARG DEBIAN_FRONTEND=noninteractive

SHELL ["/bin/bash", "-Eeuo", "pipefail", "-c"]

RUN echo "deb http://deb.debian.org/debian sid main" >> /etc/apt/sources.list && \
    apt update && \
    apt upgrade -y && \
    apt install --yes curl build-essential fakeroot devscripts \
        iputils-ping ruby-ronn openconnect libuid-wrapper \
        libnss-wrapper libsocket-wrapper gss-ntlmssp git-core make autoconf \
        libtool autopoint gettext automake nettle-dev libwrap0-dev \
        libpam0g-dev liblz4-dev libseccomp-dev libreadline-dev libnl-route-3-dev \
        libkrb5-dev liboath-dev libradcli-dev libprotobuf-dev libtalloc-dev \
        libhttp-parser-dev libpcl1-dev protobuf-c-compiler gperf liblockfile-bin \
        nuttcp libpam-oath libev-dev libgnutls28-dev gnutls-bin haproxy \
        yajl-tools libcurl4-gnutls-dev libcjose-dev libjansson-dev libssl-dev \
        iproute2 libpam-wrapper tcpdump libopenconnect-dev iperf3 ipcalc-ng \
        freeradius libfreeradius-dev &&\
    curl -fLO https://www.infradead.org/ocserv/download/ocserv-1.3.0.tar.xz && \
    tar -xvf ./ocserv-1.3.0.tar.xz && \
    cd ./ocserv-1.3.0/ && \
    ./configure --enable-oidc-auth && make && \
    mkdir /usr/share/doc/ocserv/ && \
    cp ./doc/sample.config /usr/share/doc/ocserv/

WORKDIR /ocserv-1.3.0

CMD [ "sleep", "999999" ]And we run the build with the command (will take some time):
docker build -f Dockerfile_build ./ -t openconnect-build:v1.3In this command, the
-fflag explicitly specifies the build description file,./means to use the current directory as the working directory, andopenconnect-build:v1.3is the name of the image being built along with its tag (v1.3), which we’ll refer to when building the final image.
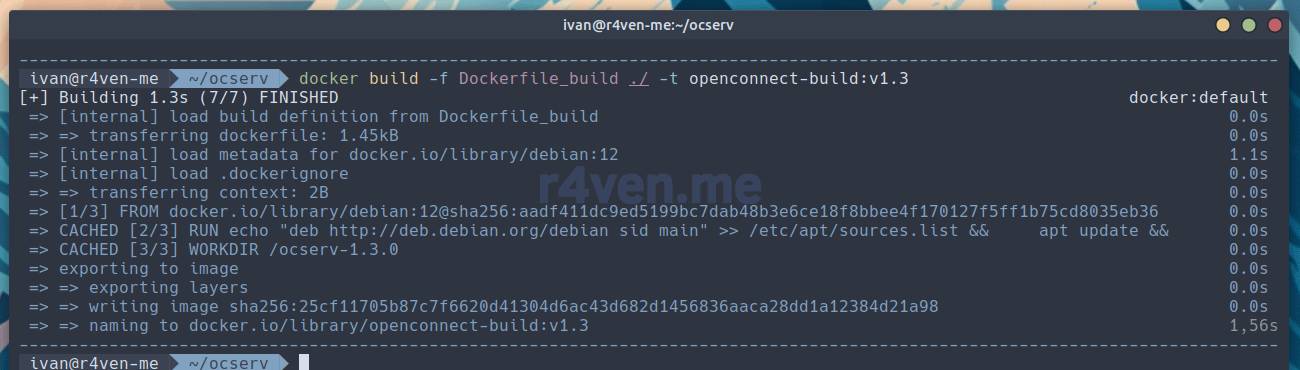
Done. After it finishes, let’s check:
docker image ls
A full 1.4 GB, a bit chunky 😳 But, as I mentioned earlier, this is the build image. Next, we’ll only copy the compiled ocserv files from it into the final image.
Creating the final Docker image with ocserv 1.3
Again, let’s copy from my GitHub the Docker file describing the final image + the previously mentioned bash script for running ocserv:
curl -fLO https://raw.githubusercontent.com/r4ven-me/openconnect/main/src/server/v1.3/Dockerfile

curl -fLO https://raw.githubusercontent.com/r4ven-me/openconnect/main/src/server/v1.3/ocserv.sh

chmod +x ./ocserv.sh
ocserv.shwill be copied into the image during the build.
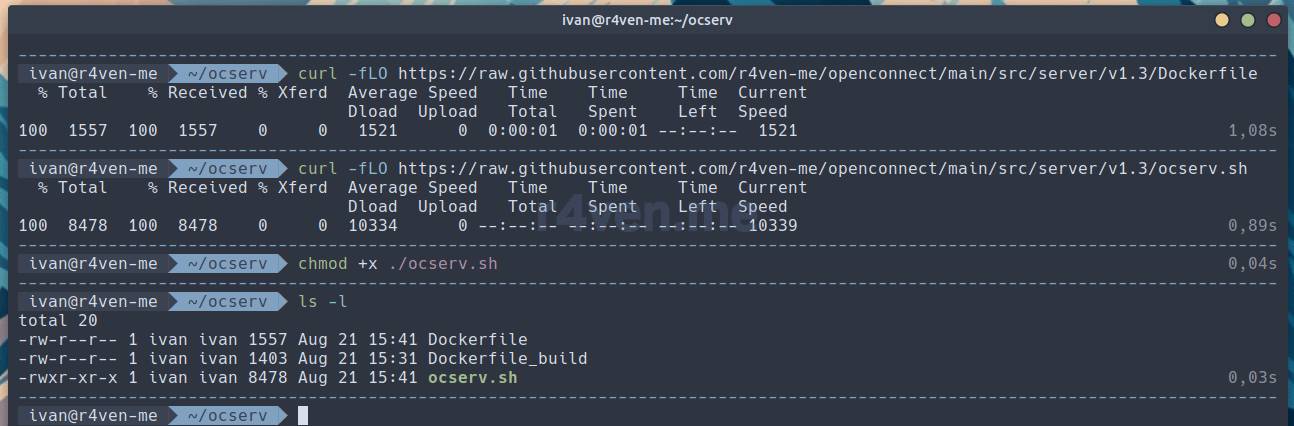
Contents of Dockerfile:
FROM openconnect-build:v1.3 AS builder

FROM debian:12

LABEL maintainer="Ivan Cherniy <kar-kar@r4ven.me>"

STOPSIGNAL SIGTERM

COPY --from=builder ["/ocserv-1.3.0/src/occtl/occtl", "/usr/bin"]
COPY --from=builder ["/ocserv-1.3.0/src/ocpasswd/ocpasswd", "/usr/bin"]
COPY --from=builder ["/ocserv-1.3.0/src/ocserv-fw", "/usr/libexec"]
COPY --from=builder ["/ocserv-1.3.0/src/ocserv", "/usr/sbin"]
COPY --from=builder ["/ocserv-1.3.0/src/ocserv-worker", "/usr/sbin"]
COPY --from=builder ["/usr/share/doc/ocserv", "/usr/share/doc/ocserv"]

ENV OCSERV_DIR="/etc/ocserv"
ENV CERTS_DIR="${OCSERV_DIR}/certs"
ENV SSL_DIR="${OCSERV_DIR}/ssl"
ENV SECRETS_DIR="${OCSERV_DIR}/secrets"
ENV PATH="${OCSERV_DIR}:${PATH}"

ARG DEBIAN_FRONTEND=noninteractive

RUN echo "deb http://deb.debian.org/debian sid main" >> /etc/apt/sources.list && \
    apt update && \
    apt install -y --no-install-recommends \
        libllhttp9.1 \
        libtalloc2 \
        libradcli4 \
        liboath0 \
        libpcl1 \
        libev4 \
        libprotobuf-c1 \
        libreadline8 \
        libnl-route-3-200 \
        libcurl3-gnutls \
        libcjose0 \
        less \
        gnutls-bin \
        iptables \
        iproute2 \
        iputils-ping && \
    mkdir /etc/ocserv/ && \
    apt autoremove --yes && \
    apt clean -y && \
    rm -rf /var/lib/{apt,dpkg,cache,log}/*

COPY ./ocserv.sh /

ENTRYPOINT ["/ocserv.sh"]

CMD ["ocserv", "--config", "/etc/ocserv/ocserv.conf", "--foreground"]

HEALTHCHECK --interval=5m --timeout=3s \
CMD pidof -q ocserv || exit 1Contents of ocserv.sh:
#!/bin/bash

# Some protection
set -Eeuo pipefail

# Define default server vars if they are not set
SRV_CN="${SRV_CN:=example.com}"
SRV_CA="${SRV_CA:=Example CA}"

# Ocserv vars (do not modify)
OCSERV_DIR="/etc/ocserv"
CERTS_DIR="${OCSERV_DIR}/certs"
SSL_DIR="${OCSERV_DIR}/ssl"
SECRETS_DIR="${OCSERV_DIR}/secrets"

# Start server if data files exist
if [[ -r "${OCSERV_DIR}"/ocserv.conf ]]; then
    echo "Starting OpenConnect Server"
    exec "$@" || { echo "Starting failed" >&2; exit 1; }
else
    echo "Running OpenConnect Server at first with new certs generation"
fi

# Create certs dirs
if [[ -d $OCSERV_DIR ]]; then
    for sub_dir in "${OCSERV_DIR}"/{"ssl/live/${SRV_CN}","certs","secrets"}; do
        mkdir -p "$sub_dir"
    done
    if [[ -r /usr/share/doc/ocserv/sample.config ]]; then
        cp /usr/share/doc/ocserv/sample.config "${OCSERV_DIR}"/
    fi
fi

# Create ocserv config file
cat << _EOF_ > "${OCSERV_DIR}"/ocserv.conf
auth = "certificate"
#auth = "plain[passwd=${OCSERV_DIR}/ocpasswd]"
#enable-auth = "certificate"
tcp-port = 443
socket-file = /run/ocserv-socket
server-cert = ${SSL_DIR}/live/${SRV_CN}/fullchain.pem
server-key = ${SSL_DIR}/live/${SRV_CN}/privkey.pem
ca-cert = ${CERTS_DIR}/ca-cert.pem
isolate-workers = true
max-clients = 20
max-same-clients = 2
rate-limit-ms = 200
server-stats-reset-time = 604800
keepalive = 10
dpd = 120
mobile-dpd = 1800
switch-to-tcp-timeout = 25
try-mtu-discovery = false
cert-user-oid = 0.9.2342.19200300.100.1.1
tls-priorities = "NORMAL:%SERVER_PRECEDENCE:%COMPAT:-VERS-SSL3.0:-VERS-TLS1.0:-VERS-TLS1.1:-VERS-TLS1.3"
auth-timeout = 1000
min-reauth-time = 300
max-ban-score = 100
ban-reset-time = 1200
cookie-timeout = 600
deny-roaming = false
rekey-time = 172800
rekey-method = ssl
connect-script = ${OCSERV_DIR}/connect.sh
disconnect-script = ${OCSERV_DIR}/disconnect.sh
use-occtl = true
pid-file = /run/ocserv.pid
log-level = 1
device = vpns
predictable-ips = true
default-domain = $SRV_CN
ipv4-network = 10.10.10.0
ipv4-netmask = 255.255.255.0
tunnel-all-dns = true
dns = 8.8.8.8
ping-leases = false
config-per-user = ${OCSERV_DIR}/config-per-user/
cisco-client-compat = true
dtls-legacy = true
client-bypass-protocol = false
crl = /etc/ocserv/certs/crl.pem
_EOF_

# Create template for CA SSL cert
cat << _EOF_ > "${CERTS_DIR}"/ca.tmpl
organization = $SRV_CN
cn = $SRV_CA
serial = 001
expiration_days = -1
ca
signing_key
cert_signing_key
crl_signing_key
_EOF_

# Create template for users SSL certs
cat << _EOF_ > "${CERTS_DIR}"/users.cfg
organization = $SRV_CN
cn = Example User
uid = exampleuser
expiration_days = -1
tls_www_client
signing_key
encryption_key
_EOF_

# Create template for server self-signed SSL cert
cat << _EOF_ > "${SSL_DIR}"/server.tmpl
cn = $SRV_CA
dns_name = $SRV_CN
organization = $SRV_CN
expiration_days = -1
signing_key
encryption_key #only if the generated key is an RSA one
tls_www_server
_EOF_

# Generate empty revoke file
cat << _EOF_ > "${CERTS_DIR}"/crl.tmpl
crl_next_update = 365
crl_number = 1
_EOF_

# Create connect script which runs for every user connection
cat << _EOF_ > "${OCSERV_DIR}"/connect.sh && chmod +x "${OCSERV_DIR}"/connect.sh
#!/bin/bash

set -Eeuo pipefail

echo "\$(date) User \${USERNAME} Connected - Server: \${IP_REAL_LOCAL} VPN IP: \${IP_REMOTE}  Remote IP: \${IP_REAL} Device:\${DEVICE}"
echo "Running iptables MASQUERADE for User \${USERNAME} connected with VPN IP \${IP_REMOTE}"
iptables -t nat  -A POSTROUTING -s \${IP_REMOTE}/32 -o eth0 -j MASQUERADE
_EOF_

# Create disconnect script which runs for every user disconnection
cat << _EOF_ > "${OCSERV_DIR}"/disconnect.sh && chmod +x "${OCSERV_DIR}"/disconnect.sh
#!/bin/bash

set -Eeuo pipefail

echo "\$(date) User \${USERNAME} Disconnected - Bytes In: \${STATS_BYTES_IN} Bytes Out: \${STATS_BYTES_OUT} Duration:\${STATS_DURATION}"
_EOF_

# Create script to create new users
cat << _EOF_ > "${OCSERV_DIR}"/ocuser && chmod +x "${OCSERV_DIR}"/ocuser
#!/bin/bash

set -Eeuo pipefail

# Check and set script params
if [[ \$# -eq 2 ]]; then
    USER_UID="\$1"
    USER_CN="\$2"
elif [[ \$# -eq 3 ]]; then
	if [[ "\$1" == "-A" ]]; then
    		USER_UID="\$2"
    		USER_CN="\$3"
	else
		echo "Use -A key as a first param to generate cert for IOS devices" >&2
        exit 1
	fi
else
    echo "Please run script with two params: username and 'Common Username'" >&2
    echo "Example: ocuser john 'John Doe'" >&2
    echo "For IOS or HarmonyOS devices add -A key as first param in command" >&2
    echo "Example: ocuser -A steve 'Steve Jobs'" >&2
    exit 1
fi

# Modify user cert template and generate user key, cert and protected .p12 file
sed -i -e "s/^organization.*/organization = \$SRV_CN/" -e "s/^cn.*/cn = \$USER_CN/" -e "s/^uid.*/uid = \$USER_UID/g" "\${CERTS_DIR}"/users.cfg
echo "\$(tr -cd "[:alnum:]" < /dev/urandom | head -c 60)" | ocpasswd -c "\${OCSERV_DIR}"/ocpasswd "\$USER_UID"
certtool --generate-privkey --outfile "\${CERTS_DIR}"/"\${USER_UID}"-privkey.pem
certtool --generate-certificate --load-privkey "\${CERTS_DIR}"/"\${USER_UID}"-privkey.pem --load-ca-certificate "\${CERTS_DIR}"/ca-cert.pem --load-ca-privkey "\${CERTS_DIR}"/ca-key.pem --template "\${CERTS_DIR}"/users.cfg --outfile "\${CERTS_DIR}"/"\${USER_UID}"-cert.pem
if [[ "\$1" == "-A" ]]; then
	sleep 1 && certtool --to-p12 --load-certificate "\${CERTS_DIR}"/"\${USER_UID}"-cert.pem --load-privkey "\${CERTS_DIR}"/"\${USER_UID}"-privkey.pem --pkcs-cipher 3des-pkcs12 --hash SHA1 --outder --outfile "\${SECRETS_DIR}"/"\${USER_UID}".p12
else
	sleep 1 && certtool --load-certificate "\${CERTS_DIR}"/"\${USER_UID}"-cert.pem --load-privkey "\${CERTS_DIR}"/"\${USER_UID}"-privkey.pem --pkcs-cipher aes-256 --to-p12 --outder --outfile "\${SECRETS_DIR}"/"\${USER_UID}".p12
fi
_EOF_

# Add revoke script
cat << _EOF_ > "${OCSERV_DIR}"/ocrevoke && chmod +x "${OCSERV_DIR}"/ocrevoke
#!/bin/bash

set -Eeuo pipefail

if [[ ! -e "\${CERTS_DIR}"/crl.tmpl ]]; then
cat << __EOF__ > "\${CERTS_DIR}"/crl.tmpl
crl_next_update = 365
crl_number = 1
__EOF__
fi

if [[ \$# -eq 1 ]]; then
    if [[ "\$1" == "HELP" ]]; then
        echo "Usage:
        CMD to revoke cert of some user: ocrevoke <exist_user>
        CMD to apply current revoked.pem: ocrevoke RELOAD
        CMD to reset all revokes: ocrevoke RESET
        CMD to print this help: ocrevoke HELP"
    elif [[ "\$1" == "RESET" ]]; then
        certtool --generate-crl --load-ca-privkey "\${CERTS_DIR}"/ca-key.pem --load-ca-certificate "\${CERTS_DIR}"/ca-cert.pem --template "\${CERTS_DIR}"/crl.tmpl --outfile "\${CERTS_DIR}"/crl.pem
        occtl reload
    elif [[ "\$1" == "RELOAD" ]]; then
        certtool --generate-crl --load-ca-privkey "\${CERTS_DIR}"/ca-key.pem --load-ca-certificate "\${CERTS_DIR}"/ca-cert.pem --load-certificate "\${CERTS_DIR}"/revoked.pem --template "\${CERTS_DIR}"/crl.tmpl --outfile "\${CERTS_DIR}"/crl.pem
    else
        USER_UID="\$1"
        cat "\${CERTS_DIR}"/"\${USER_UID}"-cert.pem >> "\${CERTS_DIR}"/revoked.pem
        certtool --generate-crl --load-ca-privkey "\${CERTS_DIR}"/ca-key.pem --load-ca-certificate "\${CERTS_DIR}"/ca-cert.pem --load-certificate "\${CERTS_DIR}"/revoked.pem --template "\${CERTS_DIR}"/crl.tmpl --outfile "\${CERTS_DIR}"/crl.pem
        occtl reload
    fi
else
    echo "Usage:
    CMD to revoke cert of some user: ocrevoke <exist_user>
    CMD to apply current revoked.pem: ocrevoke RELOAD
    CMD to reset all revokes: ocrevoke RESET
    CMD to print this help: ocrevoke HELP"
fi
_EOF_

# Server certificates generation
certtool --generate-privkey --outfile "${CERTS_DIR}"/ca-key.pem
certtool --generate-self-signed --load-privkey "${CERTS_DIR}"/ca-key.pem --template "${CERTS_DIR}"/ca.tmpl --outfile "${CERTS_DIR}"/ca-cert.pem
certtool --generate-crl --load-ca-privkey "${CERTS_DIR}"/ca-key.pem --load-ca-certificate "${CERTS_DIR}"/ca-cert.pem --template "${CERTS_DIR}"/crl.tmpl --outfile "${CERTS_DIR}"/crl.pem
if [[ ! -e  "${SSL_DIR}"/live/"${SRV_CN}"/privkey.pem && ! -e "${SSL_DIR}"/live/"${SRV_CN}"/fullchain.pem ]]; then
    certtool --generate-privkey --outfile "${SSL_DIR}"/live/"${SRV_CN}"/privkey.pem
    certtool --generate-certificate --load-privkey "${SSL_DIR}"/live/"${SRV_CN}"/privkey.pem --load-ca-certificate "${CERTS_DIR}"/ca-cert.pem --load-ca-privkey "${CERTS_DIR}"/ca-key.pem --template "${SSL_DIR}"/server.tmpl --outfile "${SSL_DIR}"/live/"${SRV_CN}"/fullchain.pem
fi

# Start ocserv service
echo "Starting OpenConnect Server"
exec "$@" || { echo "Starting failed" >&2; exit 1; }And we run the build with the command:
docker build -f Dockerfile ./ -t openconnect:v1.3Note that the build file name and image tag are different.
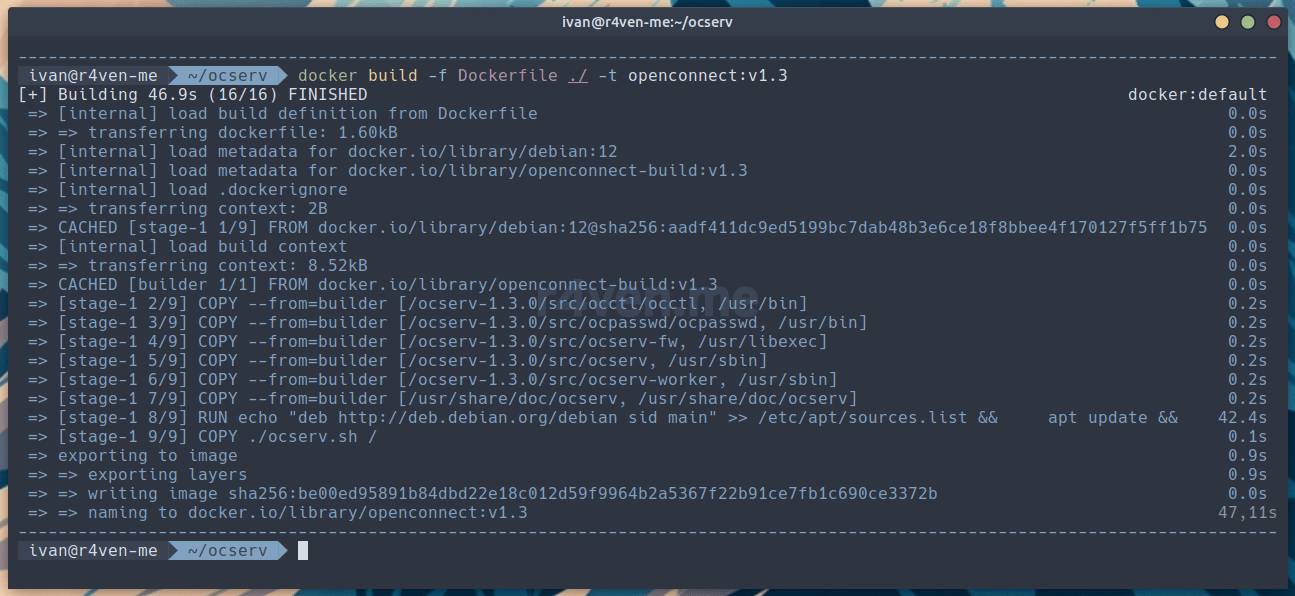
Done.
Let’s look at the list of images:
docker image ls
The difference is obvious.
Running ocserv in a Docker container
A test run can be done like this:
docker run --rm --detach openconnect:v1.3

docker ps
But I recommend using docker compose:
curl -fLO https://raw.githubusercontent.com/r4ven-me/openconnect/main/src/server/v1.3/docker-compose.yml

curl -fLO https://raw.githubusercontent.com/r4ven-me/openconnect/main/src/server/v1.3/.env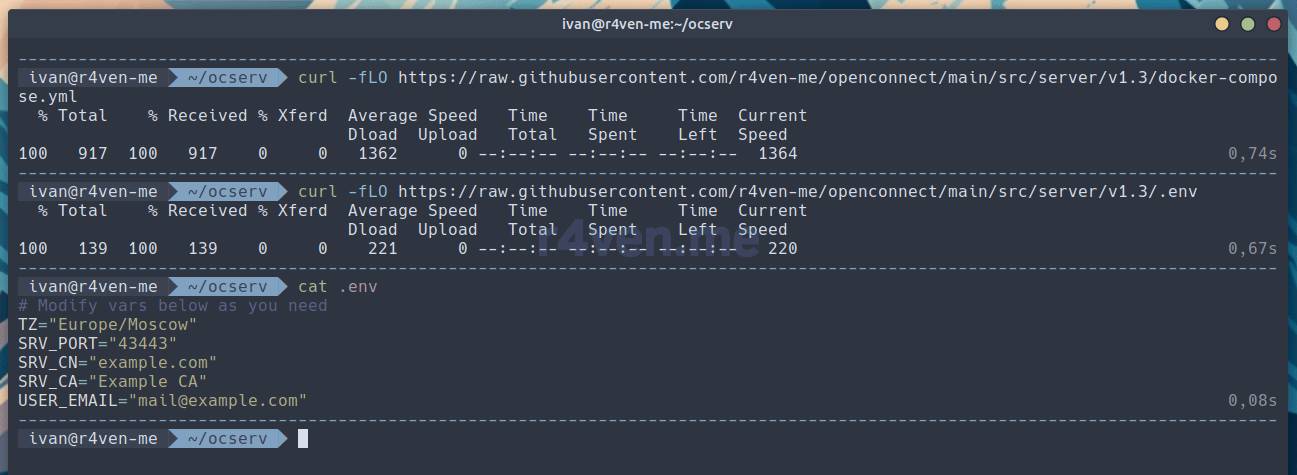
Fill in the .env file as needed and run:
docker compose up -d

docker compose ps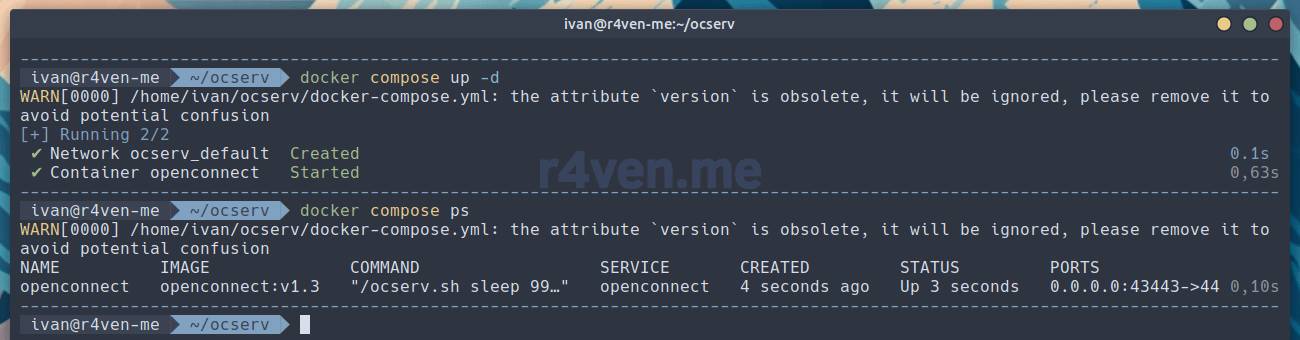
Or even better, check out the previously mentioned article: Setting up an OpenConnect SSL VPN server (ocserv) in Docker for internal projects.
Conclusion
I think this turned out to be a pretty illustrative case of what building software from source looks like. I’ll note that a lot in this situation depends on the documentation that the developers write. In the case of building ocserv, the documentation isn’t bad, but far from perfect. Some issues took me quite a lot of time. But on the other hand, this is open source software, and most often it’s distributed under licenses that don’t imply any warranty. This is when software is, as they say, “provided as is.”

In any case, this was an interesting and definitely useful experience for me.
If you still have questions or something to discuss, drop by our Telegram chat: @r4ven_me_chat. And of course subscribe to the main channel there too: @r4ven_me — links to all new posts arrive there on the day of publication. Linux quizzes are also held there 😉
Thanks for reading. I wish you error-free builds from source 😎
Materials used
- Official OpenConnect repository
- ocserv source code
- Build files from the official repository
- My OpenConnect files repository on GitHub
- Setting up an OpenConnect SSL VPN server (ocserv) in Docker for internal projects — Raven’s Blog
- Writing a bash script to connect to an OpenConnect VPN server — Raven’s Blog
Comments
📝 Note
Egorov Ivan:
Thanks to the author, the only thing missing is instructions on how to set it up on the client ))
Ivan Cherniy:
Take a look here)
Setting up client connections
Egorov Ivan:
Thanks, I can’t find your bash startup script on GitHub, found it on another site, it starts as a service either way. What should I do?
[Unit]
Description=OpenConnect SSL VPN server
Documentation=man:ocserv(8)
After=network-online.target

[Service]
PrivateTmp=true
PIDFile=/run/ocserv.pid
Type=simple
ExecStart=/usr/sbin/ocserv —foreground —pid-file /run/ocserv.pid —config /etc/ocserv/ocserv.conf
ExecReload=/bin/kill -HUP $MAINPID

[Install]
WantedBy=multi-user.targetlocate executable ‘/usr/sbin/ocserv’: No such file or directory
Feb 25 19:40:13 d12 (ocserv)[1406]: openconnect.service: Failed at step EXEC spawning /usr/sbin/ocserv: No such file or directory
Feb 25 19:40:13 d12 systemd[1]: openconnect.service: Main process exited, code=exited, status=203/EXEC
Even though the file is right there ))
I want to do without docker for now……
Ivan Cherniy:
I don’t quite understand what and how you’re running)
The article is about running the server in docker.
Egorov Ivan:
yeah, mixed up the pages )))
📝 Note
Egorov Ivan:
The build failed with an error ) Looks like it’s not my day today….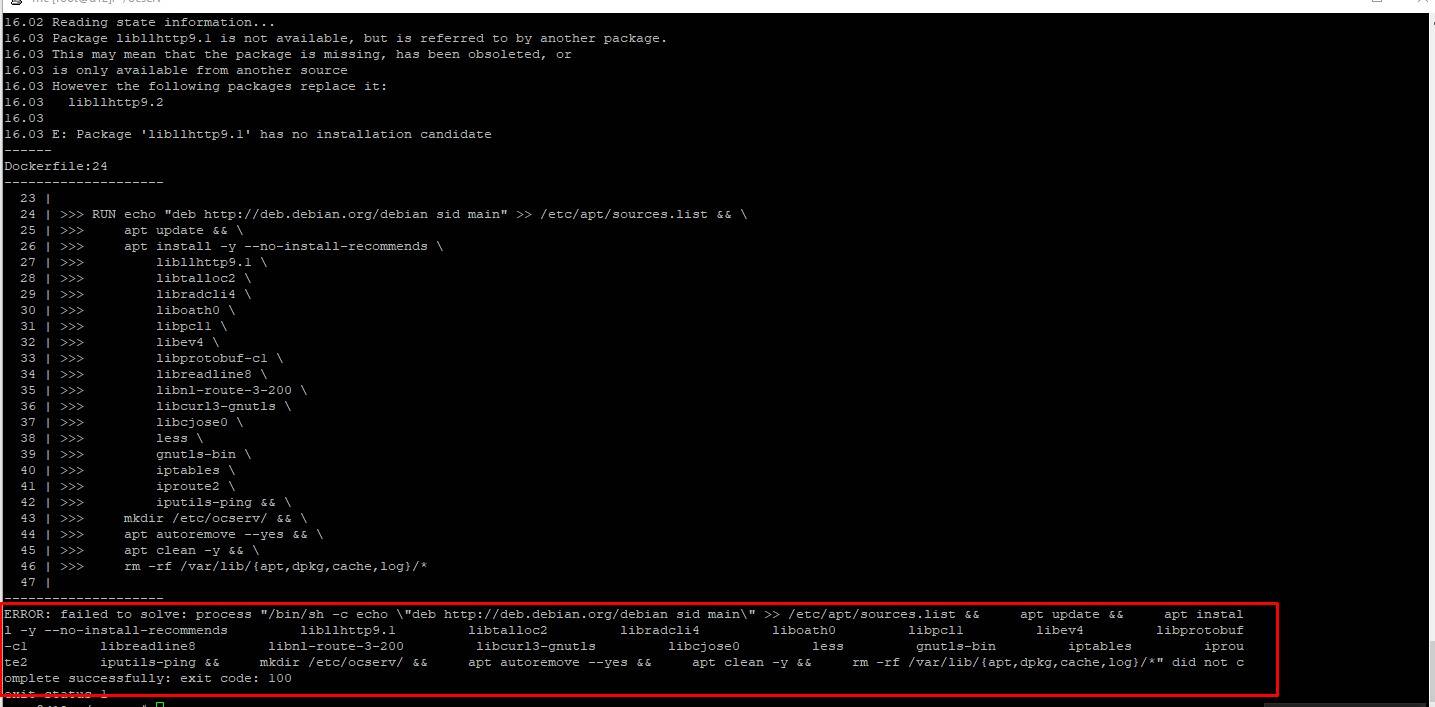
Ivan Cherniy:
Yes, the library version was updated there
In the Dockerfile replace it with libllhttp9.2
Egorov Ivan:
how do I understand this, do I put it in with echo? you probably saw it that way )))
Ivan Cherniy:
- Open the Dockerfile for editing
- Find the line with libllhttp9.1
- Replace it with libllhttp9.2
- Run the build again
Egorov Ivan:
the sequence is clear, I mean something else, how do I understand from this script that it stopped at libllhttp9.1.
Ivan Cherniy:
From which script?
I don’t quite understand you)
📝 Note
Egorov Ivan:
Ivan, how do I run it in docker? Do I need to specify ports + where to put the config, do I need to move the folder outside the container… There’s not much info about this.
Ivan Cherniy:
I recommend reading the other article:
https://r4ven.me/en/it-razdel/instrukcii/podnimaem-openconnect-ssl-vpn-server-ocserv-v-docker-dlya-vnutrennih-proektov/
It describes an example of deploying ocserv in docker in detail.
Comments