

In this article we will build our own Docker image with a modern DNS server — Unbound. We’ll take a detailed look at the Dockerfile, as well as my script for preparing the container environment.
🖐️Hey!
Subscribe to our Telegram channel @r4ven_me📱, so you don’t miss new posts on the website 😉. If you have questions or just want to chat about the topic, feel free to join the Raven chat at @r4ven_me_chat🧐.
Essentially, this is the story of how I built the container🐳 for my previous article: Setting up your own Unbound DNS server and Pihole ad blocker in docker.
Today we will need📑:
- 1️⃣An installed and configured Linux-based server;
- 2️⃣Access to the server, for example via SSH;
- 3️⃣Docker engine installed on the server;
- 4️⃣An account with sudo privileges!
If everything is ready, let’s connect to the server and get started🏃.
Downloading and reviewing the project files
I’ll be demonstrating the steps from this article in a Debian 12 distribution environment. Everything can be reproduced in roughly the same way on other Linux-based systems🙂.
To download the project files, we’ll need the git utility from the version control system of the same name. If it’s not yet installed, let’s install it:
sudo apt update && sudo apt install -y git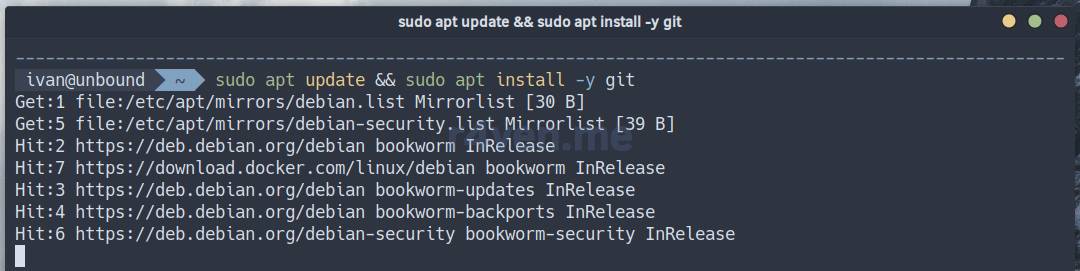
Now let’s clone the repository with the build files into the /opt folder:
sudo git clone https://github.com/r4ven-me/unbound /opt/unbound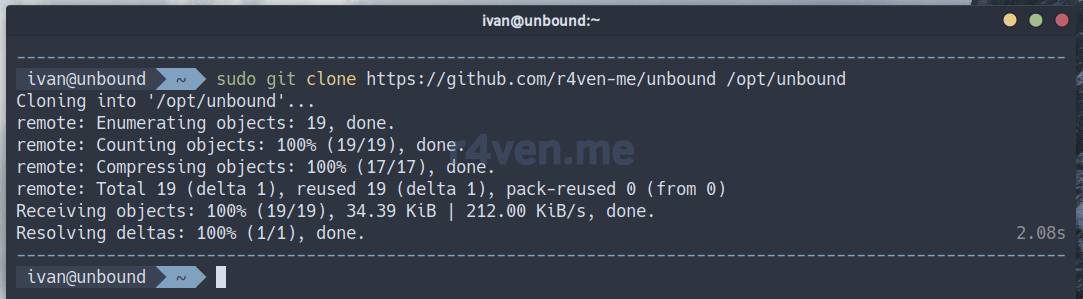
Let’s take a closer look at the project’s contents (links lead to GitHub):
- docker-compose.yml — an example compose file for running the built (see
src) Unbound container viadocker compose; - unbound.service — an example systemd unit file that allows running Unbound in Docker as a service user via
sudo; - unbound_sudoers — an example file for
/etc/sudoers.d/that allows the unbound service user to run (docker compose up/down) the unbound container without a password;
src — a directory with the source files for building the Unbound image:
- Dockerfile — a script for building the Docker image containing Unbound with the necessary configurations and dependencies;
- unbound.sh — a script for starting and managing the Unbound service;
- unbound.conf — the main configuration file for setting up the DNS server’s operating parameters;
- root.hints — a file listing the root DNS servers, used by Unbound to initialize the name resolution process;
- root.key — a DNSSEC key used to verify the authenticity of responses from root servers;
- forward-records.conf — an example configuration file defining the rules for forwarding DNS queries to other servers;
- a-records.conf — an example configuration file containing A records for mapping domain names to IP addresses;
- srv-records.conf — an example configuration file containing SRV records that indicate the location of services on the network;
- check.sh — a script for calculating recommended values for some parameters in
unbound.conf;
Let’s take a closer look at the build script file and the Unbound startup script inside the container (click the spoiler):
Dockerfile
Thanks to dafanasiev for your useful merge👍
# base image - lightweight Debian 12
FROM debian:12-slim

# suppress interactive prompts during package installation
ENV DEBIAN_FRONTEND=noninteractive

# metadata
LABEL maintainer="Ivan Cherniy <kar-kar@r4ven.me>"

# disable automatic apt cache cleanup in Docker
RUN rm -f /etc/apt/apt.conf.d/docker-clean; \
    echo 'Binary::apt::APT::Keep-Downloaded-Packages "true";' > /etc/apt/apt.conf.d/keep-cache

# install packages and configure Unbound
RUN --mount=type=bind,target=/src,source=./ \  # mount sources
    --mount=type=cache,target=/var/cache/apt,sharing=locked \  # package cache
    --mount=type=cache,target=/var/lib/apt,sharing=locked \  # metadata cache
    --mount=type=tmpfs,target=/var/log \  # logs in memory
    --mount=type=tmpfs,target=/var/tmp \  # temp files in memory
    --mount=type=tmpfs,target=/var/cache/debconf \  # install configs in memory
    --mount=type=tmpfs,target=/run \  # runtime files in memory
    --mount=type=tmpfs,target=/tmp \  # temp files in memory
    set -x && \  # enable shell debug mode
    apt update && \  # update apt cache
    # install without recommended dependencies
    apt install --yes --no-install-recommends --no-install-suggests \
        tini \  # tiny init process for containers
        unbound \  # the DNS server itself
        unbound-anchor \  # utility for managing DNSSEC root keys
        iproute2 \  # network utilities (ip, ss, etc.)
        iputils-ping \  # ping utility
        ldnsutils \  # utilities for working with DNS (drill, etc.)
        bc \  # calculator for scripts
        less \  # pager for viewing files
        ca-certificates \  # SSL certificates of trusted authorities
        curl && \  # utility for interacting with the web
    # change UID/GID of the unbound user
    usermod -u 14956 unbound && \
    groupmod -g 14956 unbound && \
    # initialize the DNSSEC root key
    { unbound-anchor -a /etc/unbound/root.key; true; } && \
    # download the list of root DNS servers from InterNIC
    curl -sSL https://www.internic.net/domain/named.cache > /etc/unbound/root.hints && \
    # copy configs
    cp /src/*.conf /etc/unbound/ && \
    cp /src/*.conf /usr/share/doc/unbound/ && \
    cp /src/unbound.sh /src/check.sh / && \
    # copy root files
    cp /etc/unbound/root.key /etc/unbound/root.hints /usr/share/doc/unbound/ && \
    # change ownership of configs
    chown -R unbound:unbound /etc/unbound/ && \
    # clean up unneeded packages
    apt purge --yes --auto-remove

# expose DNS ports
EXPOSE 53/tcp \
       53/udp

# container health check - test DNS query
HEALTHCHECK --interval=5m --timeout=20s --start-period=20s \
    CMD drill @127.0.0.1 opennameserver.org > /dev/null || exit 1

# entrypoint script
ENTRYPOINT ["/unbound.sh"]

# default command: start Unbound via tini
CMD ["/usr/bin/tini", "--", "/usr/sbin/unbound", "-d", "-p", "-c", "/etc/unbound/unbound.conf"]Dockerfile — the instructions📒 that docker uses to build the image based on Debian 12 (Bullseye), install unbound version 1.17.1, create the unbound user, copy configs and scripts into the container, and in CMD run unbound.sh, which then configures everything and starts the DNS server itself.
If you need a more recent version of Unbound, use Debian Sid as the base image. Or study the Dockerfile from this GitHub repository — there Unbound is built from source during the Docker image build stage🐧.
unbound.sh
#!/bin/bash

### PREPARATION ###
WORK_DIR="/etc/unbound"  # unbound working directory
ROOT_HINTS_URL="https://www.internic.net/domain/named.cache"  # link to root servers
CONF_LIST=("unbound.conf" "forward-records.conf" "srv-records.conf" "a-records.conf")  # list of configs

# copy configs from templates if missing in the working directory
for config in "${CONF_LIST[@]}"; do
    if [[ ! -f "${WORK_DIR}"/"${config}" ]]; then
        cp /usr/share/doc/unbound/"${config}" "${WORK_DIR}"
    fi
done

# handling root.key (DNSSEC key)
if [[ -f "${WORK_DIR}"/root.key ]]; then
    # make a backup before updating
    cp "${WORK_DIR}"/root.key{,_backup}

    # try to update, if it fails - restore the backup
    if ! unbound-anchor -a "${WORK_DIR}"/root.key; then
        mv "${WORK_DIR}"/root.key{_backup,}
    else
        # if updated successfully - remove the backup
        rm -f "${WORK_DIR}"/root.key_backup
    fi
else
    # if the file doesn't exist at all - copy from templates
    cp /usr/share/doc/unbound/root.key "$WORK_DIR"
fi

# handling root.hints (list of root servers)
if [[ -f "${WORK_DIR}"/root.hints ]]; then
    # similarly, make a backup
    cp "${WORK_DIR}"/root.hints{,_backup}

    # try to download a fresh list
    if ! curl -sSL "$ROOT_HINTS_URL" > "${WORK_DIR}"/root.hints; then
        # if it fails - restore
        mv "${WORK_DIR}"/root.hints{_backup,}
    else
        # if ok - remove the backup
        rm -f "${WORK_DIR}"/root.hints_backup
    fi
else
    # if the file doesn't exist - copy from templates
    cp /usr/share/doc/unbound/root.hints "$WORK_DIR"
fi

# fix permissions on the working directory
chown -R unbound:unbound "$WORK_DIR"


### STARTING UNBOUND ###
echo "Запускаем Unbound DNS-сервер..."
# execute the passed arguments (command from CMD)
exec "$@" || { echo "не удалось запустить :(" >&2; exit 1; }A small bash script that checks at startup whether the required configs exist, and if not — copies them from /usr/share/doc/unbound/; updates the root DNS key (root.key) and hints (root.hints), making backup copies in case of failure; and finally starts unbound itself.
Let’s gradually move on to practice😉.
Building the image
Let’s build our image using the following command:
sudo docker build --tag r4venme/unbound /opt/unbound/src/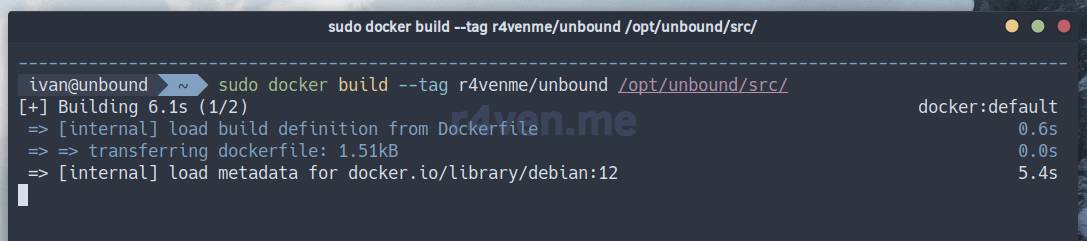
Where r4venme/unbound is an arbitrary image tag. In this case, I specified my Docker Hub username followed by / and the repository name.
Once finished, let’s check:
sudo docker image ls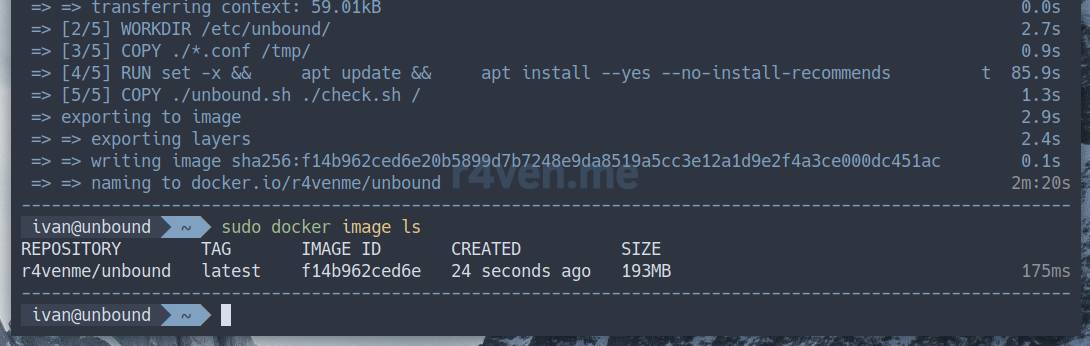
The image is ready👍.
Building for different architectures
If needed, you can build the image for different architectures. This is most often done with a subsequent push to an image repository, for example hub.docker.com (prior authorization in the repository via docker login is required):
sudo docker buildx create --use

sudo docker buildx build \
    --platform linux/amd64,linux/arm64,linux/arm/v7 \
    --tag r4venme/unbound \
--push /opt/unbound/srcThe command above builds the image for the amd64, arm64, and armv7 platforms.
Running and testing Unbound in docker
Among the project files there is an example compose file📁. Let’s use it to run a container based on the built image🎛️.
⚠️Please note that the container described in the
docker-compose.ymlfile is intentionally limited in hardware resources (thedeploydirective) tocpus: '0.70'andmemory: 512M, i.e. the maximum allowed CPU usage is 70% of one core and 512 MB of RAM + reserve. Limits on container log storage are also explicitly set: 5 files of 50 MB each. Adjust these parameters as needed to suit your requirements. Read more about service resource limits when using docker compose here, and about logging here.
Let’s start the container in the background (detach) and view the logs:
sudo docker compose --file /opt/unbound/docker-compose.yml up --detach

sudo docker logs --follow unbound 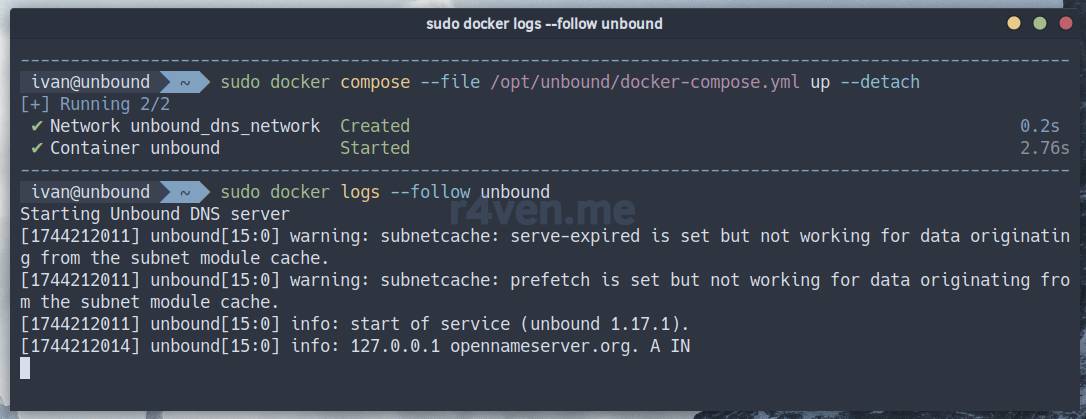
⚠️To exit log viewing mode, press
Ctrl+c.
You will see healthcheck entries, which perform a test DNS query every 5 minutes.
If needed, you can disable this check in docker-compose.yml by adding the directive to the service:
healthcheck:
disable: trueNow let’s check the DNS server’s operation without interrupting the container log view. To do this, open a neighboring terminal and install the DNS utility — dig:
sudo apt install -y dnsutils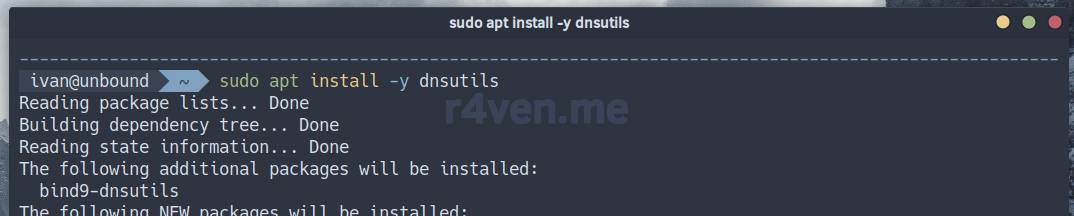
Let’s perform a test query to the container’s IP address (it is explicitly set in docker-compose.yml):
dig @10.100.100.200 r4ven.me +short +identify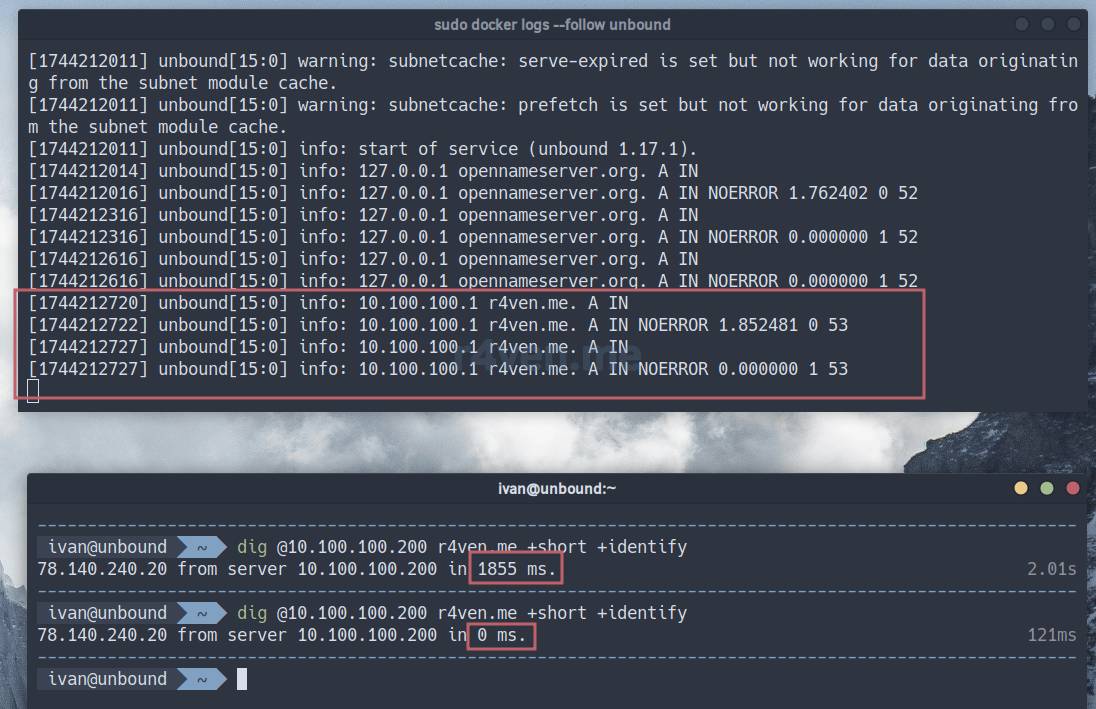
☝️Note that the response to the second query arrived noticeably faster — this is the result of the caching mechanism. By default, it is stored in the container’s RAM and is cleared on restart. To change this behavior, study and set the corresponding parameters in /opt/unbound/data/etc/unbound.conf.
If you enable verbose logging mode when starting Unbound, requests to root DNS servers during initial resolution will be visible in the container’s output. You can do this by changing the container start command in the compose file:
command:
- /usr/sbin/unbound -vvv -d -p -c /etc/unbound/unbound.confThis is usually excessive, but sometimes useful for debugging👌.
As for how to configure external clients to query the DNS server in the container, I described that in a separate section of the article about Unbound+Pihole.
Calculating recommended values for Unbound
I wanted to separately mention the check.sh script, whose logic I borrowed from another Unbound build project (see sources at the end).
When run without arguments, based on the amount of available RAM and CPU cores, this script calculates values for the following parameters:
msg-cache-size— the amount of memory allocated for caching full DNS responses (includes the query and the response);rrset-cache-size— the amount of memory for the Resource Record Sets (RRsets) cache — individual DNS records (A, MX, NS, etc.);num-threads— the number of threads (CPU cores) that Unbound will use;msg-cache-slabs— the number of “shards” (partitions) formsg-cache;rrset-cache-slabs— similarly, but forrrset-cache.
The script is located in the container’s root and can be run like this:
sudo docker exec -it unbound /check.shBut because containers are often resource-limited (see the note about deploy above), and the container itself doesn’t realize it has been limited😅 (it sees the host’s real RAM and CPU parameters) — I added the ability to manually specify parameters in the script.
For example, the command to calculate recommendations for 4 GB of RAM (specified in MB) and 4 CPU cores looks like this:
sudo docker exec -it unbound /check.sh -m 4096 -t 4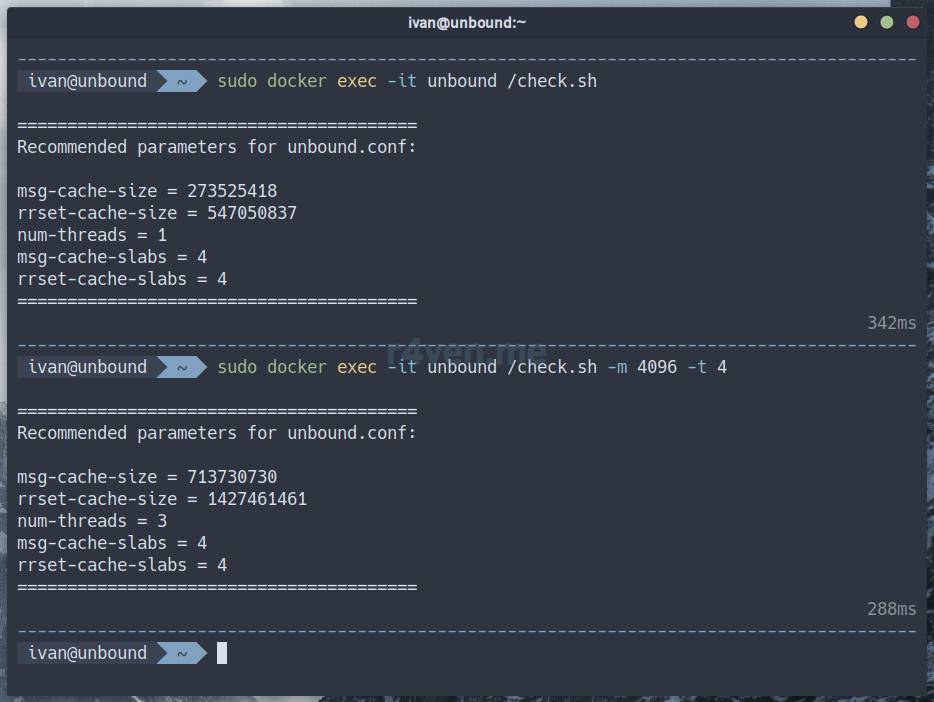
The resulting values can be set in the main config file: /opt/unbound/data/etc/unbound.conf.
I’ll emphasize once again that these calculations are only recommendations😏.
Optional: running Unbound as a service user with Sudo and Systemd
I prefer to manage my services using the init system — Systemd. So next I’ll show one way to run the container as a restricted-privilege user using sudo + systemd😌.
Let’s stop the previously started service:
sudo docker compose --file /opt/unbound/docker-compose.yml downLet’s create the service user:
sudo addgroup --system --gid 14956 unbound

sudo adduser --system --gecos 'Unbound DNS service' \
    --disabled-password --uid 14956 --ingroup unbound \
    --shell /sbin/nologin --home /opt/unbound/data unbound
Click here to view the description of the command parameters
adgroup — the command for creating a group;
--system— marks the group as a system group and applies established policies to it;--gid 14956— specifies an explicit group identifier (GID), matching the one in the container;unbound— the name of the group being created;
adduser — the command for creating a user
--system— marks the group as a system group and applies established policies to it;--gecos— allows you to set a description for the user;--disabled-password— disables the user’s password (in this case, you cannot log into the system with this user using a password);--uid 14956— specifies an explicit user identifier (UID), matching the one in the container;--ingroup unbound— adds the user to the previously created unbound group;--shell /sbin/nologin— sets nologin as the user’s shell — you cannot log into the system with it;--home /opt/unbound/data— sets the user’s home directory, in our case this is the directory with the unbound service files;unbound— the name of the user being created.
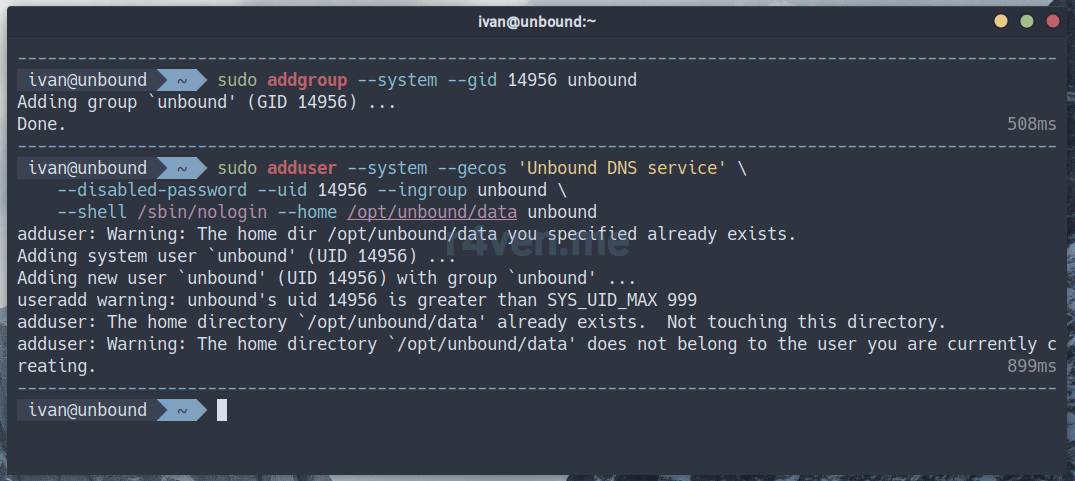
Let’s copy the file listing the restricted sudo privileges for the unbound user:
sudo cp /opt/unbound/unbound_sudoers /etc/sudoers.d/90_unbound

# just in case, check the syntax
sudo visudo -c -f /etc/sudoers.d/90_unbound
Let’s copy the Systemd service file, start it, and enable autostart:
sudo cp /opt/unbound/unbound.service /etc/systemd/system/

sudo systemctl daemon-reload

sudo systemctl enable --now unbound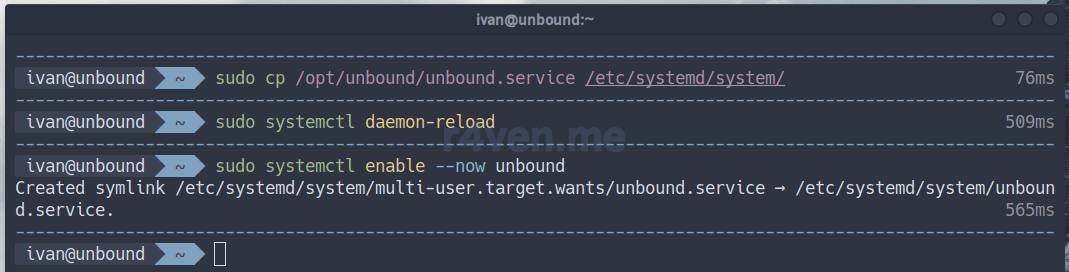
Let’s check the status and view the logs:
sudo systemctl status unbound

sudo journalctl --follow --unit unbound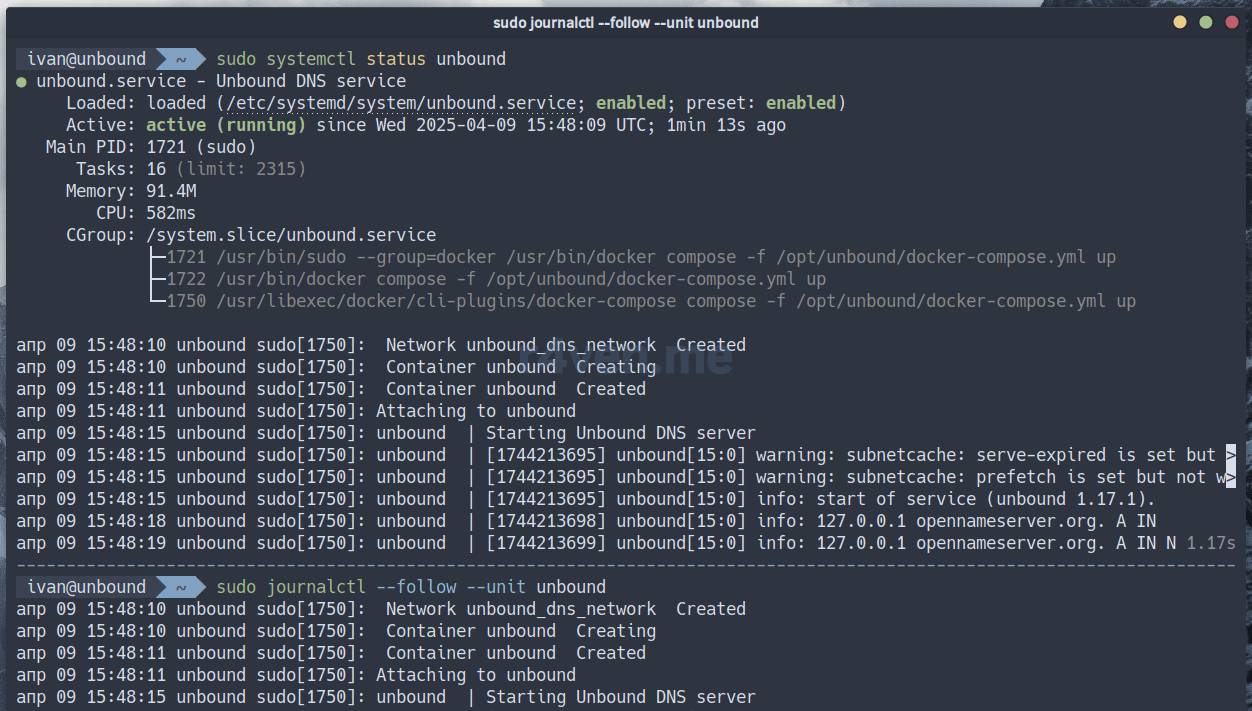
That’s about it.
Sources used
- Setting up Unbound and Pihole in docker | Raven Blog
- Unbound source code | GitHub
- Unbound stable package version page | Debian packages
- Docker image building Unbound from source | GitHub
👨💻And…
Don’t forget about our Telegram channel 📱 and chat
Or maybe you want to become a co-author? Then click here🔗
💬 All the best ✌️
That should be it. If not, check the logs 🙂

Comments