
Today I’ll tell and show you how you can try Linux right inside Windows. To do this, we’ll need to take a few steps, the hardest of which will be entering the UEFI/BIOS.
To run another operating system inside the current one, the so-called virtualization technology is used, hardware support for which is implemented in practically every more or less modern processor. Whether it’s a solution from AMD (AMD-V) or Intel (Intel VT). You can read more about virtualization, as usual, on Wikipedia.
🖐️Hey!
Subscribe to our Telegram channel @r4ven_me📱, so you don’t miss new posts on the website 😉. If you have questions or just want to chat about the topic, feel free to join the Raven chat at @r4ven_me_chat🧐.
There will be 7 steps in total:
- Step 1. Enabling virtualization in BIOS/UEFI
- Step 2. Downloading a Linux distribution
- Step 3. Downloading the VirtualBox hypervisor program
- Step 4. Installing VirtualBox
- Step 5. Creating a virtual machine
- Step 6. Launching and installing Linux Mint on the virtual machine
- Step 7. First boot of the installed OS
So, let’s get started.
Enabling virtualization in BIOS/UEFI
In order to use virtualization technology, you need to enable it in the BIOS/UEFI menu. To get there, you need to press the entry key right before turning on the computer. In 90% of cases this is the “DEL” key. Sometimes there are other options, for example F12. To find out for sure, you can ask Google by entering the name of your motherboard manufacturer, if you have a PC, or your laptop model.
I’ll show this using an Asus motherboard as an example.
We press the power button and immediately after that repeatedly press the DEL key.
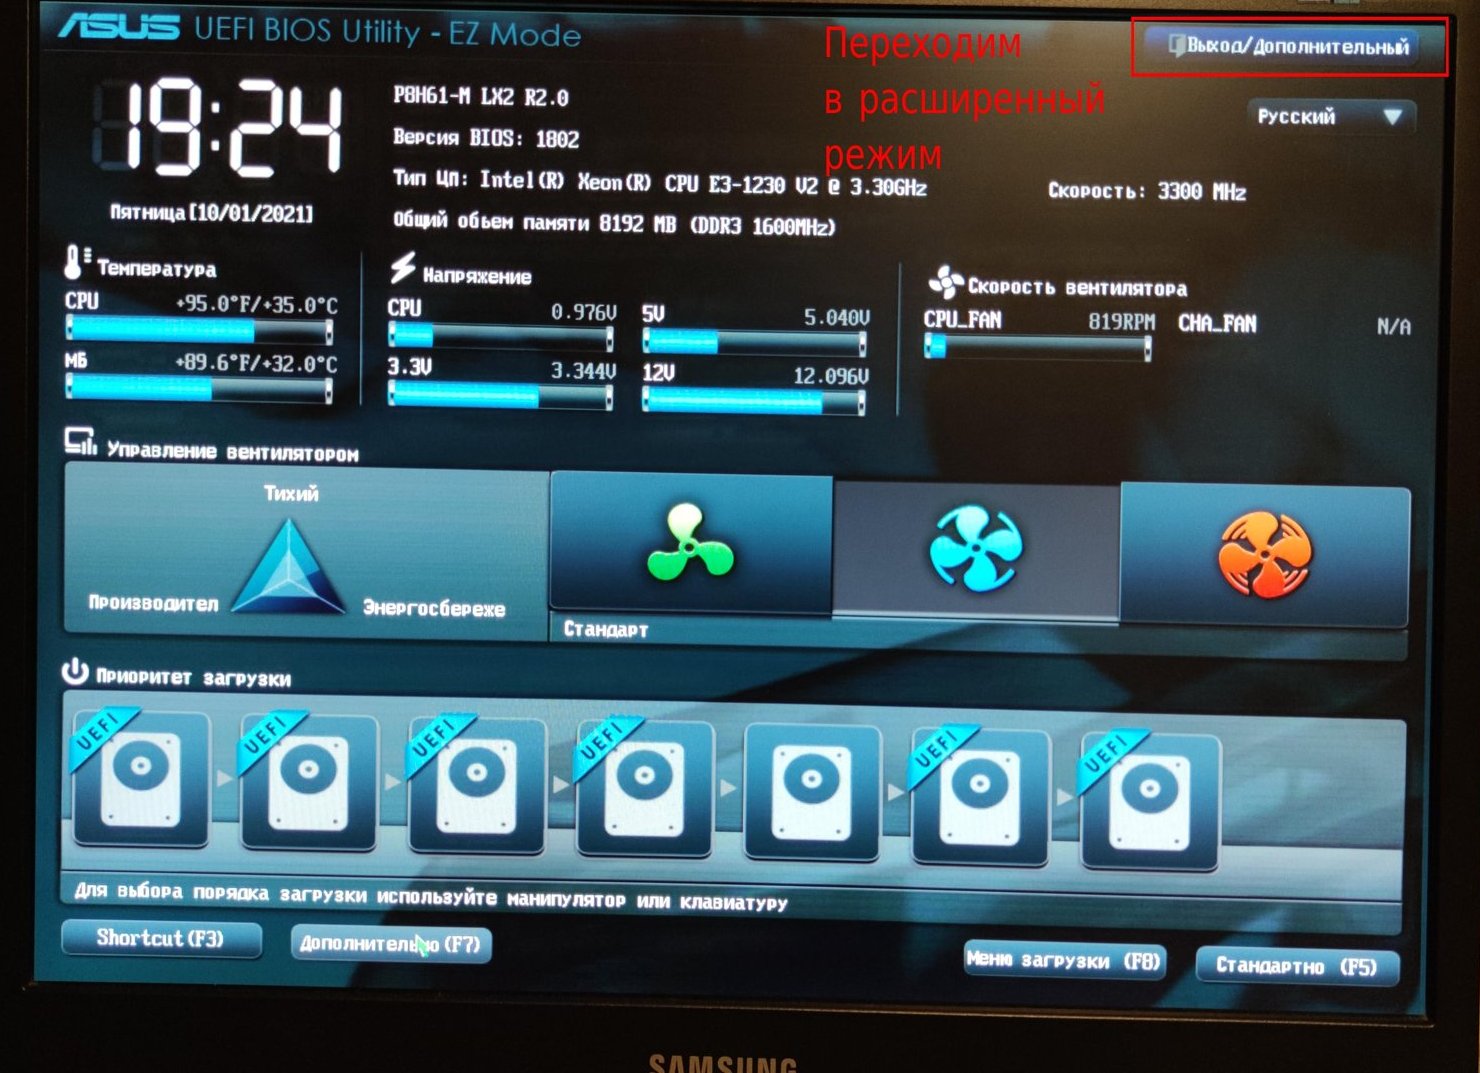
We end up in the low-level configuration menu of your hardware, in this case UEFI. Next, click the “Advanced” or “Advanced mode” button at the top of the screen to switch to advanced mode.
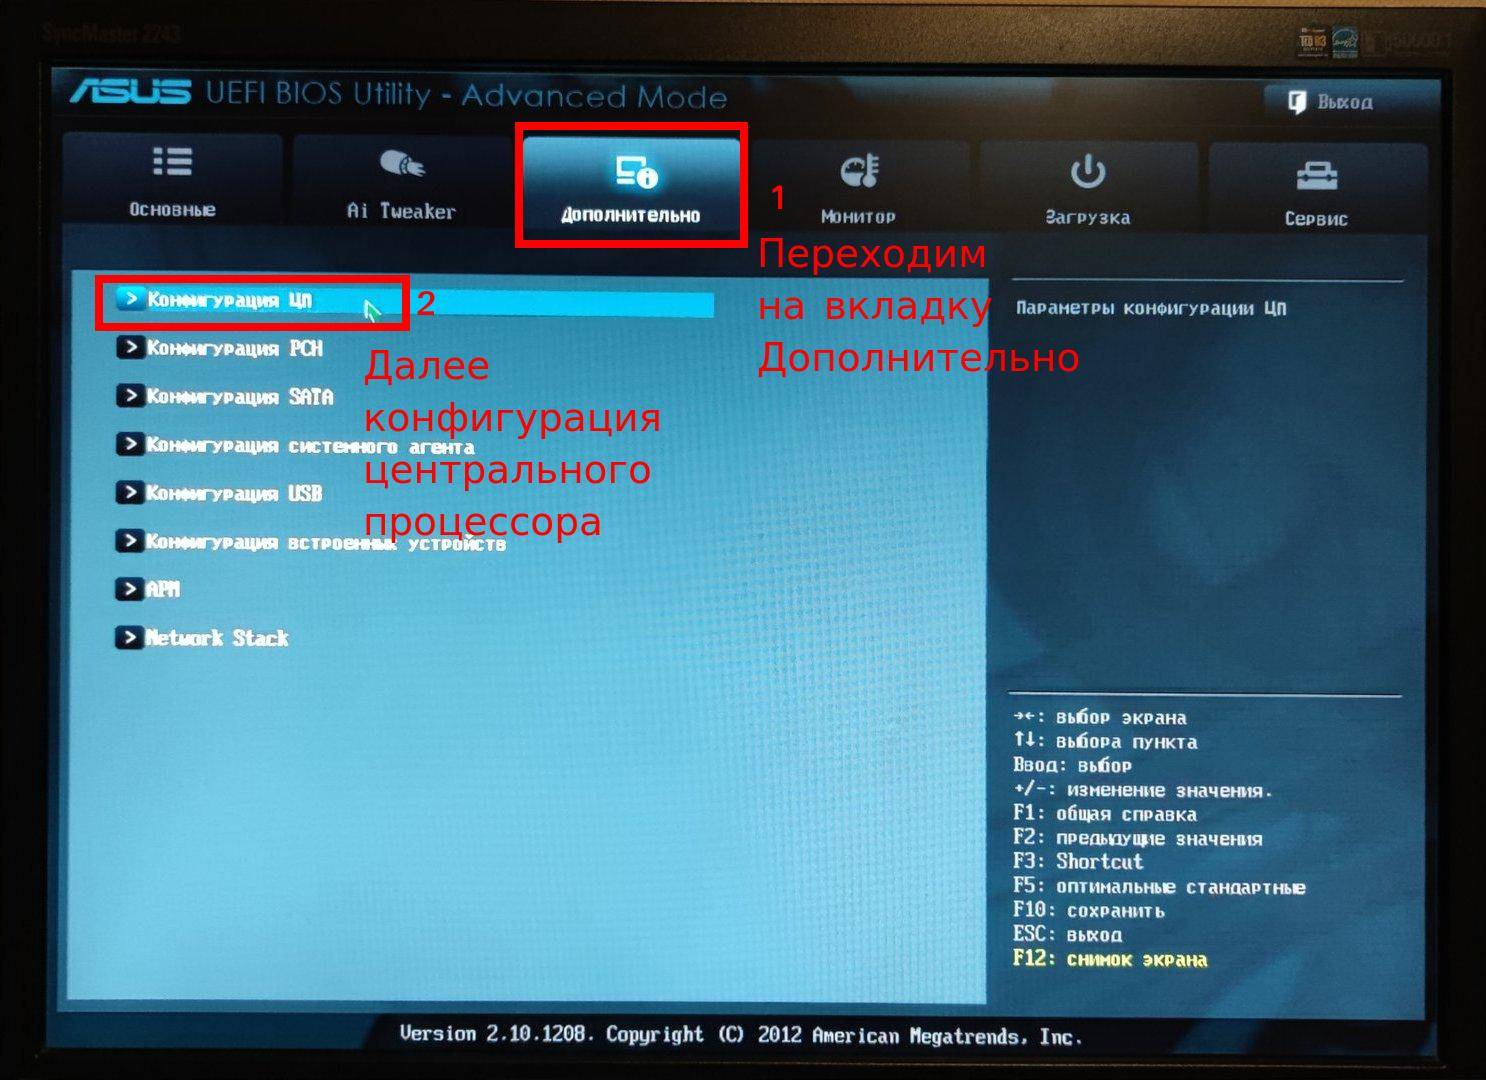
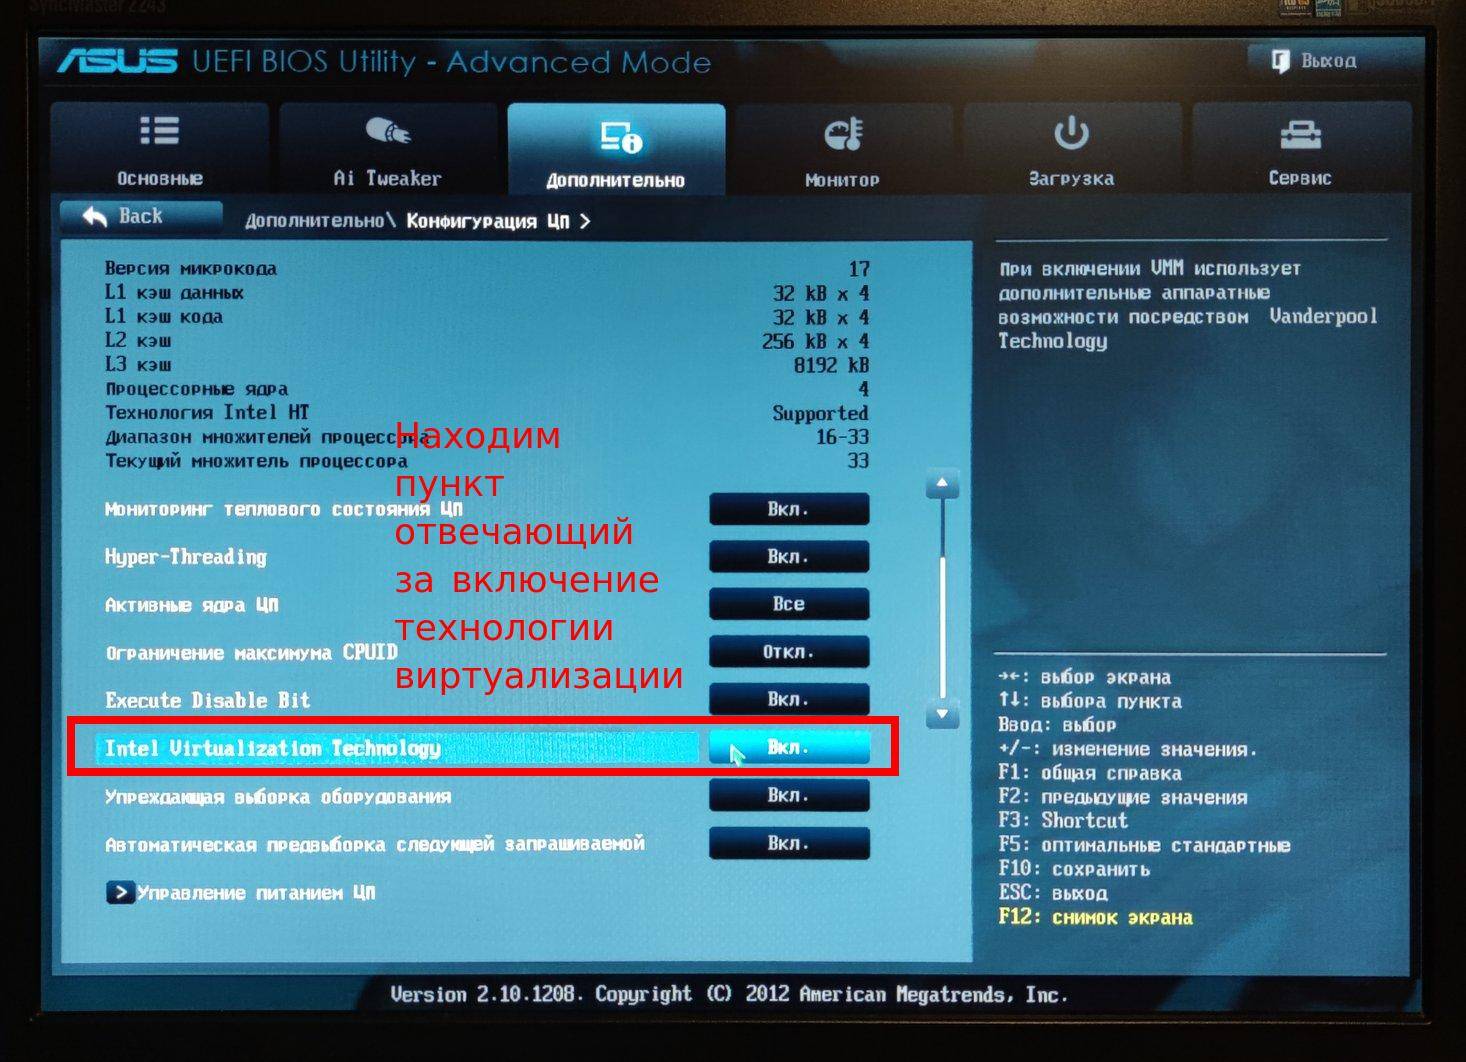
Then we go to the “Advanced” tab, find the “CPU Configuration” item, and then look for the line named “Intel Virtualization Technology”. If this item is set to “enabled,” it means virtualization technology is already turned on for us; if not, press the “Enter” key and change the selection from “disable” to “enable”. After that, you need to save the settings by pressing the “F10” key and confirm by pressing “Enter”.
After these manipulations, the computer may go dark for a second entirely — this is normal, it’s engaging the hardware module responsible for using virtualization. After which it will turn back on and the operating system will boot as usual.
Here are a few photos of this procedure:
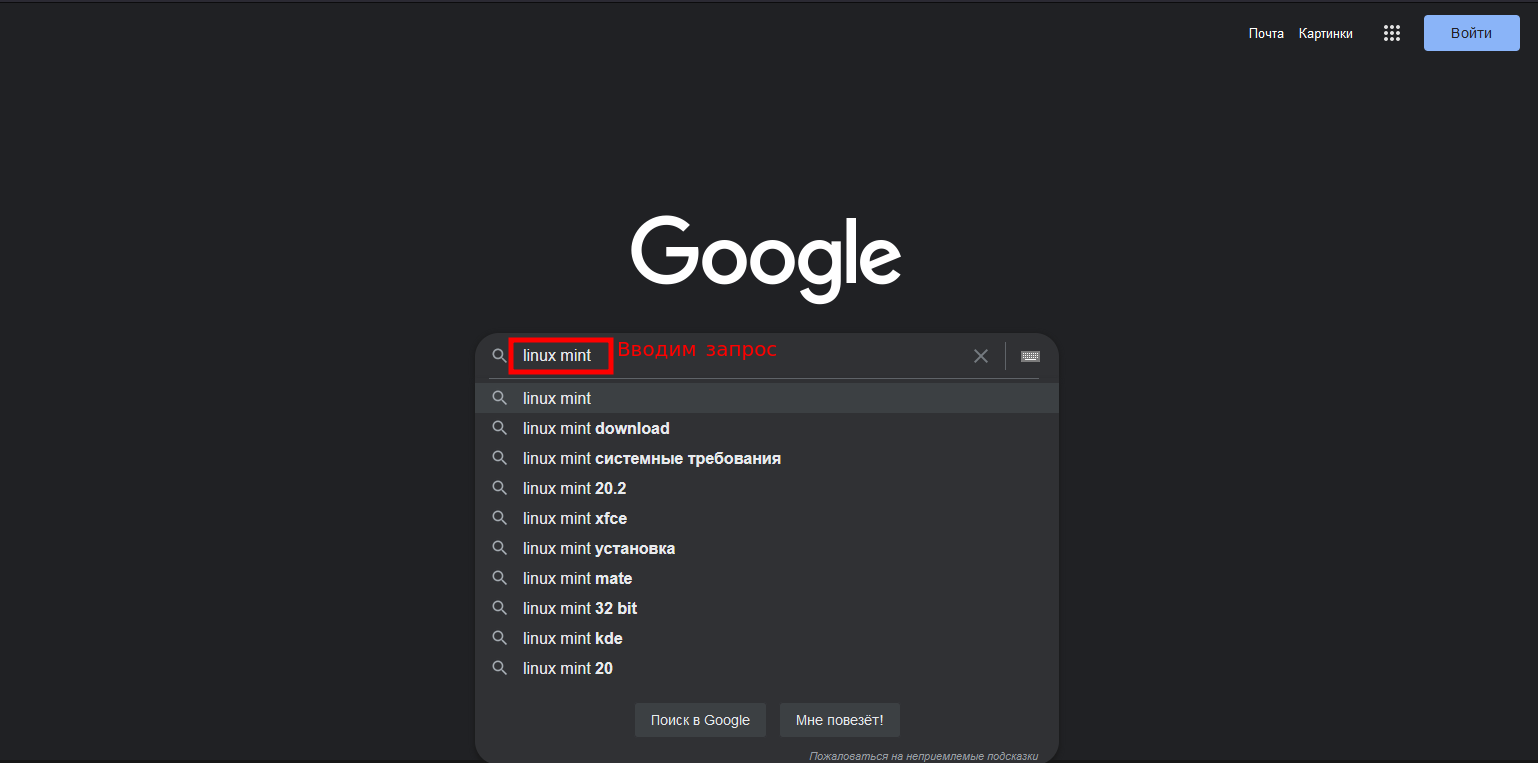
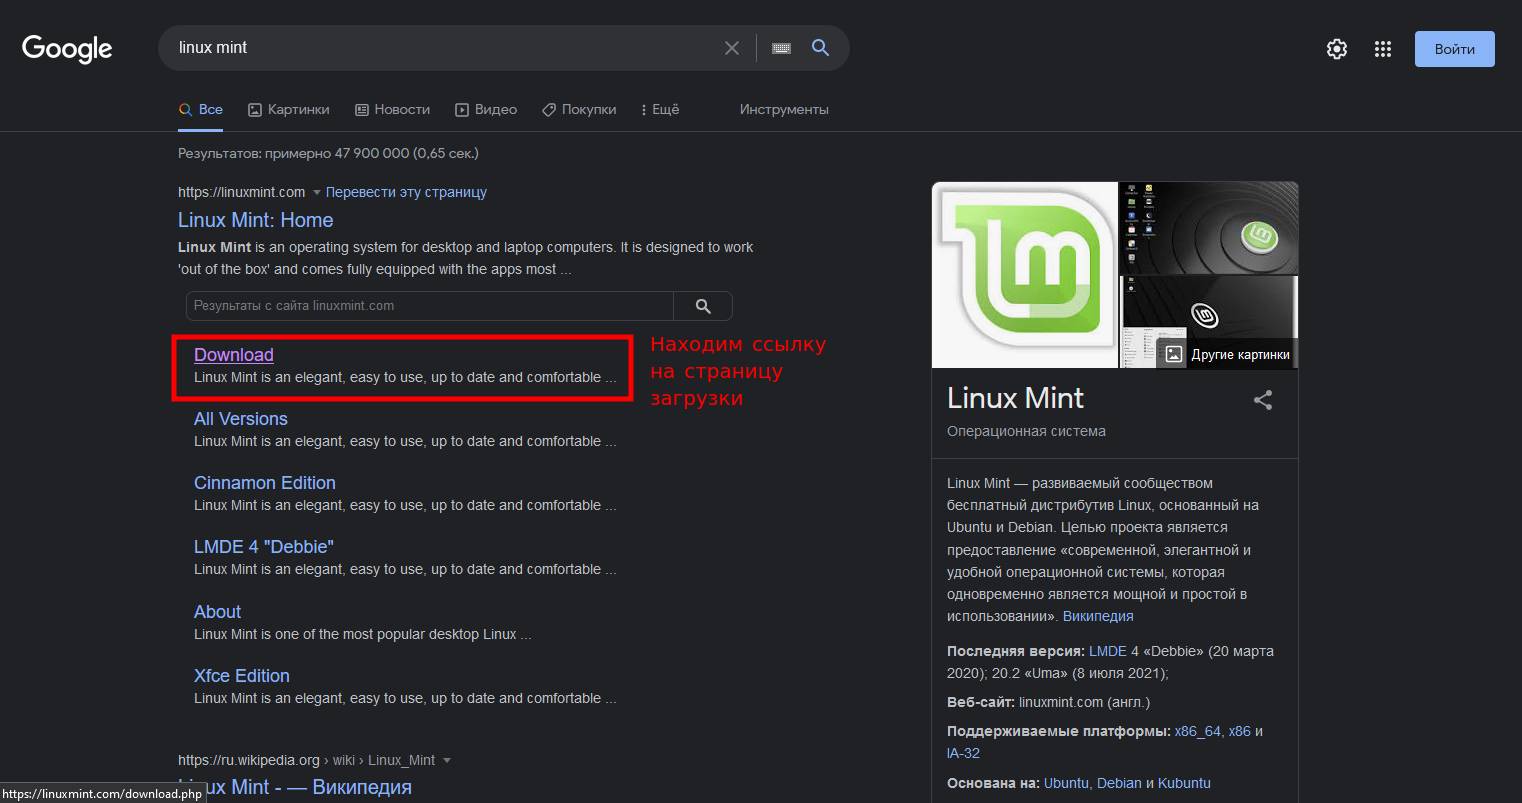
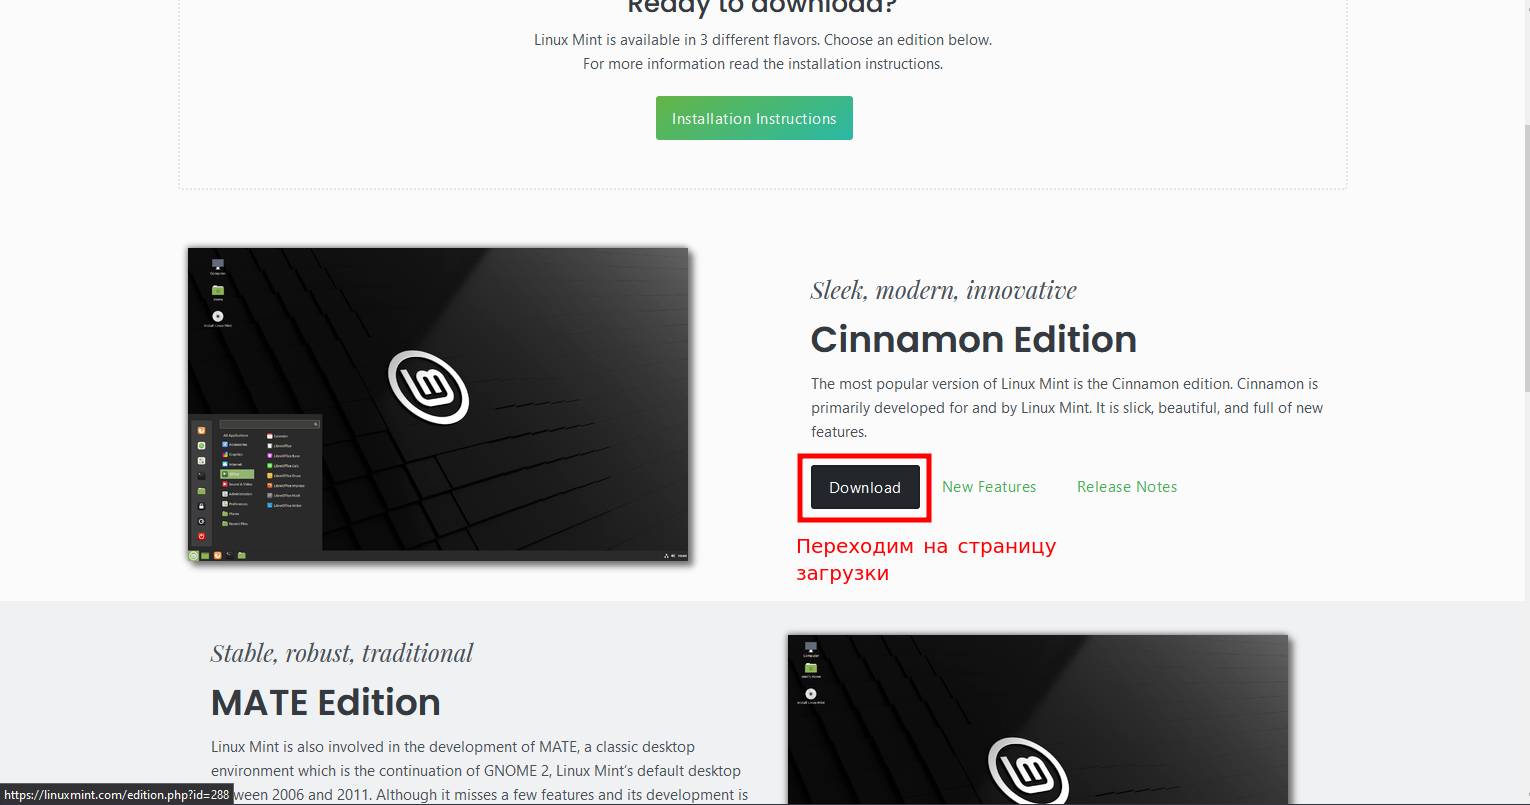
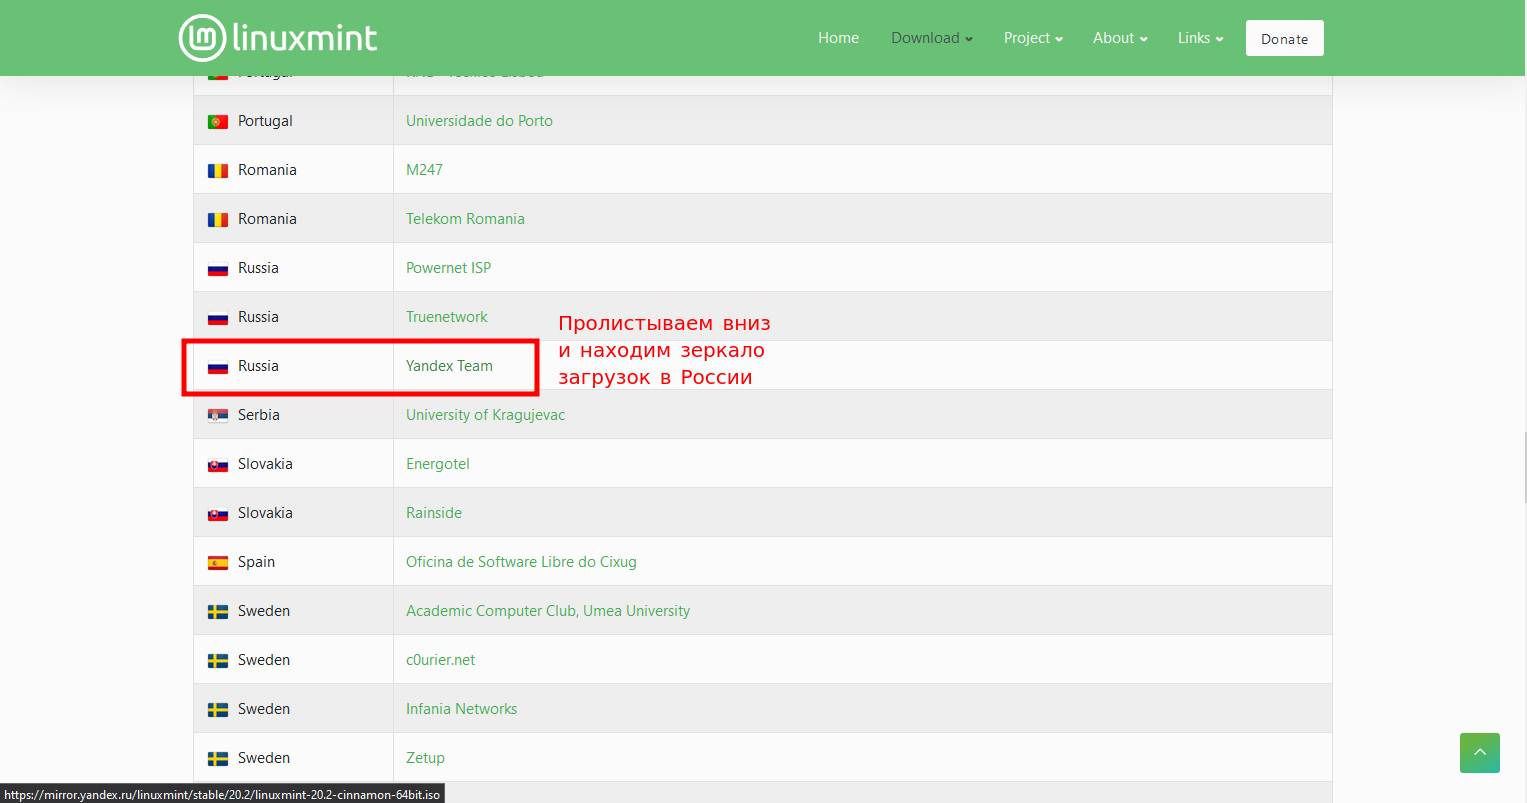
Downloading a Linux distribution
Among the many Linux-based operating system builds, there are quite a few that are designed for beginners and inexperienced users. One such build (otherwise — a Linux distribution) is Linux Mint. This distribution is in the top 5 most popular desktop OS choices for PCs. It has many advantages, the main ones being:
- best localization (in my experience);
- stable operation;
- a modern and pleasant default appearance;
- a full set of preinstalled programs necessary for everyday use;
- as well as regular updates to the system and installed programs.
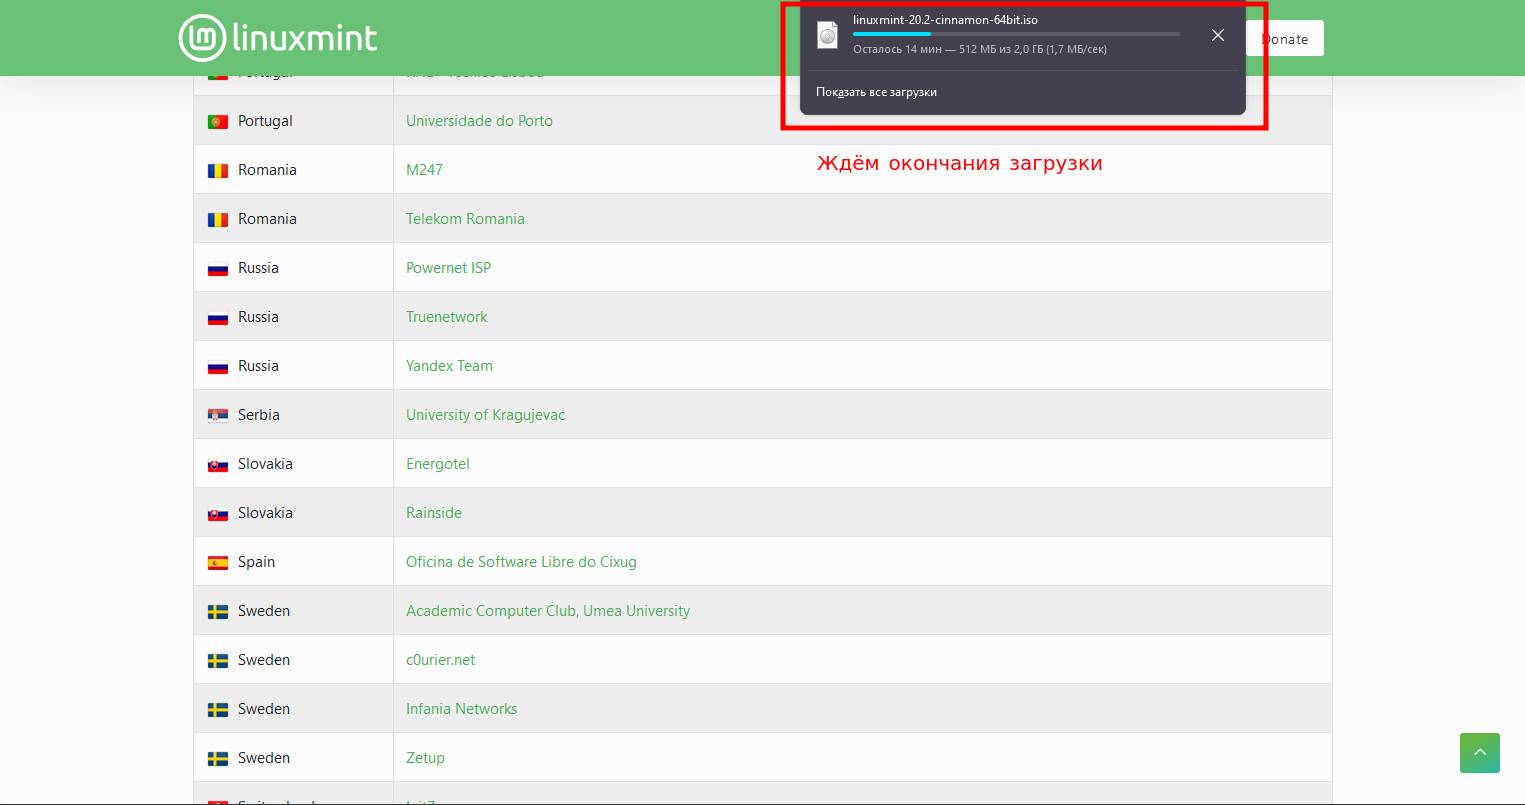
Download instructions with screenshots:
Downloading the VirtualBox hypervisor program
Next, we need to download and install the hypervisor program called VirtualBox. This program is specifically designed for creating virtual machines* (emulating a virtual environment inside a running system), passing them a portion of the allocated hardware of the computer on which the program is running. This software also provides the user with a convenient and easy-to-use graphical interface, through which the necessary parameters for creating virtual machines can be easily configured.
A virtual machine is an abstract computer inside a running operating system, with a certain set of hardware characteristics allocated to it, such as CPU cores, RAM, disk space, and other equipment.
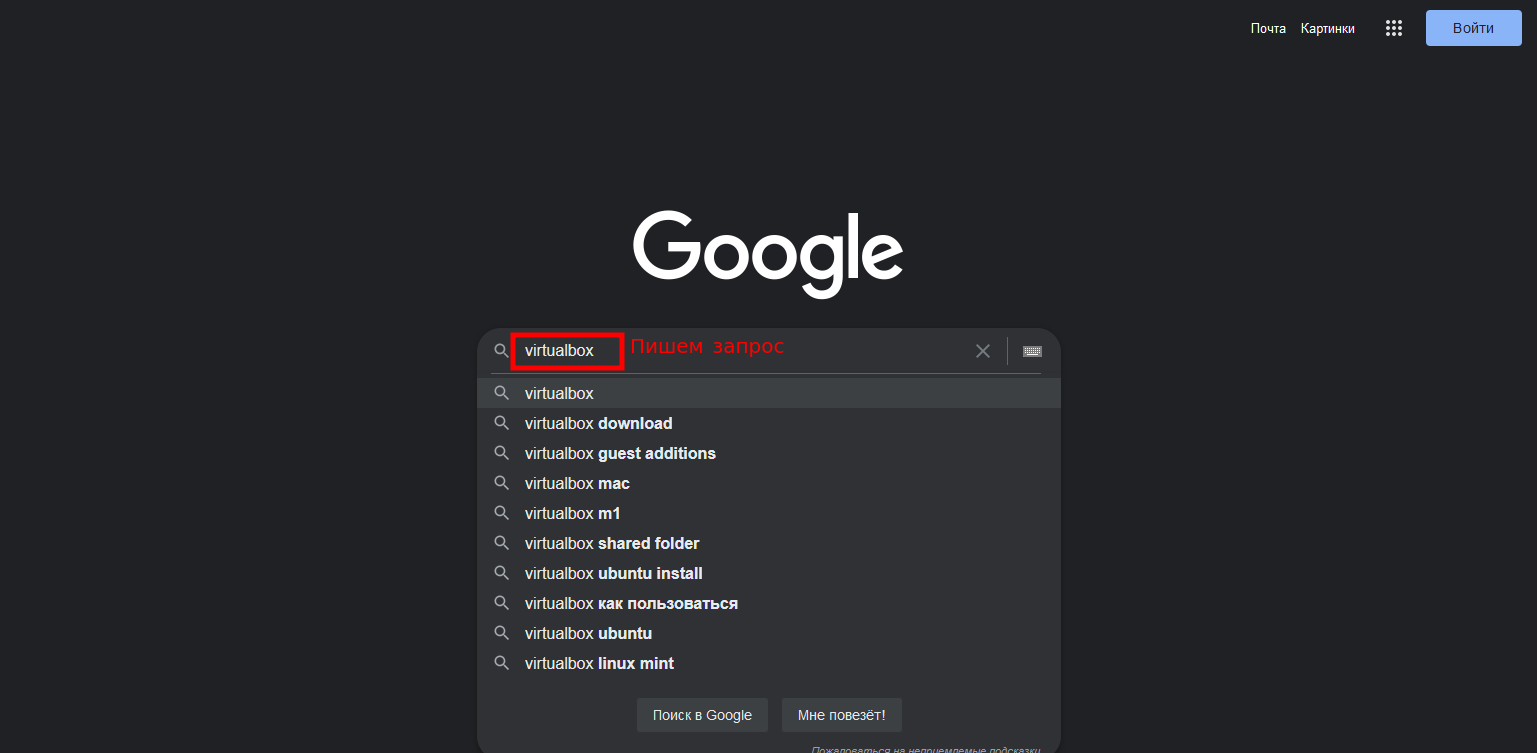
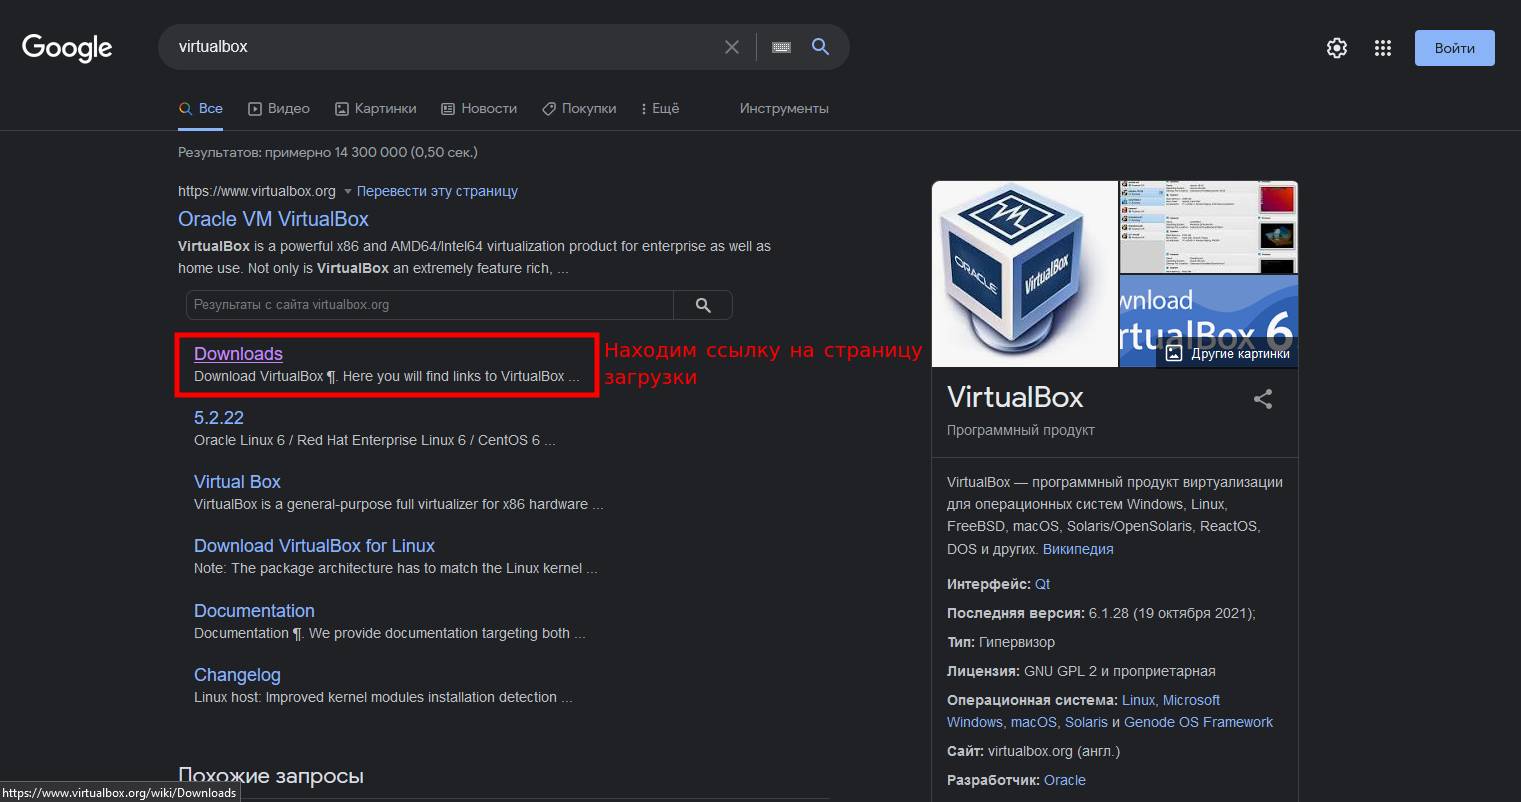
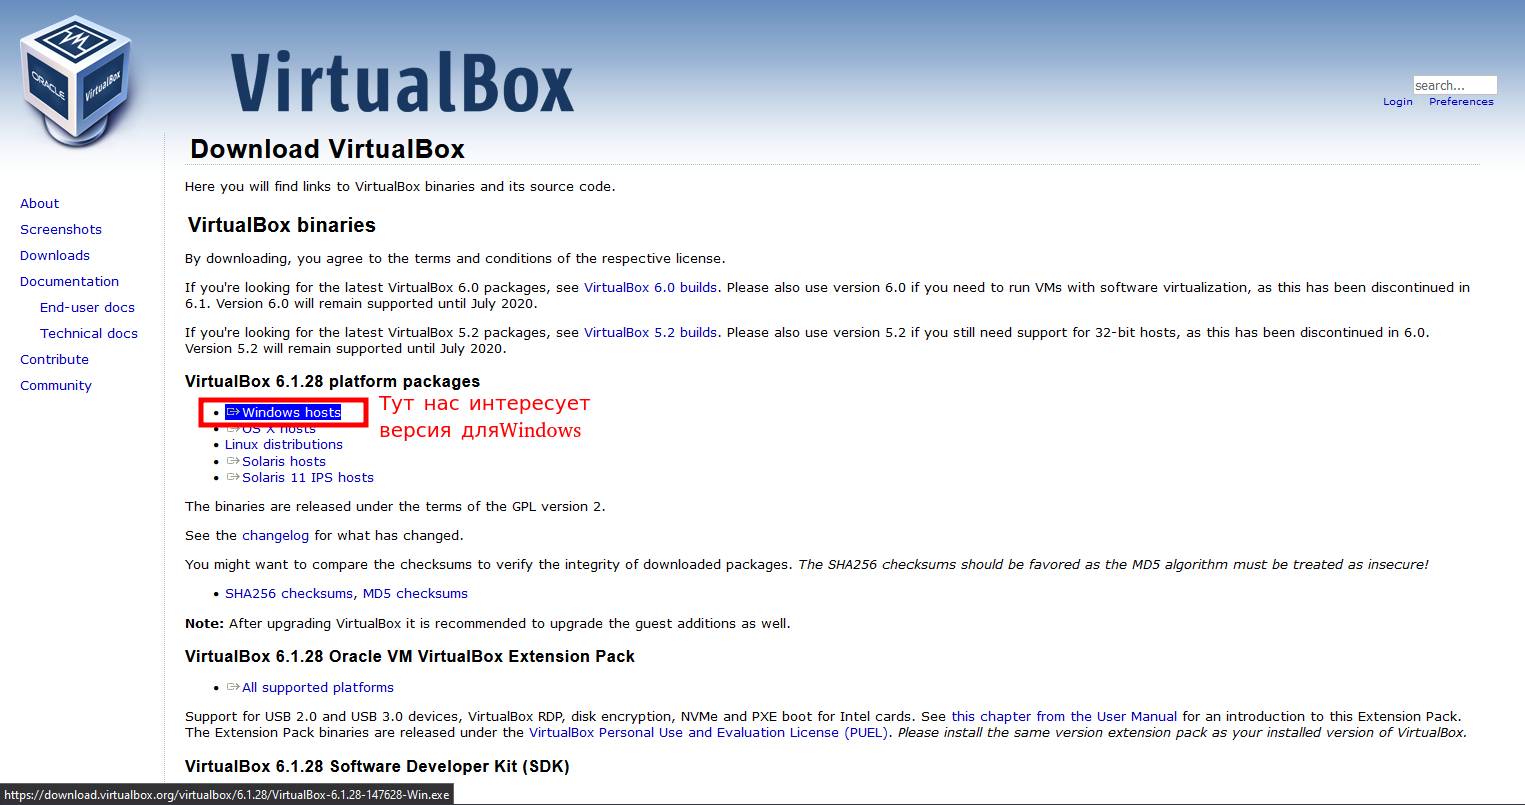
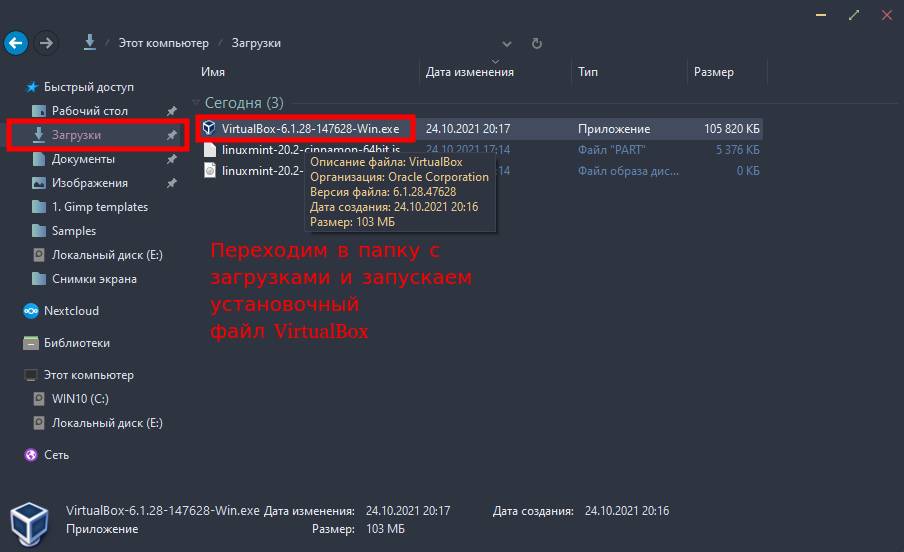
To download VirtualBox, go to the developer’s website and download the latest version of the program. It’s worth noting that the main program is free for any use, while the additional Extension Pack, which allows connecting external USB devices, using RDP, etc., restricts free use of VirtualBox to personal use or evaluation purposes only, which is, in principle, more than enough for us. We won’t need this extension in order to run Linux in VirtualBox. So we just download VirtualBox itself.
More screenshots:
Installing VirtualBox
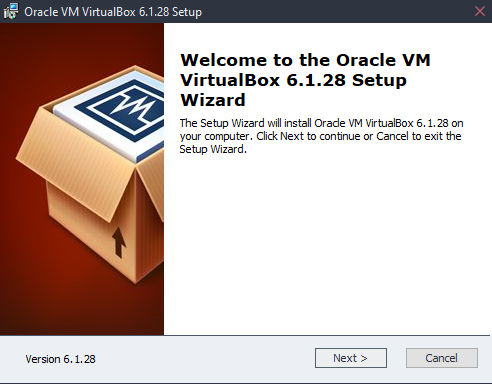
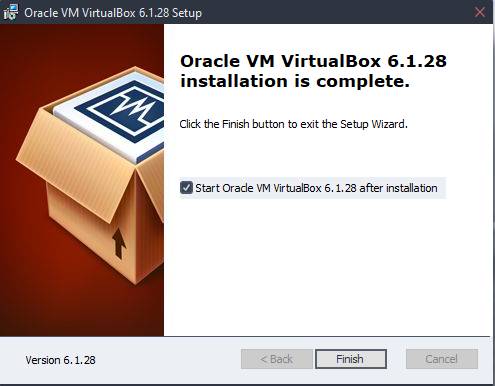
We run the VirtualBox installer. Installing the program comes down to simply clicking “Next — Next — Finish”. In general, there’s no need to change any settings, you can leave everything as default.
Installation:
Creating a virtual machine
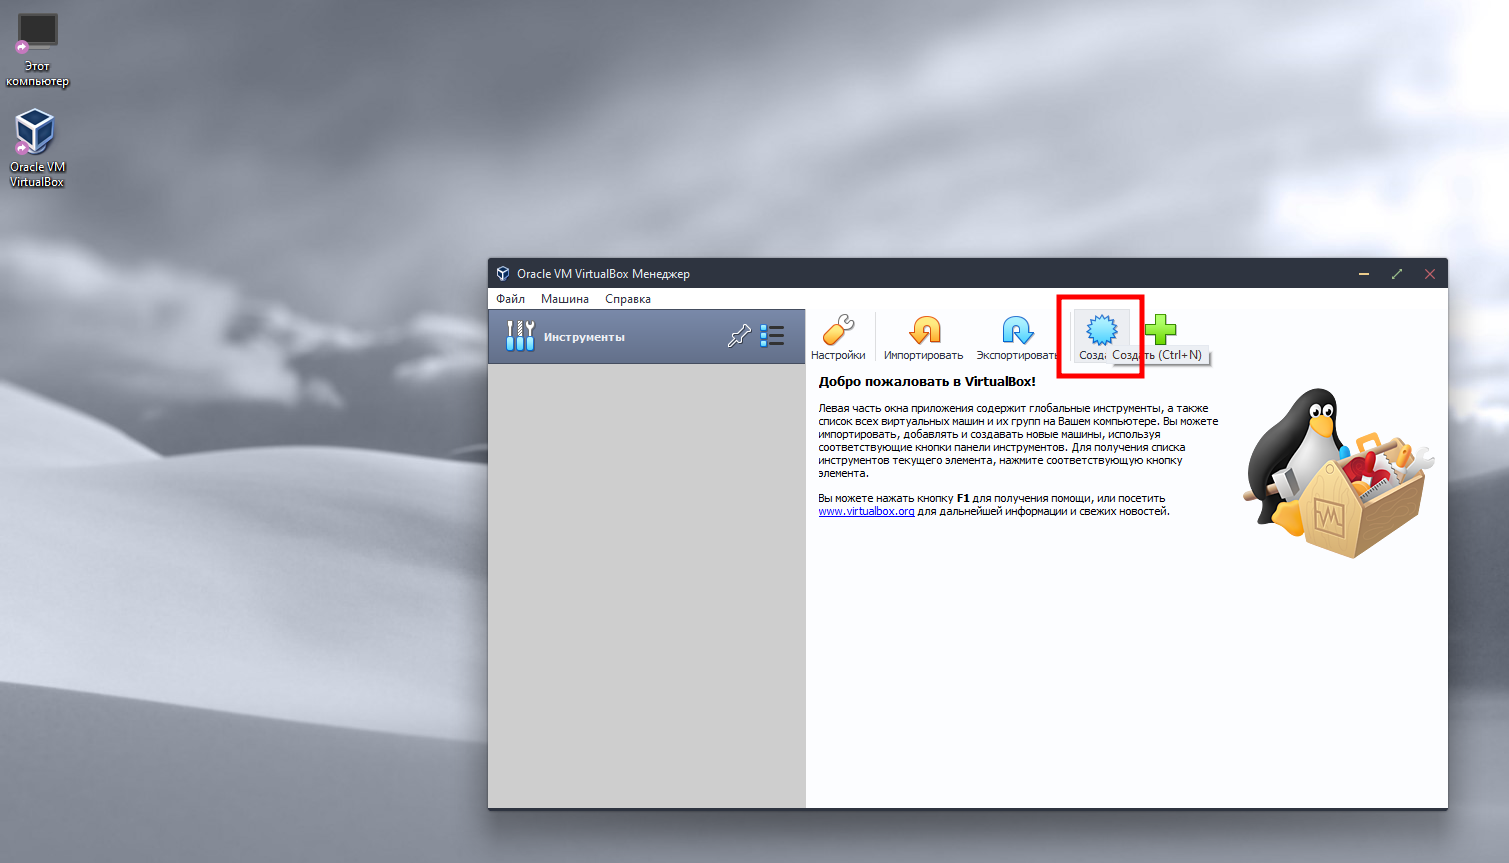
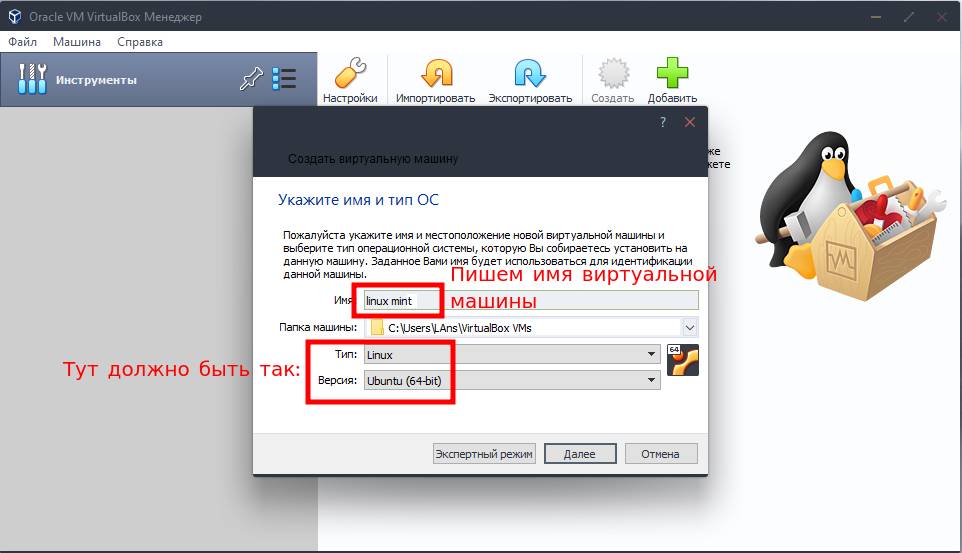
Now we go to the main window of the program and click the “New” button. The virtual machine creation wizard will open. In the first window, you need to enter the name of the virtual machine: we type linux mint, and based on the name VirtualBox will automatically detect the operating system to select; if you chose a different name, you need to manually select the type and version of the machine being created: Linux — Ubuntu (64-bit) — I’ll explain why Ubuntu another time.
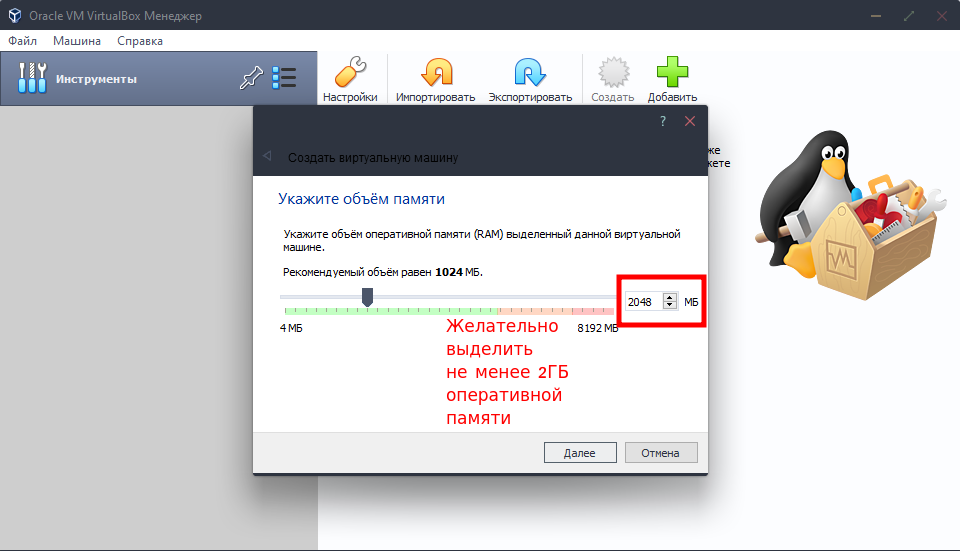
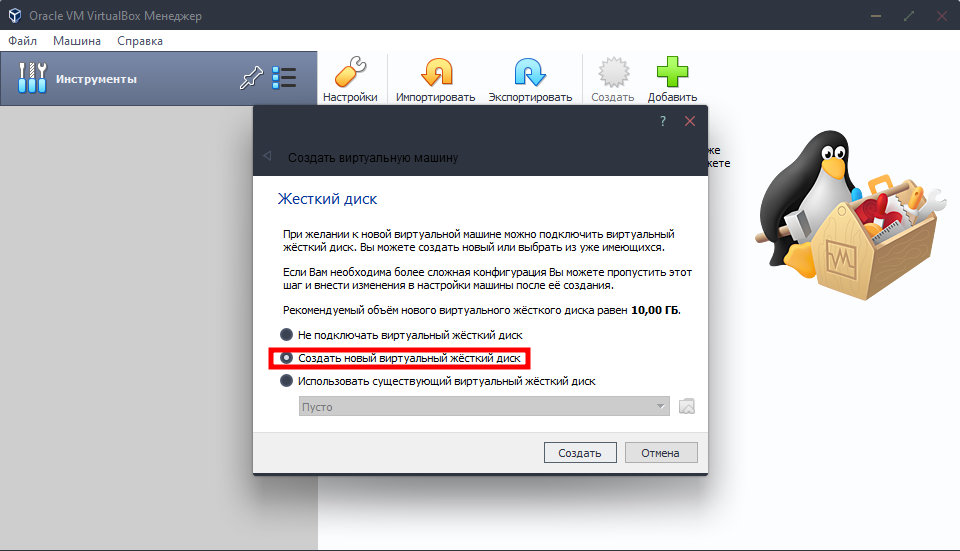
We click “Next”. We end up in the section for creating a virtual hard disk for our Linux. Here we leave the default option: “Create a new virtual hard disk” and click Create.
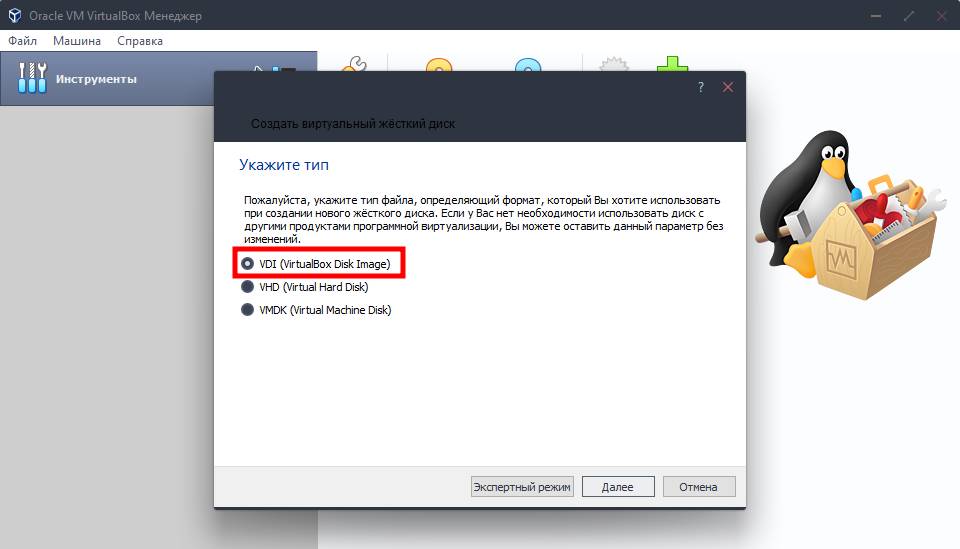
At the next step, we also leave the default option — disk type VDI. Let’s go on.
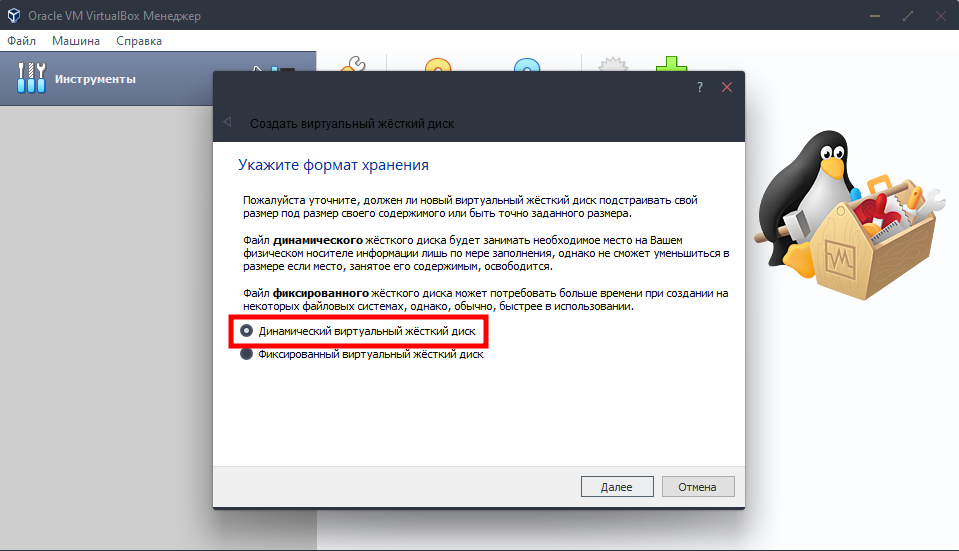
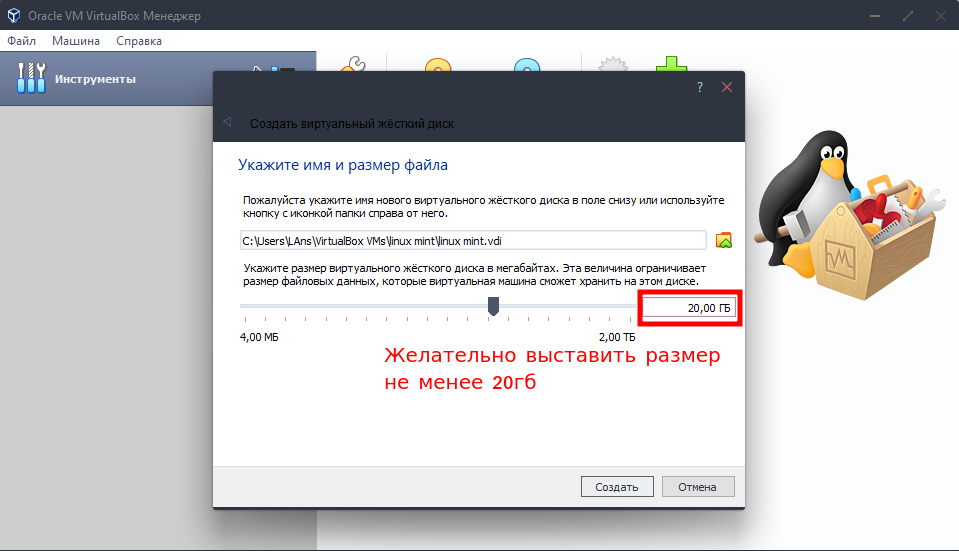
So, we determine the disk size for the system. I recommend setting it to 20 GB, but since we chose a dynamically allocated hard disk, it won’t actually take up that much space, and will only start growing in size once we begin installing Linux Mint onto it.
Also at this step we can, if desired, change the storage folder for our virtual disk images.
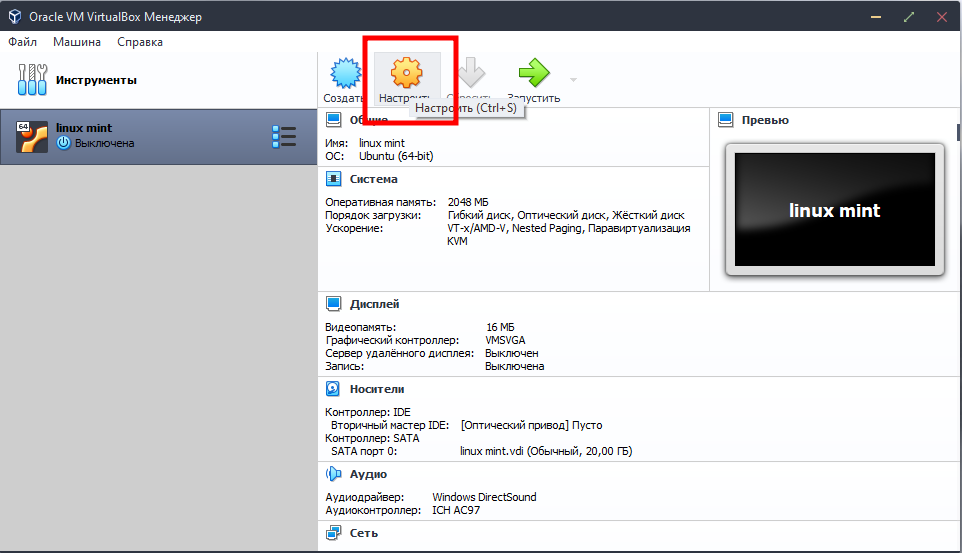
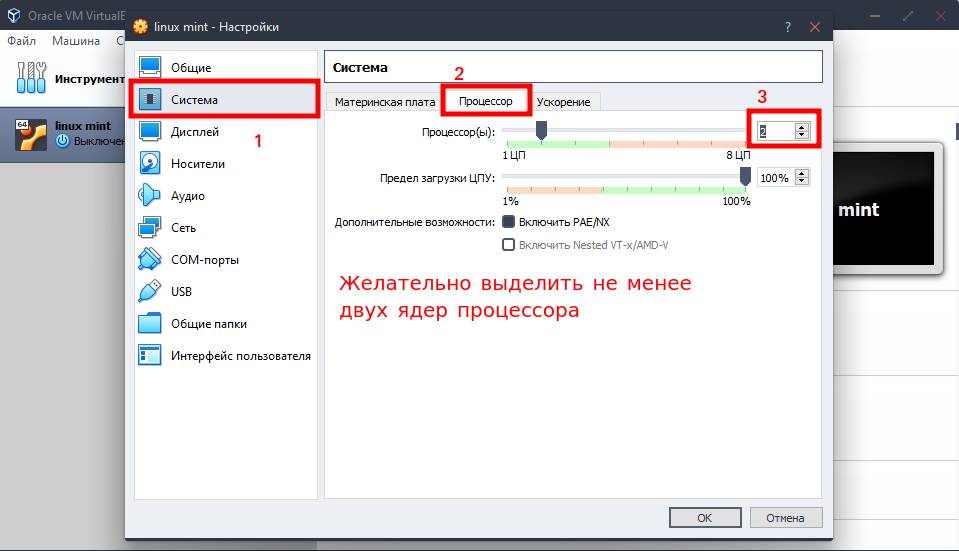
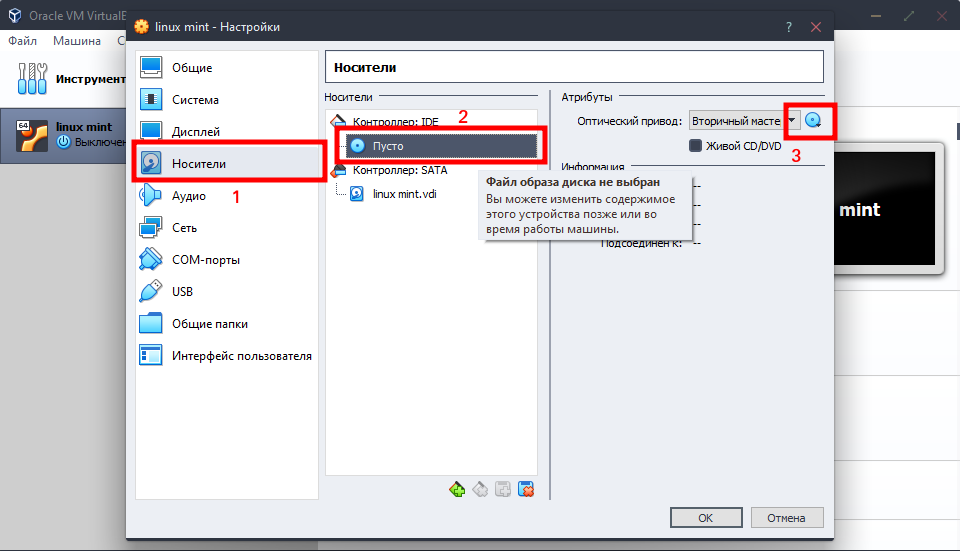
We click “Create”. Now our machine has been successfully created, and there’s just a couple of settings left to configure before starting it up. Select our machine in the main window on the left, then on the right side click “Settings,” then go to the “System” section -> “Processor” tab and increase the number of allocated CPU cores with the slider, again, if your main hardware’s power allows. Two cores will be enough for a full walkthrough of the process. Without clicking “OK,” go to the “Storage” section on the left.
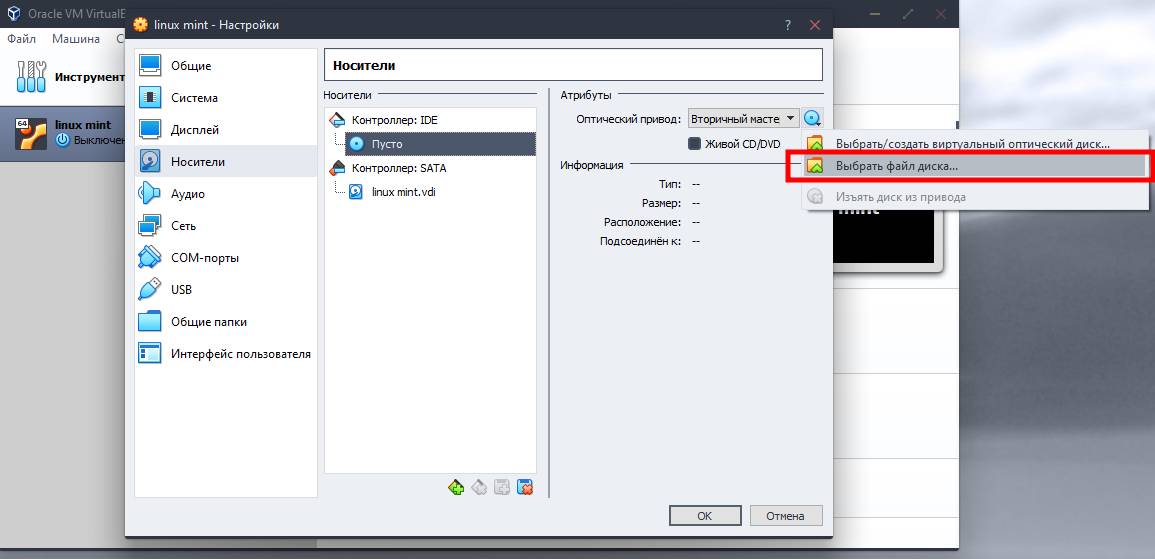
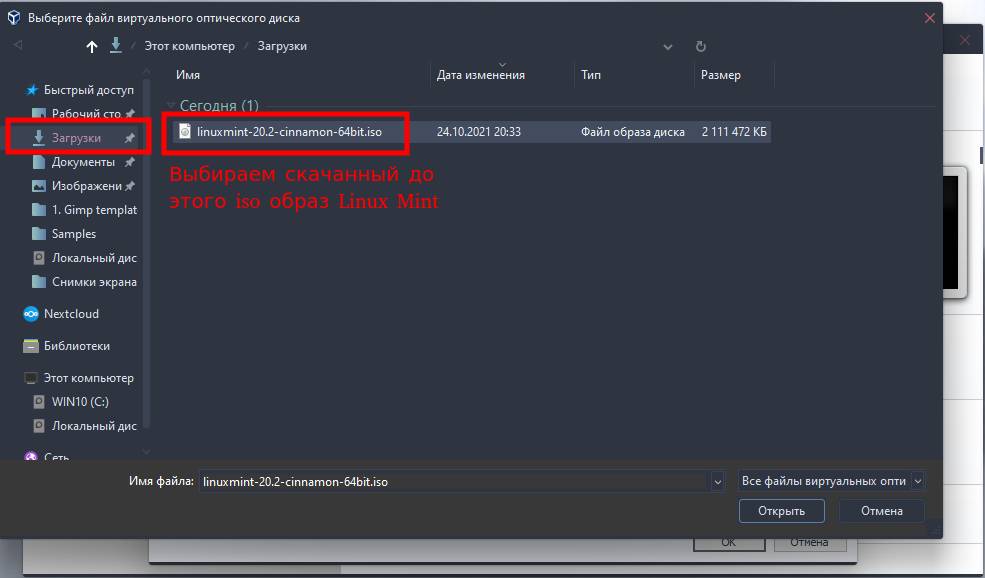
Here we need to select the “Empty” cd rom entry under “Controller: IDE”. Then on the right, where it says “Optical Drive,” click the blue circle, and click “Choose a disk file…” and here we search for and select our Linux Mint iso image, which we downloaded earlier.
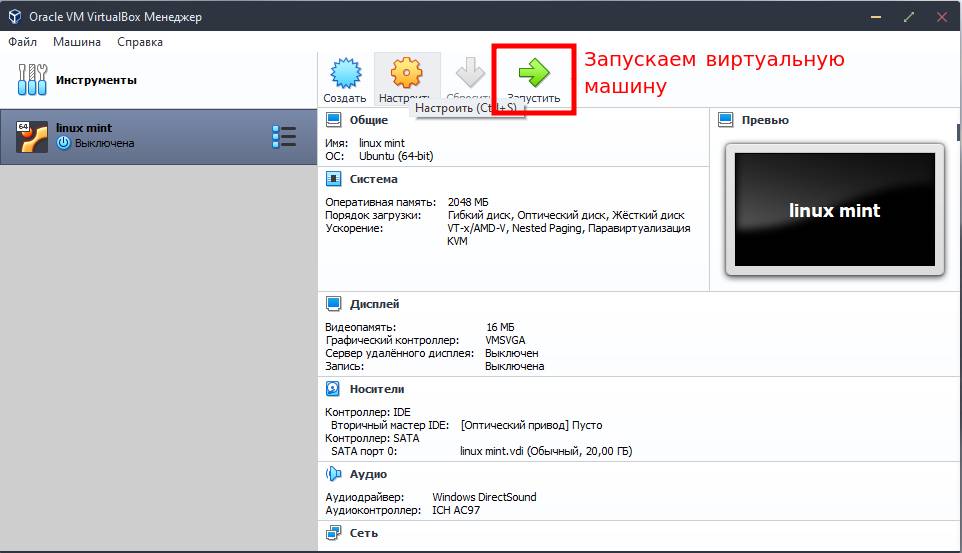
After all this, click the “OK” button. And click the green “Start” arrow in the main window of the program.
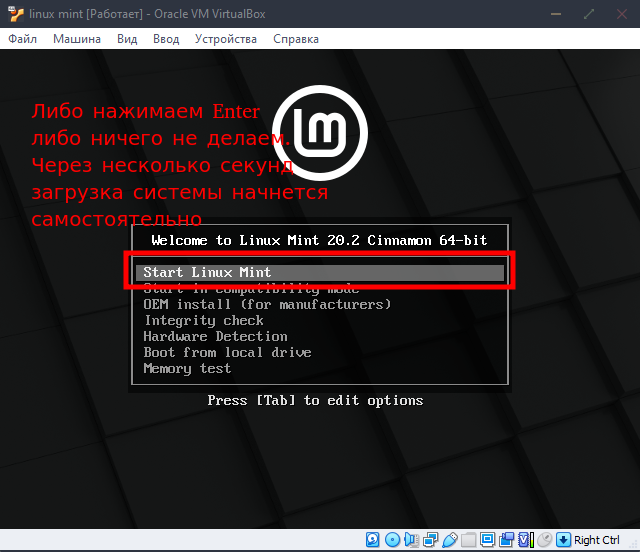
After that, if you’ve configured everything correctly, you’ll see the boot screen of the Linux Mint distribution iso image:
Launching and installing Linux Mint on the virtual machine
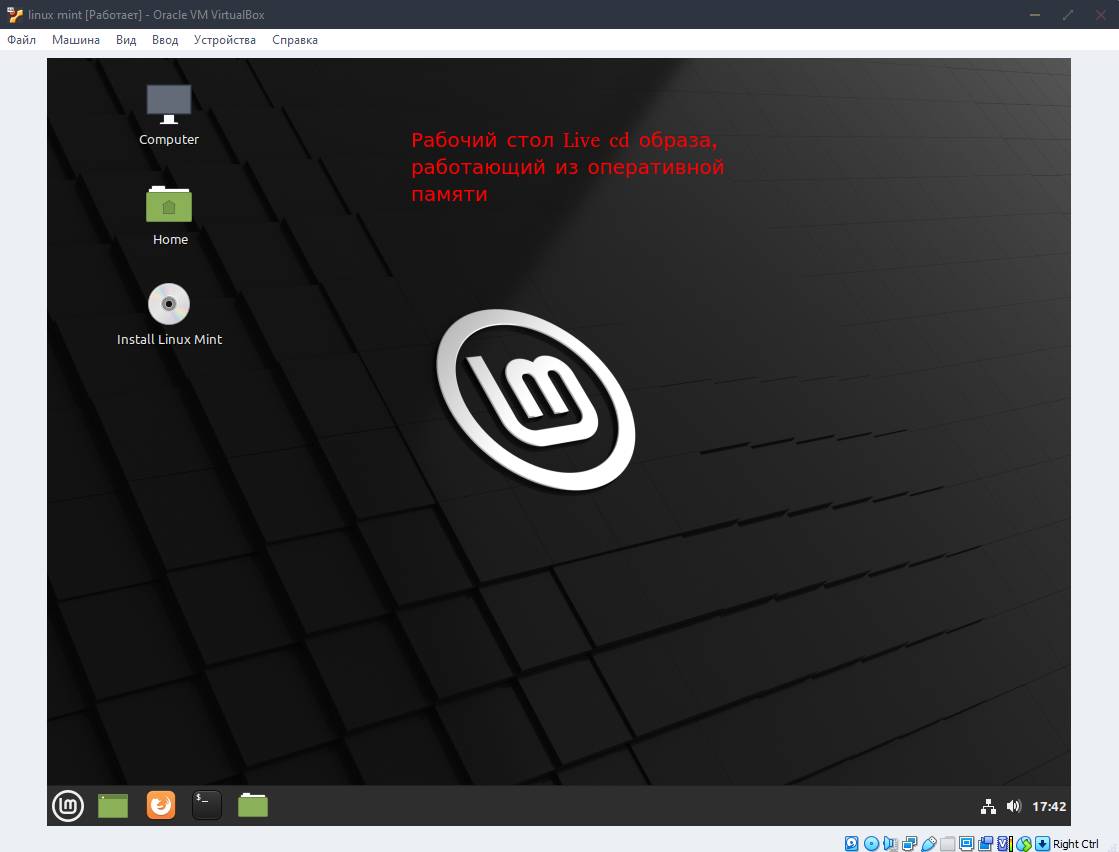
The window that opens is the running virtual machine booting from the live cd image. Here there’s nothing to click, just wait a while until the operating system image unpacks into RAM and shows us a desktop screen, the so-called live environment. This won’t be the operating system itself, but rather its “live image” from the iso file. We’ll use it to install Linux Mint in graphical mode.
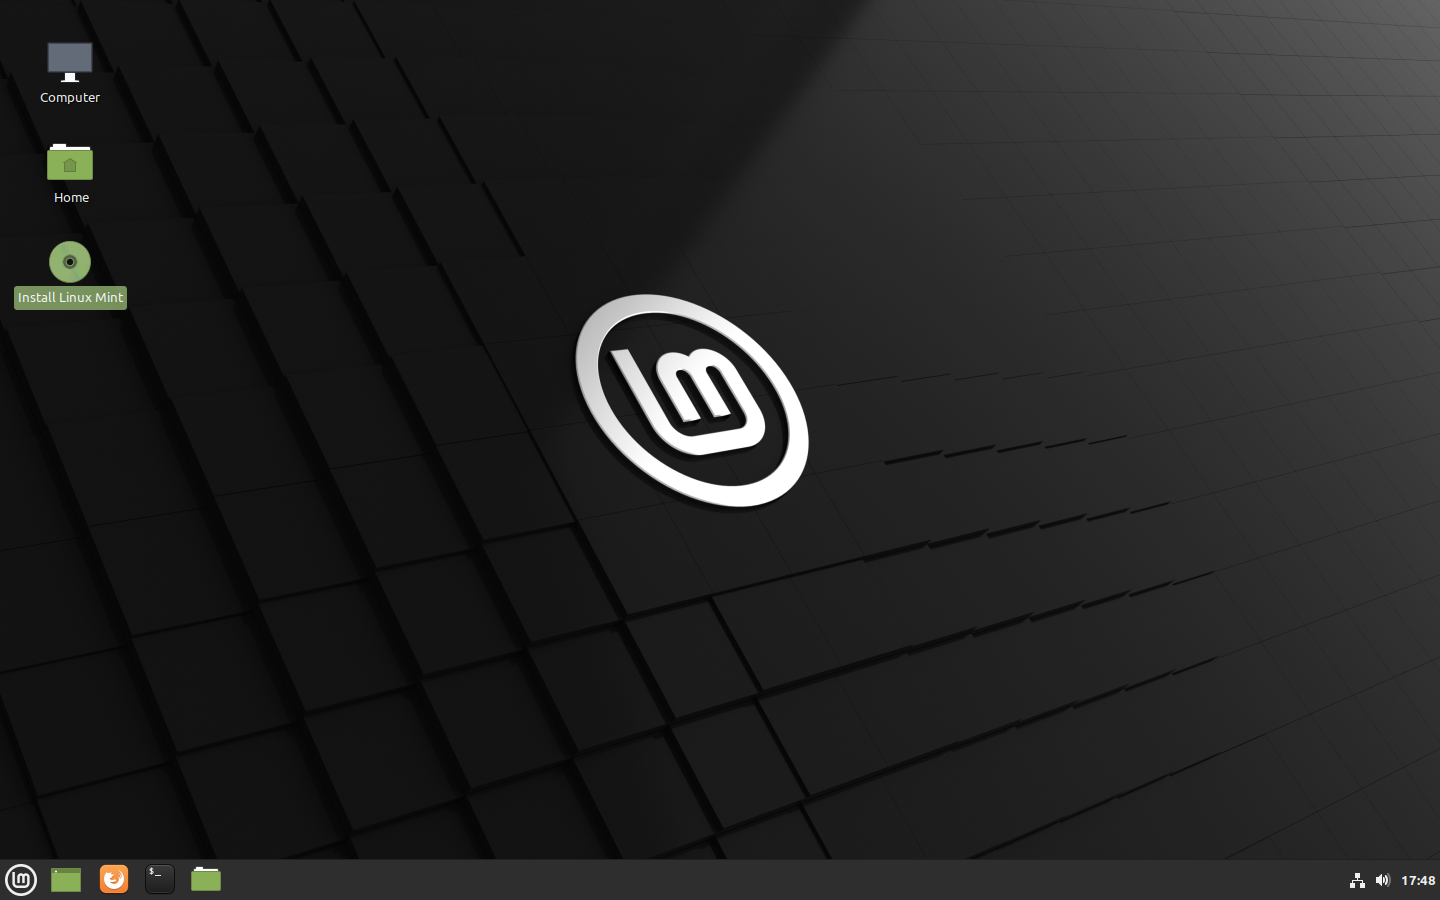
On the desktop of the running system there will be an “Install Linux Mint” shortcut: double-click it to launch.
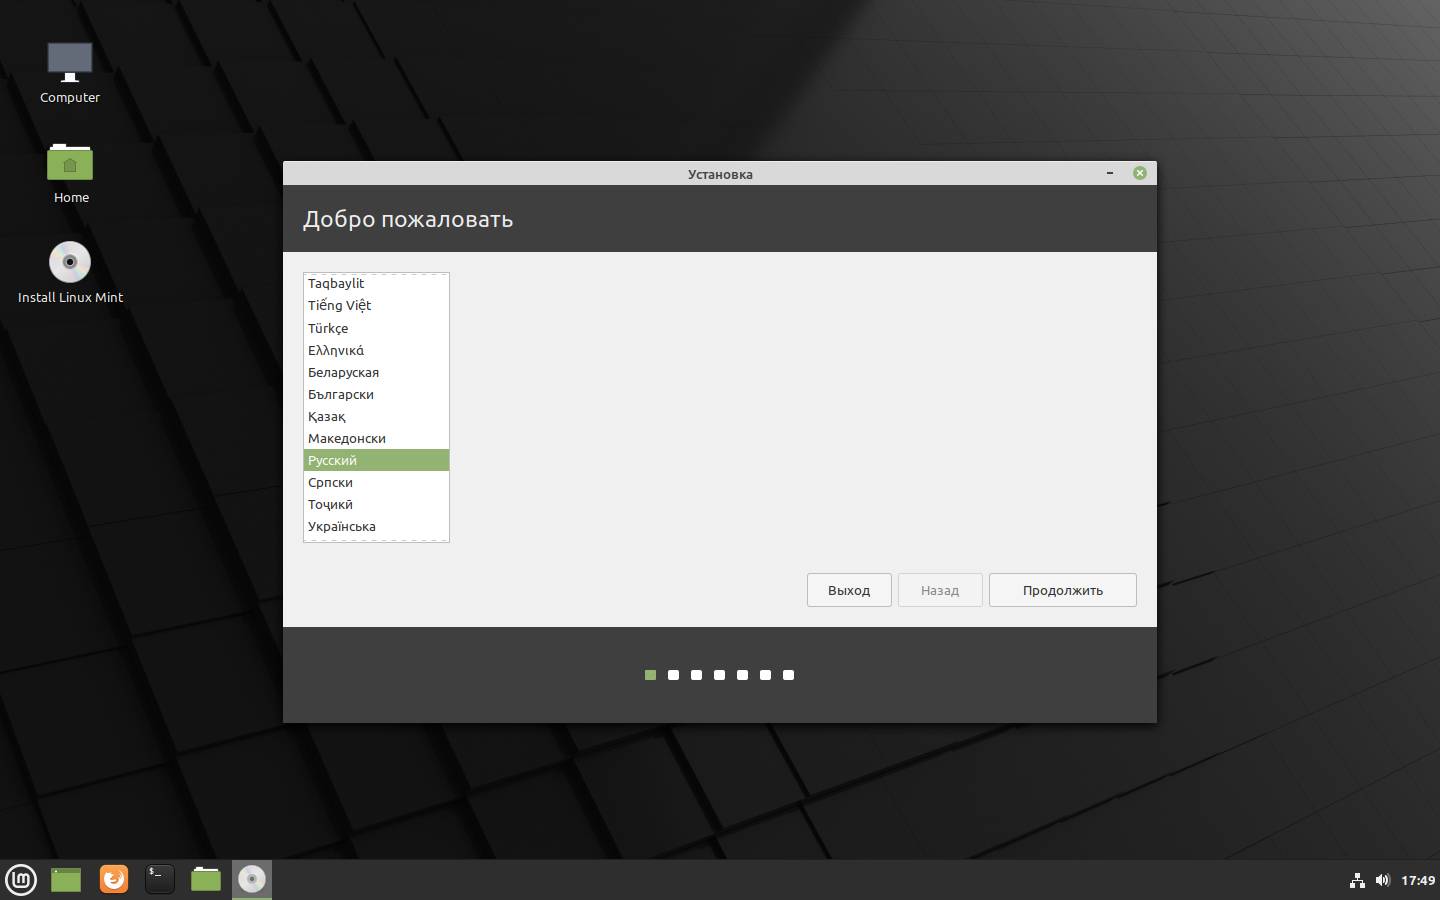
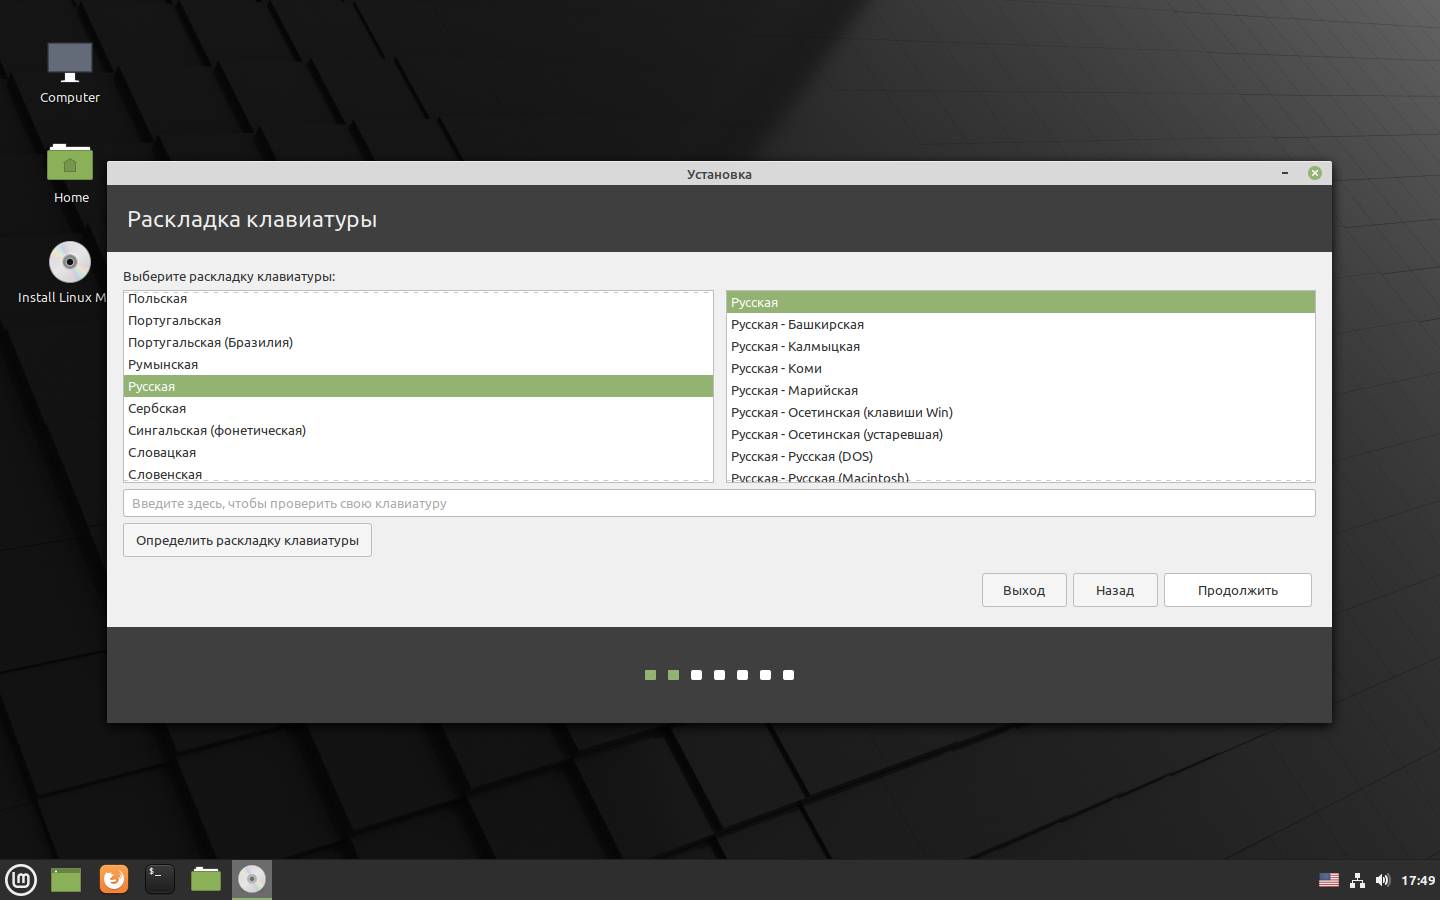
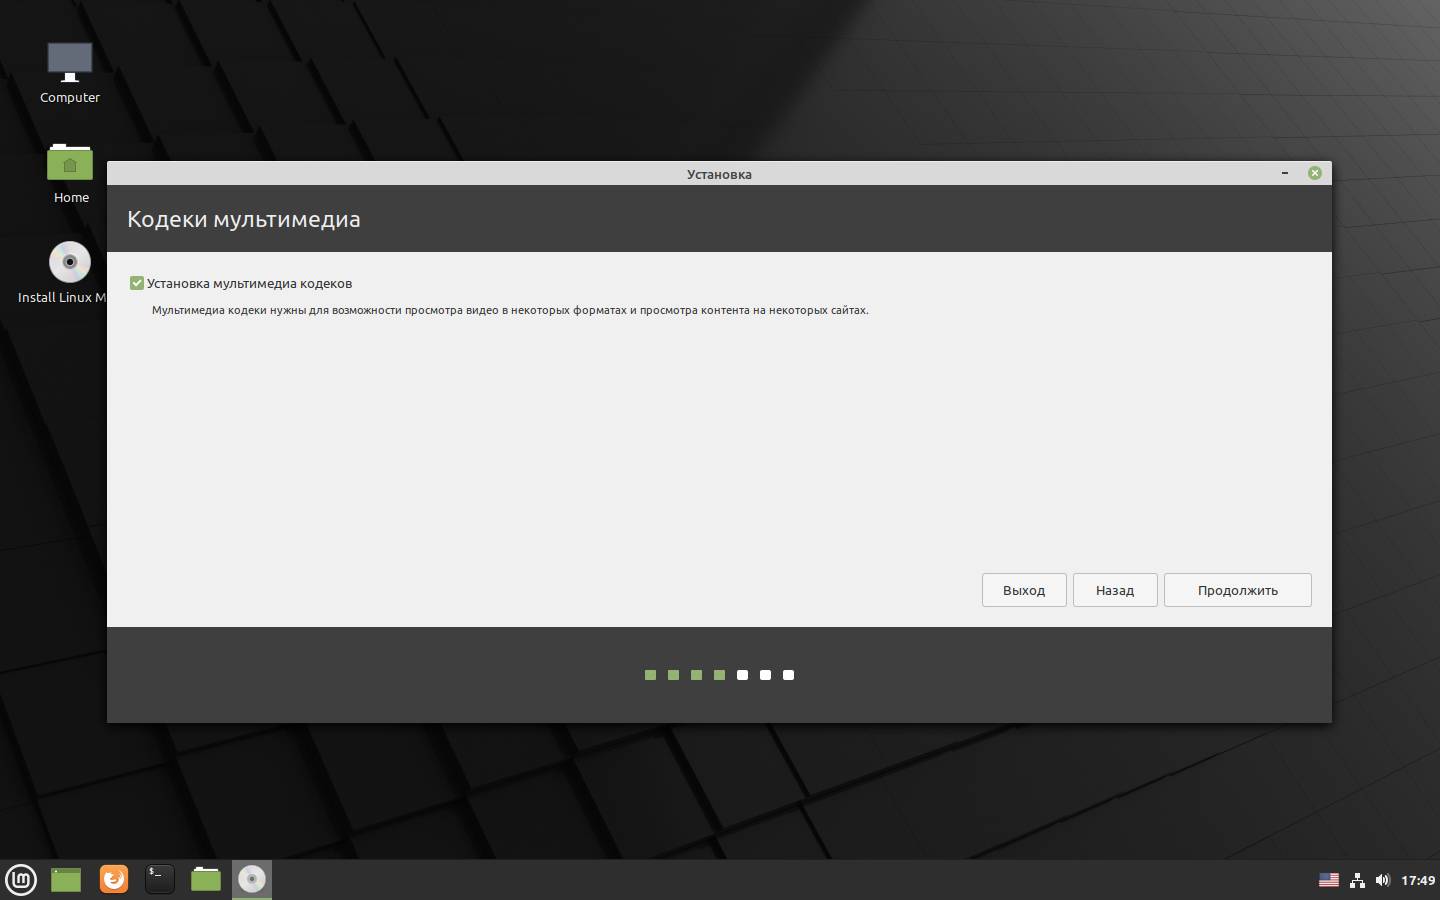
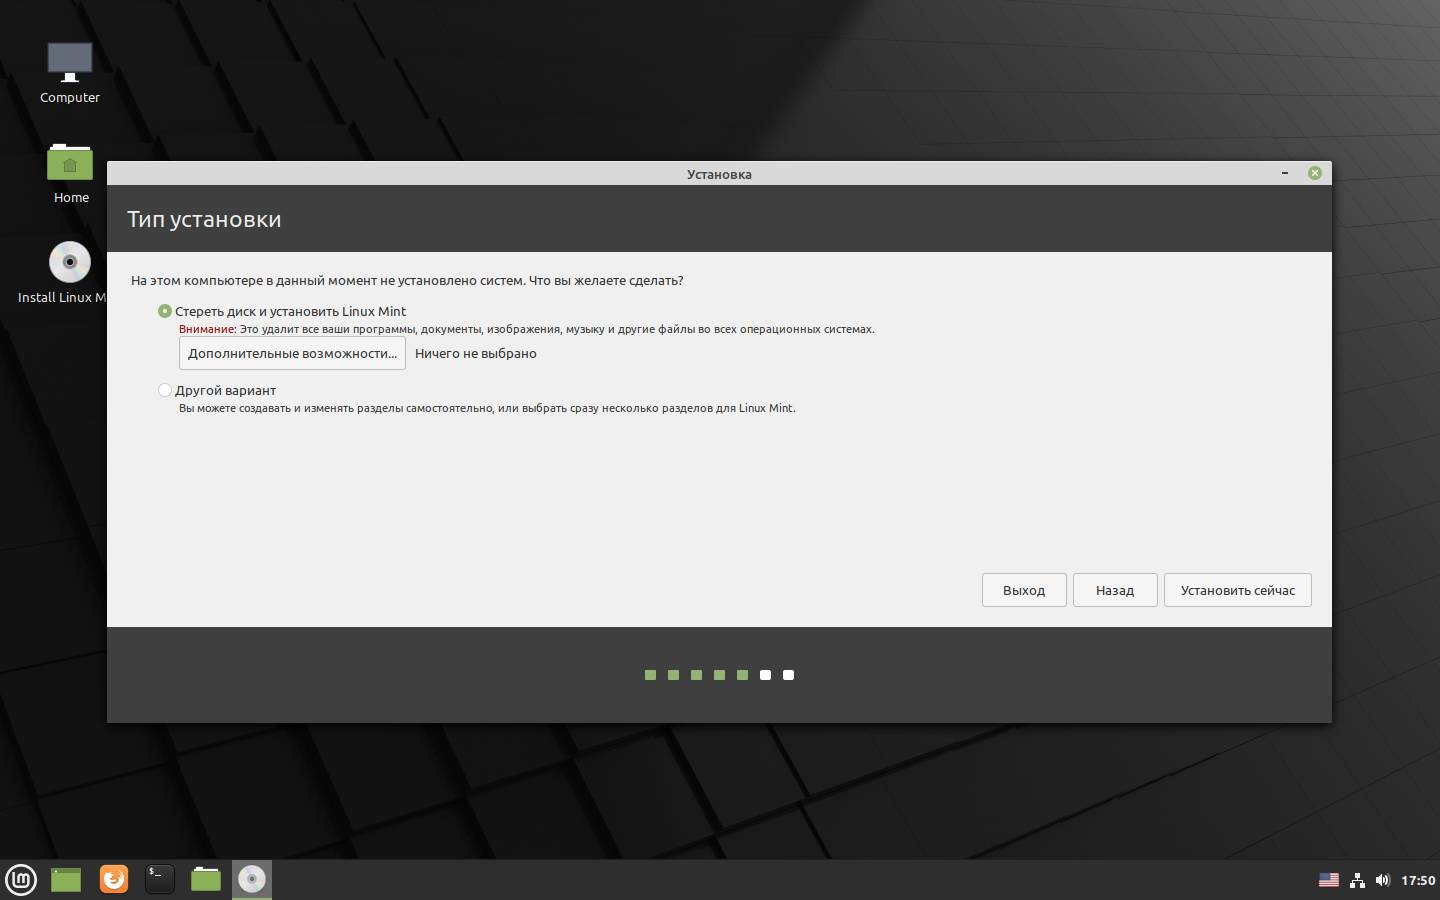
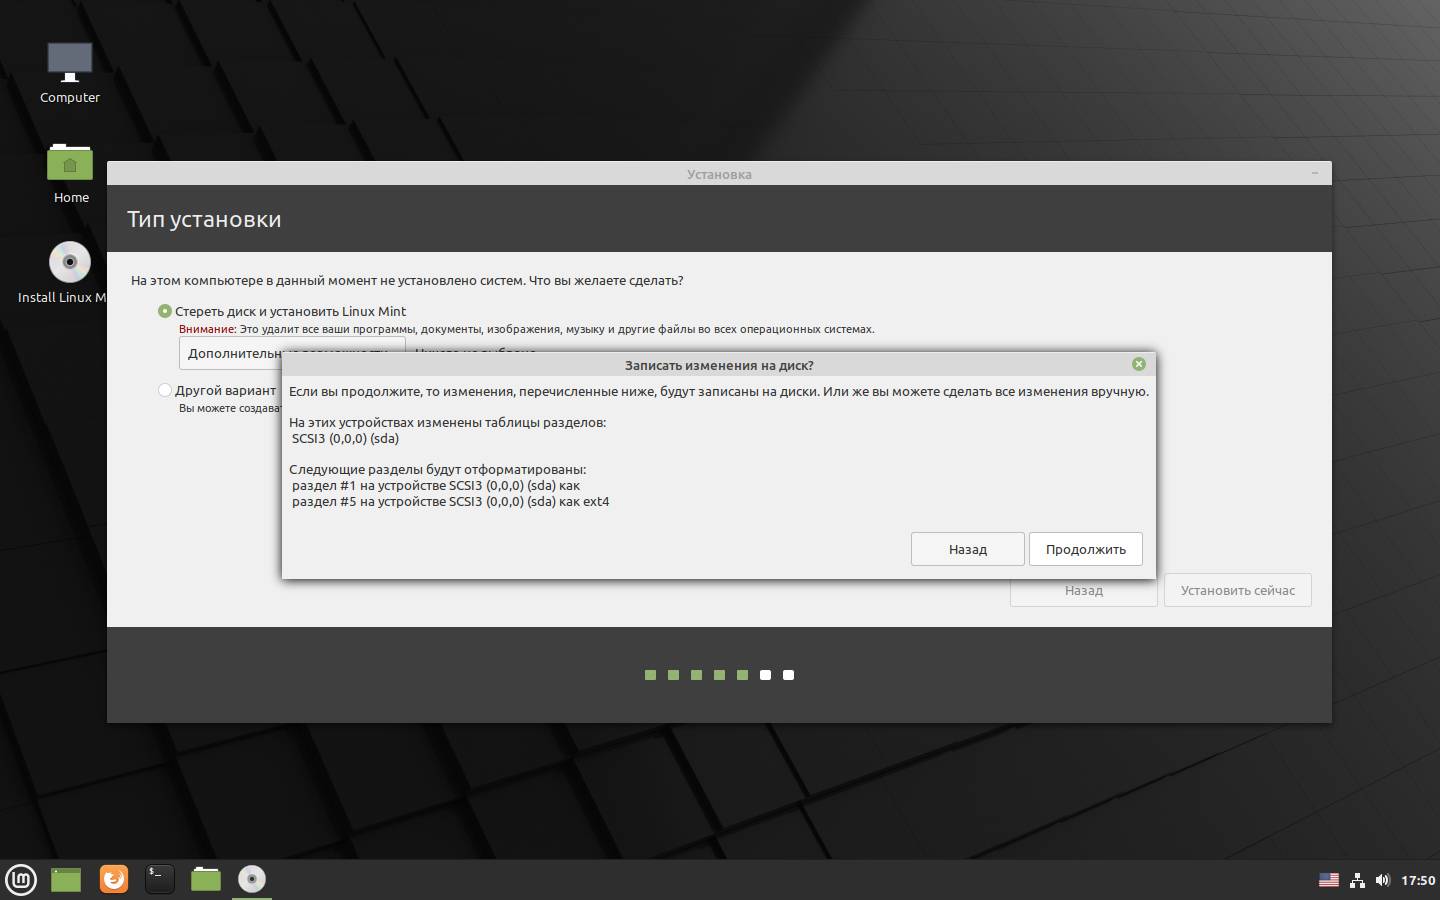
So as not to overload the reader with the intricacies of installing the operating system, we’ll just perform the actions as shown in the screenshots. To achieve the goal set by this guide, it’s fine to skip over the installation details.
Step by step:
- Choose the system language
- Keyboard layout language
- Check the box to install video codecs
- Choose “Erase disk and install Linux Mint”
- Confirm by clicking “Continue”
- Choose the needed time zone — either with the mouse or type it manually
- Fill in the username, computer name, user login name, and password for it. “Require my password to log in” — set as you wish
- Wait for the installation to finish
- Click “Restart Now”
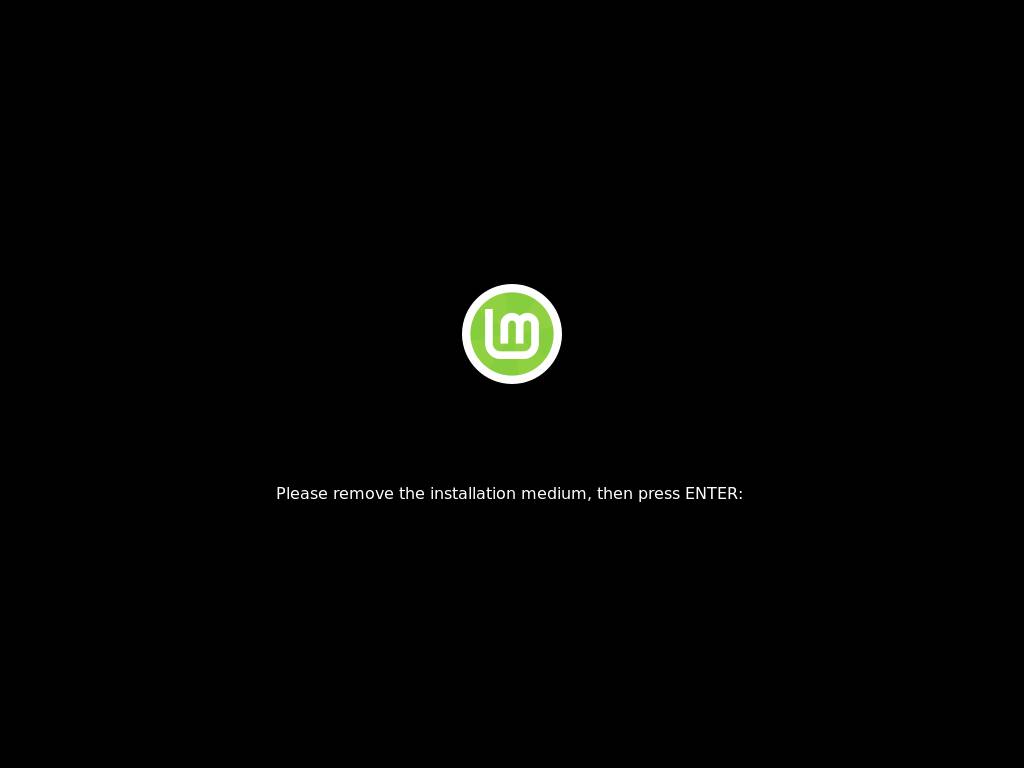
- On the black screen, press “Enter”
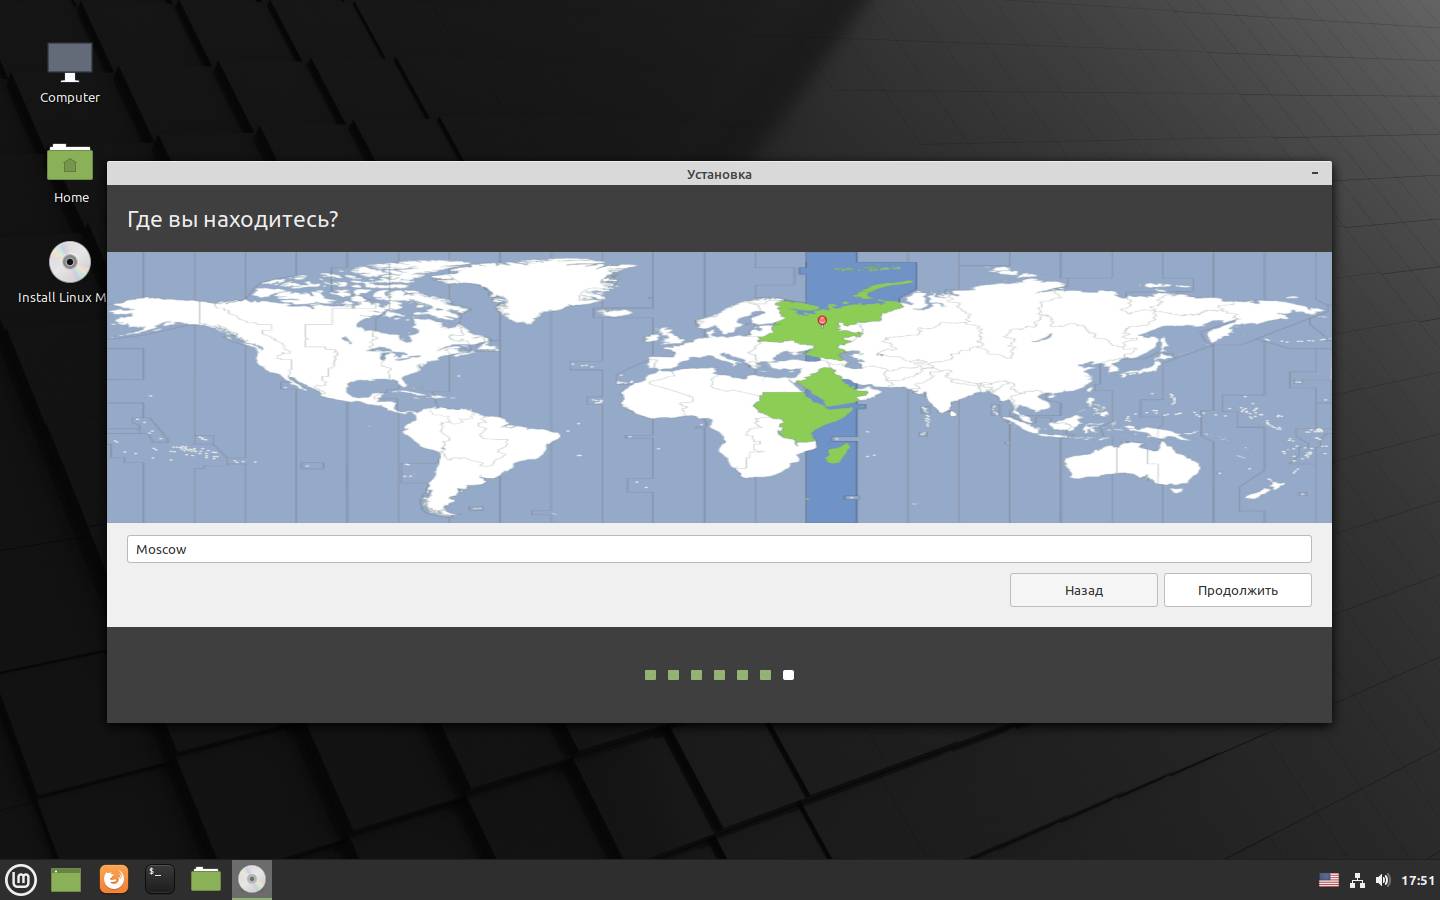
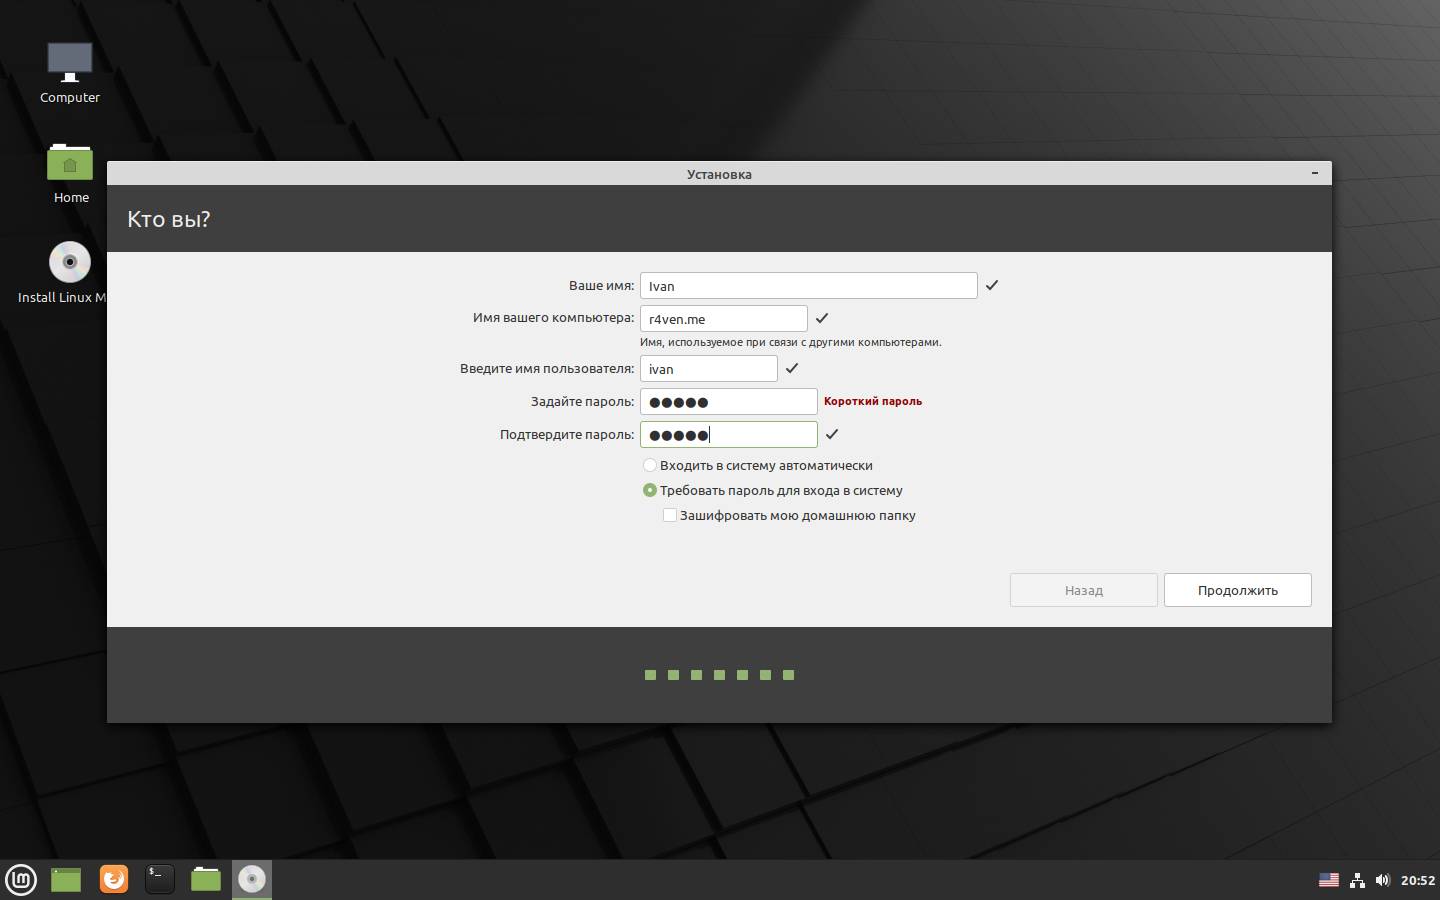
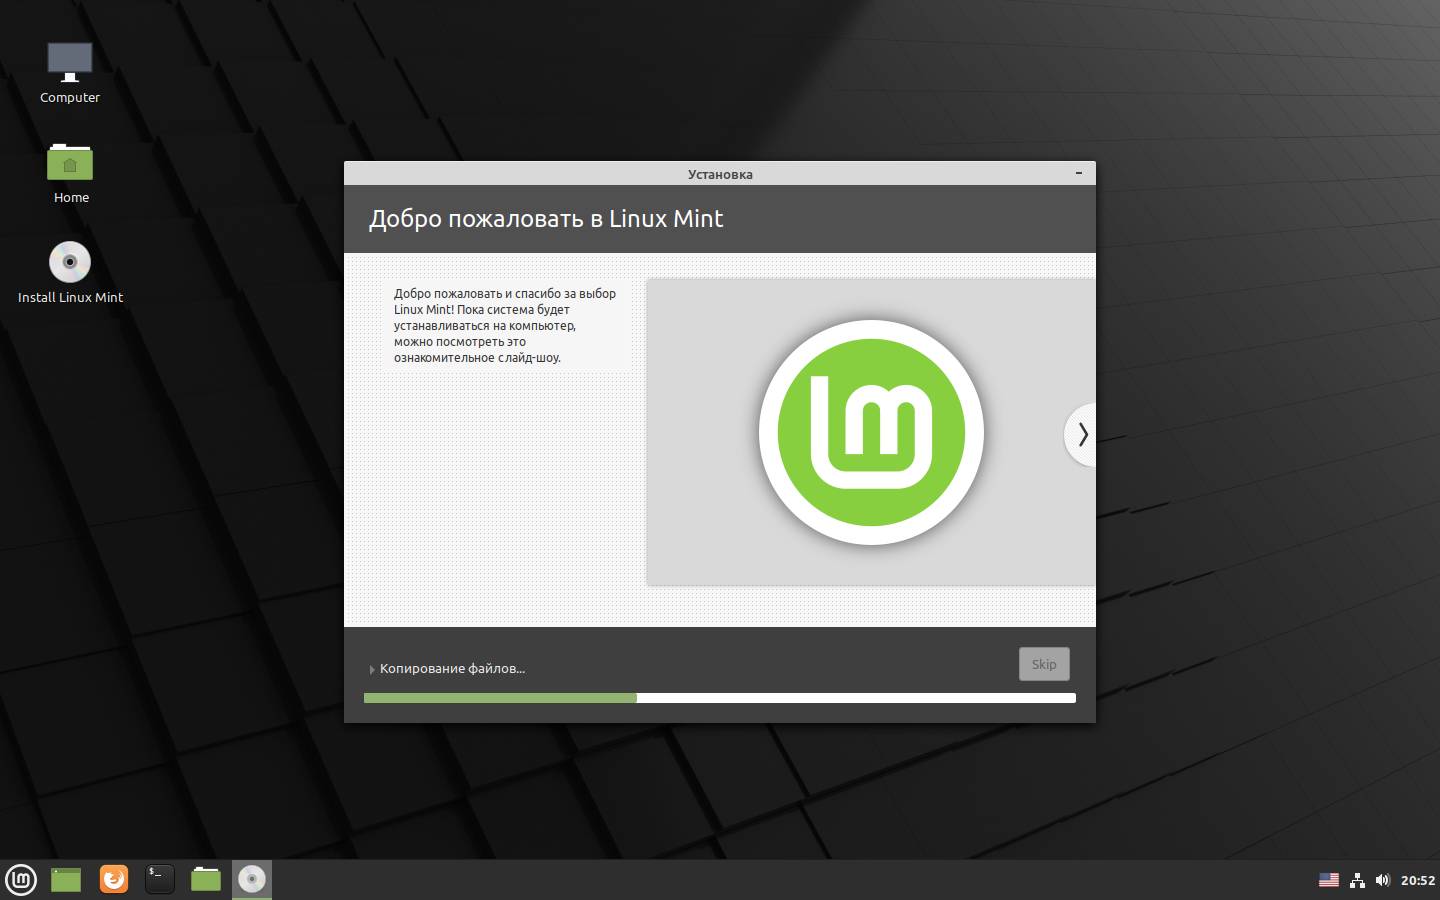
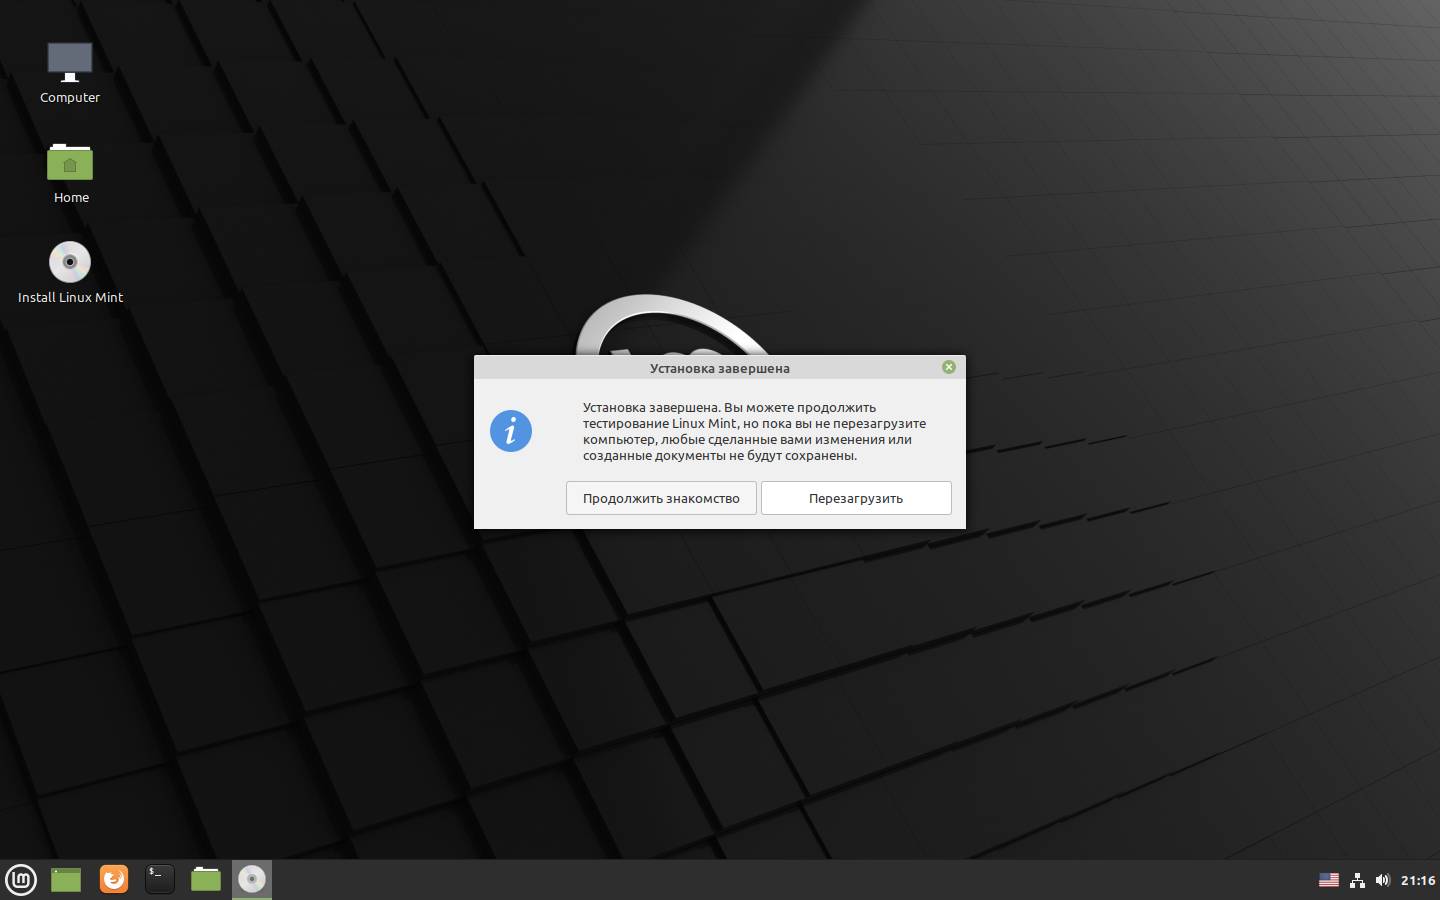
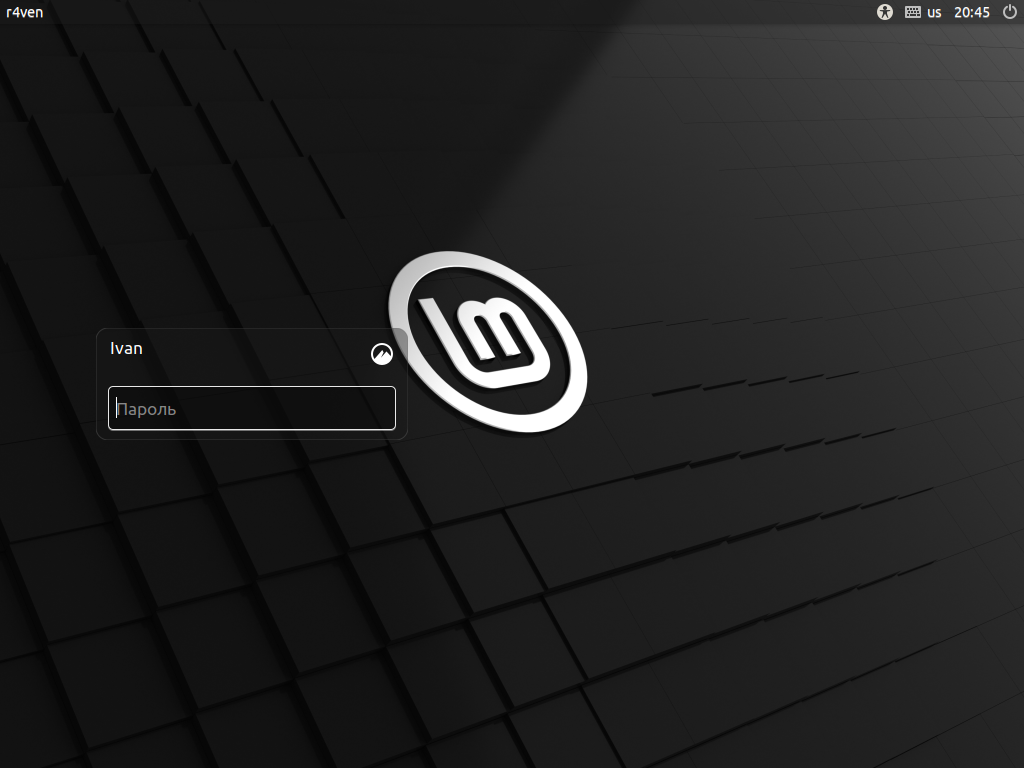
First boot of the installed OS
After the final reboot, our installed system should load, not our iso image. You can make sure of this by looking at the localization — if everything is in Russian, then everything’s fine. Actually, after installation and reboot, the iso image that was previously mounted in the cd rom emulator should be automatically ejected. Just mentioning this detail.
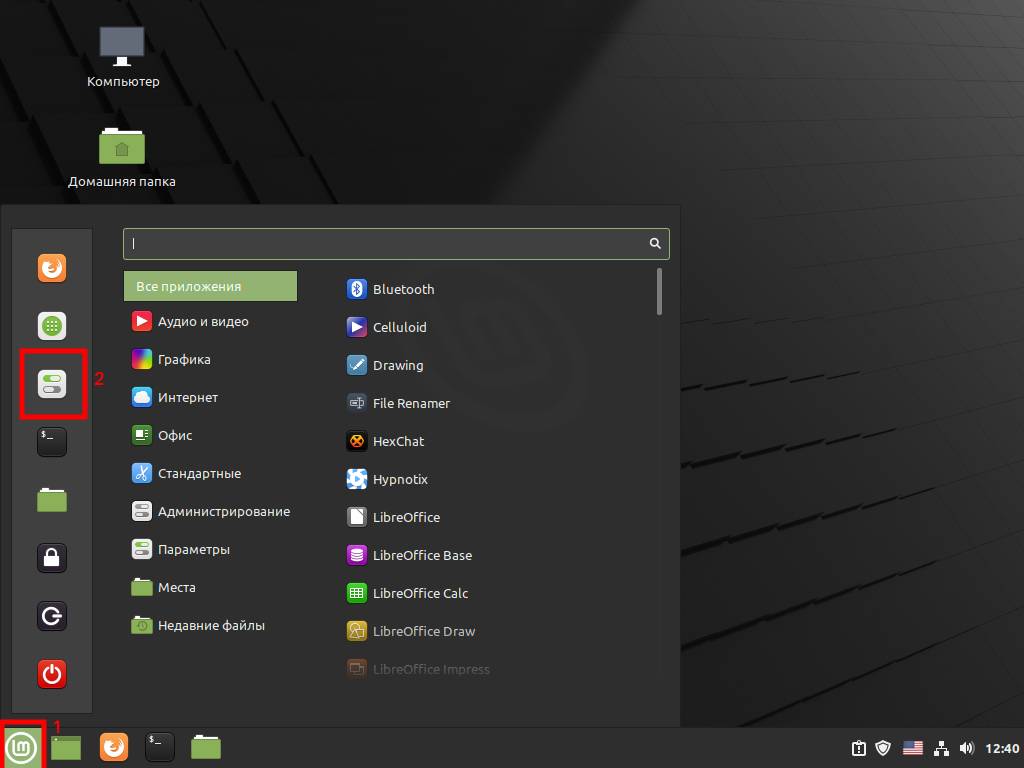
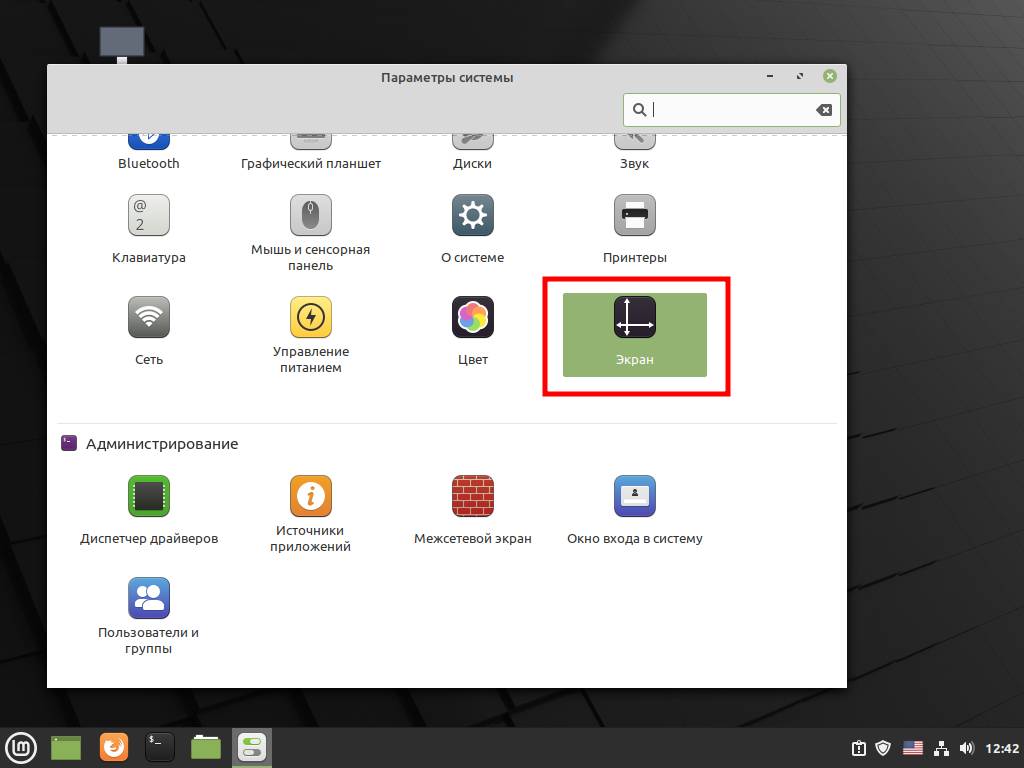
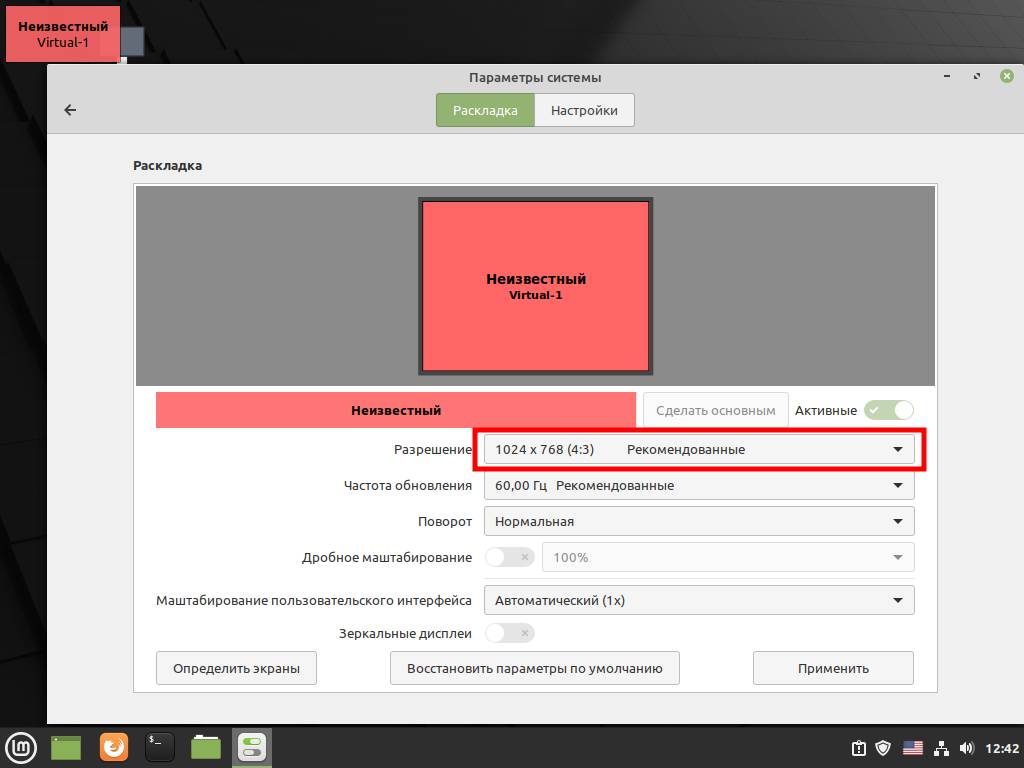
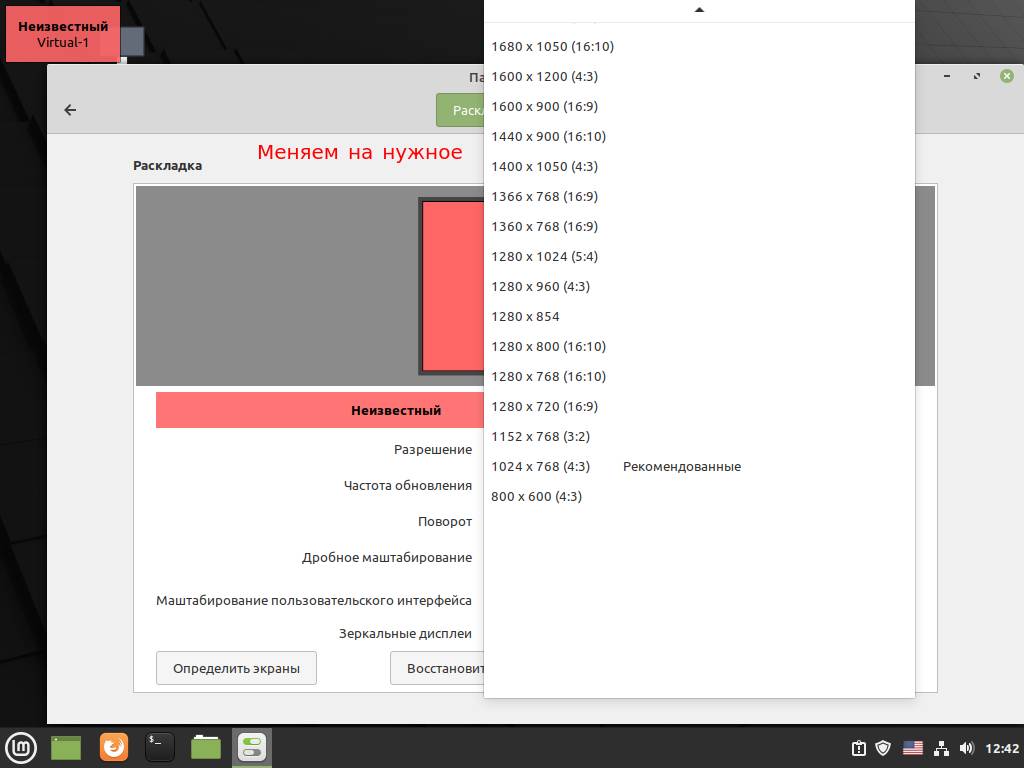
So, usually the first thing to do after installing a fresh OS is to change the screen resolution to something more suitable. To do this:
- Click the menu button (bottom left corner, similar to the Start menu in Windows)
- Go into settings
- Then “Display”
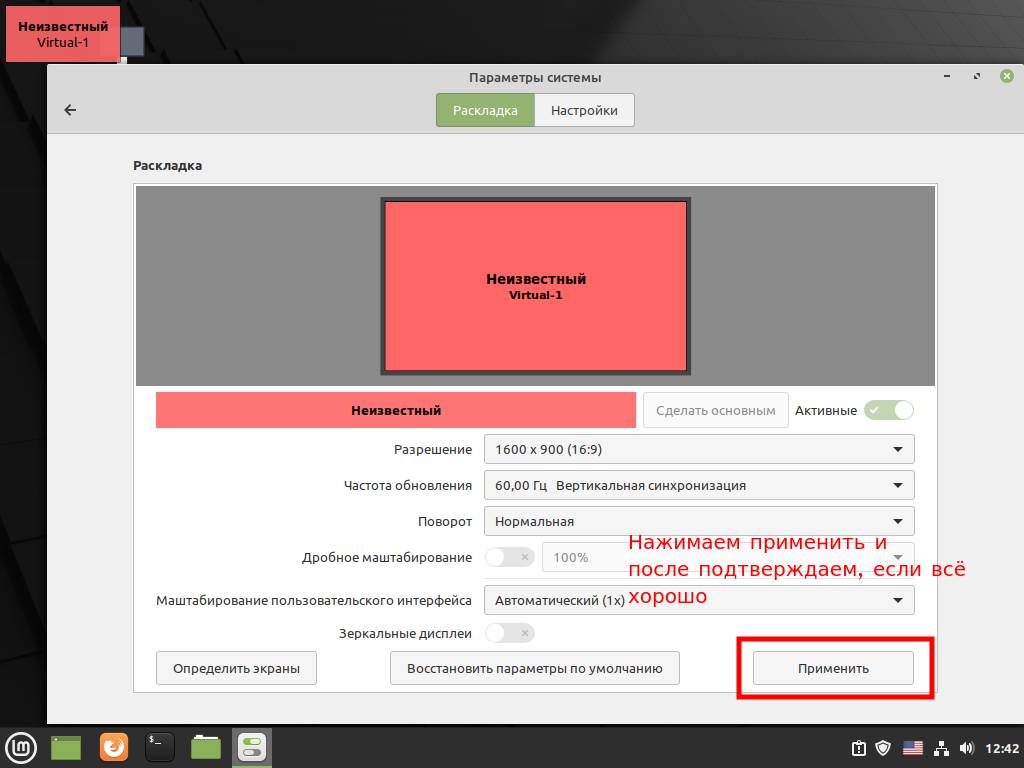
- Set the resolution we need
- Click “Apply” and confirm
Linux Mint desktop:
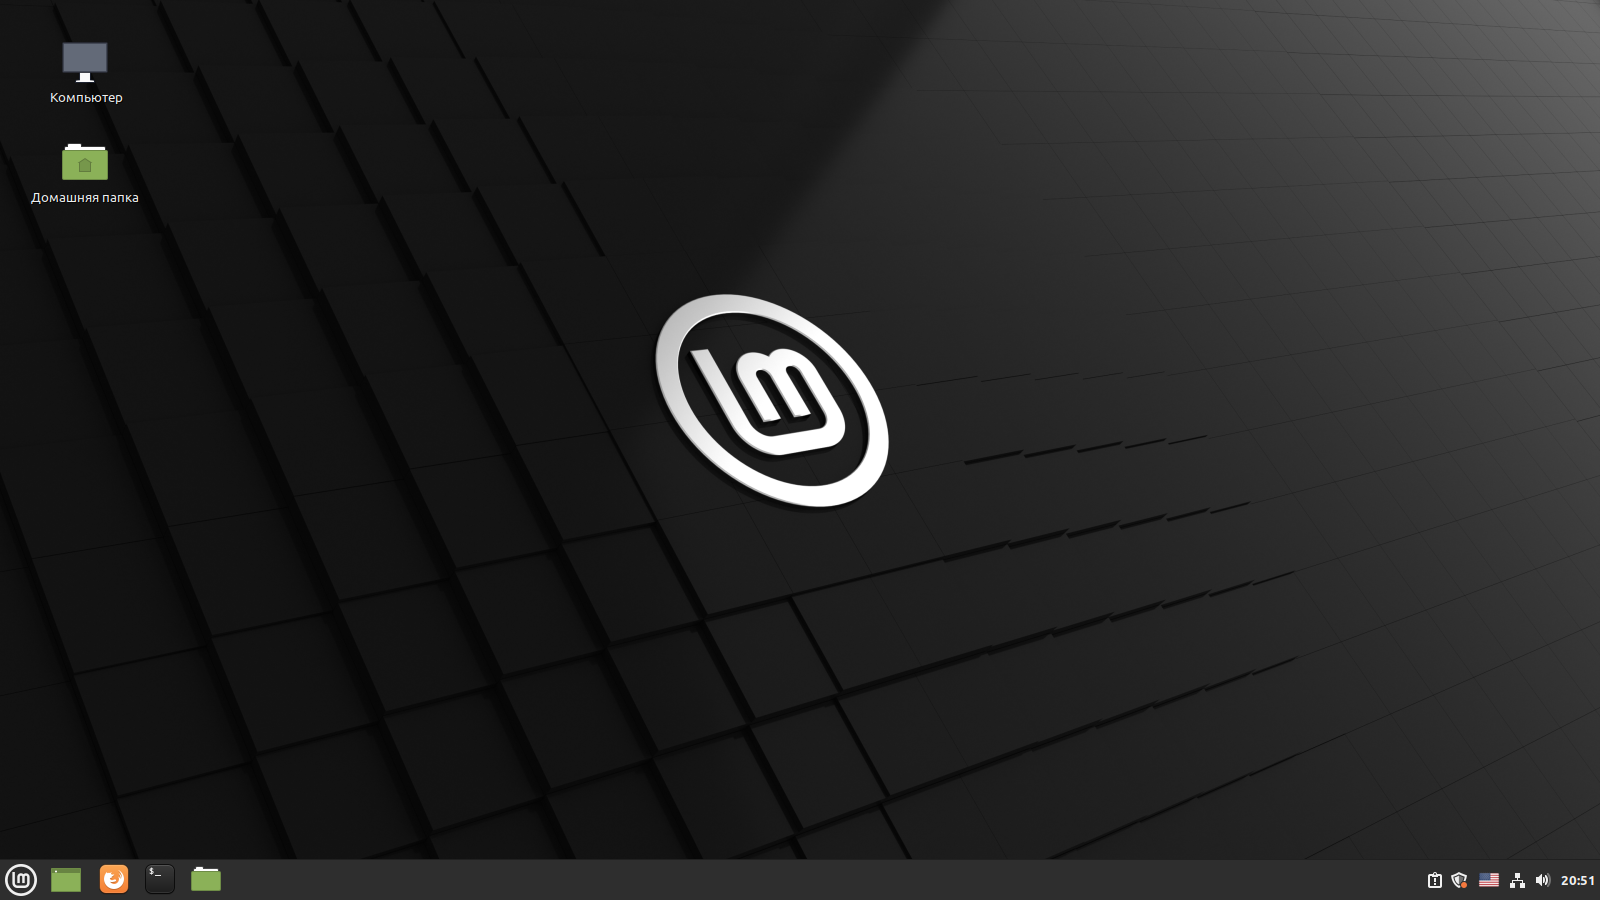
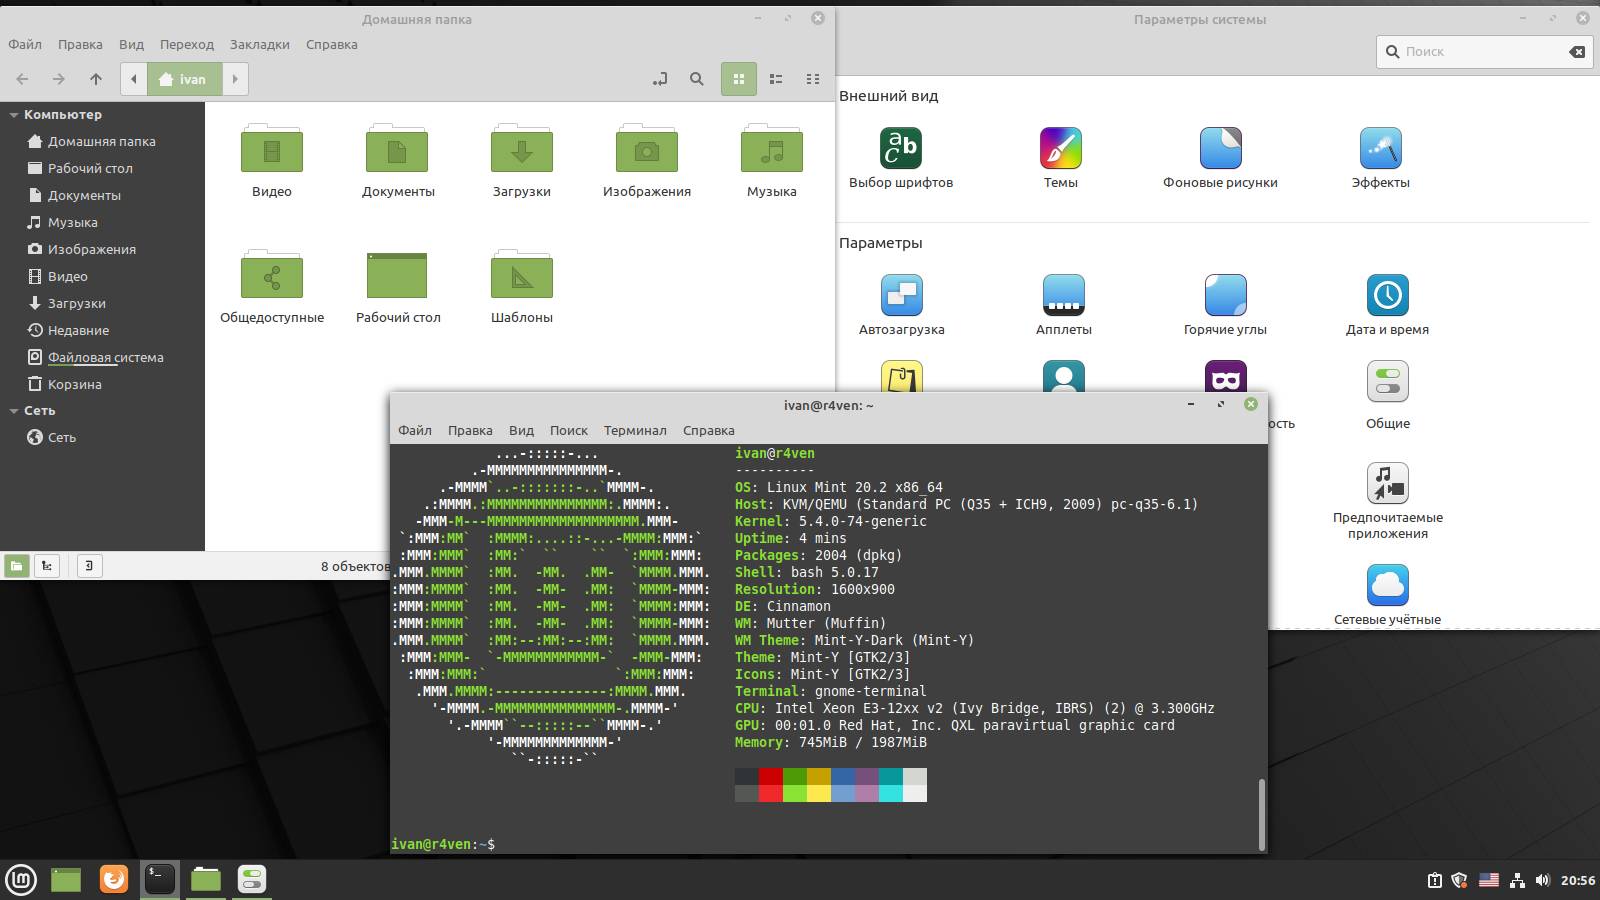
That’s it. Our system is ready to use. Now you can fully explore what Linux on the desktop is like: try various programs, customize the appearance in the settings, work with files, install programs you’re interested in from the app store, and more.
Overall, this distribution is tailored for people who are used to working in Windows systems for years. Such an interface and default appearance of programs was chosen not by accident, but to smooth over the dissonance that arises after switching from one OS to another.
Linux systems have many advantages, but there are also downsides — they’re far from perfect. But one thing you can be sure of — such systems will give you far more freedom than any Windows or macOS. And as a result of that freedom, one of the pleasant perks of Linux is the absence of advertising in it. It may only be found in proprietary programs, which you’ll most likely install manually.
I hope my guide was useful to you ;) Thanks for reading it through. Good luck.
👨💻And…
Don’t forget about our Telegram channel 📱 and chat
Or maybe you want to become a co-author? Then click here🔗
💬 All the best ✌️
That should be it. If not, check the logs 🙂

Comments