In this note, we will learn how to modify disk images in qcow2 format using console utilities from the libguestfs-tools library.
🖐️Hey!
Subscribe to our Telegram channel @r4ven_me📱, so you don’t miss new posts on the website 😉. If you have questions or just want to chat about the topic, feel free to join the Raven chat at @r4ven_me_chat🧐.
The note is in HowTo format, so fewer words, more commands🙃.
☝️ The command examples below were run in the console of the Proxmox 9 (Debian 13) hypervisor.
Connect to the server via SSH:
ssh root@proxmox.lanUpdate the package cache and install the required utilities:
apt update

apt install wget libguestfs-toolsDownload the current base Debian 13 image in qcow2 format:
wget https://cloud.debian.org/images/cloud/trixie/latest/debian-13-generic-amd64.qcow2

ls -l ./debian-13-generic-amd64.qcow2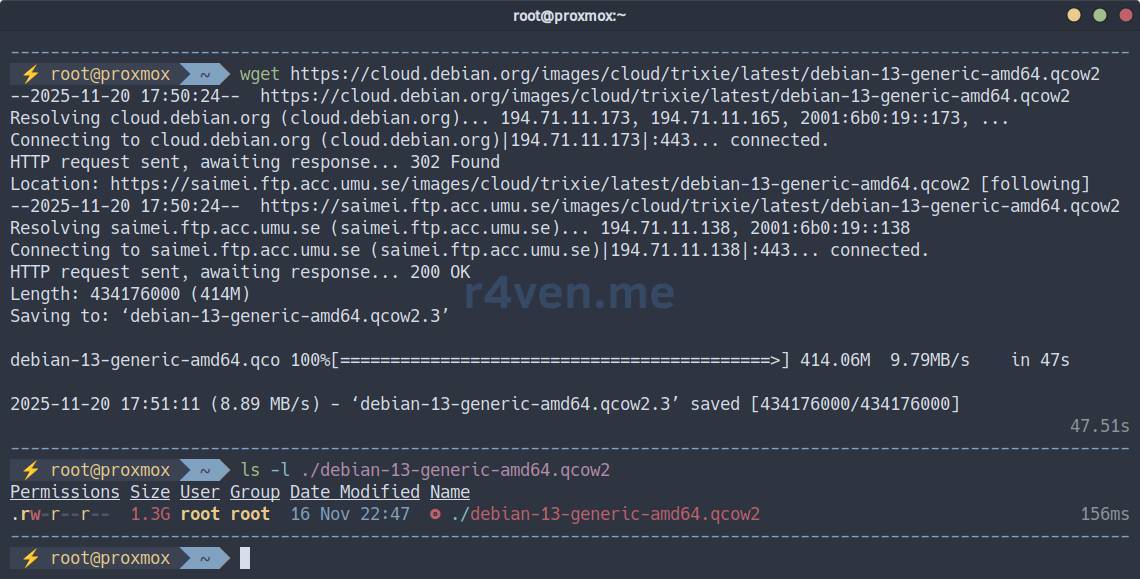
Resize the disk (specify a suitable value for your case):
qemu-img resize ./debian-13-generic-amd64.qcow2 20G💡 If you are preparing disks outside the Proxmox console and the qemu-img utility is not installed, you need to install the qemu-utils package.
Now customize our image according to your preferences.
Below, I will update packages and install some utilities + configure the locale:
⚠️ The process may take some time.
virt-customize -a debian-13-generic-amd64.qcow2 --update \
    --install qemu-guest-agent,locales,zsh,git,curl,neovim,bat,eza,fzf \
    --run-command "echo 'en_US.UTF-8 UTF-8' >> /etc/locale.gen" \
    --run-command "echo 'ru_RU.UTF-8 UTF-8' >> /etc/locale.gen" \
    --run-command "locale-gen"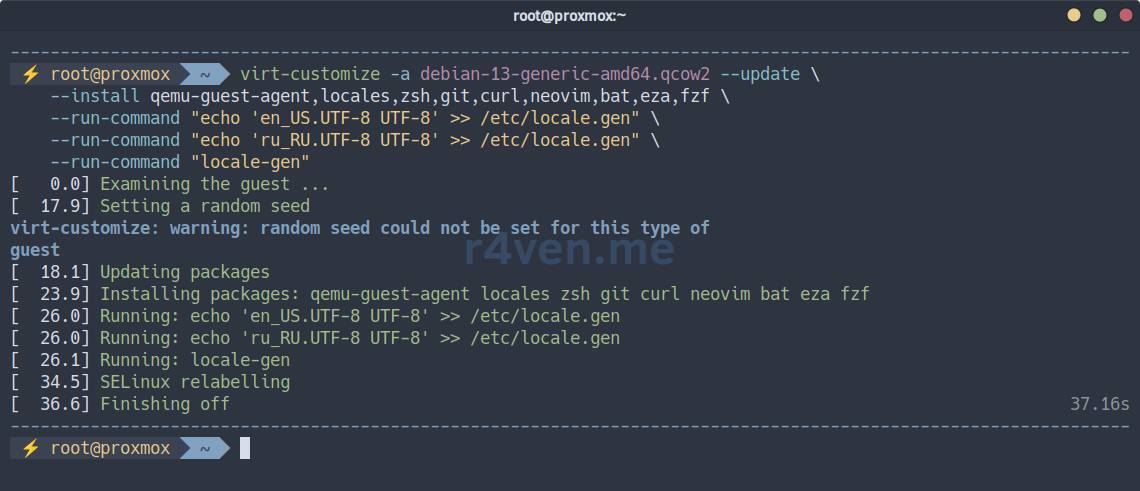
Done.
If you need to copy an external file into the image, this is done with the virt-copy-in command.
For example, let’s put my .zshrc file into the image:
curl -fsSL https://raw.githubusercontent.com/r4ven-me/dots/main/.zshrc \
    --output /tmp/.zshrc

chmod 640 /tmp/.zshrc && chown root: /tmp/.zshrc

virt-copy-in -a ./debian-13-generic-amd64.qcow2 /tmp/.zshrc /root

virt-copy-in -a ./debian-13-generic-amd64.qcow2 /tmp/.zshrc /etc/skel/If you need to edit any file inside the image, use the virt-edit command.
For example, set ZSH as the default shell for new users.
For the useradd command:
virt-edit -a ./debian-13-generic-amd64.qcow2 /etc/default/useradd📝 The vi/vim editor will open.
Set SHELL=/usr/bin/zsh.

Now for the adduser command:
virt-edit -a ./debian-13-generic-amd64.qcow2 /etc/adduser.confSet DSHELL=/usr/bin/zsh.
If you need to change many files, a more convenient option is to mount the image into the host system, for example at /mnt/qcow2:
mkdir -p /mnt/qcow2

guestmount -i -a ./debian-13-generic-amd64.qcow2 /mnt/qcow2

ls -l /mnt/qcow2
To unmount it, use the command:
guestunmount /mnt/qcow2If basic operations are not enough for you, you can launch an interactive shell directly inside the image:
guestfish -i -a ./debian-13-generic-amd64.qcow2For example, change the shell of the root user:
sh 'chsh -s /usr/bin/zsh'

sh 'grep root /etc/passwd'
That is how simple and very convenient it is😉. Use the prepared image for your new virtual machines👨💻.
Below is an extended list of the main image modification commands:
# View directory contents in the image
virt-ls -a <image.img> /path

# View file contents
virt-cat -a <image.img> /path/to/file

# Edit a file inside the image
virt-edit -a <image.img> /path/to/file

# Copy a file from the host into the image
virt-copy-in -a <image.img> <host_file> /guest/path

# Copy a file from the image to the host
virt-copy-out -a <image.img> /guest/path <host_path>

# Archive image contents
virt-tar-out -a <image.img> /path /host/archive.tar

# Extract a tar archive into the image
virt-tar-in -a <image.img> archive.tar /guest/path

# Show file systems, partitions, LVM
virt-filesystems -a <image.img>

# Extract kernel and initrd from the guest OS
virt-get-kernel -a <image.img>

# Read system logs inside the image
virt-log -a <image.img>

# Analyze the image: OS, packages, services, settings
virt-inspector -a <image.img>

# Use file systems (df analog)
virt-df -a <image.img>

# Create ready-made OS images (builder)
virt-builder <os-name>

# Manage the image repository for builder
virt-builder-repository

# Modify images: packages, keys, commands, files
virt-customize -a <image.img> --install vim --ssh-inject root:file:id_rsa.pub

# Clean up an image before distribution (sysprep)
virt-sysprep -a <image.img>

# Shrink qcow2, remove zero blocks
virt-sparsify <in.qcow2> <out.qcow2>

# Resize partitions/FS
virt-resize --expand /dev/sda1 in.qcow2 out.qcow2