We will deploy our own Davis to store files, calendars, and contacts on our server. Then we will connect it to Linux Mint and Android. We will run everything with Docker Compose and use the Caddy reverse proxy for HTTPS and automatic TLS certificates.
🖐️Hey!
Subscribe to our Telegram channel @r4ven_me📱, so you don’t miss new posts on the website 😉. If you have questions or just want to chat about the topic, feel free to join the Raven chat at @r4ven_me_chat🧐.
Introduction
I think personal files and data no longer need an explanation for why they belong on private servers. Deploying a full cloud service like Nextcloud is not always justified, especially for standard *DAV protocols and a simple admin panel.
For example, I store my secrets in a KeePass database on a WebDav server. This is convenient when you need access to that database from different devices and locations.
Recently, I came across Davis, a compact open-source server based on Symfony and sabre/dav. It supports three useful protocols:
WebDAV- file access;CalDAV- calendar synchronization;CardDAV- contact synchronization.
Davis has a Web GUI for managing users, calendars, and address books. For a small personal installation, we can use SQLite, so we will not need a separate database server.
There are several ways to connect the file storage in Linux. For this demonstration, I will use the Nemo file manager from Linux Mint. I recently covered more flexible WebDav mounting with rclone in my article on mounting SFTP, WebDAV, and S3 network storage. Take a look.
Prerequisites
This setup assumes that we already have:
- a Linux server with Docker Engine and Docker Compose installed;
- a domain pointing to the server’s public IP address,
dav.r4ven.mein my example; - incoming ports
80/tcpand443/tcpopen; - privileged access to the server through
sudo.
The Caddy reverse proxy will run alongside Davis in the same Compose project. It will accept external connections on ports 80 and 443 and automatically obtain a Let’s Encrypt certificate. It will proxy requests to the davis container over the internal Docker network.
☝️ DAV clients send usernames and passwords through HTTP Basic Auth. Use only HTTPS, otherwise someone can intercept your credentials on the network.
Installing Davis
Connect to the server over SSH and switch to the root account:
ssh ivan@dav.r4ven.me

sudo -iCreate the project directory and restrict access to it:
install -m 700 -d /etc/compose/davis

cd /etc/compose/davisCreating the Compose File
Create compose.yaml, for example, with vim:
vim ./compose.yamlAdd the following:
  1---
  2name: davis
  3
  4networks:
  5  davis:
  6
  7volumes:
  8  davis_data:
  9    name: davis_data
 10  davis_webdav:
 11    name: davis_webdav
 12  davis_caddy_data:
 13    name: davis_caddy_data
 14  davis_caddy_config:
 15    name: davis_caddy_config
 16
 17services:
 18  davis:
 19    image: ghcr.io/tchapi/davis-standalone:5.6.3
 20    container_name: davis
 21    restart: always
 22    stop_grace_period: 30s
 23    cpus: 1
 24    mem_limit: 1g
 25    hostname: davis
 26    command:
 27      - sh
 28      - -c
 29      - |
 30        set -e
 31        mkdir -p /webdav/public /webdav/homes
 32        APP_ENV=prod bin/console doctrine:migrations:migrate --no-interaction
 33        chown -R www-data:www-data /data /webdav
 34        exec /usr/bin/supervisord -c /etc/supervisord.conf
 35    env_file:
 36      - .env
 37    volumes:
 38      - /etc/ssl/certs/ca-certificates.crt:/etc/ssl/certs/ca-certificates.crt:ro
 39      - /etc/timezone:/etc/timezone:ro
 40      - /etc/localtime:/etc/localtime:ro
 41      - davis_data:/data
 42      - davis_webdav:/webdav
 43    expose:
 44      - "9000"
 45    networks:
 46      - davis
 47    logging:
 48      driver: json-file
 49      options:
 50        max-size: "10m"
 51        max-file: "3"
 52
 53  davis_caddy:
 54    image: docker.io/caddy:2-alpine
 55    depends_on:
 56      - davis
 57    container_name: davis-caddy
 58    restart: unless-stopped
 59    stop_grace_period: 30s
 60    cpus: 1
 61    mem_limit: 1g
 62    hostname: davis-caddy
 63    env_file: ./.env
 64    configs:
 65      - source: Caddyfile
 66        target: /etc/caddy/Caddyfile
 67    ports:
 68      - "80:80/tcp"
 69      - "443:443/tcp"
 70      - "443:443/udp"
 71    volumes:
 72      - /etc/timezone:/etc/timezone:ro
 73      - /etc/localtime:/etc/localtime:ro
 74      - davis_caddy_data:/data
 75      - davis_caddy_config:/config
 76    networks:
 77      - davis
 78    logging:
 79      driver: json-file
 80      options:
 81        max-size: "10m"
 82        max-file: "3"
 83
 84configs:
 85  Caddyfile:
 86    content: |
 87      {
 88          email ${ACME_EMAIL}
 89          admin off
 90      }
 91
 92      ${DAVIS_DOMAIN} {
 93          encode zstd gzip
 94
 95          reverse_proxy davis:9000
 96
 97          header {
 98              Strict-Transport-Security "max-age=31536000; includeSubDomains; preload"
 99              X-Content-Type-Options "nosniff"
100              X-Frame-Options "SAMEORIGIN"
101              Referrer-Policy "no-referrer"
102              -Server
103          }
104 }In this setup, the standalone Davis image contains a web server and php-fpm. A separate Caddy container handles external HTTPS. Davis port 9000 is available only inside the Docker network and is not published on the host.
The Caddy configuration lives directly in compose.yaml, in the configs section. The ACME_EMAIL and DAVIS_DOMAIN variables populate Caddyfile from .env. The reverse_proxy davis:9000 directive forwards requests to Davis by its service name.
The data is split across four Docker volumes:
davis_data- theSQLitedatabase and application service data;davis_webdav- WebDAV user files;davis_caddy_data- TLS certificates, keys, and Caddy state;davis_caddy_config- Caddy service configuration.
At each startup, the Davis container creates the required directories, applies database migrations, and checks permissions. This removes the need to run migrations manually during updates.
⚠️ The 5.6.3 tag matches my current configuration and is the latest image version at the time of writing. A newer version may be available when you read this; check the releases page.
Configuring Environment Variables
Create .env:
vim ./.envAdd the following:
TZ=Europe/Moscow
DAVIS_DOMAIN=dav.r4ven.me
ACME_EMAIL=kar-kar@r4ven.me
APP_ENV=prod
APP_TIMEZONE=Europe/Moscow
CALDAV_ENABLED=true
CARDDAV_ENABLED=true
WEBDAV_ENABLED=true
PUBLIC_CALENDARS_ENABLED=true
BIRTHDAY_REMINDER_OFFSET=PT9H
ADMIN_LOGIN=ivan
ADMIN_PASSWORD=r4ven_me
ADMIN_AUTH_BYPASS=false
AUTH_METHOD=Basic
AUTH_REALM=SabreDAV
WEBDAV_TMP_DIR=/tmp
WEBDAV_PUBLIC_DIR=
WEBDAV_HOMES_DIR=/webdav/homes
INVITE_FROM_ADDRESS=no-reply@r4ven.me
MAILER_DSN=null://null
SYMFONY_TRUSTED_PROXIES=REMOTE_ADDR
DATABASE_DRIVER=sqlite
DATABASE_URL=sqlite:////data/davis_database.dbMain parameters:
DAVIS_DOMAIN- the domain name for which Caddy will obtain a TLS certificate;ACME_EMAIL- the email address for ACME account registration and certificate notifications;CALDAV_ENABLED,CARDDAV_ENABLEDandWEBDAV_ENABLED- enable the required DAV protocols;PUBLIC_CALENDARS_ENABLED- allows public calendars but does not make them public automatically;ADMIN_LOGINandADMIN_PASSWORD- Web GUI administrator credentials;AUTH_METHOD=Basic- local Davis user authentication;AUTH_REALM=SabreDAV- the HTTP authentication realm;WEBDAV_TMP_DIR=/tmp- the WebDAV temporary directory;WEBDAV_HOMES_DIR=/webdav/homes- the root directory for users’ personal file directories;DATABASE_DRIVER=sqlite- selects the embedded database;DATABASE_URL- the database file path inside thedavis_datavolume;SYMFONY_TRUSTED_PROXIES=REMOTE_ADDR- trusts headers from the directly connected reverse proxy.
Generate the administrator password:
ADMIN_PASSWORD="$(openssl rand -base64 32 | tr -d '\n')"

sed -i "s|^ADMIN_PASSWORD=.*|ADMIN_PASSWORD=${ADMIN_PASSWORD}|" ./.envAnd restrict access to the configuration:
chmod 600 ./.env ./compose.yaml☝️ Do not change AUTH_REALM after creating users. Older Davis records may include the realm in the password hash, so changing it can break existing authentication.
In this example, MAILER_DSN=null://null disables email invitations. You will need a working SMTP service to invite event participants. We will configure it below.
Starting the Container
Check the final configuration:
docker compose configStart the stack:
docker compose up -d

docker compose logs -fPress Ctrl+c to stop viewing the logs. Then check the container status:
docker compose ps
Configuring HTTPS with Caddy
After startup, Caddy reads the embedded configuration in compose.yaml, Caddyfile, and contacts the Let’s Encrypt ACME server. It requests a certificate for the domain specified by DAVIS_DOMAIN. It stores certificates and keys in davis_caddy_data, so ordinary container recreation does not trigger new issuance.
Automatic certificate issuance requires three conditions:
- the domain’s DNS record (
dav.r4ven.mein my example) points to the server’s public IP address; - incoming ports
80/tcpand443/tcpare accessible from the internet; - no other services use these ports.
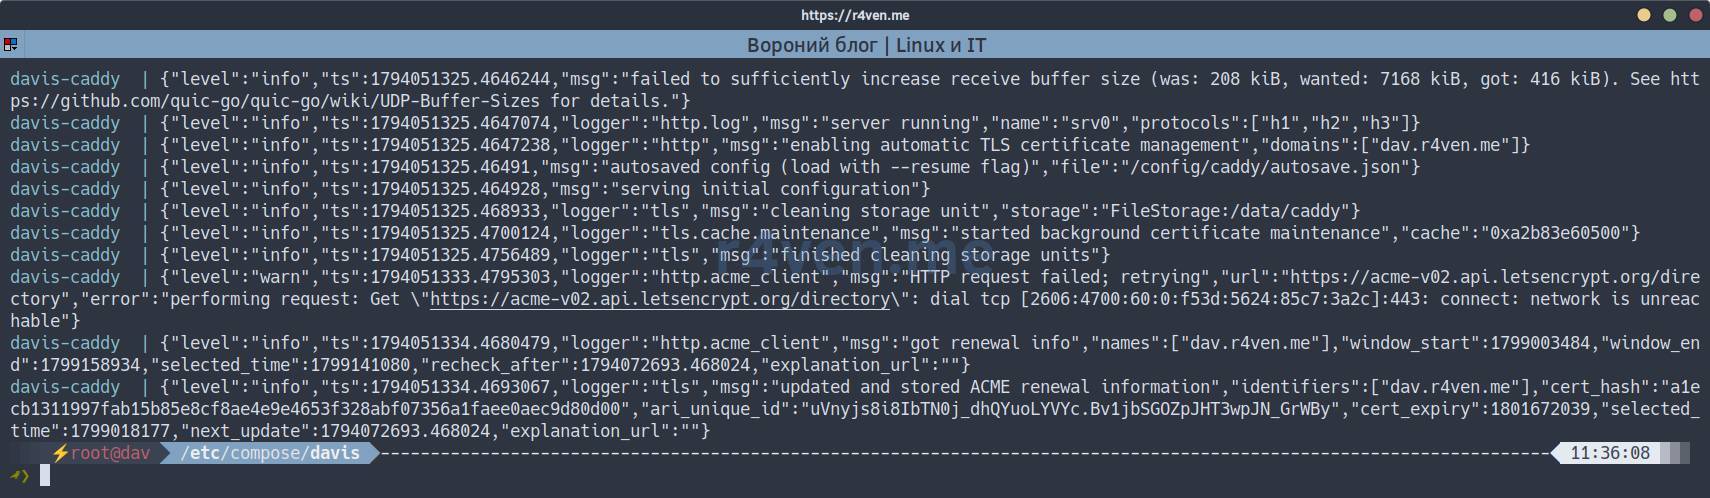
Check the Caddy log:
docker compose logs davis_caddyThe log should report that Caddy successfully obtained the certificate. Then open https://dav.r4ven.me/ in a browser and check the certificate:
Davis handles /.well-known/caldav and /.well-known/carddav itself, redirecting clients to /dav/. You do not need separate rewrite rules in Caddyfile.
Check external access:
curl -I https://dav.r4ven.me/

curl -I https://dav.r4ven.me/.well-known/caldav

curl -I https://dav.r4ven.me/.well-known/carddavThe well-known addresses should redirect to the main /dav/ endpoint. If the certificate is not ready, first check docker compose logs davis_caddy, the DNS record, and ports 80 and 443.
Initial Davis Setup
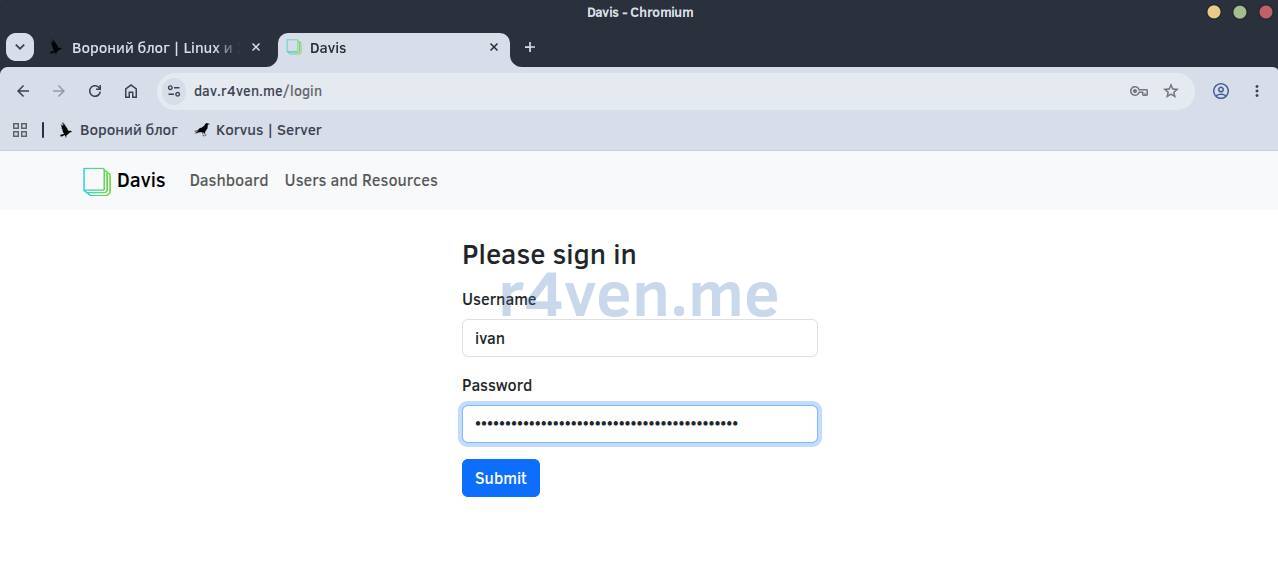
Open the administration panel address in a browser:
https://dav.r4ven.me/dashboardEnter ADMIN_LOGIN and ADMIN_PASSWORD from .env:
Open the users section (Users and Resources) and create a regular account:
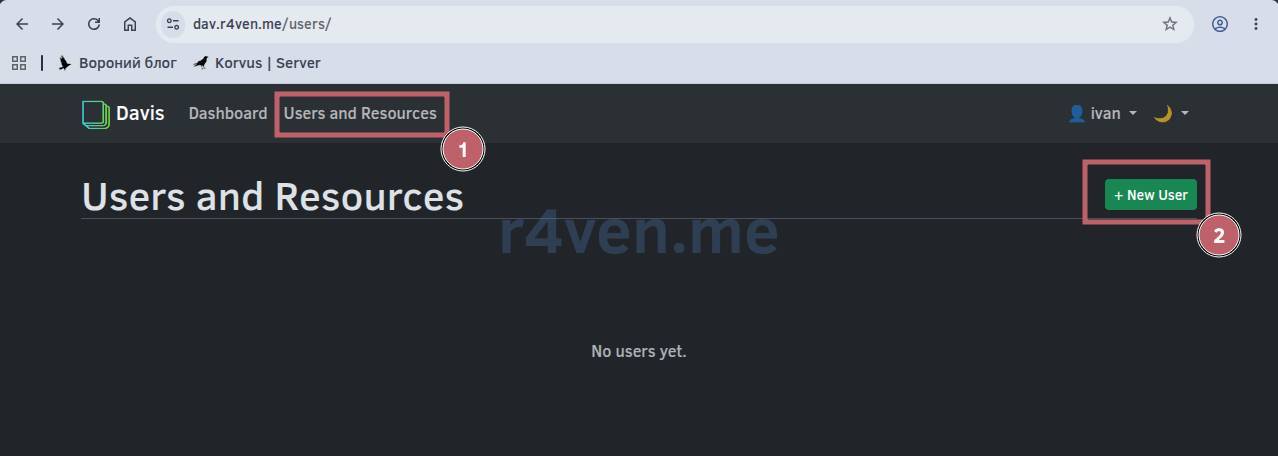
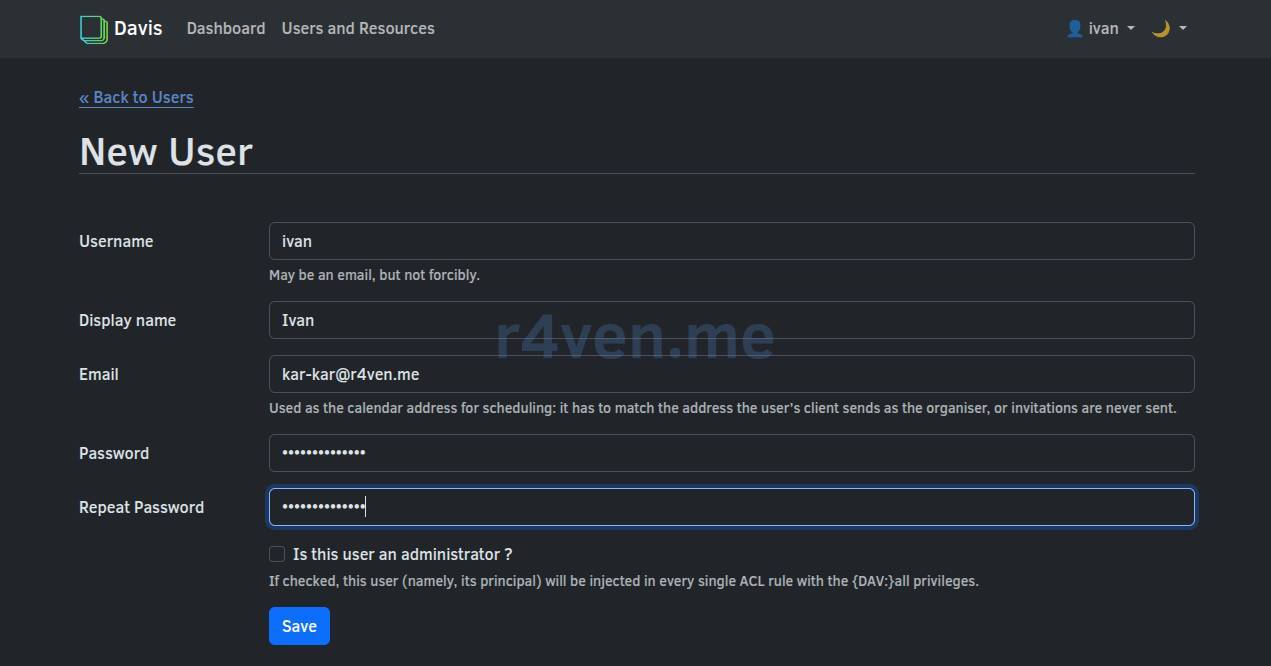
Enter the following:
- a username, for example
ivan; - a separate strong password;
- the user’s email address;
- a display name;
- administrator privileges - only if they are actually required.
📝 The Web GUI administrator and DAV user are separate accounts. ADMIN_LOGIN and ADMIN_PASSWORD provide access to the administration panel. To connect calendars, contacts, and files, create a user in the panel itself.
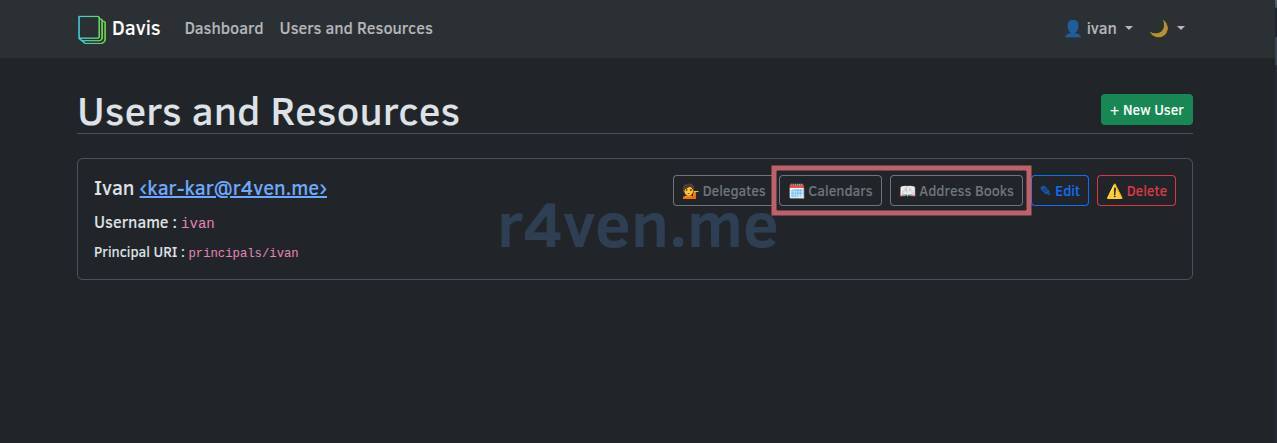
Creating a user also creates a calendar and an address book for them: Default Calendar and Default Address Book:
In the calendars section, hover over the i symbol to display the calendar’s full web address:
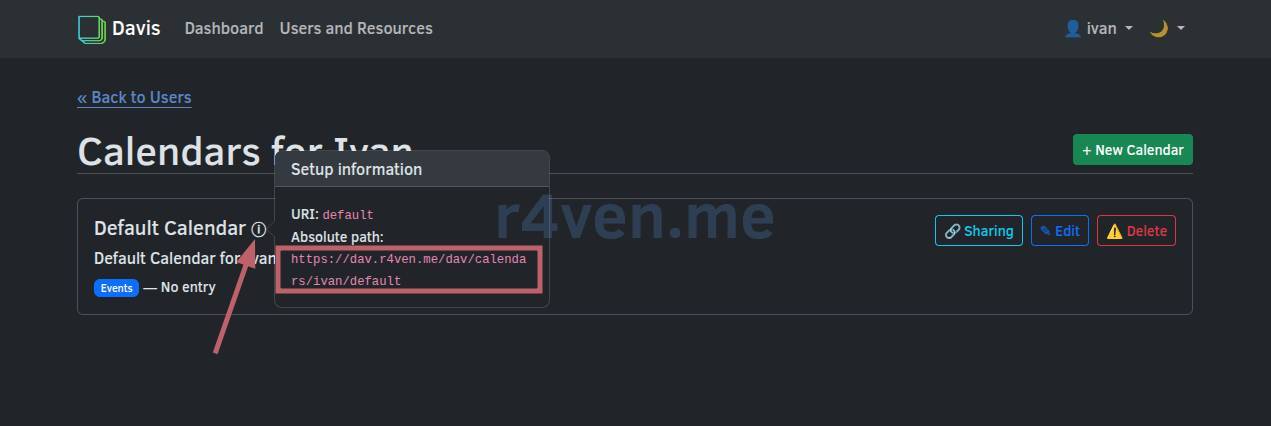
We will need this address when configuring clients.
Finally, open /dashboard/diagnostics and verify that migrations have run, directories are writable, and DAV endpoints are enabled:
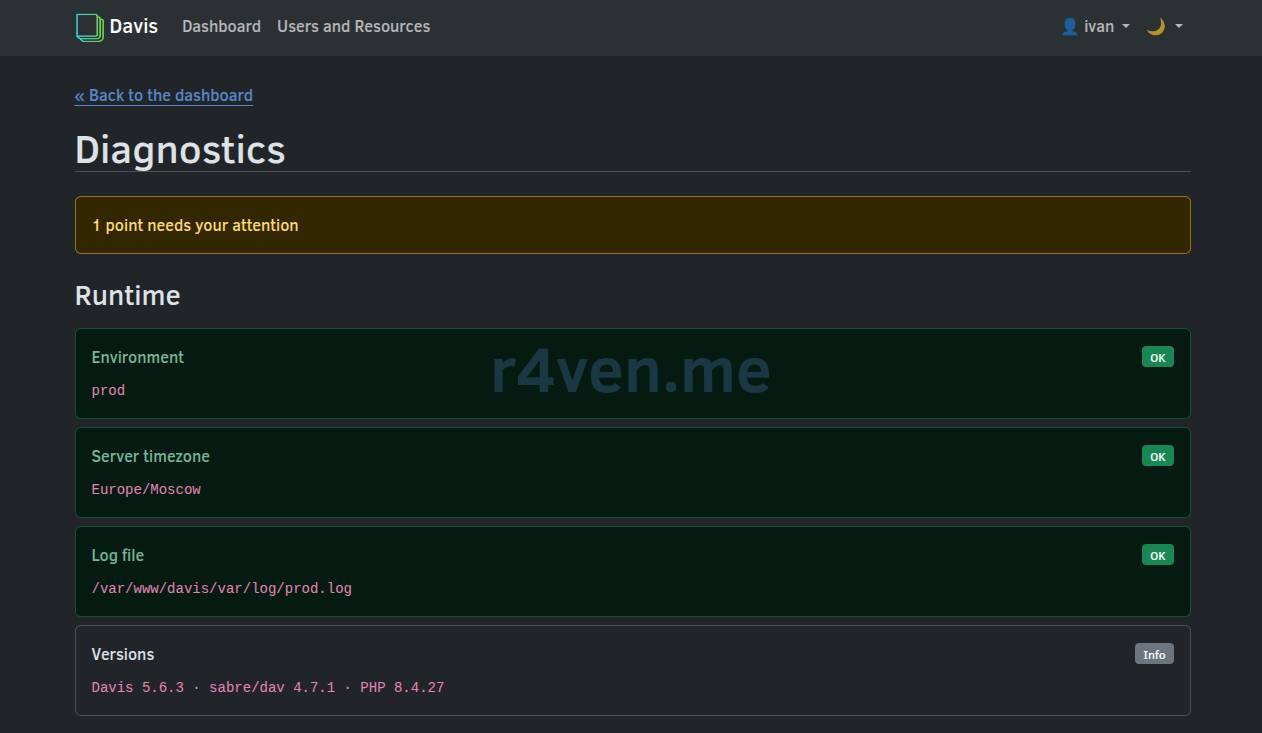
About SMTP Configuration
Davis uses email for just one purpose: sending invitations to calendar event participants. For a personal calendar without invitations, leave MAILER_DSN=null://null and skip this section.
If you need invitations, open .env and change two variables:
vim /etc/compose/davis/.envMAILER_DSN=smtp://no-reply%40r4ven.me:PASSWORD@smtp.r4ven.me:587
INVITE_FROM_ADDRESS=no-reply@r4ven.meThe DSN uses the standard Symfony Mailer format: smtp://логин:пароль@сервер:порт. For implicit TLS on port 465, use the smtps:// scheme. On 587, the connection usually upgrades automatically through STARTTLS.
⚠️ URL-encode special characters in the username and password (@, :, /, #, $, &, and others). That is why @ in the username above became %40. Otherwise, you may get a DSN parsing error or authenticate against the wrong host.
You can encode the password directly in the console:
python3 -c 'import sys, urllib.parse; print(urllib.parse.quote(sys.argv[1], safe=""))' 'my:p@ss/word'my%3Ap%40ss%2FwordYour SMTP server must allow the INVITE_FROM_ADDRESS address as a sender; otherwise, it will reject the messages. If you leave the variable empty, Davis will not send invitations and will log a warning.
Apply the changes. Recreate the container so that it reads .env again:
cd /etc/compose/davis

docker compose up -d --force-recreate davisCheck delivery with a test email, without creating an event:
docker compose exec davis php bin/console davis:mail:test kar-kar@r4ven.me

The /dashboard/diagnostics page also shows the transport, but only the scheme and host, without credentials. It also shows how many users have no email address.
📝 Davis sends an invitation only if the event organizer matches the user’s Email field in the Davis panel. If the field is empty or differs from the address the client sends, Davis will not send the email.
Automatic Startup with Systemd
The containers in our compose.yaml already have restart: always and restart: unless-stopped, so they start with Docker after a server reboot. But I prefer managing the entire stack consistently, like a regular service. This gives it a clear status, a dependency on docker.service, and systemctl start|stop|restart commands. We will create a simple unit for this.
Create the file:
vim /etc/compose/davis/davis.serviceAdd the following:
[Unit]
Description=Davis (Docker Compose)
Requires=docker.service
After=docker.service network-online.target
Wants=network-online.target

[Service]
Type=simple
WorkingDirectory=/etc/compose/davis
ExecStart=/usr/bin/docker compose up --no-color --remove-orphans
ExecStop=/usr/bin/docker compose down
Restart=on-failure
RestartSec=10
TimeoutStopSec=120

[Install]
WantedBy=multi-user.targetHere, docker compose up runs without -d, so it stays in the foreground as the service’s main process. Thus, systemd sees the stack’s actual state, and all container output goes to the journal, journald. The --no-color flag removes ANSI codes so that journalctl does not show non-printable characters. Check the binary path with command -v docker, just in case; on Debian, it is /usr/bin/docker.
Create a symlink to our service file in the unit directory, reload systemd, enable automatic startup, and start it immediately:
ln -sv /etc/compose/davis/davis.service /etc/systemd/system/davis.service

systemctl daemon-reload

systemctl enable --now davis.serviceIf you already started the stack manually with up -d, that is fine. Compose simply attaches to the running containers and starts showing their logs. Check the status and journal:
systemctl status davis.service

journalctl -fu davis.service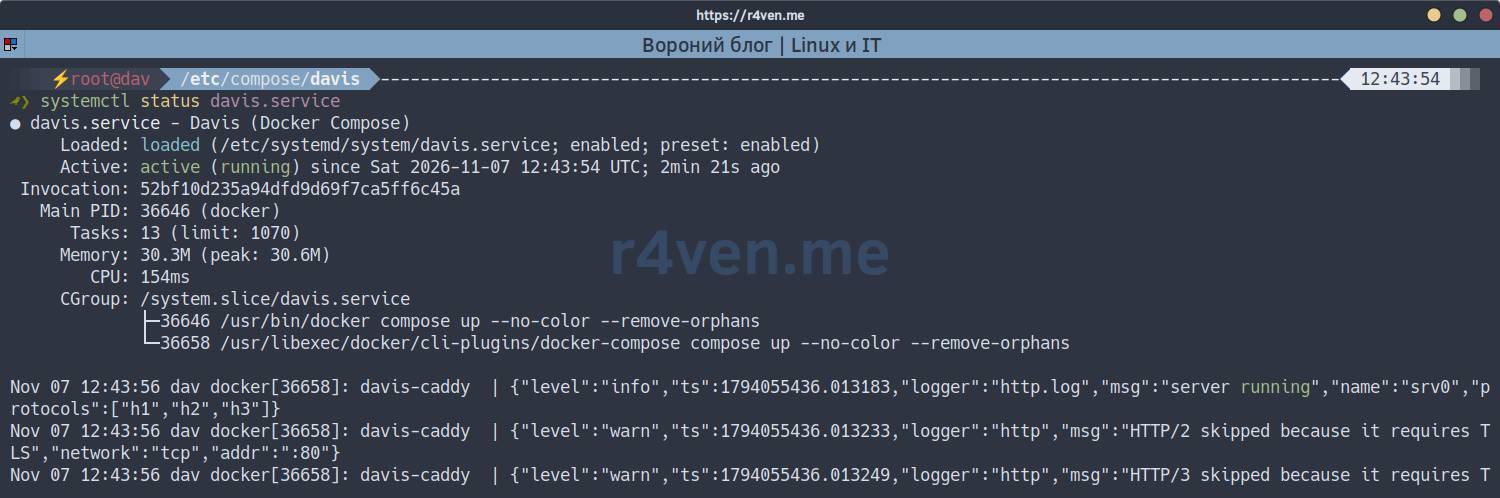
You can now manage the stack like this:
systemctl restart davis.service

systemctl stop davis.serviceMy final check is a server reboot. Afterward, I verify that the service and containers start automatically:
reboot

# after boot
systemctl is-active davis.service

docker compose -f /etc/compose/davis/compose.yaml ps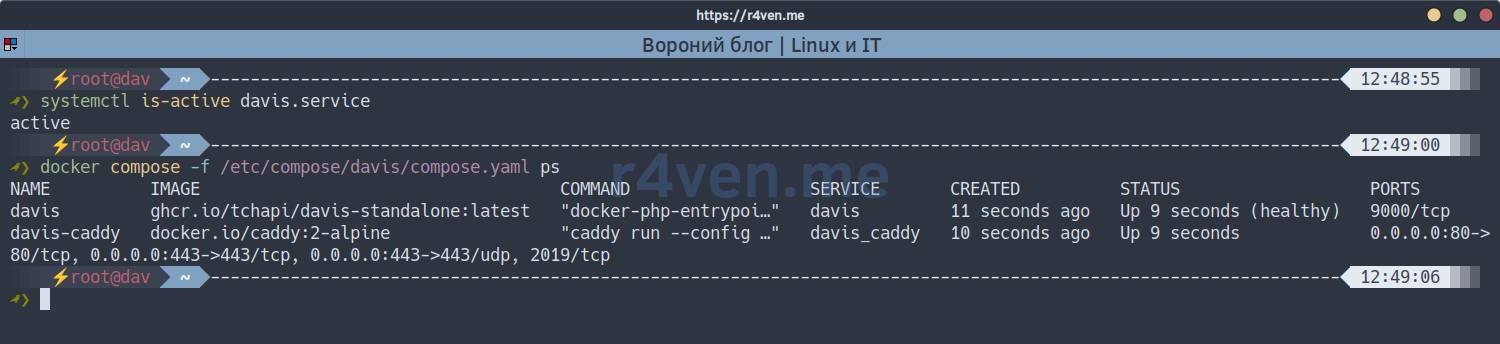
Connecting WebDAV in Linux Mint
In Linux Mint, the Nemo file manager can connect to WebDAV without additional software.
Open Nemo and select Файл -> Подключиться к серверу from the menu:
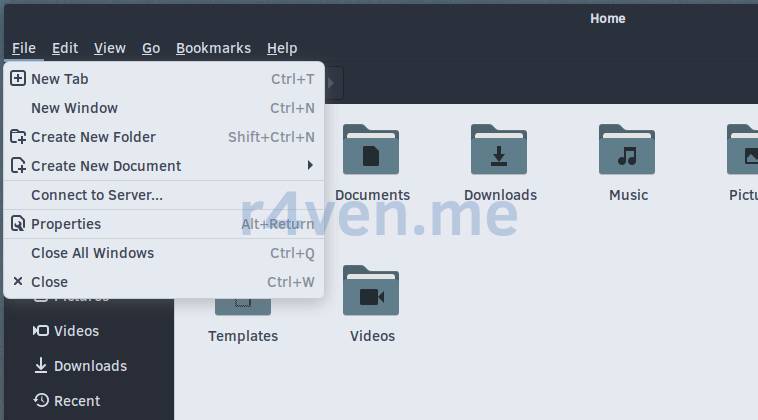
And enter the parameters:
- type -
WebDAV (HTTPS); - server -
dav.r4ven.me; - port -
443; - folder -
/dav/home/; - username -
ivan; - password - the DAV user’s password.
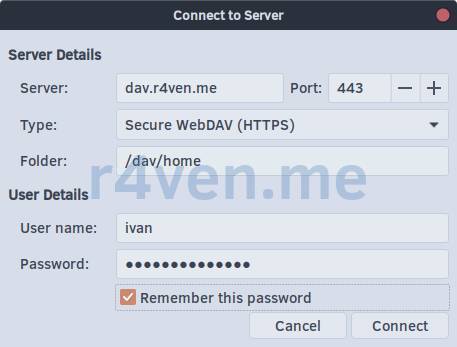
After connecting, the resource appears in Nemo’s sidebar. You can create directories, copy files, and open documents almost as you would on a regular filesystem.
If you prefer entering the address manually, use a URI with the davs scheme:
davs://dav.r4ven.me/dav/home/Check write access by creating a small test directory or file. Then verify through WebDAV that the object exists in the Davis volume, not just in the file manager’s local cache:
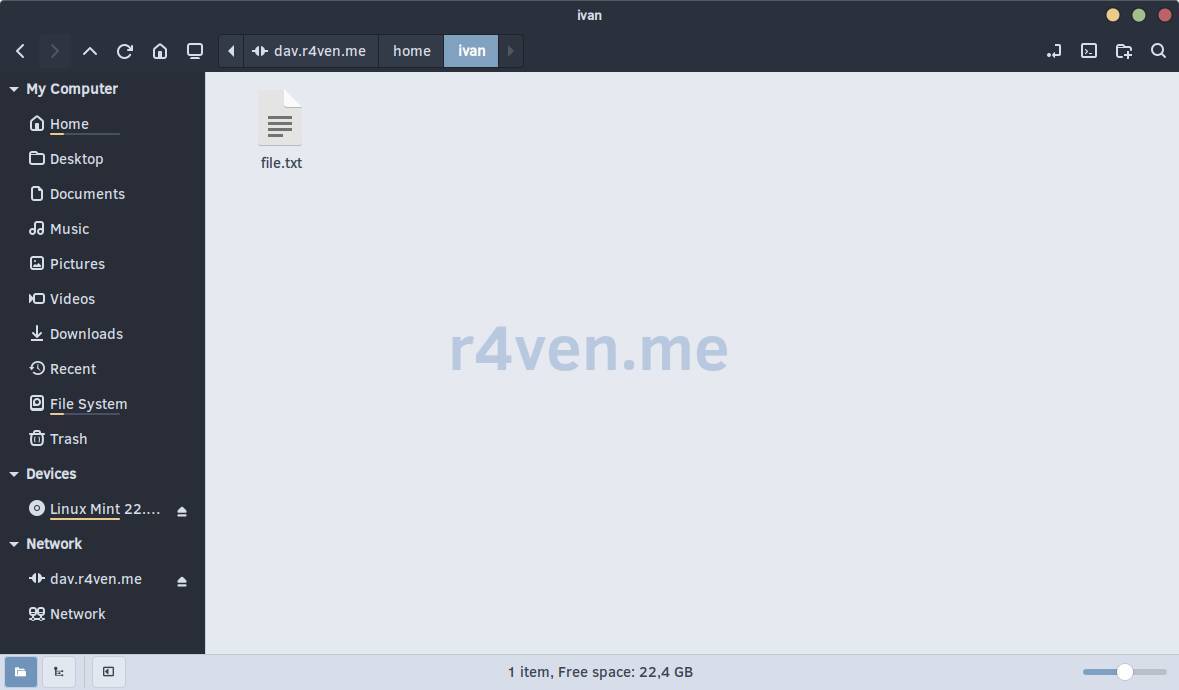
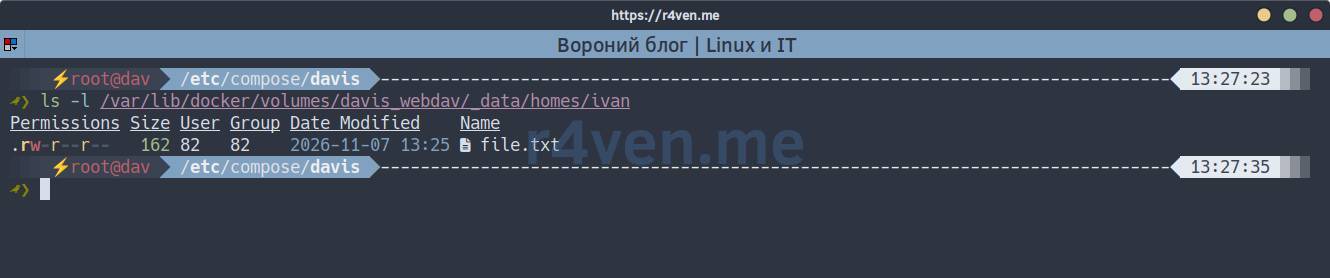
Connecting a Calendar in Linux Mint
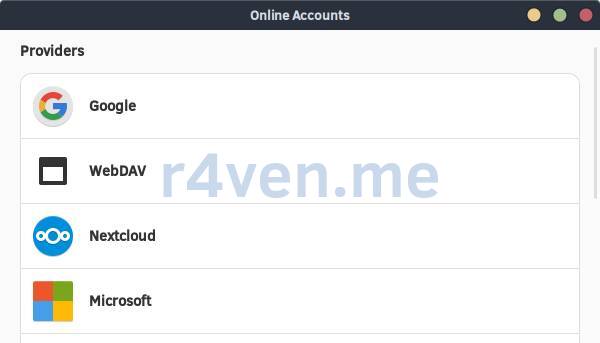
Use Online Accounts to connect the Linux Mint calendar to Davis over WebDav. You can launch it from the main application menu or the calendar:
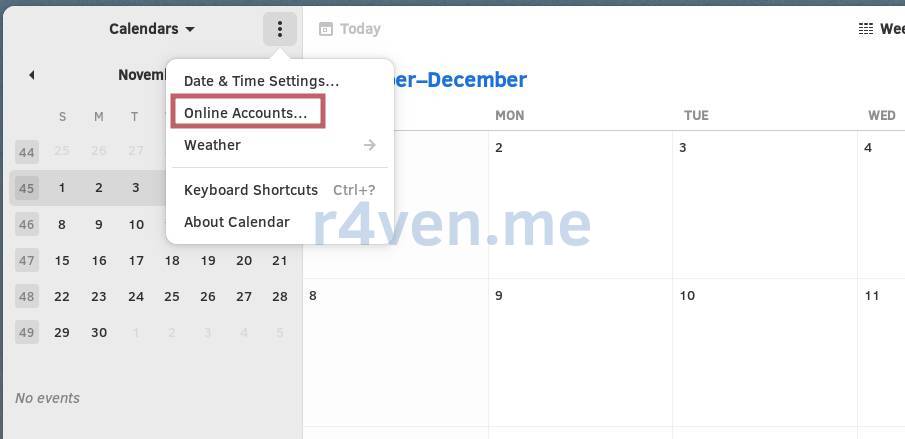
Select WebDav as the provider:
Enter the following:
- Server address -
https://dav.r4ven.me/dav/calendars/ivan/default; - Username -
ivan; - User password -
***.
In the address field, enter the URL we saw earlier in the user’s calendars section:
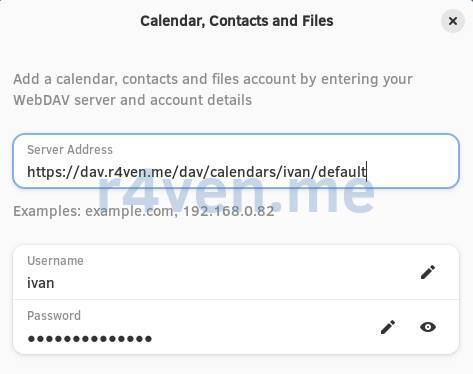
📝 Here, default is the calendar’s name in Davis.
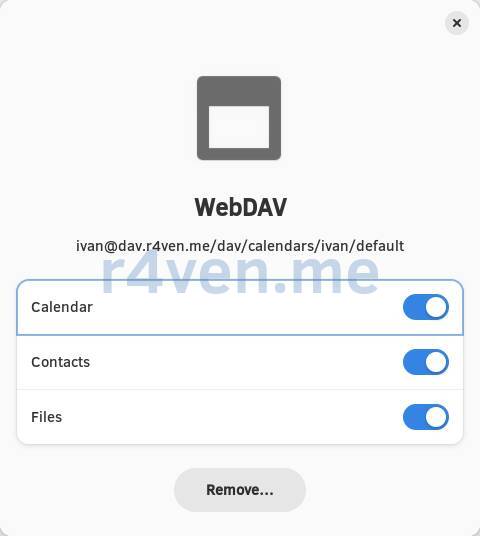
Click “Sign In”, select the items to synchronize, and close the window using the “X” in the upper-right corner:
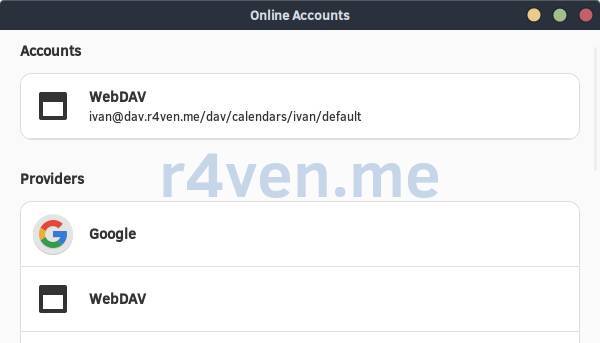
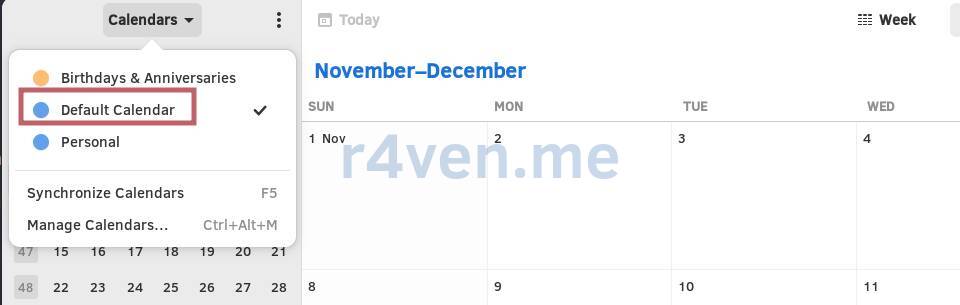
A new “Default calendar”, or whatever you named it, will appear in the calendar list:
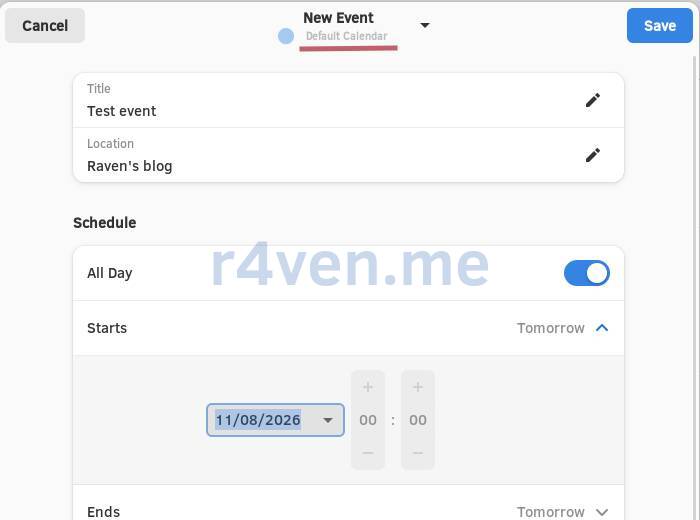
For testing, schedule an event whose synchronization we will check on Android later.
The main point: select the correct calendar when editing the event. In my example, it is “Default Calendar”:
Connecting WebDav on Android with DAVx⁵
DAVx⁵ is an open-source Android application available from F-Droid and Google Play. It connects CalDAV and CardDAV to Android’s system stores. Regular calendar applications can then access the calendars, and the system contacts application can access the contacts. The application also connects WebDav storage as mount points for file access:
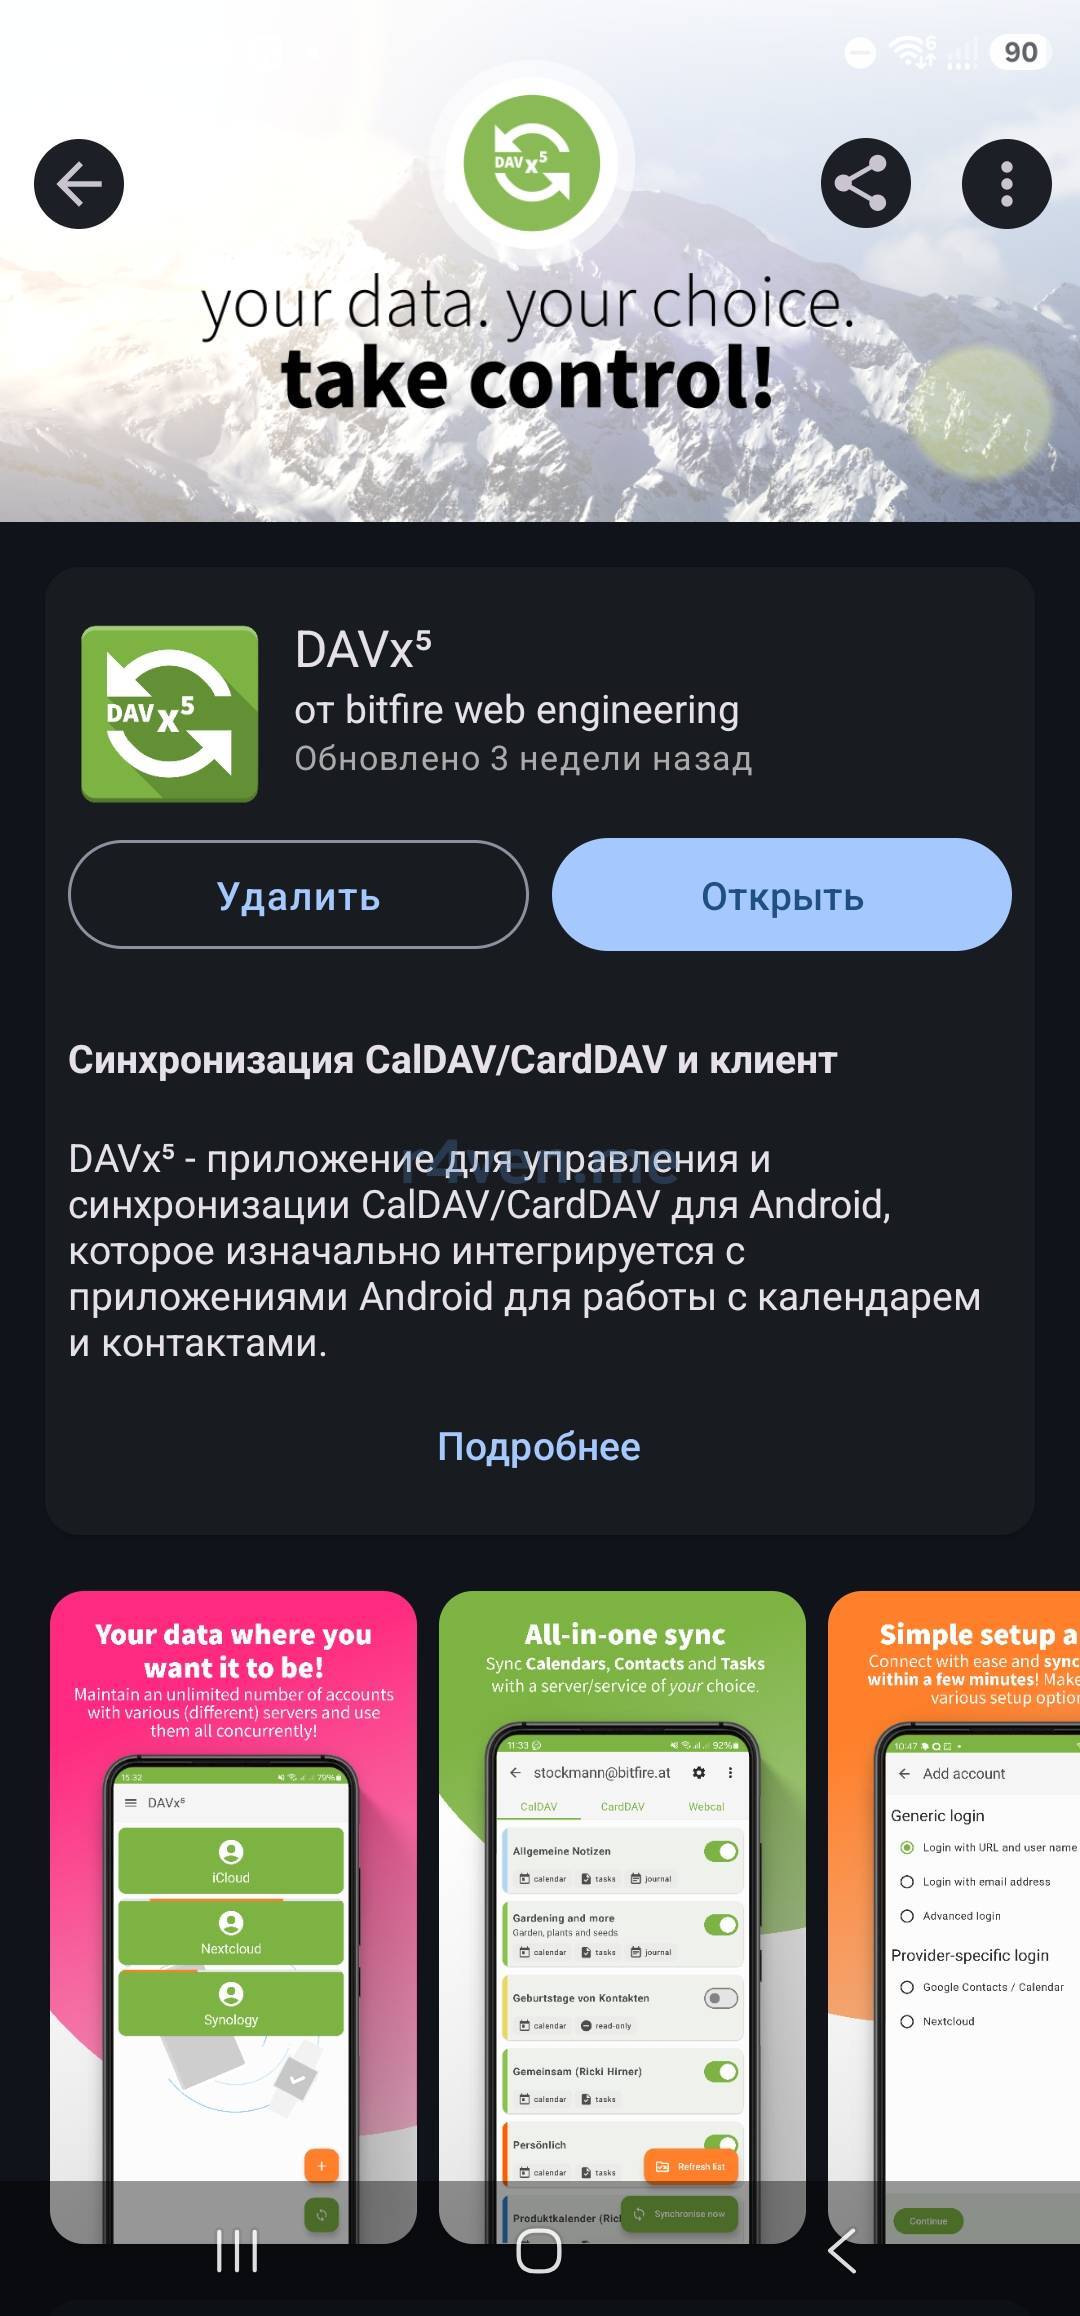
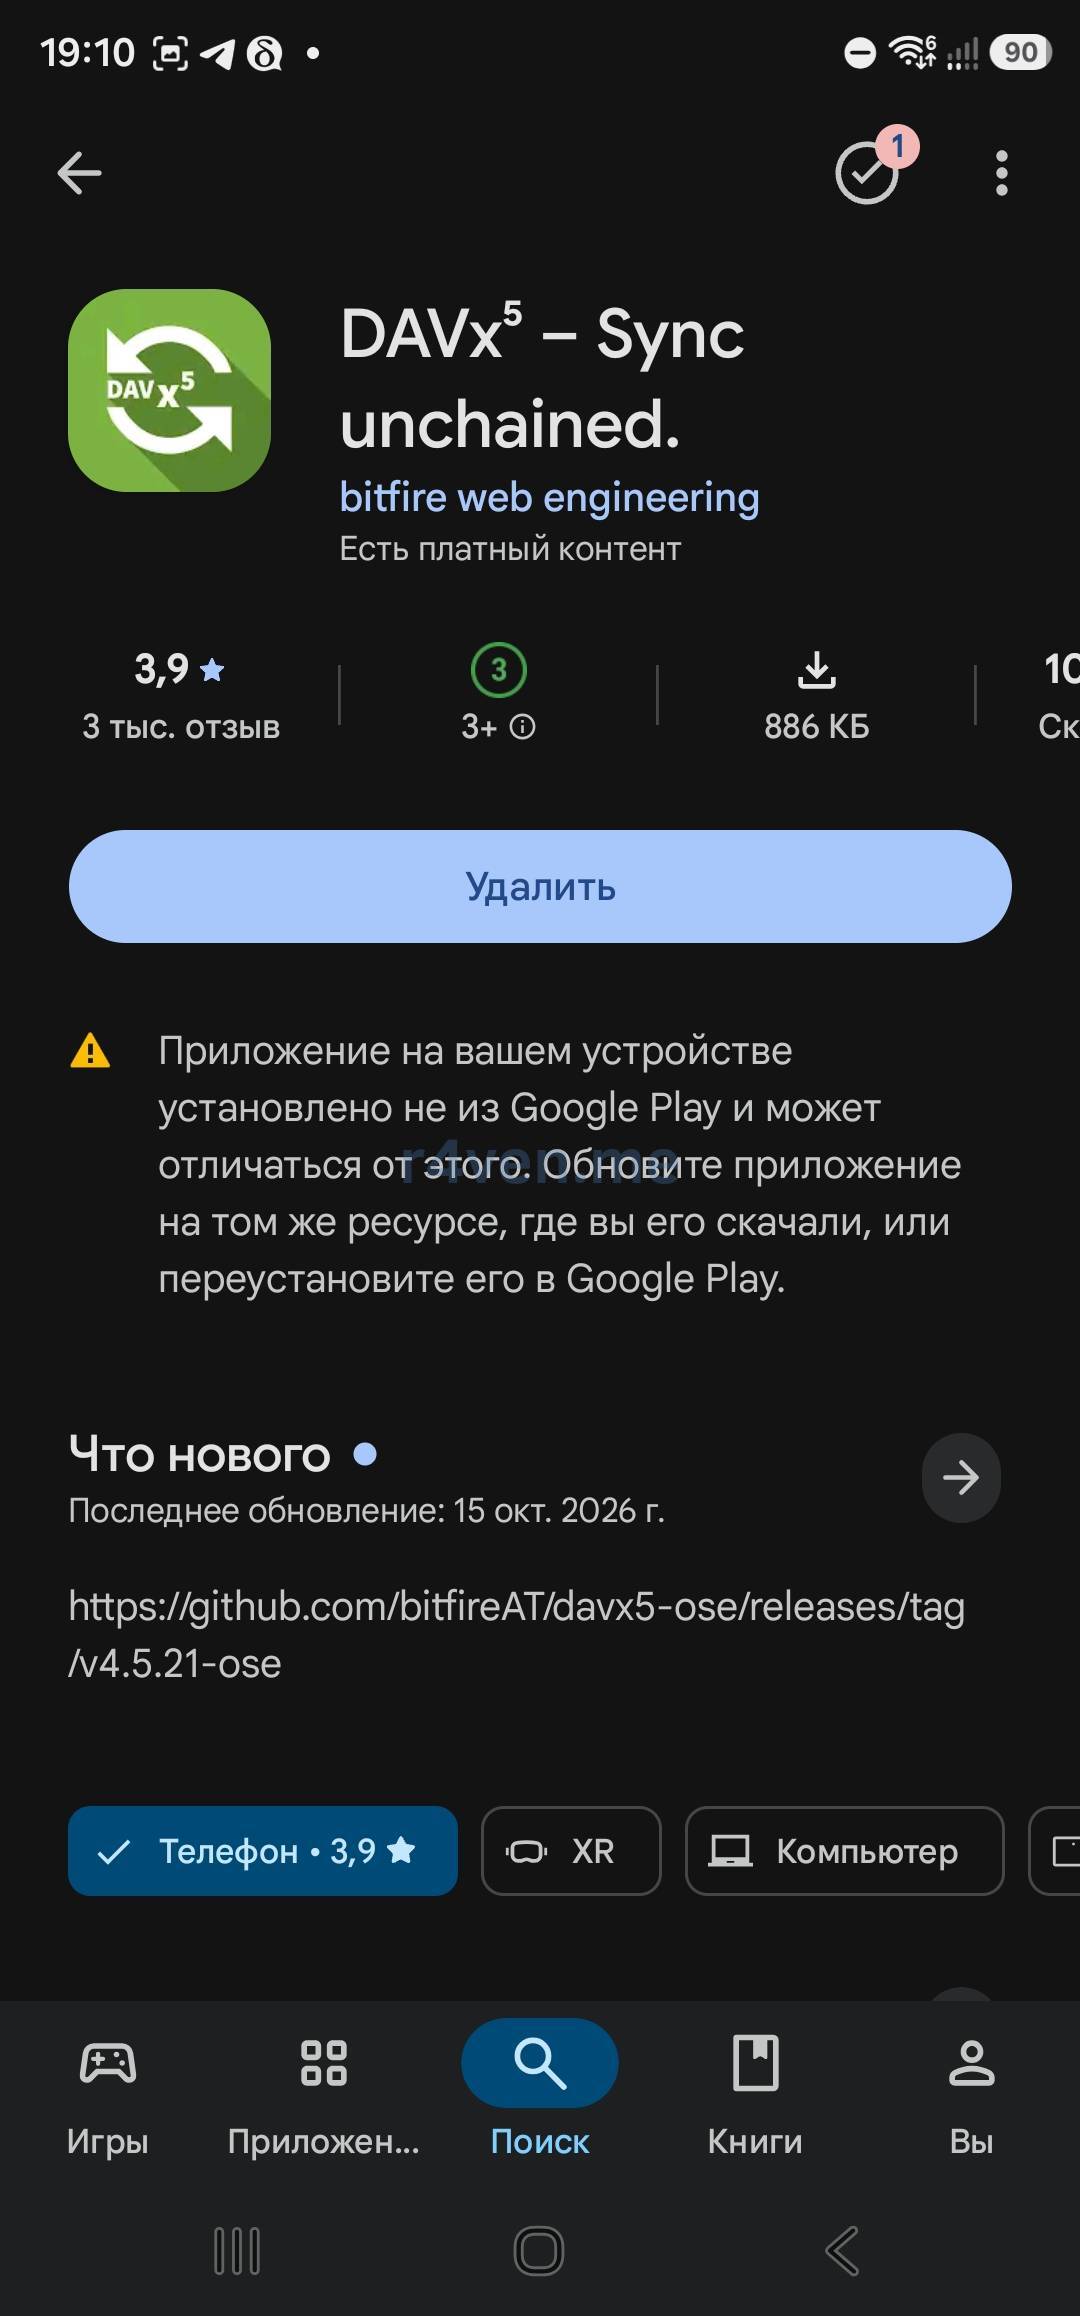
Install DAVx⁵ using your preferred method, grant the requested permissions, and create a new account.
Select login with a URL and enter:
- base URL -
https://dav.r4ven.me/dav/; - username -
ivan; - password - the DAV user’s password.
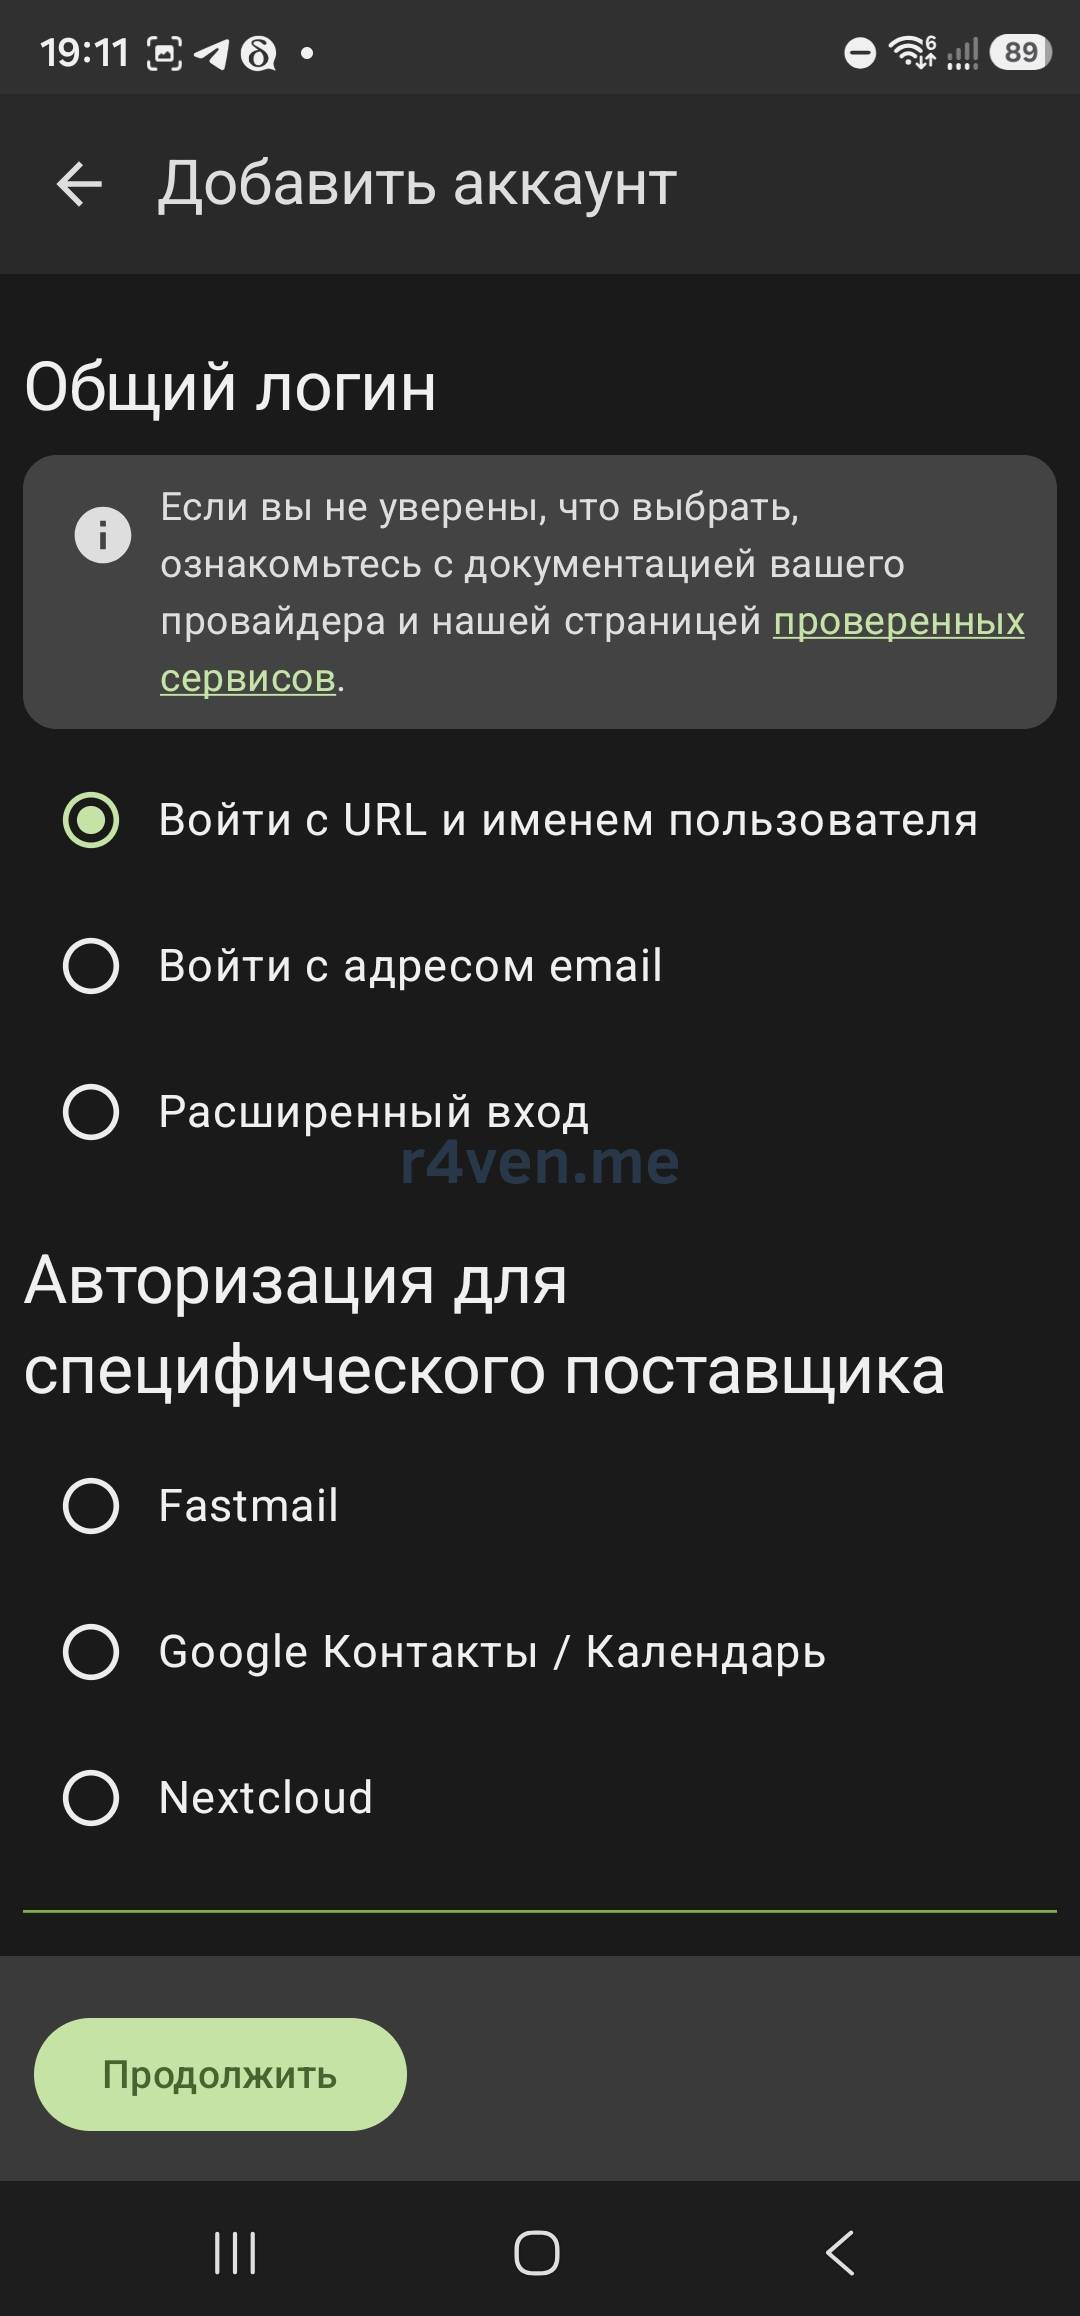
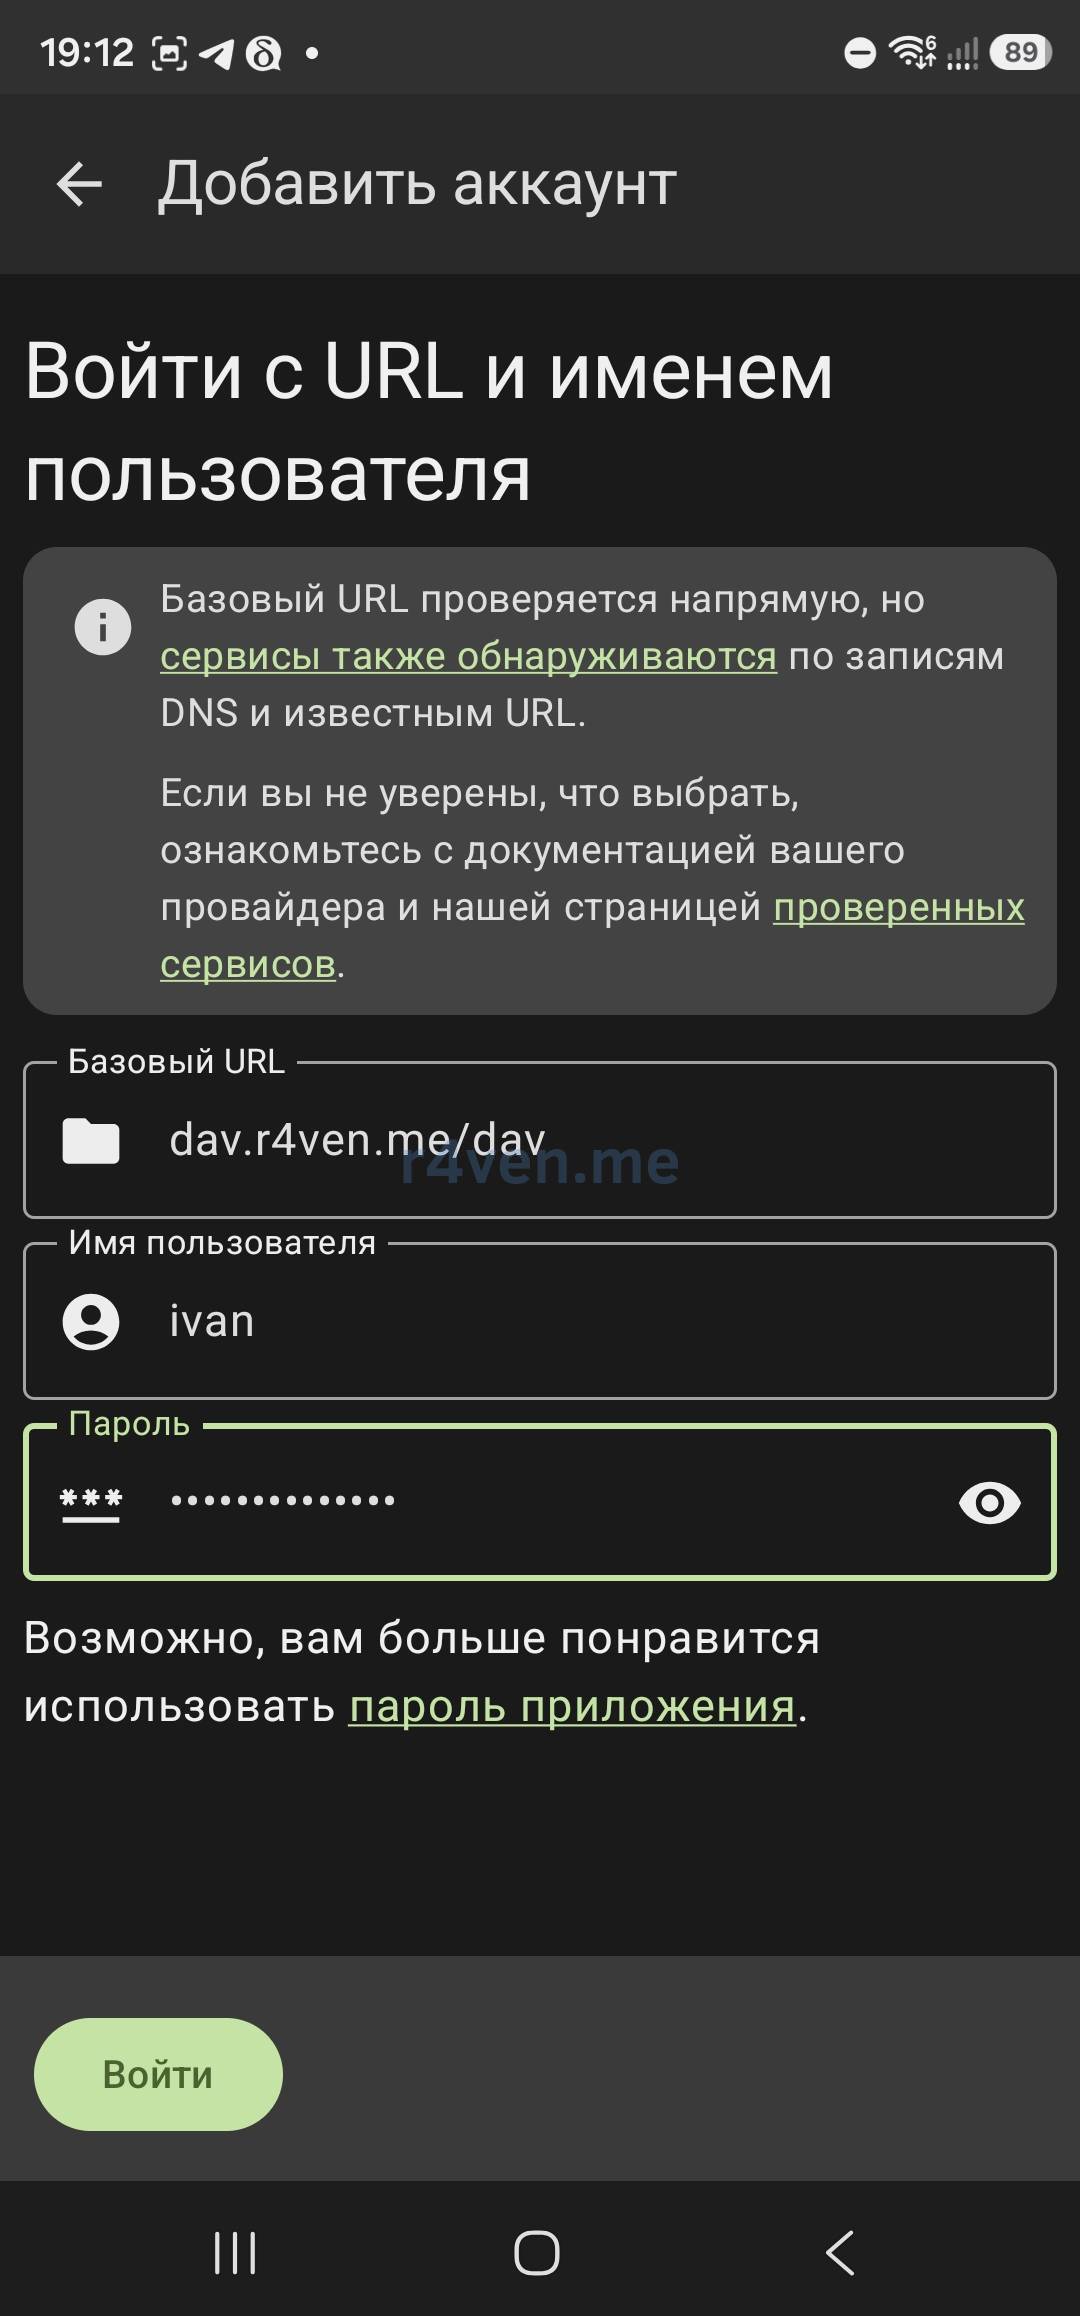
Davis supports well-known discovery, so you can also try the root URL:
https://dav.r4ven.me/However, the explicit /dav/ address is easier to troubleshoot, and the DAVx⁵ compatibility page for Davis recommends it.
After service discovery, set the account name. If you plan to use CalDAV invitations, it is better to use the user’s email address. Then open the account and select the calendars and address books to synchronize:
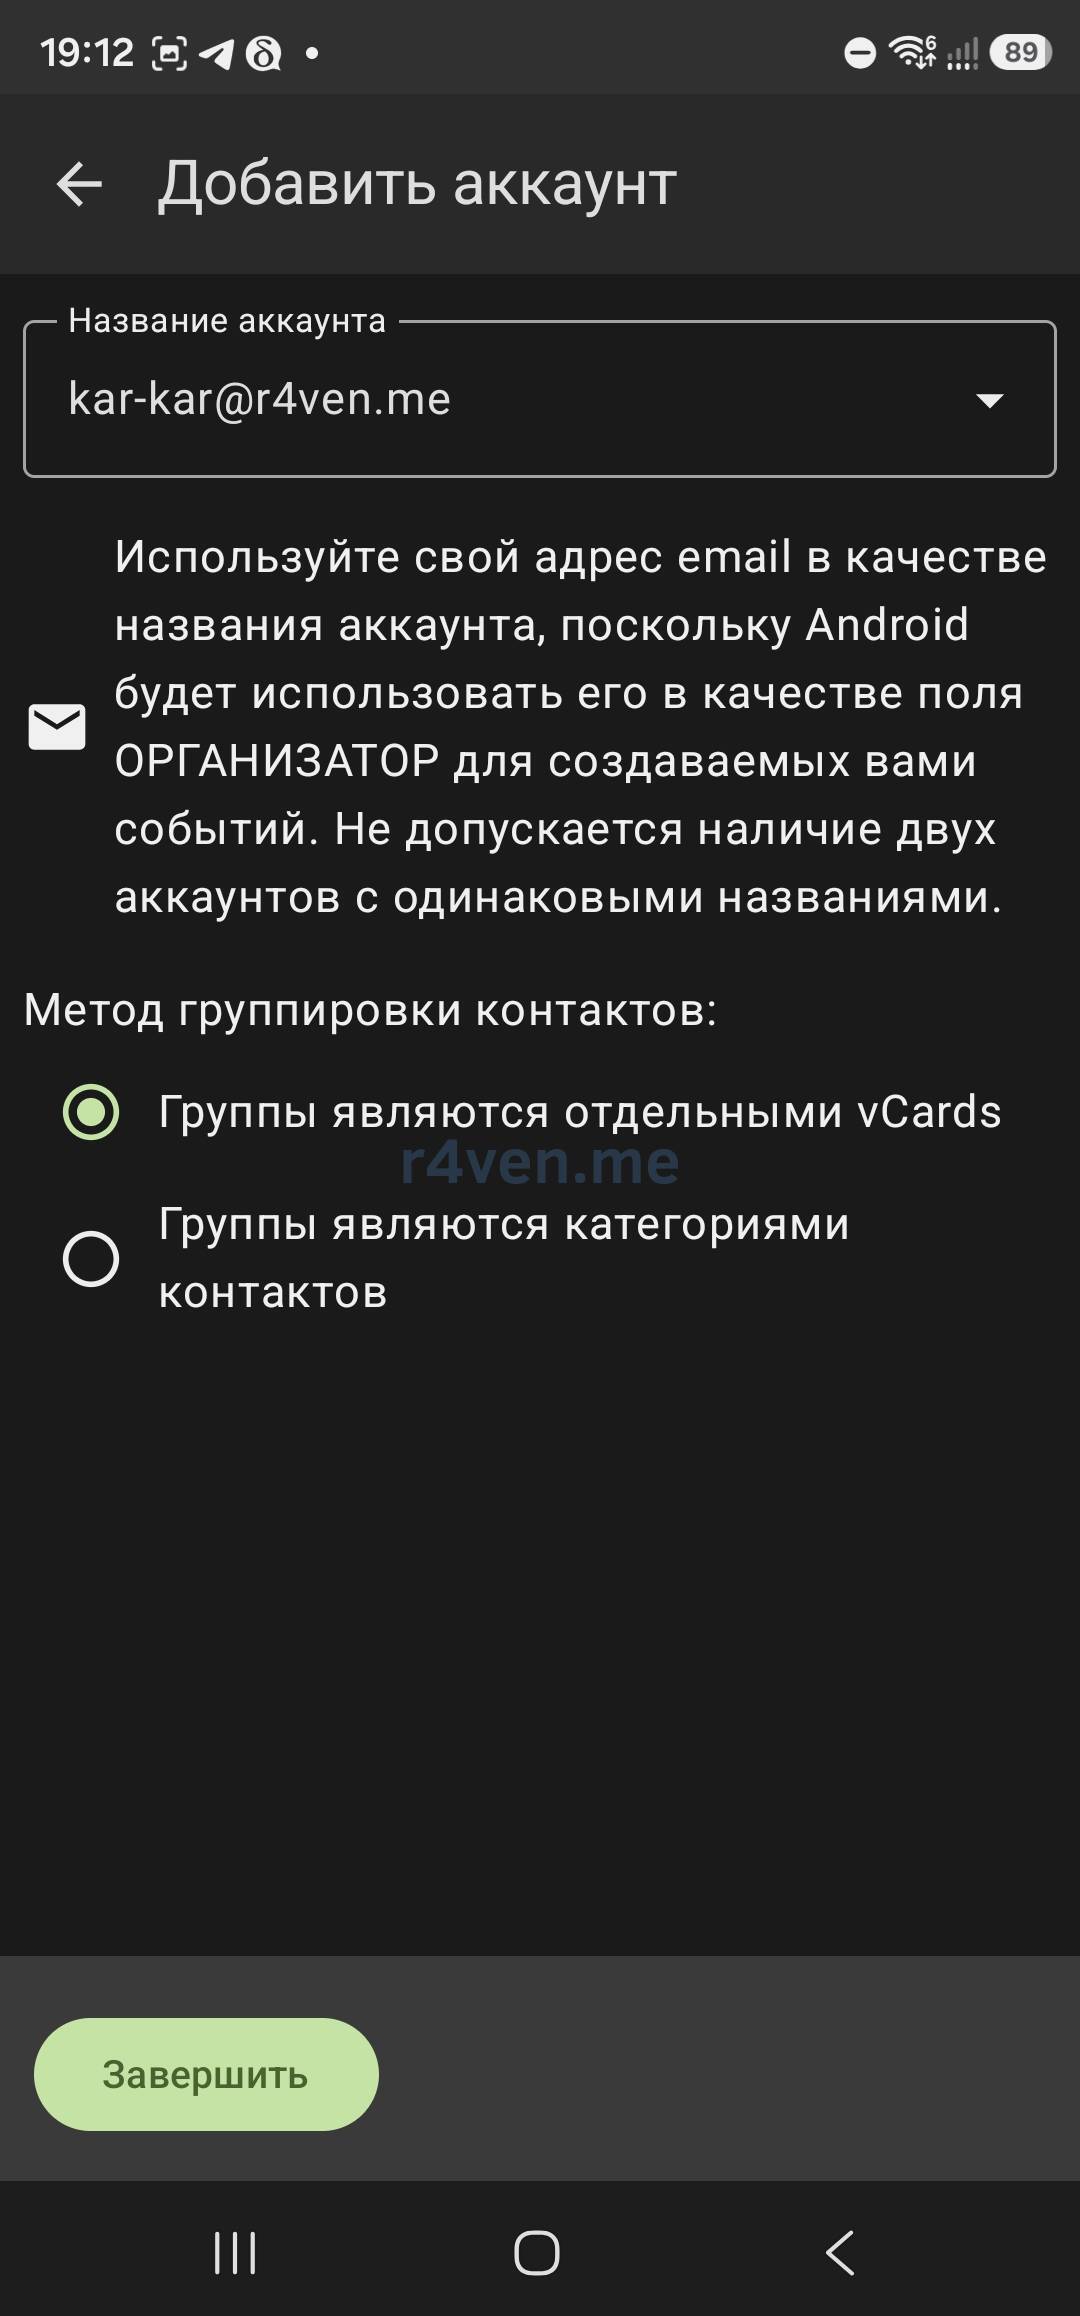
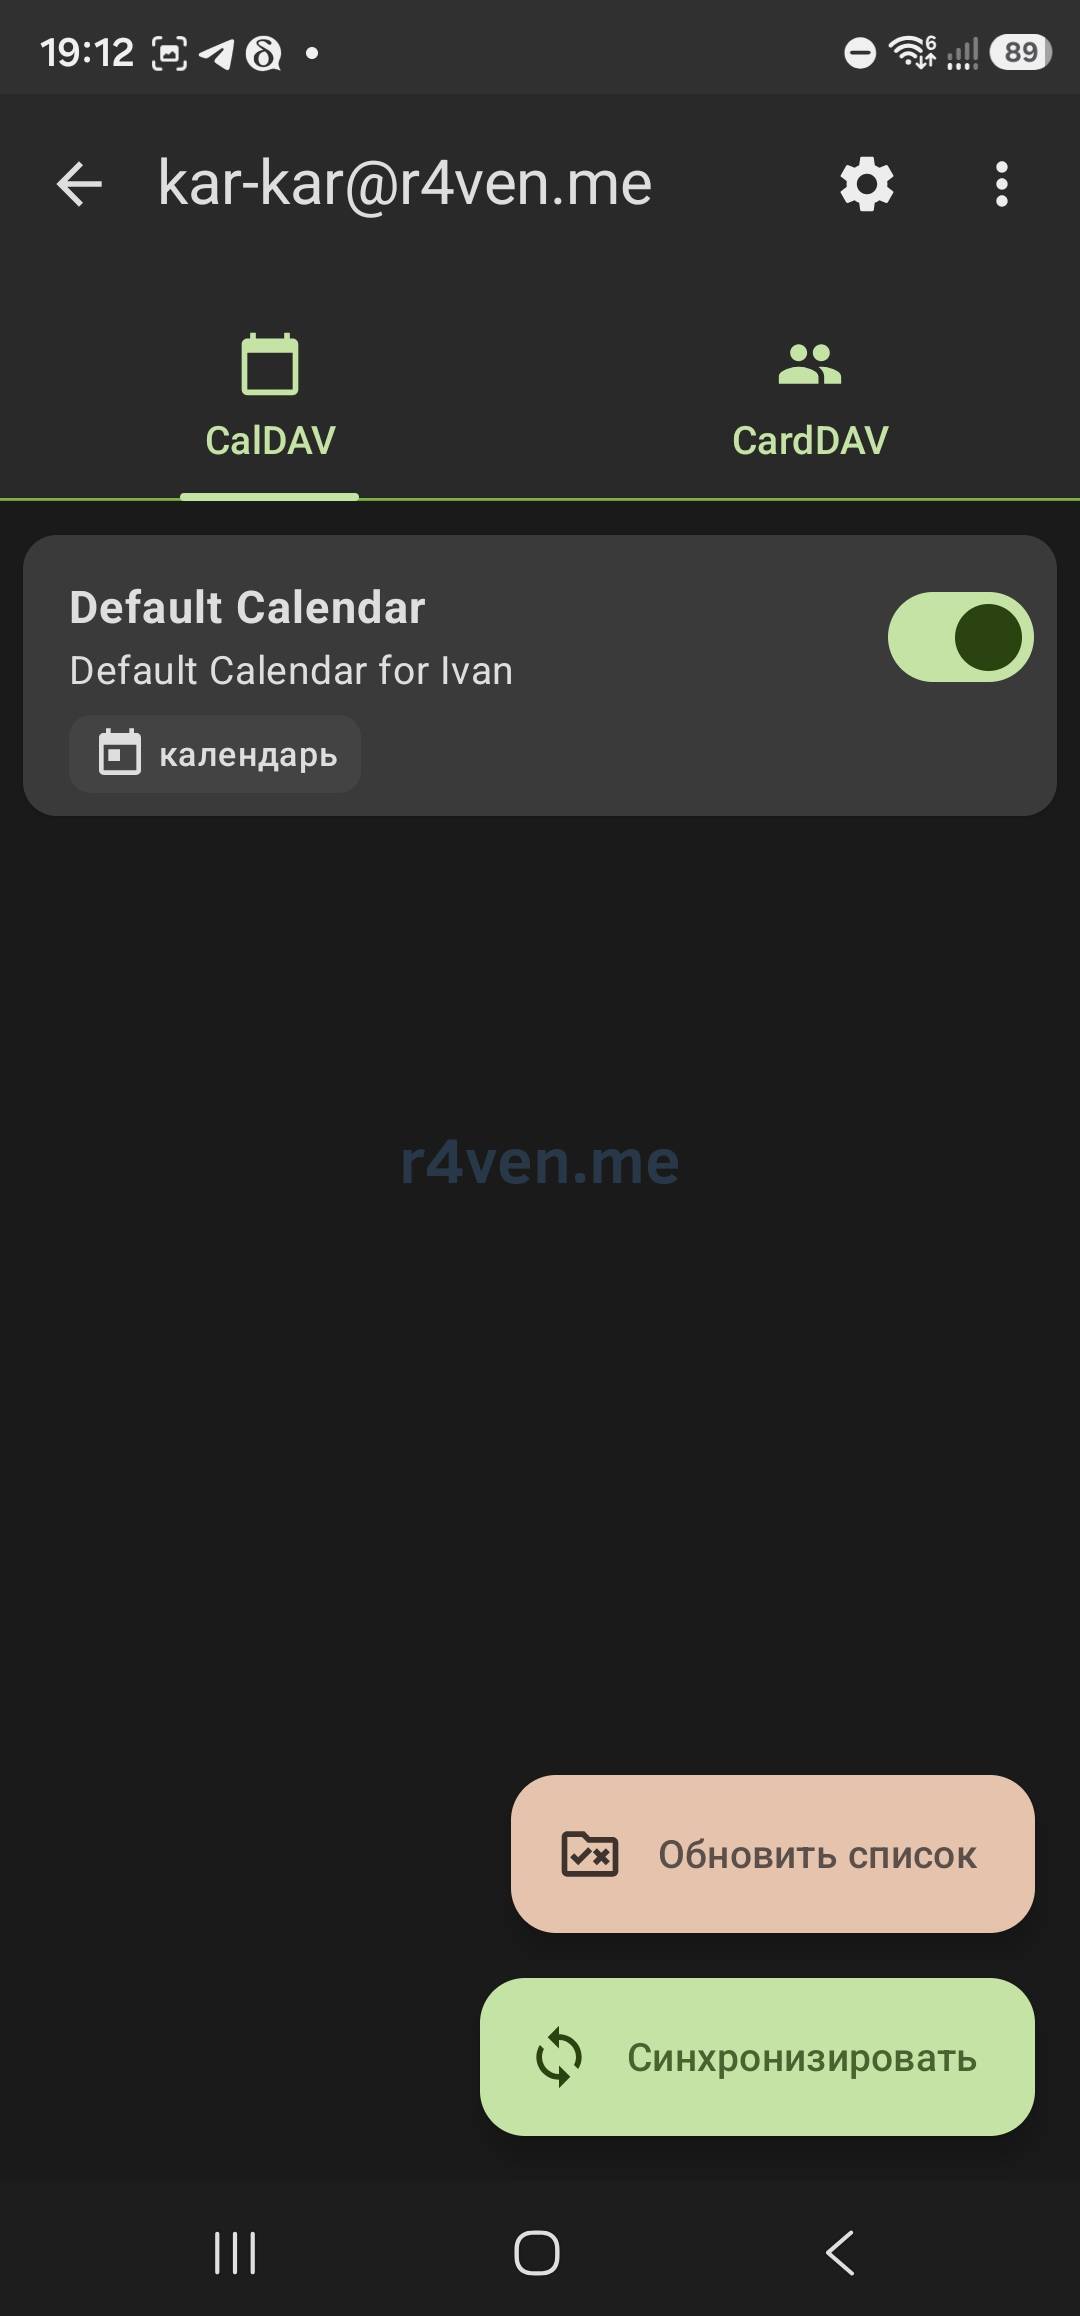
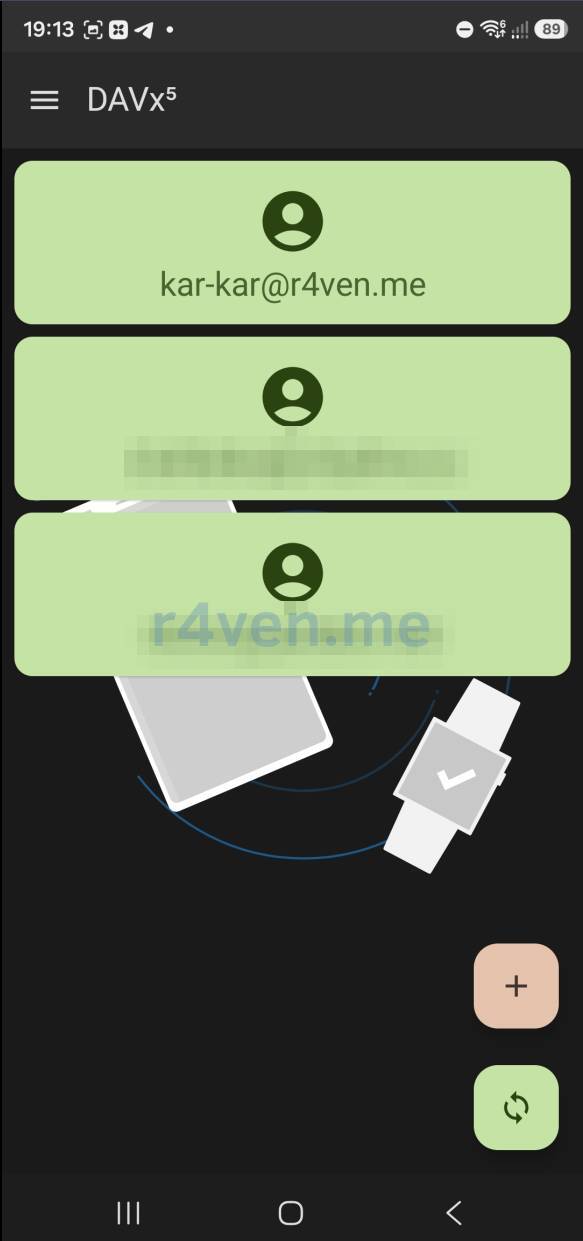
Run a manual synchronization. In Android’s system calendar, create an event specifically in the DAVx⁵ calendar. In the contacts application, create a contact in the DAVx⁵ address book. DAVx⁵ does not synchronize local phone collections or Google account collections.
📝 If you later create a calendar or address book on the server, open the corresponding account tab in DAVx⁵. Swipe down to refresh the collection list. New collections do not always appear automatically.
Check the phone’s standard calendar (Samsung and OneUI in my case):
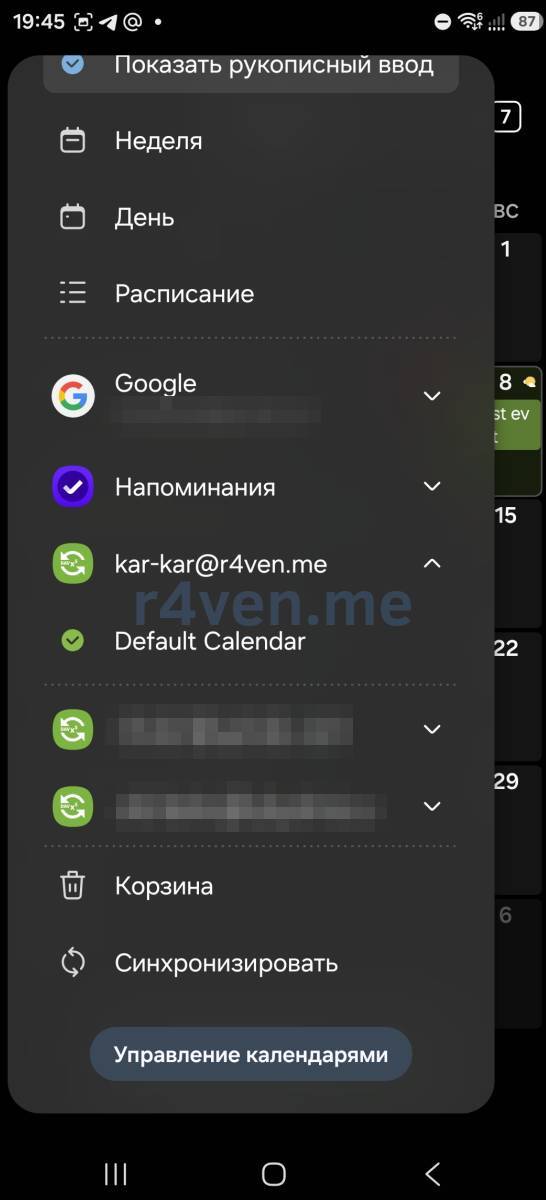
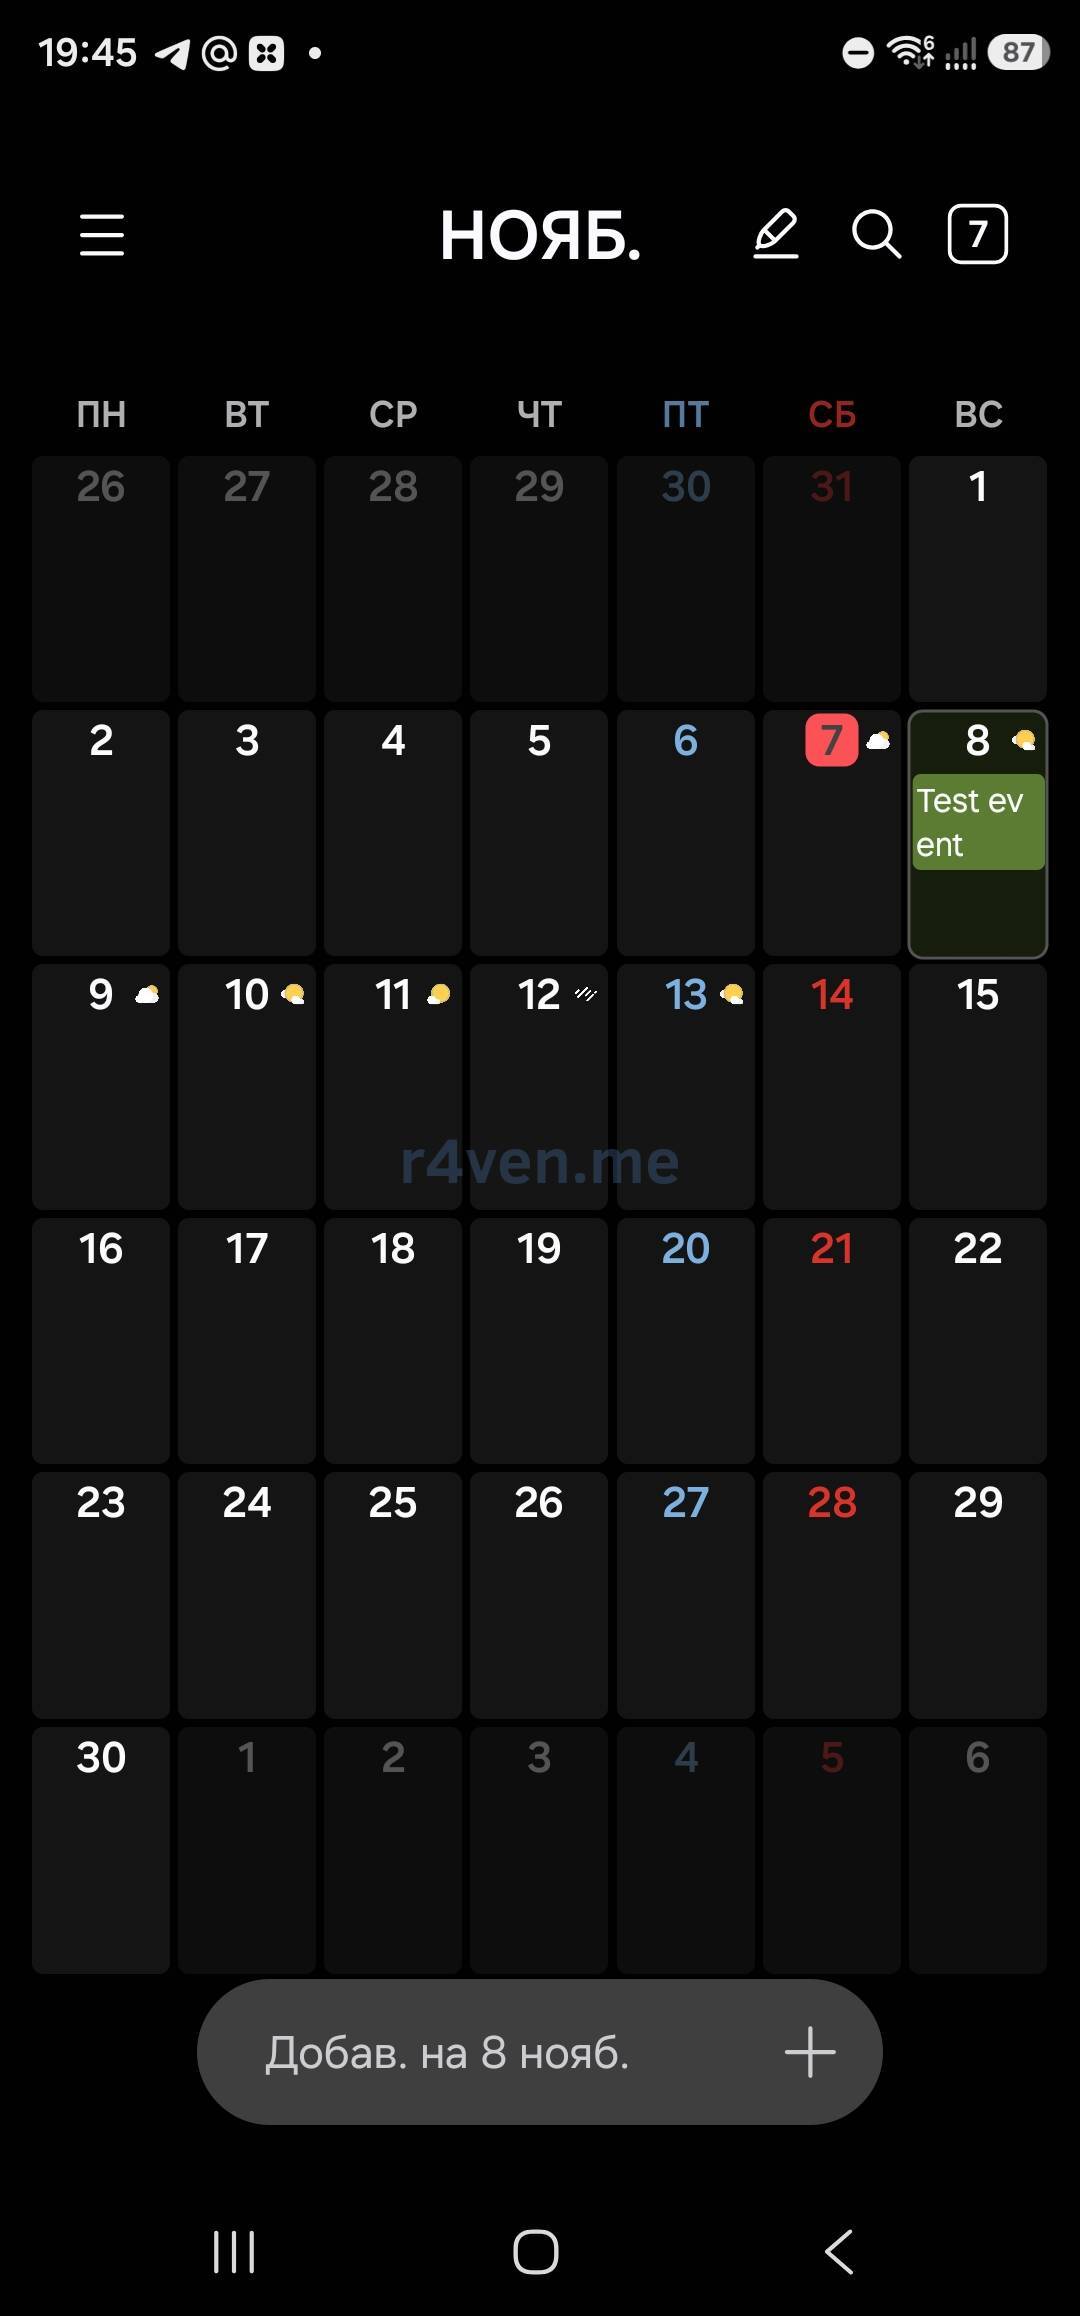
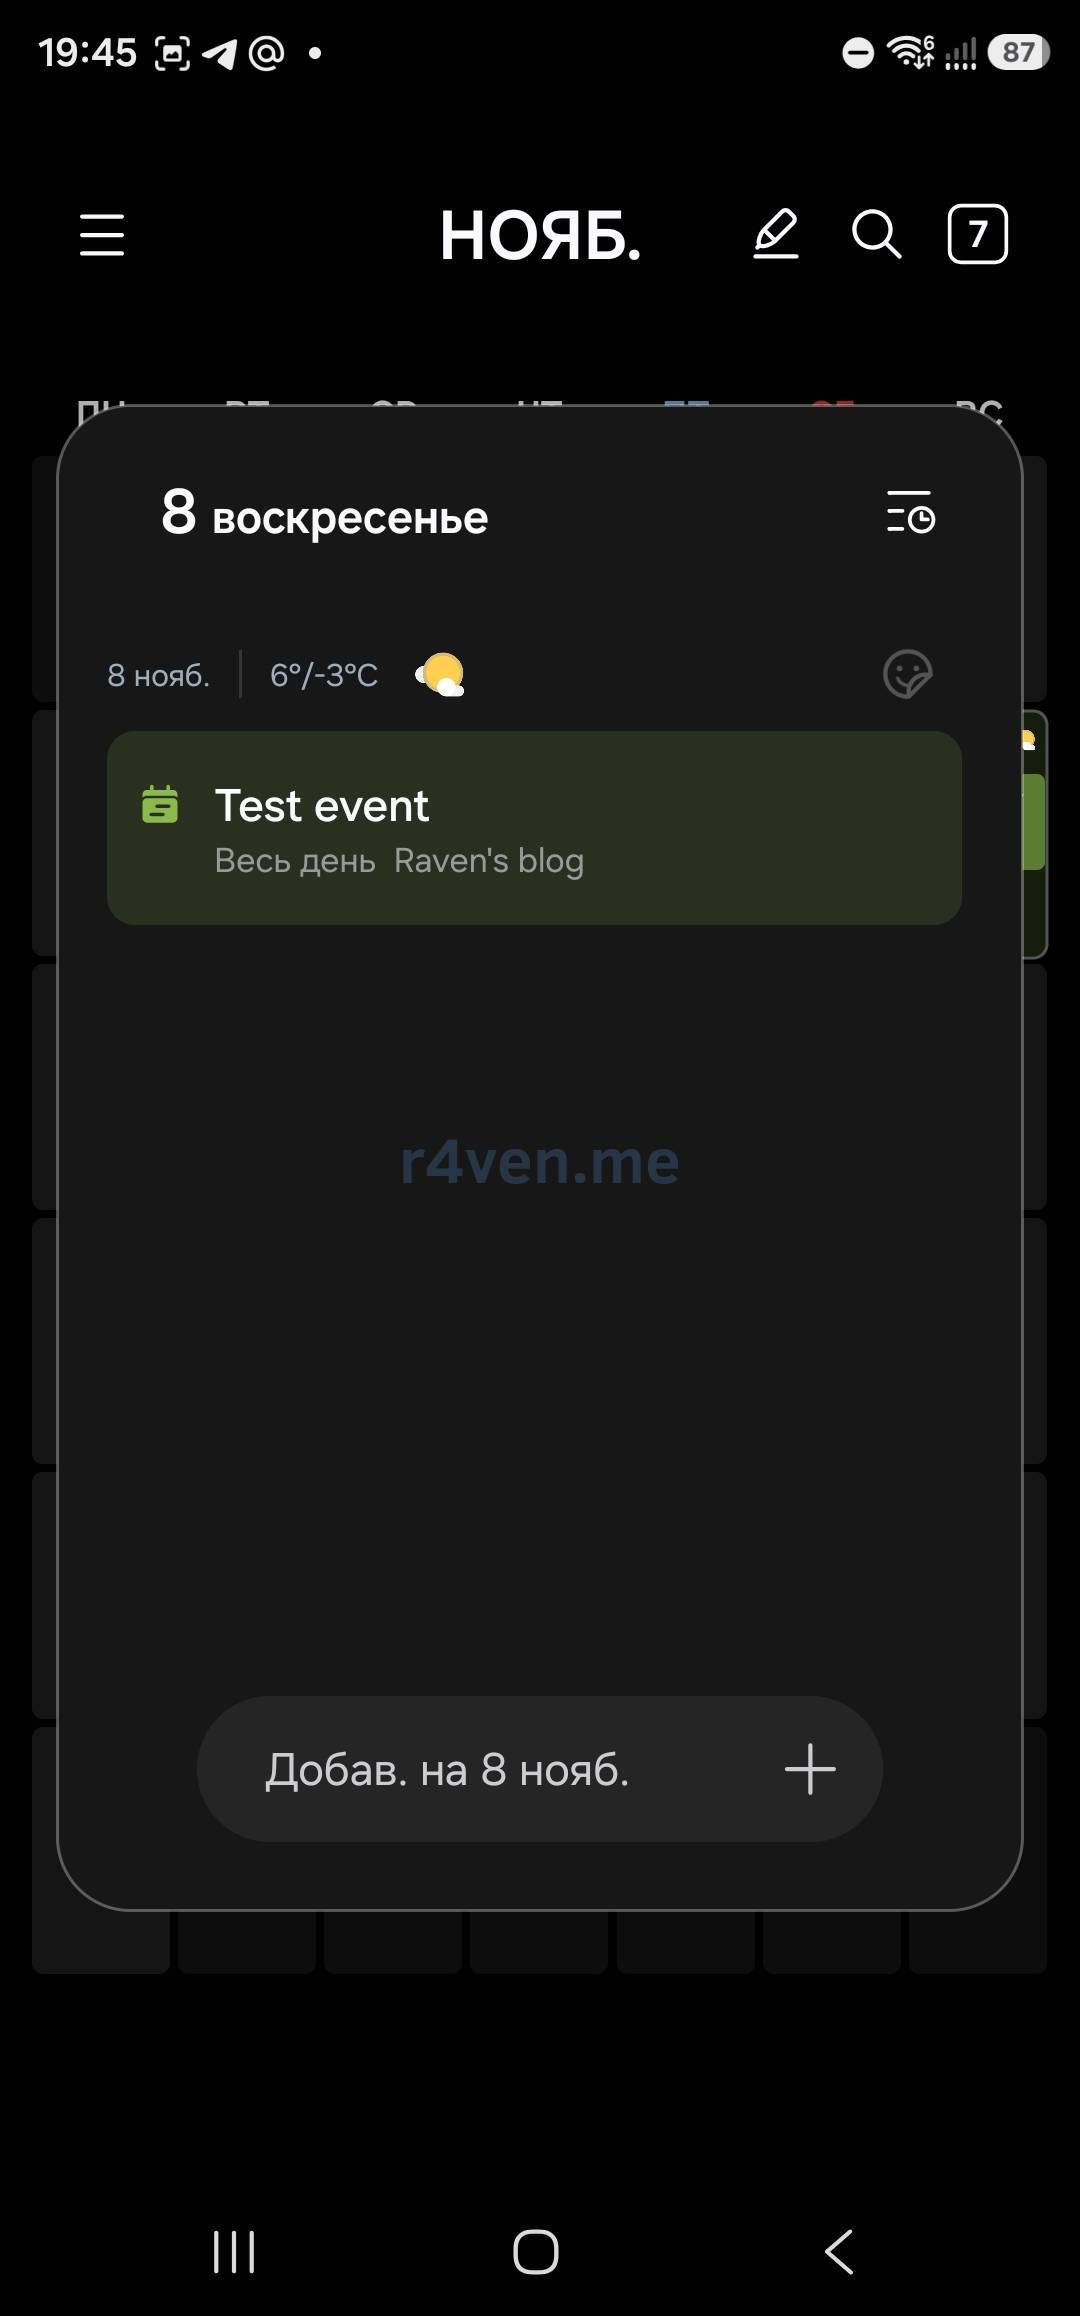
The event we added in the Linux Mint calendar is there 😌.
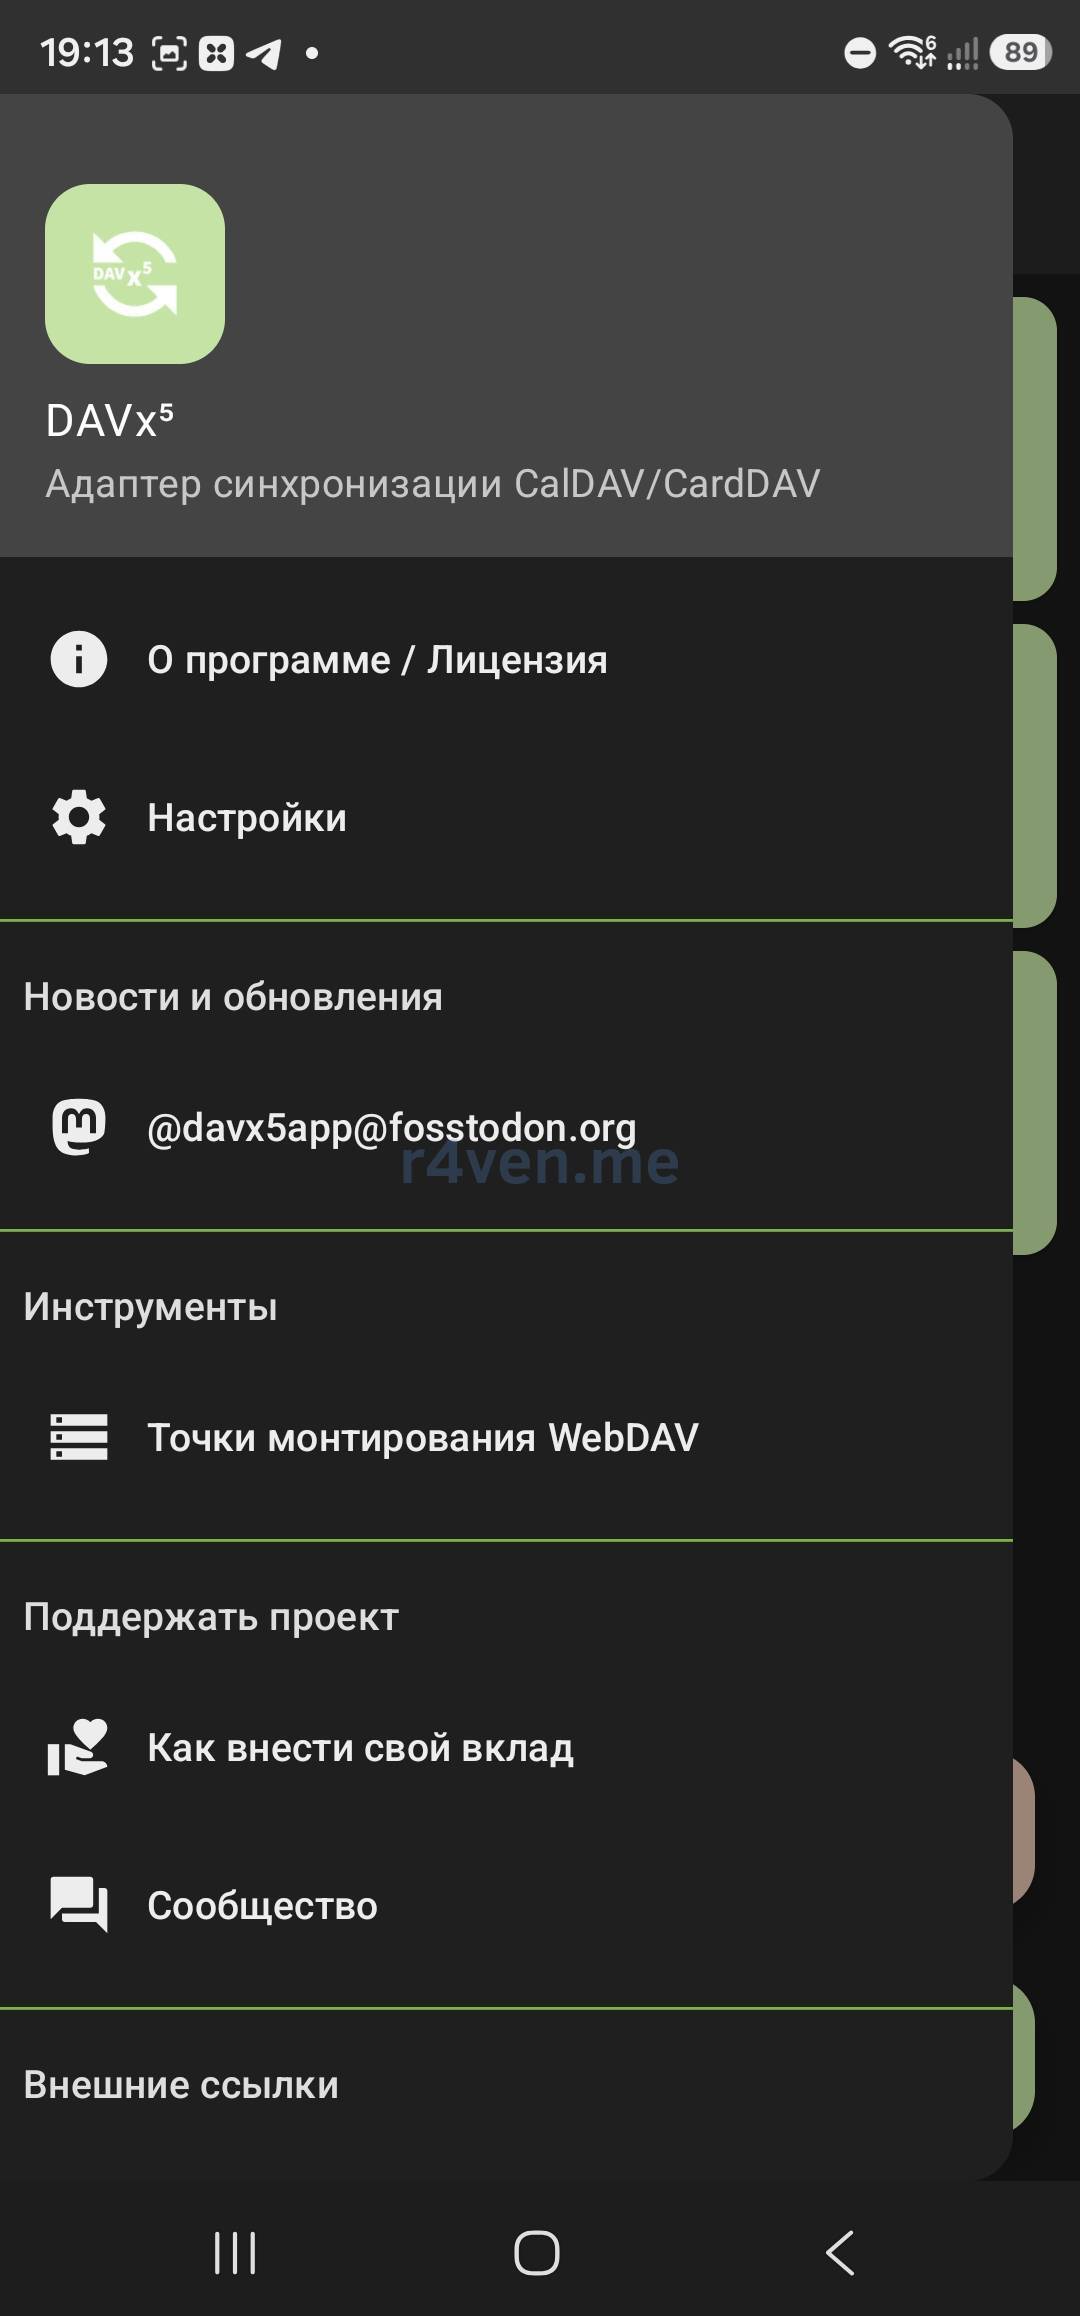
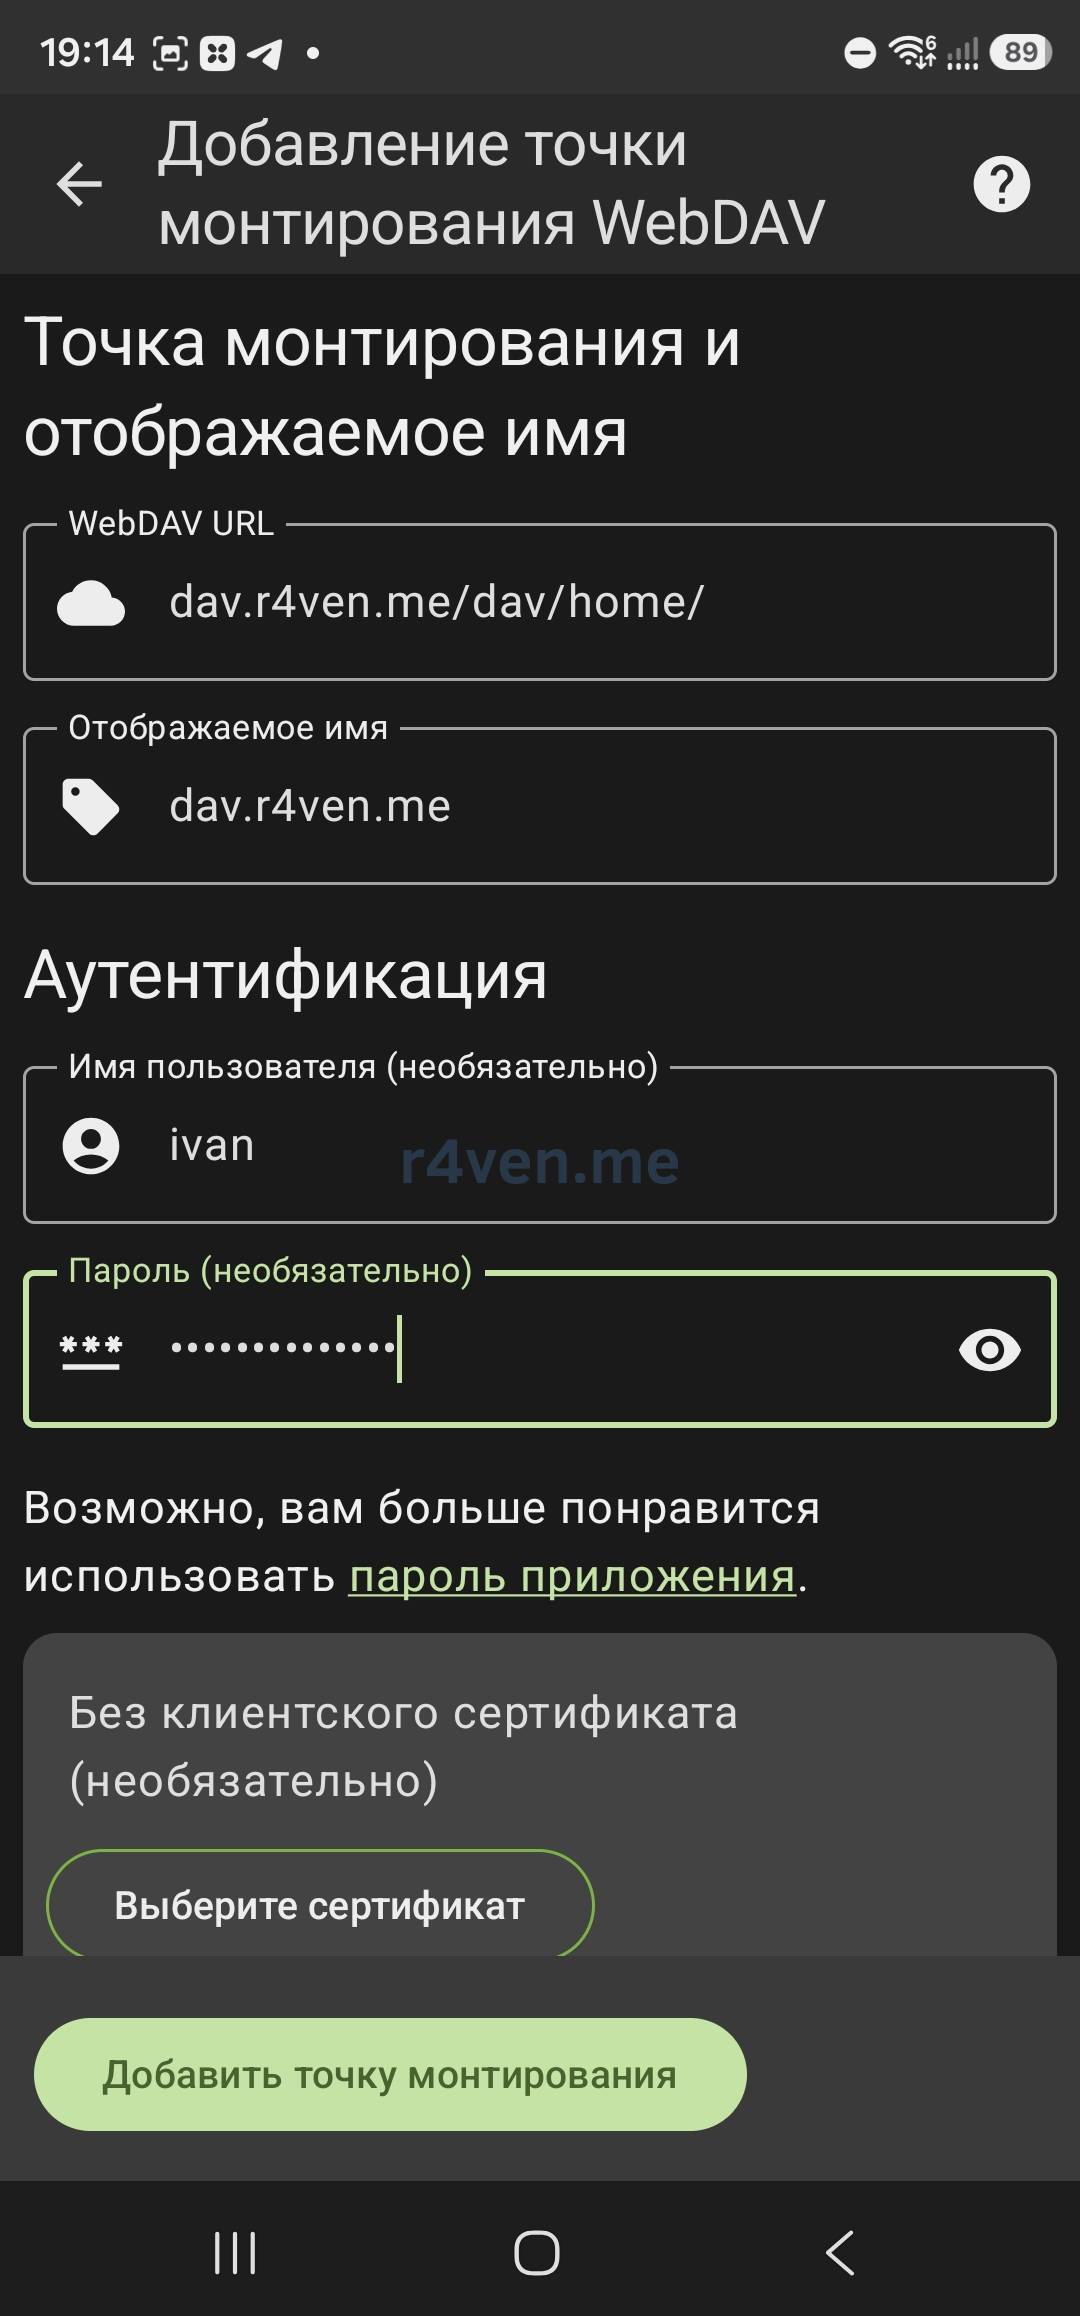
To access regular WebDAV files in DAVx⁵, configure a mount point in the application’s left sidebar:
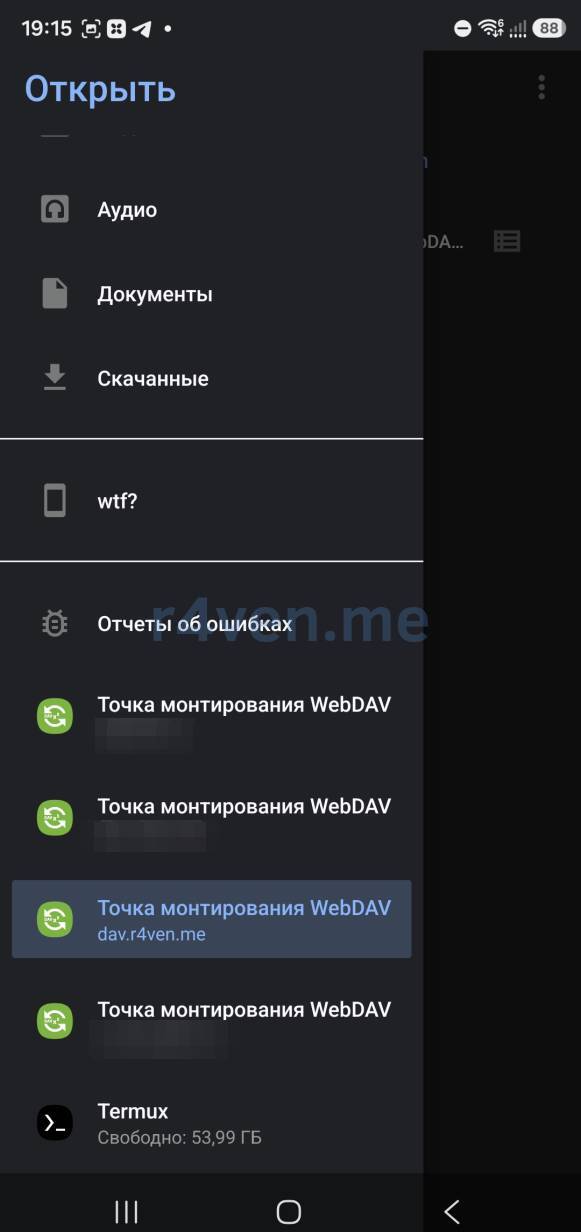
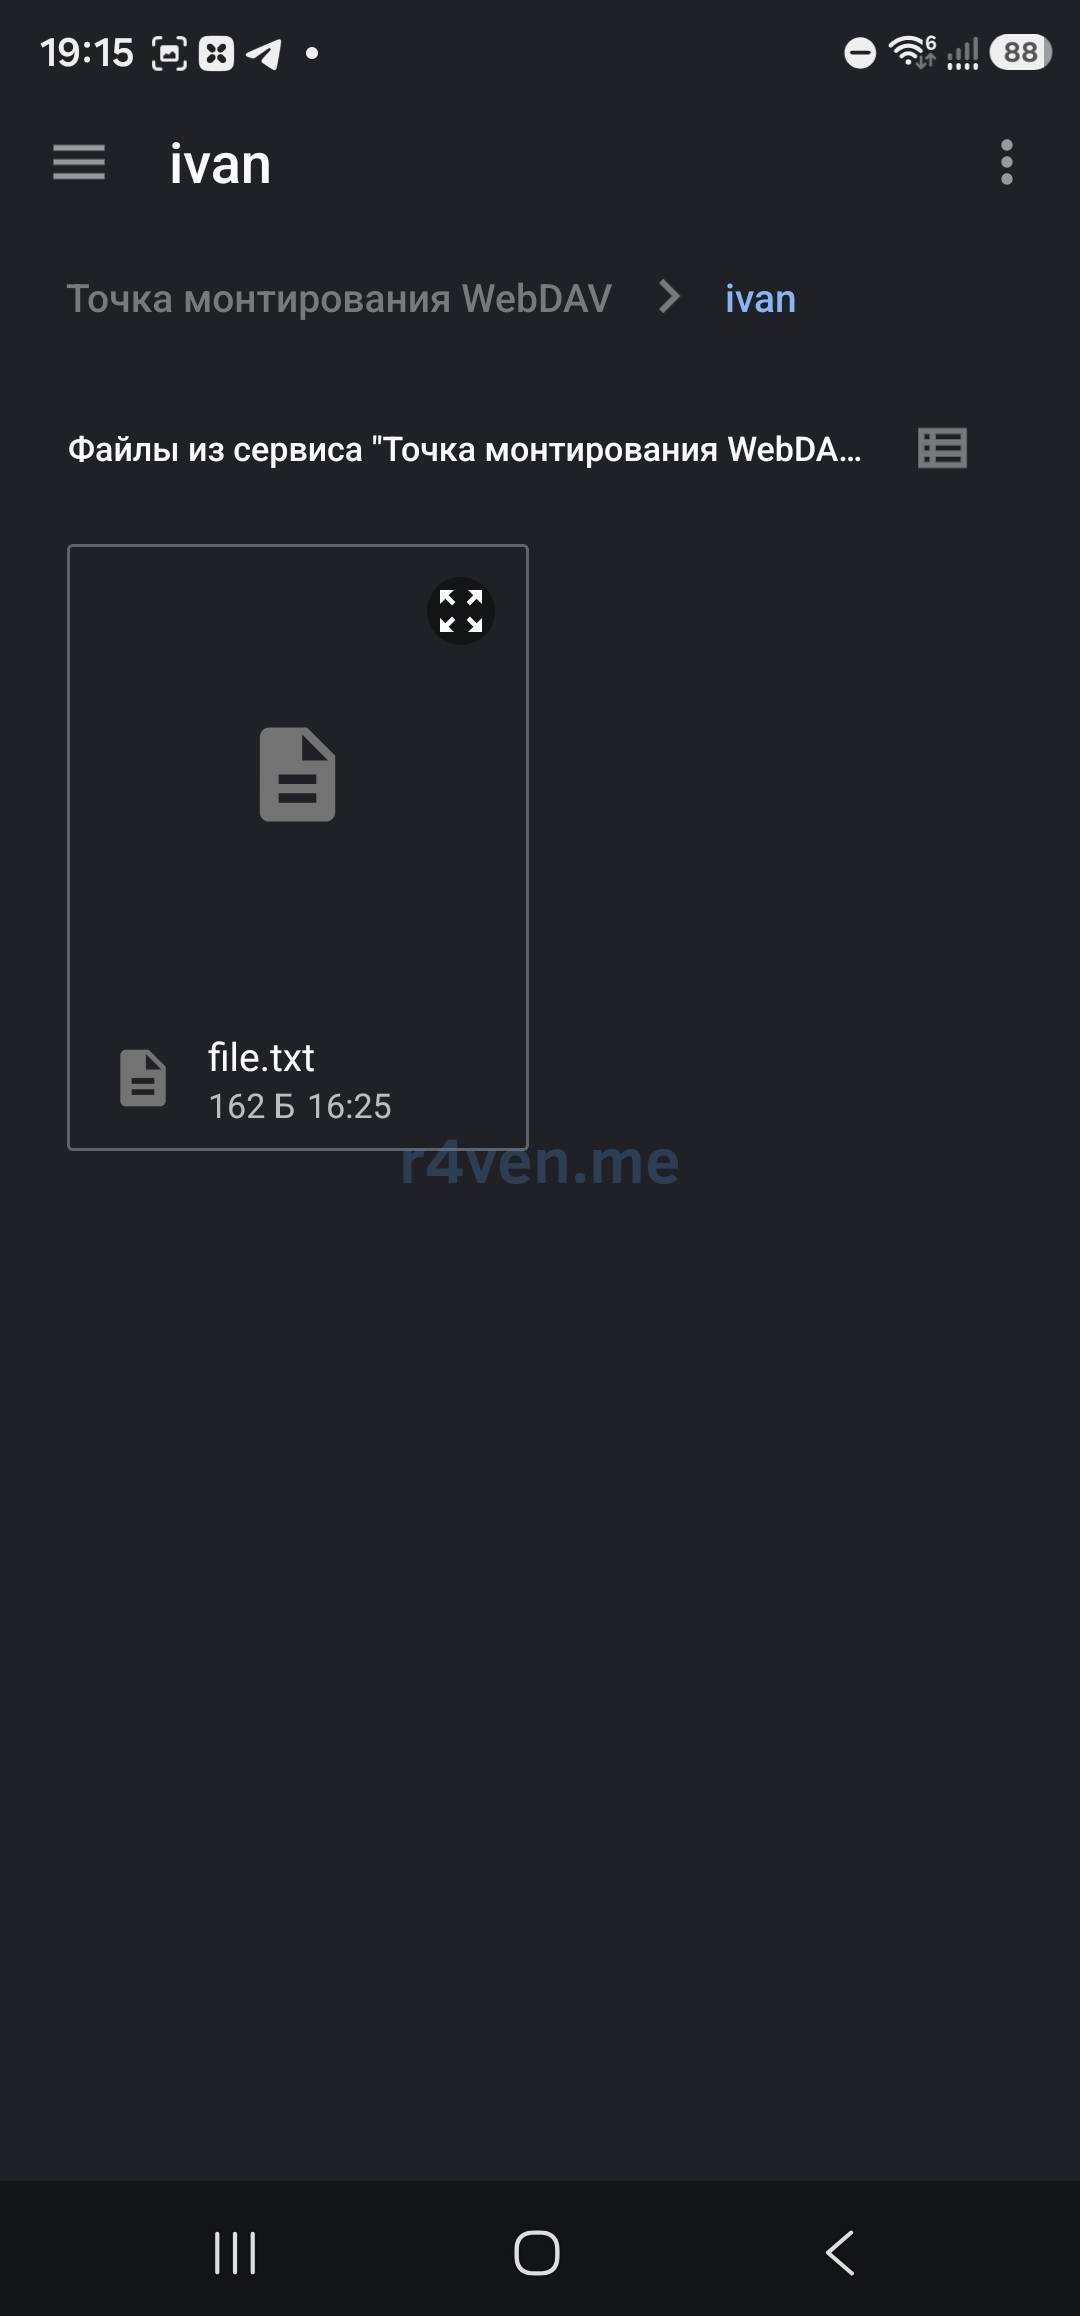
The mount point will appear in Android’s standard file viewer:
Backup and Updates
In our configuration, the davis_data and davis_webdav volumes in /var/lib/docker/volumes/ store everything important.
Before updating Davis, stop write access:
systemctl stop davisAnd back up both volumes (/var/lib/docker/volumes/davis_data and /var/lib/docker/volumes/davis_webdav), for example, using my Bash script:

After the backup, change the ghcr.io/tchapi/davis-standalone:5.6.3 image tag in compose.yaml to the required version. Download the image and start the service again:
docker compose -f /etc/compose/davis/compose.yaml pull davis

systemctl start davis

journalctl -fu davisThe startup command in compose.yaml will automatically apply database migrations.
Troubleshooting
DAVx⁵ Cannot Find Calendars and Contacts
Check the main endpoint and well-known redirects:
curl -I https://dav.r4ven.me/dav/

curl -I https://dav.r4ven.me/.well-known/caldav

curl -I https://dav.r4ven.me/.well-known/carddavVerify that the davis and davis-caddy containers share a network and Caddy forwards requests to davis:9000. In DAVx⁵, first use the explicit base URL https://dav.r4ven.me/dav/.
Error 401 When Connecting
The logs may show a message about a missing authorization header:
401 - No 'Authorization: Basic' header found. Login was neededSuch a request does not necessarily indicate a problem. Browsers and DAV clients may first connect without credentials, receive 401, and then retry with authentication. If login still fails, check the regular DAV user’s username and password.
You can view the application logs like this:
docker exec -it davis tail /var/www/davis/var/log/prod.logWebDAV Opens but Rejects Writes
Check that you are using the user’s personal path:
https://dav.r4ven.me/dav/home/ivan/Also check permissions inside the container:
docker exec -it davis ls -ld /webdav /webdav/homes /webdav/homes/ivanDuring normal startup, the command in compose.yaml assigns ownership of /webdav to www-data.
Incorrect Links or HTTP Instead of HTTPS
If Davis generates links with an incorrect scheme or domain, check this setting:
SYMFONY_TRUSTED_PROXIES=REMOTE_ADDRCaddy automatically forwards the standard X-Forwarded-Proto and X-Forwarded-Host headers. Also verify that Caddyfile specifies the davis:9000 upstream and both containers connect to the davis network.
Afterword
WebDav provides a general-purpose way to access remote storage over the standard HTTP protocol. It is not the fastest protocol, but it is widespread. Throughout my work with web technologies, I have always used WebDav for various tasks.
Davis was a pleasant discovery for cases where a full cloud service is unnecessary. It lets me keep standard calendars, contacts, and WebDAV on my own server. Two containers, SQLite, and automatic HTTPS make a great solution for a small home infrastructure 😌.
The main thing now is to remember backups. Especially given recent events. Synchronization is convenient, but that does not make it a backup.
Thanks for reading! And take care of your data.
References
- Davis GitHub repository
- Davis releases
- DAVx⁵ - connecting to Davis
- DAVx⁵ - accounts and collections
- Rclone mount - Mounting SFTP, WebDAV, and S3 Network Storage as a Local Directory in Linux
👨💻And…
Don’t forget about our Telegram channel 📱 and chat
Or maybe you want to become a co-author? Then click here🔗
💬 All the best ✌️
That should be it. If not, check the logs 🙂

Comments