
I’m opening a new series of articles: we’ll figure out PostgreSQL administration from scratch, from installation to replication, and in the first lesson we’ll set up the server in the official Docker image 🐧.
🖐️Hey!
Subscribe to our Telegram channel @r4ven_me📱, so you don’t miss new posts on the website 😉. If you have questions or just want to chat about the topic, feel free to join the Raven chat at @r4ven_me_chat🧐.
Preamble
Such materials are traditionally started with a definition and historical background. We’ll follow this tradition.
What is a DBMS and what is PostgreSQL
A DBMS (database management system) is software that stores structured data, provides concurrent access to it, maintains integrity, and responds to queries through the SQL language. Simply put, it’s a reliable intermediary between your data and the applications that need that data.
PostgreSQL is a free object-relational DBMS developed by an international open-source community (PostgreSQL license, close in spirit to MIT/BSD). Among open-source DBMSs, it stands out with arguably the richest out-of-the-box functionality - full transactions, flexible type system, JSON, full-text search, dozens of index types, and an extension mechanism through which you can add practically anything to the database, from geospatial data (PostGIS) to vector search (pgvector).
A bit of history
The story begins in 1986 at UC Berkeley: Michael Stonebraker, who had already created the Ingres DBMS by that time, launches the Postgres research project - “Post-Ingres”, an attempt to create a DBMS with support for user-defined data types and rules. In 1994, the project acquired its own SQL interpreter and got the name Postgres95, and in 1996, with the transition to an open development model, it was renamed PostgreSQL - to explicitly reflect SQL support. Since then, nearly three dozen major versions have been released, and the project itself follows a predictable annual release cycle.
Contribution of Russian developers
It’s worth noting separately that Russian developers have also left a notable mark on PostgreSQL development. Oleg Bartunov and Fedor (Theodore) Sigaev from Moscow State University are the authors of the GiST- and GIN-index infrastructure, full-text search (tsearch2), the hstore type and a number of other extensions without which it’s hard to imagine modern PostgreSQL. Alexander Korotkov is an active member of the PostgreSQL Core Team (the highest governing body of the project consisting of just a few people) and has made significant contributions to the query planner and index access methods. And Postgres Professional, which grew out of the same scientific group, is one of the largest corporate contributors to the project, maintaining its own Postgres Pro build and regularly sending patches upstream.
PostgreSQL today is the de facto standard choice for both your own infrastructure and cloud services, and sooner or later any Linux administrator has to manage it, even if there’s a separate DBA on staff. This series of articles aims to improve mutual understanding between different specialists so they can speak a “common language”.
This is also a way for me (and hopefully for you) to learn or refresh knowledge about how PostgreSQL works internally, how to configure it, maintain it, back it up and replicate it - while not forgetting about SQL itself, because without it, DBMS administration is rather pointless.
The format will be like this: each lesson is a separate article, from simple to complex. We’ll roughly go through installation, working with psql and graphical clients, architecture and MVCC, configuration, maintenance (VACUUM, WAL), data storage, system catalog, monitoring, access rights, backups and replication. Along the way, something will definitely be added or removed.
The first difference from classical courses: our working environment will not be a “live” PostgreSQL installed from packages directly on the host, but the official Docker image. First, it’s closer to how PostgreSQL is actually deployed in 2026. Second, for educational purposes it’s simply more convenient: if we break the cluster with an experiment, we just delete the volume and bring it up again in 10 seconds, without reinstalling the system.
📝 I covered Docker Engine installation and configuration in detail in a separate article - if Docker is not yet installed, start with that one.
The example data for practice (tables, queries, homework assignments 😀) will be built around a fictional infrastructure - something like server and data center accounting for a hypothetical hosting company. I called the database simply raven. I’ll show the table schema itself in one of the next lessons when we get to CREATE TABLE.
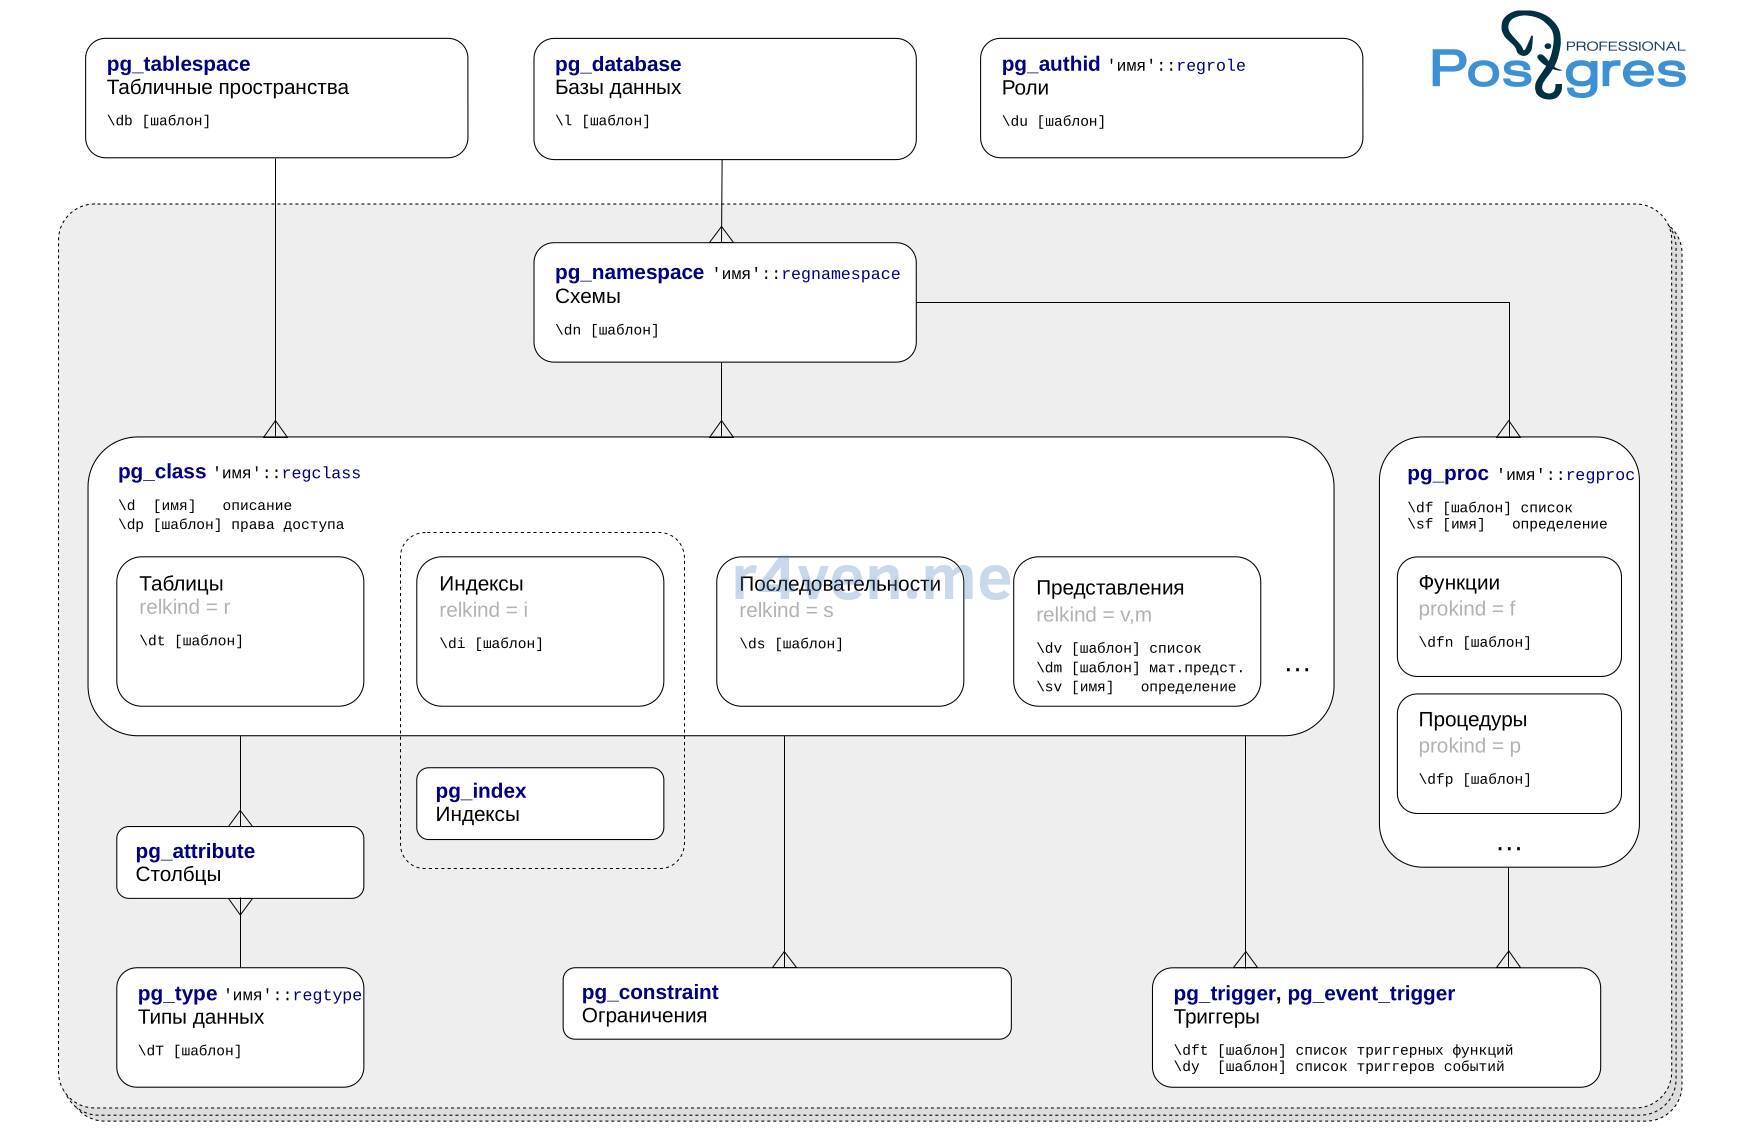
PostgreSQL DBMS Structure
Initial Data
Software used in the article:
| Software | Version |
|---|---|
| Debian (host) | 13 |
| Docker Engine | 28 |
| PostgreSQL (image) | 18 |
| psql (image) | 18 |
| DBeaver Community | 26 |
All commands are executed on a Linux host with Docker Engine already installed and the docker compose plugin. The host distribution doesn’t matter - the container behaves the same whether on Debian or any other Linux, and that’s the point of containerization.
Environment Preparation
With the help of sudo, check that Docker and the Compose plugin are in place:
sudo docker version

sudo docker compose versionAnd add our user to the docker group to make it easier to work with it without sudo:
sudo gpasswd -a $USER docker

newgrp docker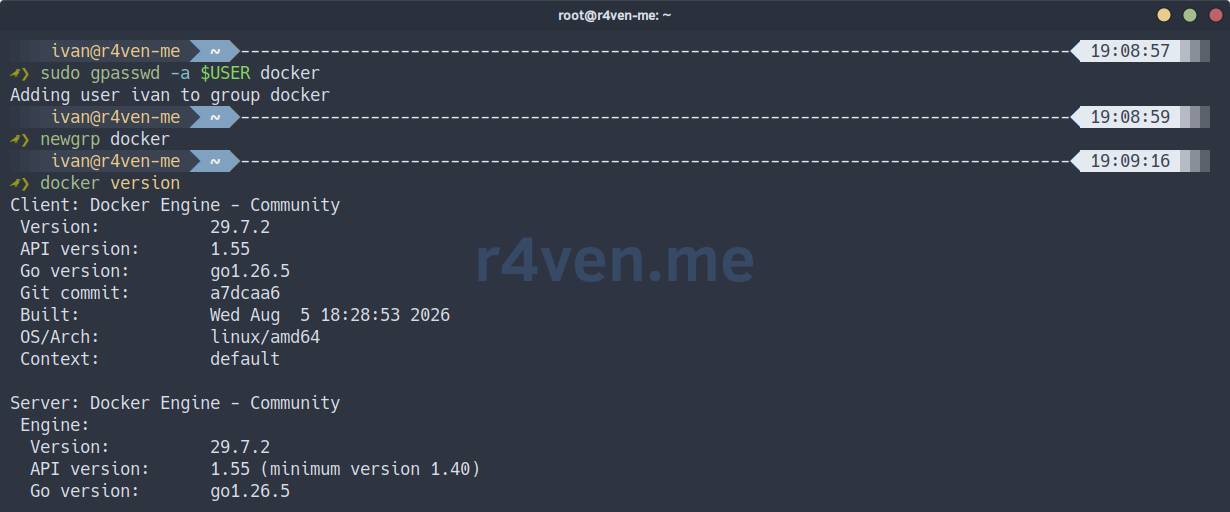
Create the project directory:
install -m 700 -d ~/Postgres

cd ~/PostgresChoosing a PostgreSQL Image
On Docker Hub, the official postgres image is built in two main variants: regular, based on Debian, and -alpine, based on Alpine Linux. The Alpine variant is noticeably lighter, but uses musl instead of glibc, which periodically causes locale and collation issues - and we still have a lesson ahead about tablespaces and low-level storage, where these nuances matter. So for the course I’m using the regular image, without -alpine.
The version tag is 18, the current stable branch of PostgreSQL at the time of writing. If by the time you read this, 19 has been released - within the scope of our educational environment you can safely use it, there won’t be any significant differences for our lessons.
Running PostgreSQL in Docker Compose
Create the compose file, for example, using the vim editor:
vim ~/Postgres/compose.yamlFill it with:
---
# https://hub.docker.com/_/postgres

networks:
  postgres_net:
    name: postgres_net
    driver: bridge
    driver_opts:
      com.docker.network.bridge.name: br-postgres

volumes:
  postgres_data:
    name: postgres_data

services:
  postgres:
    image: postgres:18
    container_name: postgres
    restart: unless-stopped
    stop_grace_period: 1m
    cpus: 2
    mem_limit: 2G
    hostname: postgres
    env_file: ./.env
    networks:
      - postgres_net
    ports:
      - "127.0.0.1:5432:5432"
    volumes:
      - postgres_data:/var/lib/postgresql/data
      - /home/${USER}/.psqlrc:/root/.psqlrc
      - /etc/timezone:/etc/timezone:ro
      - /etc/localtime:/etc/localtime:ro
    healthcheck:
      test: ["CMD-SHELL", "pg_isready -U $$POSTGRES_USER -d $$POSTGRES_DB"]
      interval: 10s
      timeout: 5s
      retries: 5
start_period: 10s📝 Pay attention to the doubled $$ in healthcheck - the POSTGRES_USER and POSTGRES_DB variables are substituted inside the container via env_file, not by Compose itself when reading the file, so the dollar sign needs to be escaped with another dollar sign (that’s the syntax).
Port 5432 is published only on 127.0.0.1 - this is sufficient for an educational environment, and it’s better not to expose the database externally without critical need.
Create the env file:
vim ~/Postgres/.envFill it with:
# https://hub.docker.com/_/postgres

TZ=Europe/Moscow
POSTGRES_USER=ivan
POSTGRES_PASSWORD=r4ven_me
POSTGRES_DB=raven
PGDATA=/var/lib/postgresql/data/pgdataWhere:
TZ- container timezone;POSTGRES_USER- cluster superuser, created on first initialization;POSTGRES_PASSWORD- its password;POSTGRES_DB- database that will be created by default (we’ll work in it throughout the course);PGDATA- subdirectory inside the volume for cluster files. Without it,initdbon first run sometimes complains about the systemlost+foundthat Docker might create at the root of the volume.
📝 In production environments, the password must always be set to something complex, for example, generated via openssl rand -hex 16. But this is an educational environment that you’re setting up locally on your machine, so I’m keeping it simple and predictable with the password r4ven_me - it’s more convenient to check examples in the articles without looking up your .env each time.
☝️ The POSTGRES_* environment variables are only applied on the first cluster initialization, i.e., when the volume with data is still empty. If you change the password in .env after the first startup, PostgreSQL won’t know about it - you’ll have to change the password from inside via ALTER ROLE or recreate the volume.
Start the stack:
docker compose up -d

docker compose logs -f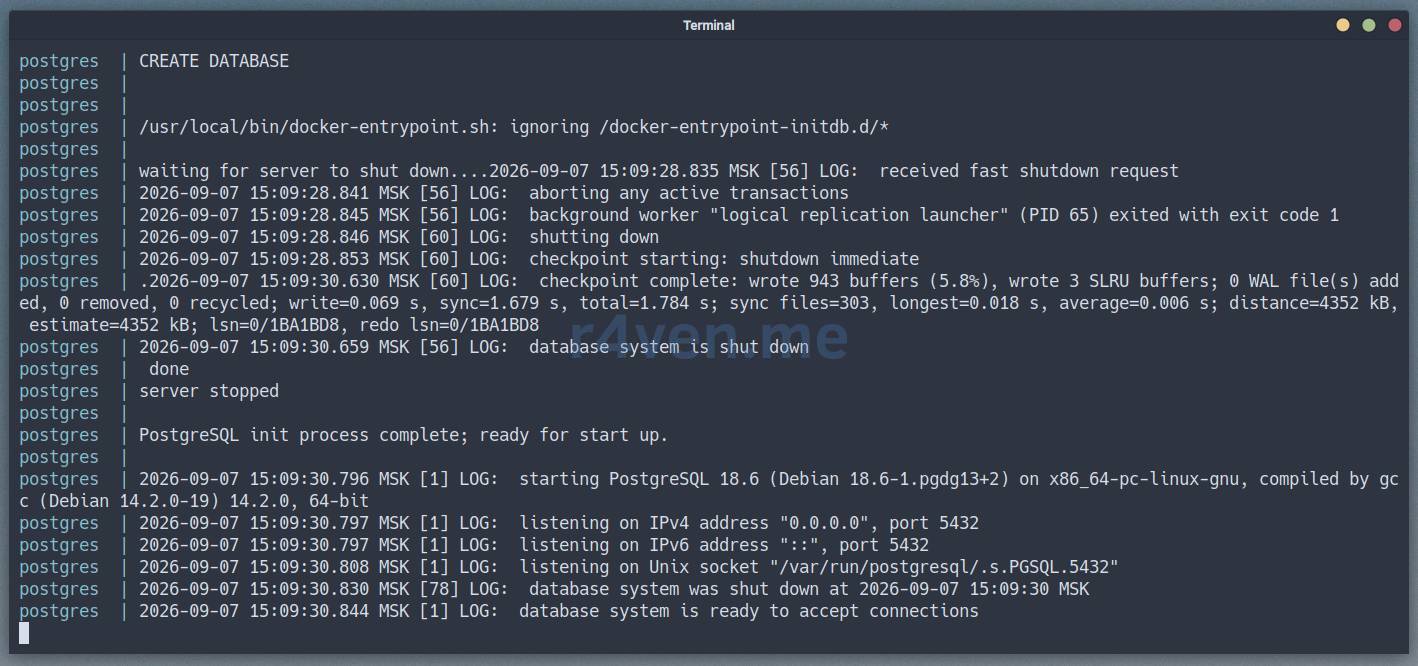
💡 To exit log viewing mode press Ctrl+c.
Check:
docker compose psIf everything is normal, you should see output like this:

Now let’s set up autostart and management of our DBMS using Systemd:
mkdir -vp ~/.config/systemd/user

cat > ~/.config/systemd/user/postgres.service << EOF
[Unit]
Description=PostgreSQL course lab service
After=graphical.target
Wants=graphical.target

[Service]
Restart=always
RestartSec=5
WorkingDirectory=$HOME/Postgres
ExecStart=/usr/bin/docker compose up --remove-orphans
ExecStop=/usr/bin/docker compose down

[Install]
WantedBy=default.target
EOFsystemctl --user daemon-reload
systemctl --user enable --now postgres
systemctl --user status postgres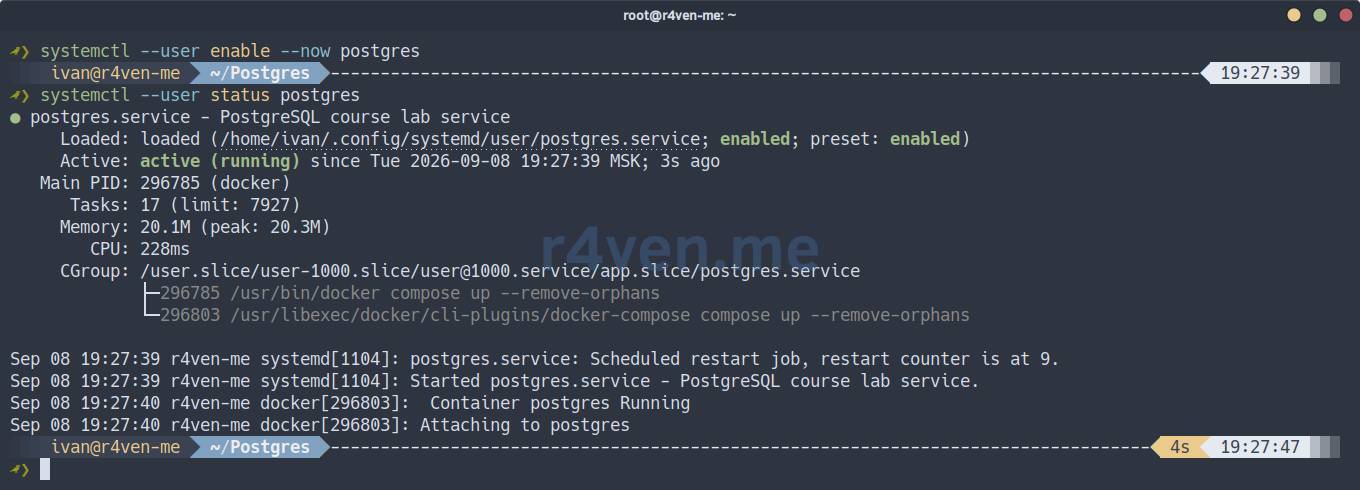
Now you can manage the postgres service with the systemctl utility, and the service log with journalctl:
systemctl --user stop postgres
systemctl --user start postgres
systemctl --user restart postgres
systemctl --user status postgres
journalctl --user -fu postgresTesting the Connection
You can look at the DBMS in two ways - through the console psql and through a graphical client. In the next lesson we’ll cover both tools in detail, but for now let’s just make sure the server is alive and responding.
Via psql
psql is already inside the image, no need to install anything separately - we execute it directly in the container:
docker compose exec postgres psql -U ivan -d raven -c "SELECT version();"
docker compose exec postgres psql -U ivan -d raven -c "SELECT current_date;"If everything is normal, you should see output like this:
                                                      version
--------------------------------------------------------------------------------------------------------------------
 PostgreSQL 18.6 (Debian 18.6-1.pgdg13+2) on x86_64-pc-linux-gnu, compiled by gcc (Debian 14.2.0-19) 14.2.0, 64-bit
(1 row)

 current_date
--------------
 2026-09-08
(1 row)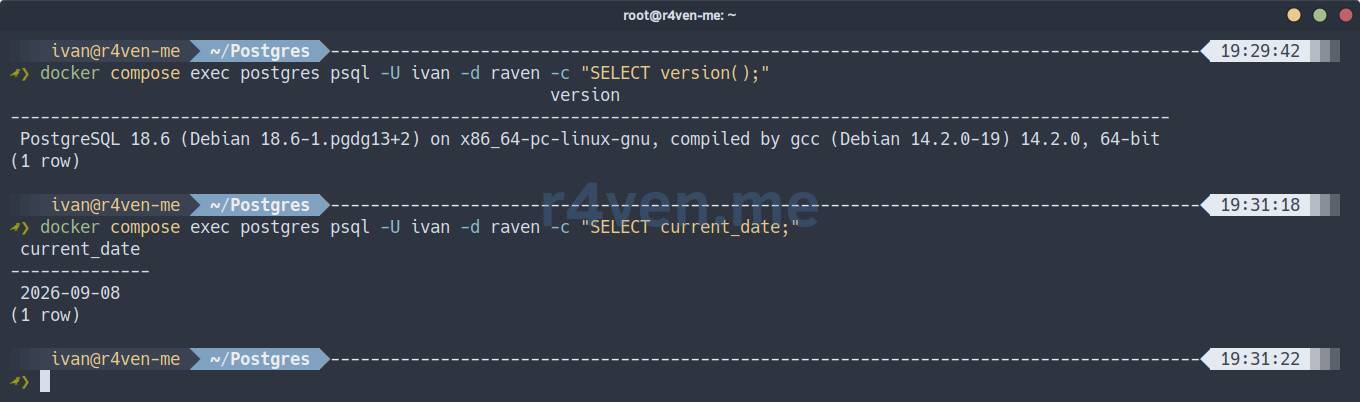
Via DBeaver
As a graphical client in this course I’ll use DBeaver Community - it’s open-source, free, cross-platform, and can do practically everything needed for PostgreSQL administration. Download the required version, install and run it.
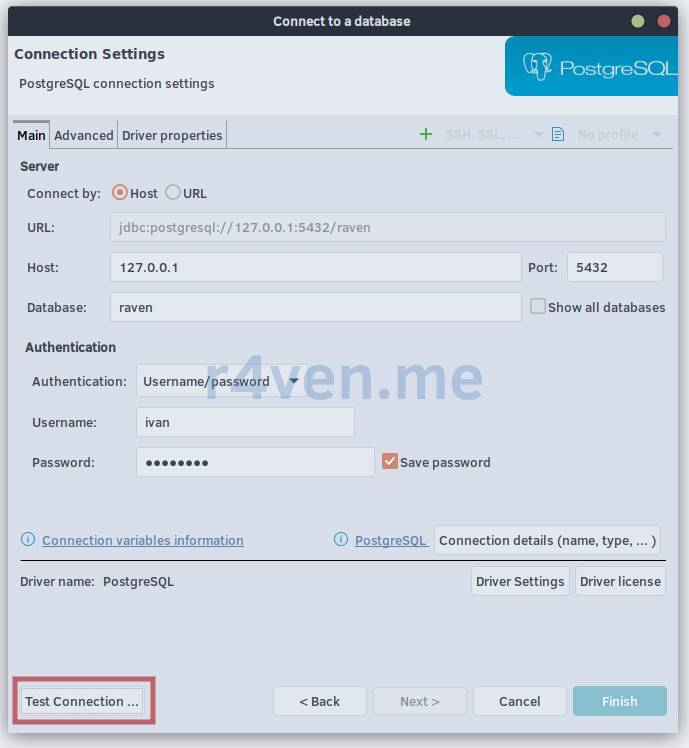
Next, create a new database connection (New Database Connection → PostgreSQL), specifying the following parameters:
Host-127.0.0.1(or the address of your server if Docker is running not locally);Port-5432;Database-raven;Username-ivan;Password-r4ven_me(or what you specified inPOSTGRES_PASSWORD, you can check it like this:grep POSTGRES_PASSWORD ./.env).
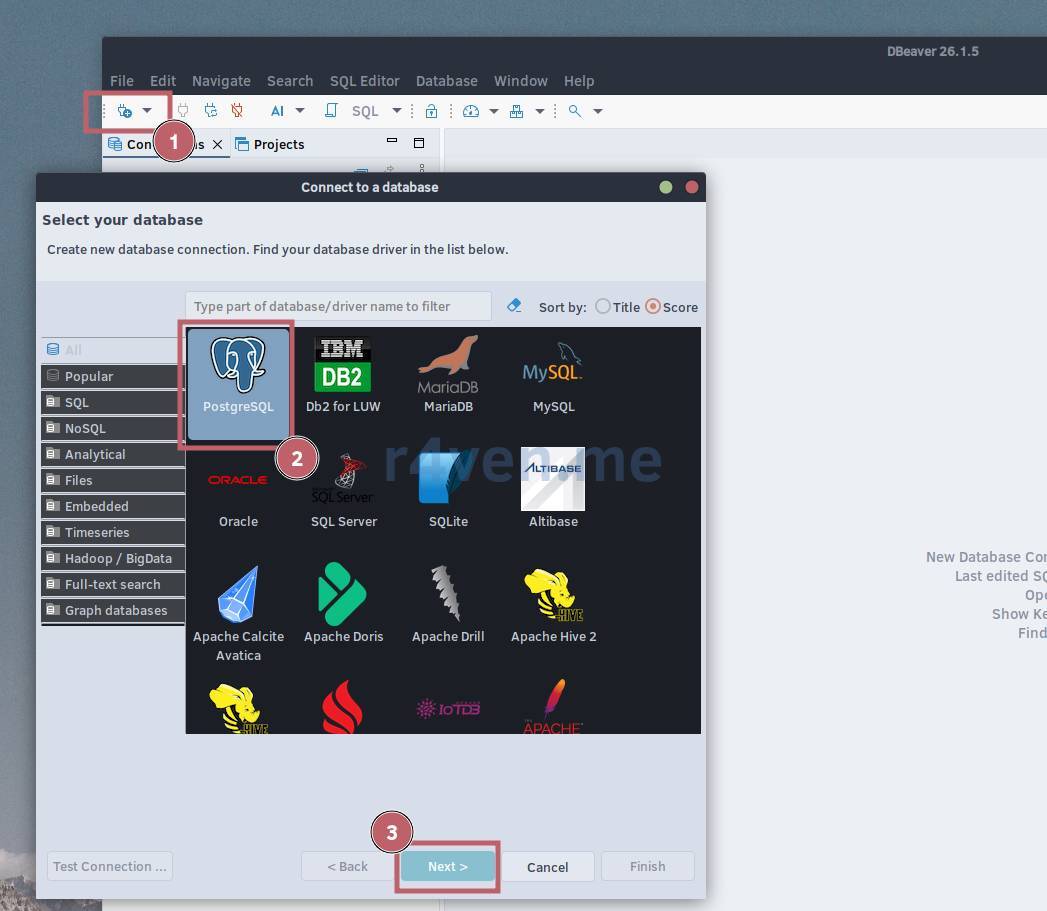
📝 If you don’t have PostgreSQL drivers, the beaver will kindly download them from the internet (maven.org).
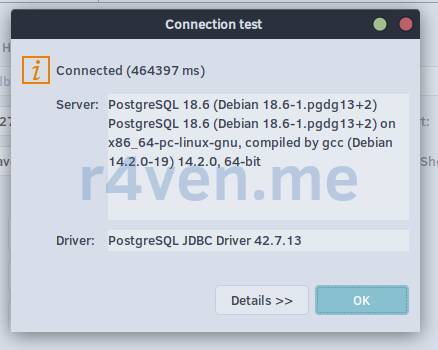
Test the connection with the Test Connection... button:
Then open the SQL editor and execute the same query as in psql:
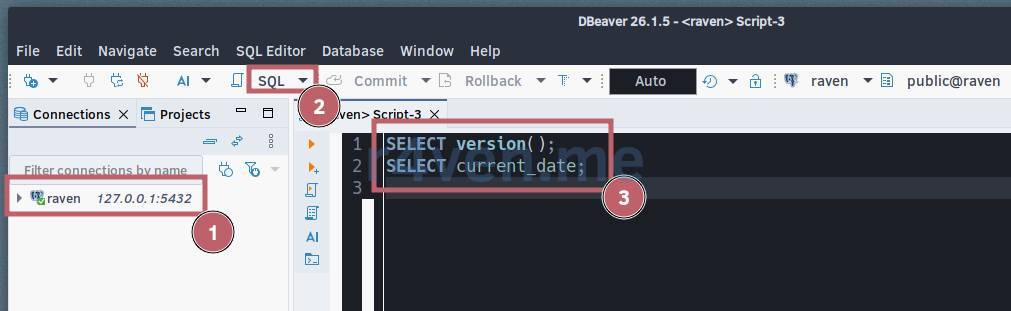
SELECT version();
SELECT current_date;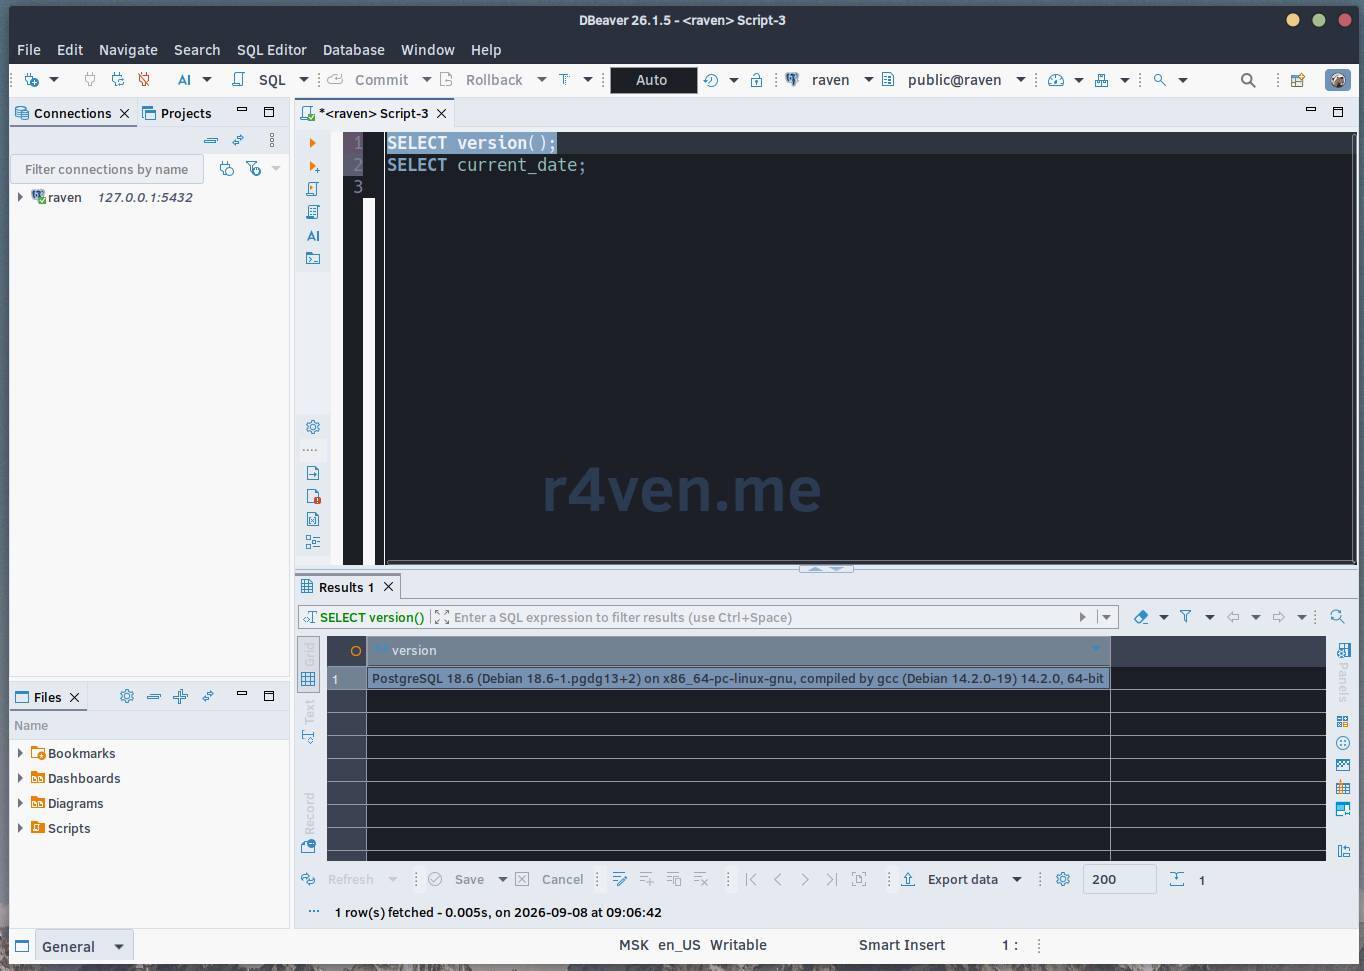
Excellent! The server is up, accessible from both console and GUI - let’s move on.
📝 Starting with this lesson, I’ll write SQL statements in uppercase (SELECT, FROM, WHERE, etc.) - it’s an informal but widely accepted SQL style that separates language keywords from table names, columns, and functions. For PostgreSQL, keyword case doesn’t matter, it’s purely a matter of readability. But the meta-commands of psql itself (those starting with \) traditionally remain lowercase - that’s not SQL anymore, but a separate language of the client itself.
Resetting the Environment for Experiments
It’s worth saying separately about how to quickly return the environment to a clean state - over the course you’ll probably want to intentionally break everything and start over more than once:
systemctl --user stop postgres

systemctl --user disable postgres

docker image rm postgres:18

docker volume rm postgres_data

docker network rm postgres_net

rm -rf ~/Postgres ~/.psqlrc ~/.pgpass⚠️ docker volume rm irreversibly deletes all data inside the cluster, including everything you managed to create in previous lessons. Use it only when you consciously want to start from scratch.
Possible Issues
- port 5432 is already in use
Error response from daemon: driver failed programming external connectivity on endpoint postgres: Bind for 127.0.0.1:5432 failed: port is already allocatedMost often this means that there’s already a “live” PostgreSQL running on the host, installed from packages. Either stop it, or change the publication port in compose.yaml, for example to 127.0.0.1:5433:5432 (don’t forget to also change the port in the DBeaver connection).
- password authentication failed for user “ivan”
If you changed POSTGRES_PASSWORD in .env after the first startup - this is expected, see the warning above about cluster initialization. The easiest solution is either to change the password from inside (ALTER ROLE ivan WITH PASSWORD '...'), or if you don’t care about the data, recreate the volume.
Afterword
An expected simple first step, but the foundation is important - the whole course will revolve around this container. Fortunately, rebuilding the training environment is easy.
In the next lesson, we’ll take a detailed look at the psql utility, and along the way get more hands-on with the DBeaver graphical client.
For extracurricular work, I recommend watching a very interesting interview with Ivan Panchenko, co-founder of Postgres Pro. The video discusses the ideology of open source, the contribution of our compatriots to the development of the Postgres project, a comparison with Oracle, and much more. It’s very interesting to follow Ivan’s train of thought regarding the use of the open-source software model for business. And of course, it’s interesting to hear about the various nuances of this model, as well as the history of the DBMS’s development.
Overall, I recommend it 👍.
The video is over an hour and a half long, but it’s an easy watch 😌.
Thanks for reading. Good luck learning PostgreSQL! 🐧
All articles in the series
References
- Official PostgreSQL image on Docker Hub
- PostgreSQL Documentation
- My article on installing Docker Engine on Debian
- DBeaver Community Edition
👨💻And…
Don’t forget about our Telegram channel 📱 and chat
Or maybe you want to become a co-author? Then click here🔗
💬 All the best ✌️
That should be it. If not, check the logs 🙂

Comments