
Today I’ll tell you how to safely and conveniently store passwords on any device: both on a PC / laptop and on a smartphone. We’ll talk about the software — KeePass and the password database format — KDBX.
🖐️Hey!
Subscribe to our Telegram channel @r4ven_me📱, so you don’t miss new posts on the website 😉. If you have questions or just want to chat about the topic, feel free to join the Raven chat at @r4ven_me_chat🧐.
Preface
Originally, KeePass is a popular open source password manager that allows you to securely store and manage your access credentials. It is designed to create strong unique passwords for each account and organize them in an encrypted database — KDBX.
A KDBX database is a regular file on your drive, most often looking like filname.kdbx.
The concept of secure password storage
Here’s the idea: using the KeePass program (or one of its forks), you create a database file (KDBX) and encrypt this file with a single master password, which you absolutely must remember. Then, when registering anywhere on the internet, you create a separate entry for it inside this database using KeePass. Then, for this entry, you generate a unique super complex password using the program’s tools and specify it during registration. This way you raise the level of reliability and confidentiality of your presence on the network by several notches.
You also populate and structure your database with the “logins and passwords” you already have.
As a result, you only need to remember one password — for the database itself, and the rest of the passwords can simply be viewed and copied, as needed, from a nicely organized list with fast search capability.
You can fearlessly put the database file (.kdbx) in your favorite public cloud (for example Google Drive, Yandex Disk, Nextcloud) — the main thing is to set a good master password for the database itself, and calmly use it on all your devices. The file is reliably encrypted.
If you’re interested, you can read about the algorithm the application uses when opening a KDBX database file in an article on Habr: Decrypting the KeePass Database: A Step-by-Step Guide. All the nuances in this article are a bit hard for me to grasp, so I trust the authors that everything there is reliable)
For regular work in the KeePass application, you need to enter the master password every time. If you’re as lazy a user as I am, there’s a way out in such cases too.
For Linux, you can automate password entry when logging into the system using the pre-installed keyring utility (I may write a separate note on this topic in the future), and on Android, add database unlocking by fingerprint (included in the standard functionality of the apps). This way we minimize the number of actions needed to find and copy the required credentials to the clipboard, and maximize their reliability and structure.
GUI applications for PC / laptop and smartphone
This article will discuss popular and more modern open source forks of KeePass: KeePassXC for Linux and Windows, and KeePassDX, Keepass2Android for Android smartphones.
Installing KeePassXC on Linux Mint 21
The popular fork KeePassXC is available in the standard Linux Mint 21 repositories. Let’s take advantage of this and install the program. Open a terminal and run:
sudo apt update && sudo apt install keepassxc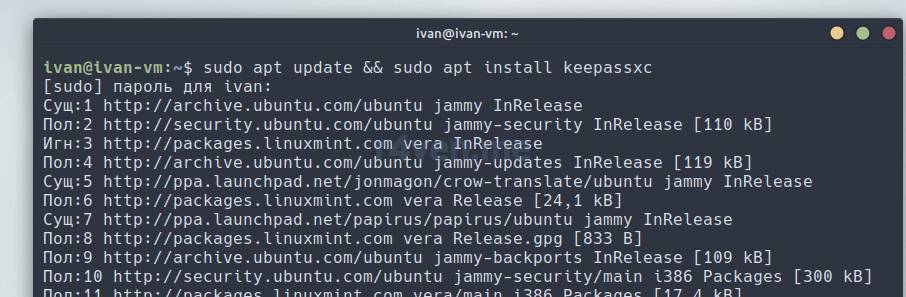
Or use other installation methods listed on the project’s official website.
You’ll also find a Windows installer on the corresponding download page.
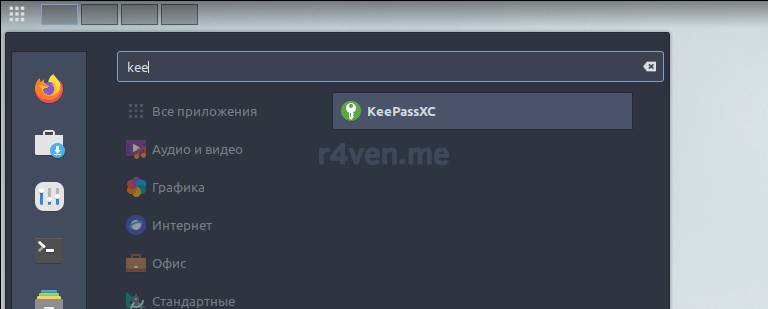
After installation, open the main menu, find our KeePassXC, and launch it:
The program looks like this:
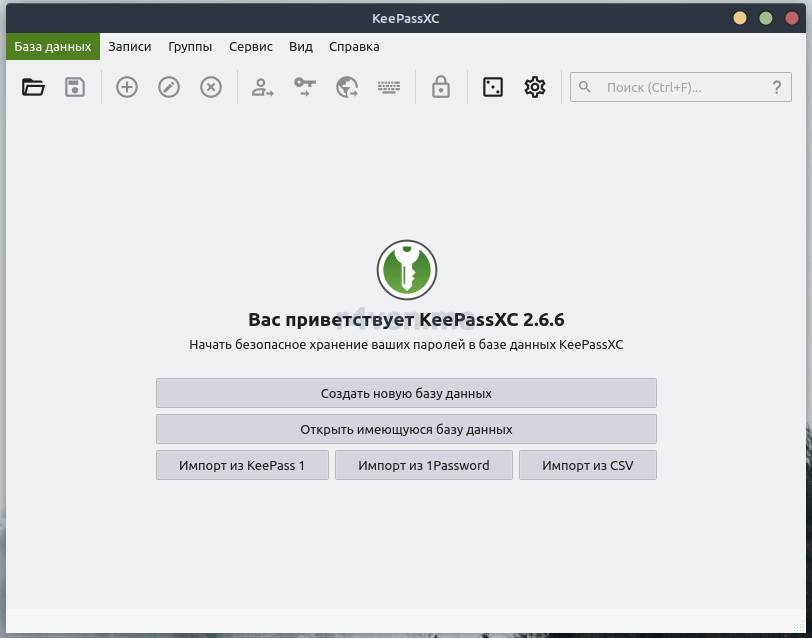
The appearance clashes a bit with the style installed in the system, so let’s click View — Theme — Classic (platform-dependent):
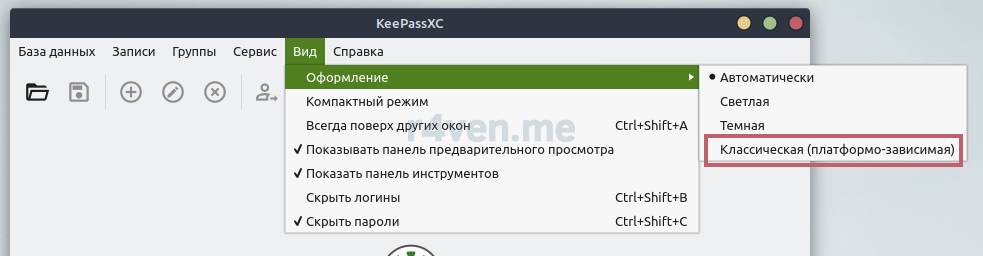
After confirming the restart, it will look the way we want:

Creating a database file
On the program’s main screen, click “Create new database” and go through the wizard steps:
- Specify a name;
- Set the database strength/generation parameters (you can leave the default values);
- Set a master password (preferably a strong one);
- Specify the database location in the file system.
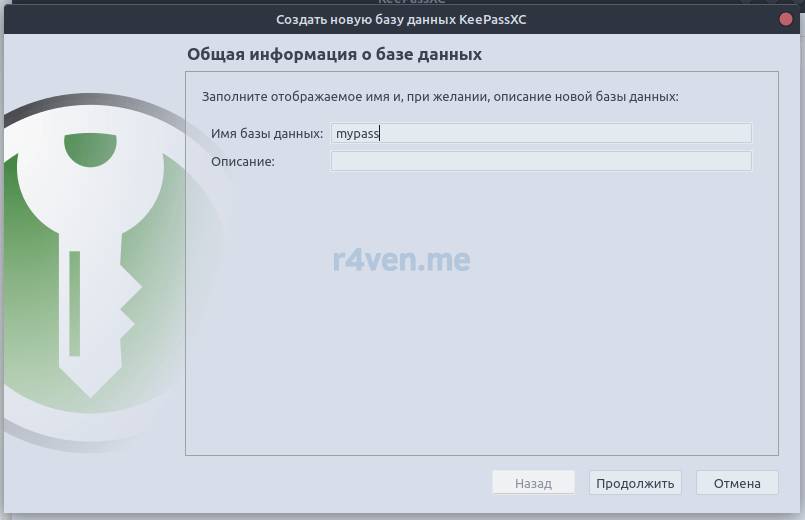
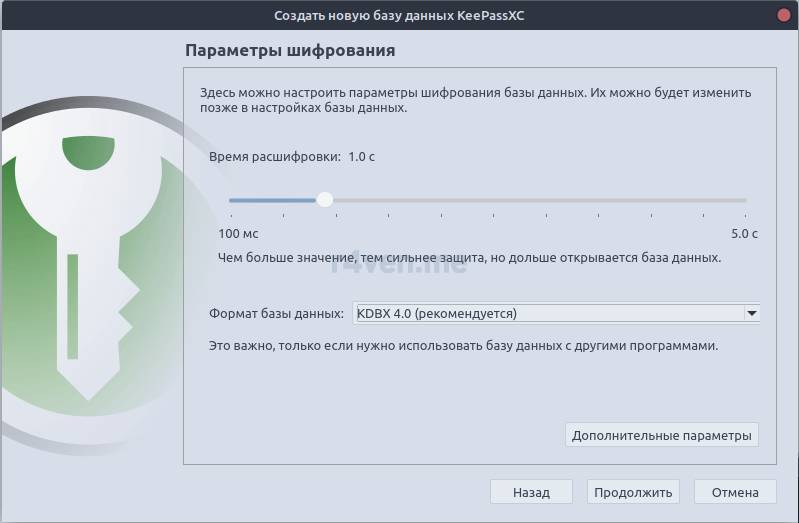
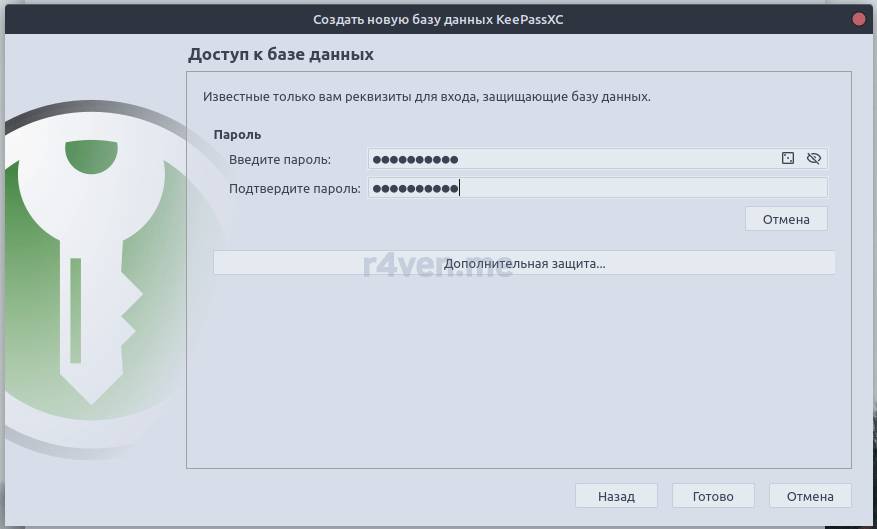
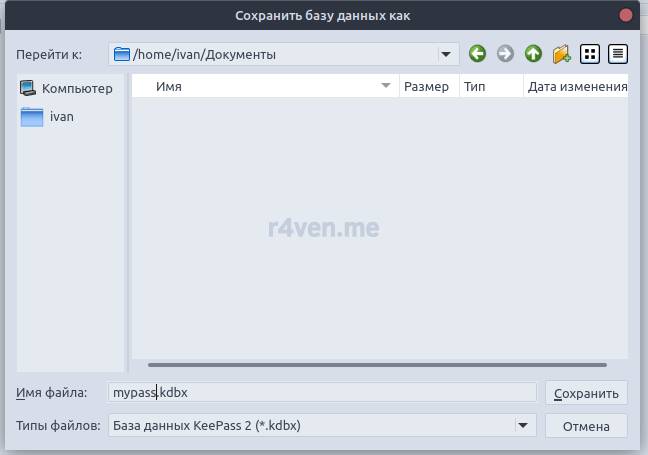
!!! WARNING !!!
Be sure to remember your master password! Or write it down somewhere on paper and hide it in a safe place. Because if you forget or lose it, there is no way to recover the contents of your database! That’s the whole point of encryption 🙂
You perform all actions at your own risk.
After the database is created, the program will open it. Here you can create the structure you need and start filling sections with entries:
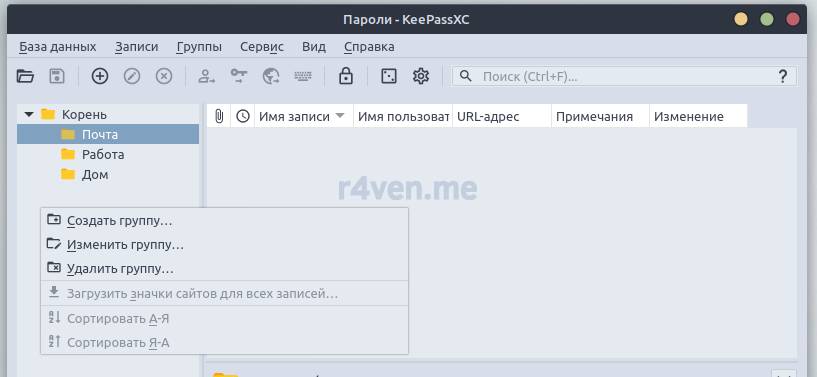
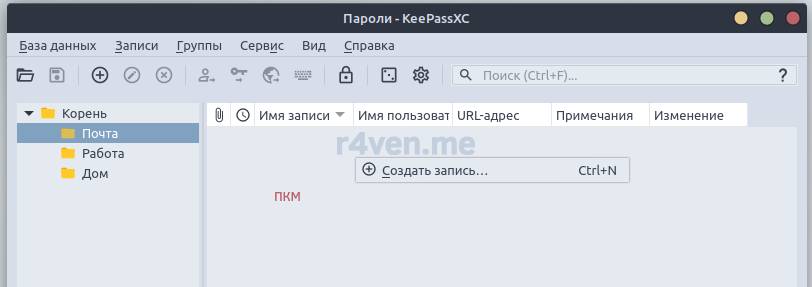
Example entry:
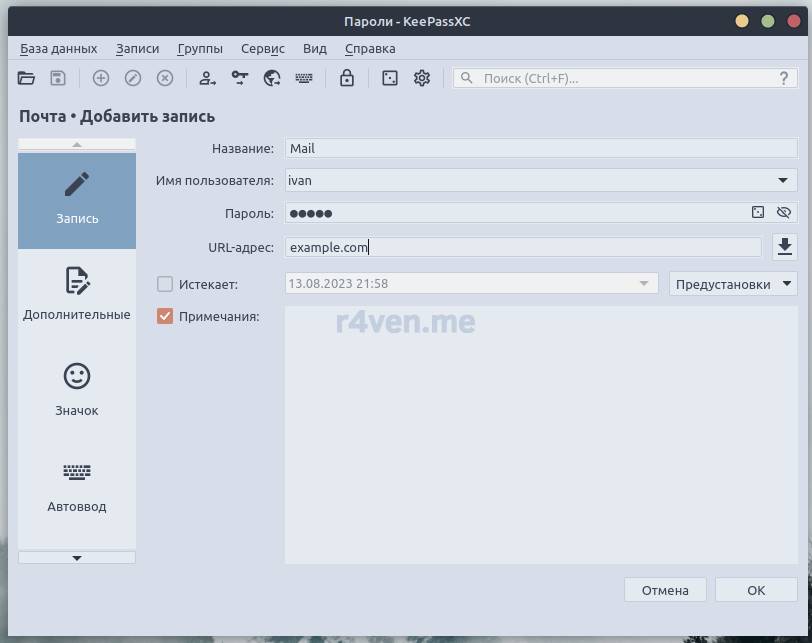
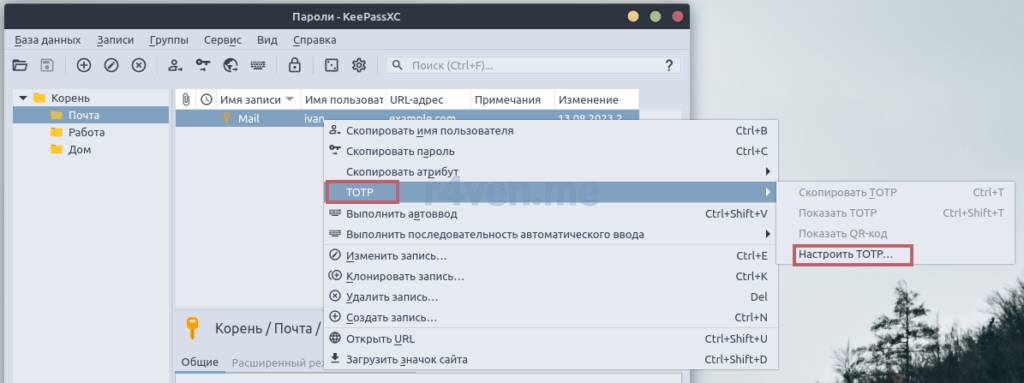
By the way, KeePassXC also supports creating TOTP secrets and generating tokens. Very convenient, everything in one place:
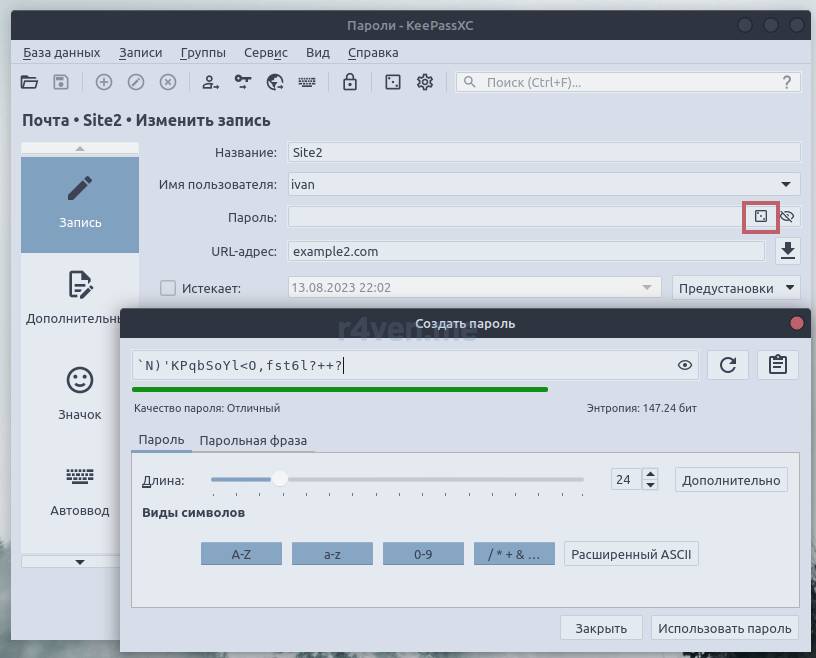
When filling in the password field, there’s a button to generate a “complex” password. You can set various parameters:
By default, the database is automatically saved on every change. This setting can easily be changed in the application settings, but I wouldn’t recommend it. Forget it once and you’ll go right back to storing your passwords in text files somewhere on disk))
By the way, the application settings allow for fairly flexible configuration of the program’s behavior. You can change security parameters and connect various integrations: browser extension, ssh-agent, the KeeShare service, and more:
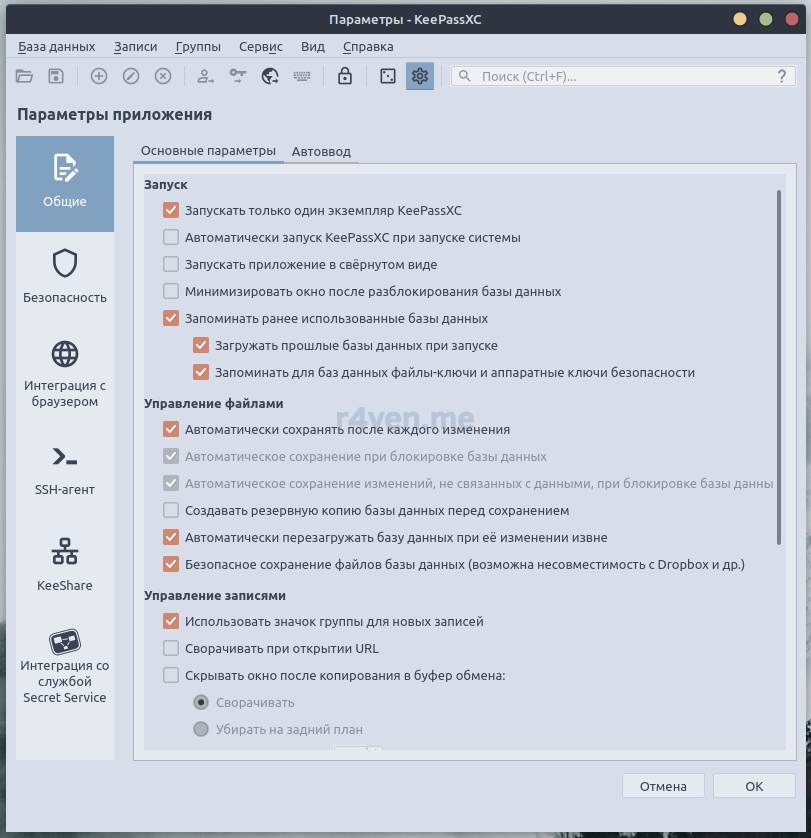
I recommend exploring the parameters and setting everything up to your preference.
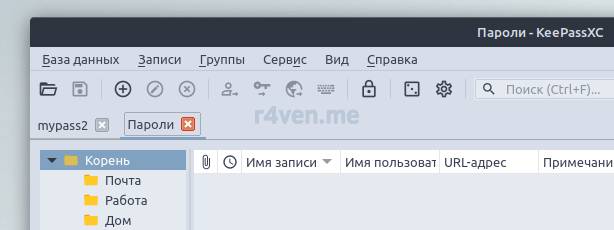
KeePassXC also supports working with several open databases simultaneously:
You can view your password database file in the file manager. The path to it can be seen when starting the program:
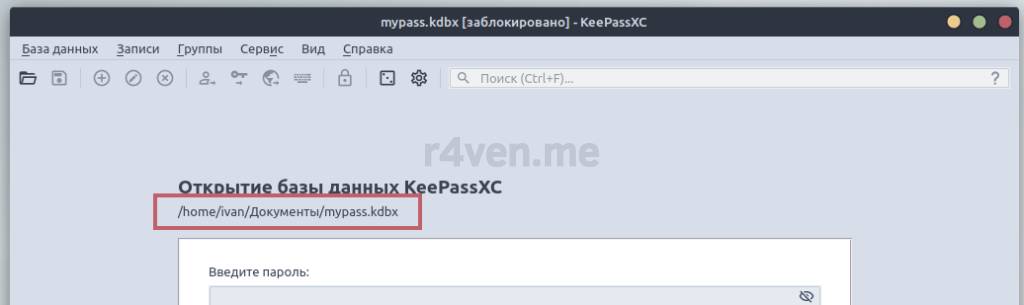
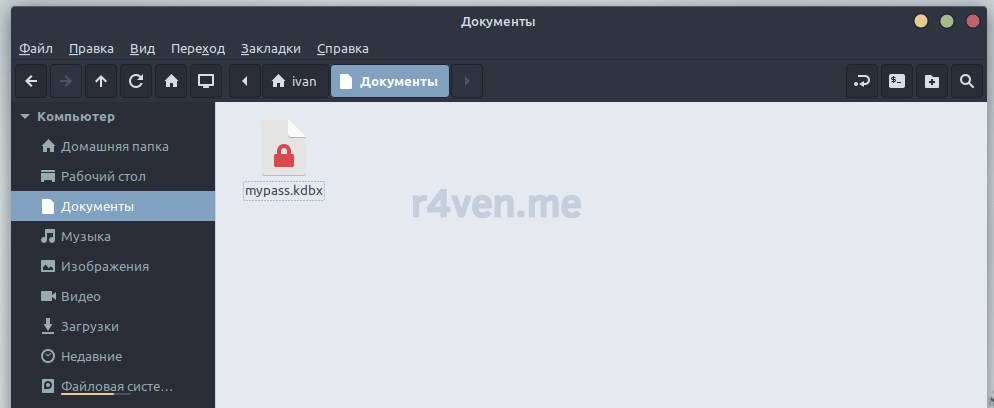
I recommend storing this file somewhere in the cloud and periodically making a backup copy.
Installing KeePassDX on an Android smartphone
As mentioned earlier, there are also convenient apps for implementing KeePass functionality for Android smartphones. Personally, I’ve used two of them for a long time and can confidently recommend them. These are KeePassDX and Keepass2Android. Both of these applications are open source.
You can download them from the official GitHub repositories or from Google Play:
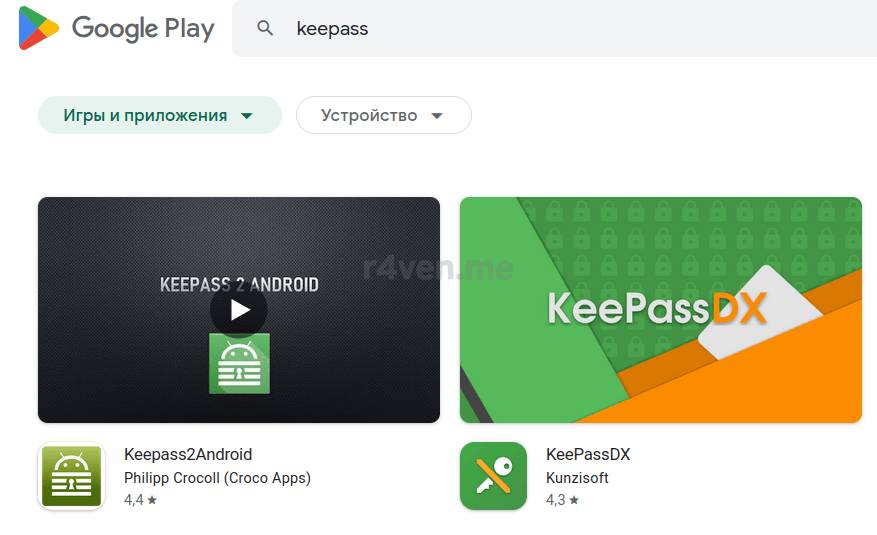
In general, I recommend downloading such smartphone apps from F-Droid, because to get there an app goes through a strict audit for code openness and functionality ethics. But unfortunately only KeePassDX is available there. Keepass2Android for some reason didn’t make it into the free repository. Apparently F-Droid didn’t have a specialist who could audit a certain part of this app’s code, so it wasn’t accepted. They’re strict) and that’s a good thing.
Overall, choose whichever download method you prefer.
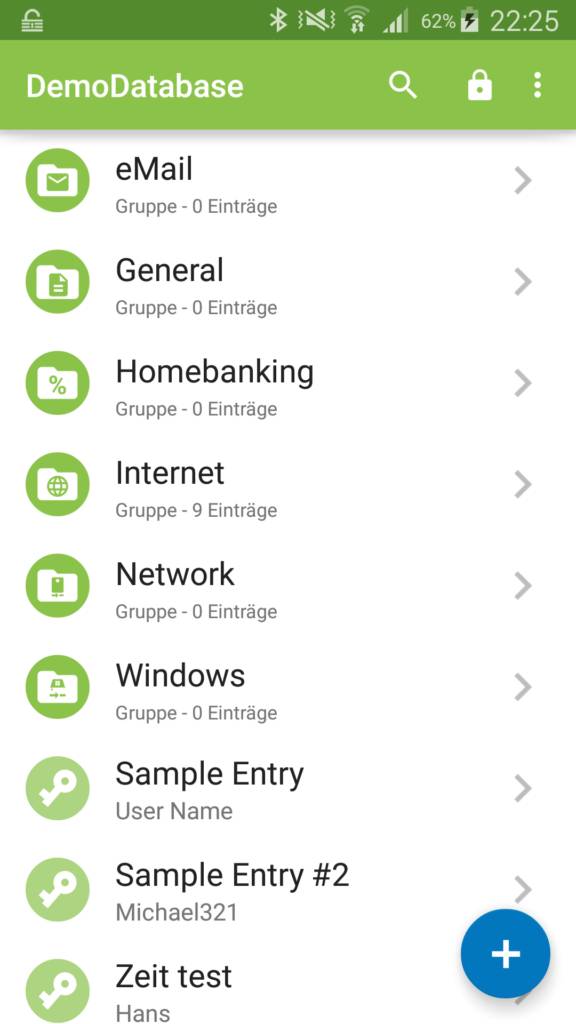
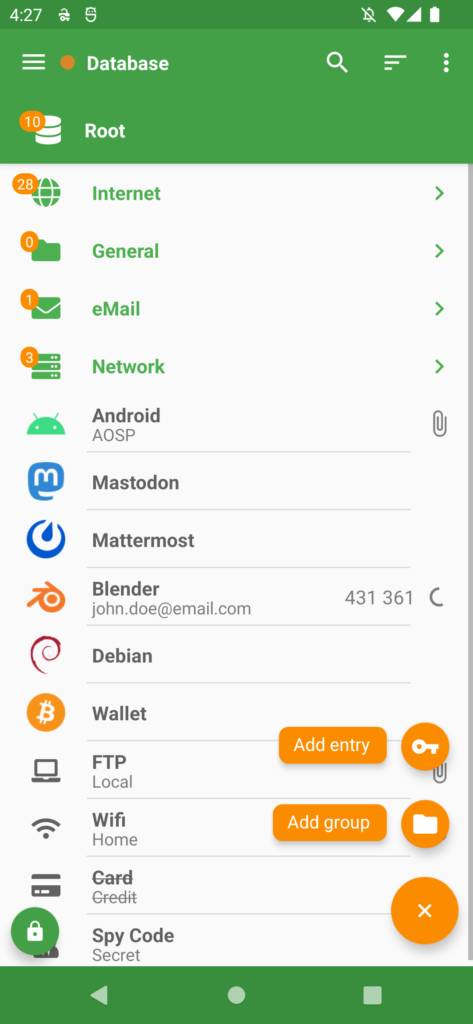
Keepass2Android (left) and KeePassDX (right)
Both applications have flexible configuration options, including database unlocking by fingerprint (the password only needs to be entered the first time).
I want to highlight one very important functional advantage of Keepass2Android — the ability to open a database file over remote access protocols (webdav, sftp), as well as connect to cloud services:
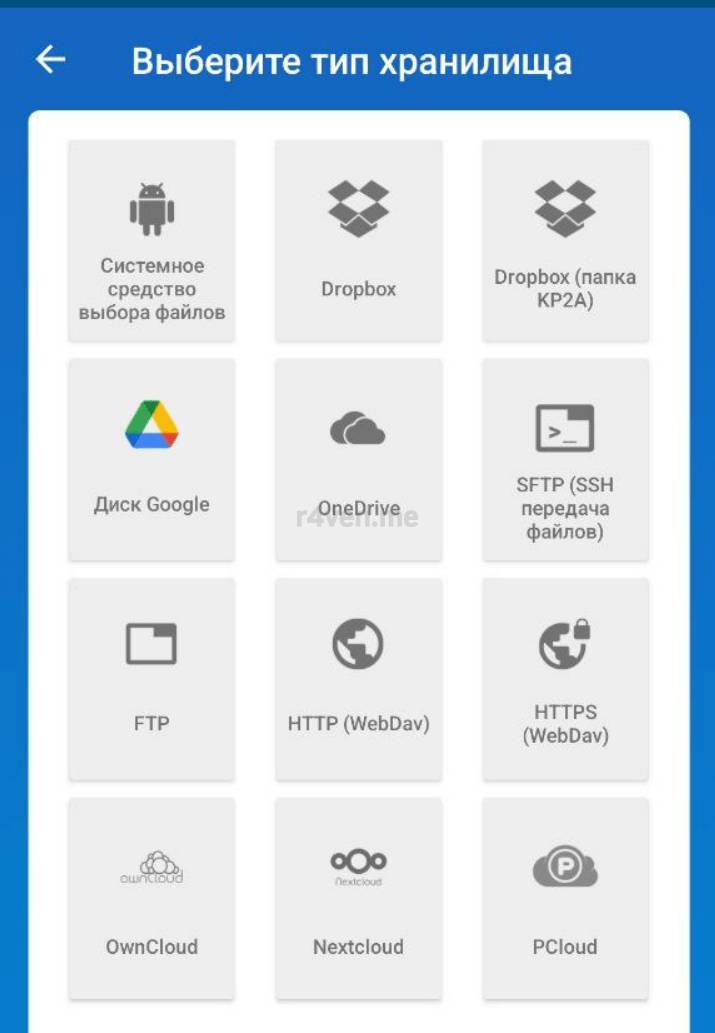
Although KeePassDX, in my opinion, looks more aesthetically pleasing. Flat design and all that)
In its case, to work with files not located locally, you need to resort to using third-party software for synchronization. But that’s a topic for a separate note, isn’t it?) In the future I’ll tell you how to set up and configure your own synchronization server — Syncthing.
Afterword
Well, we’ve learned what the “technology” of KeePass is, why it’s needed, and how to use it. We also installed the KeePassXC program on Linux Mint 21, created a new password database, and explored the application’s functionality.
After that we talked about apps for working with the KDBX database on Android — KeePassDX and Keepass2Android.
Remember, besides yourself, no one will take care of your security, especially on the internet.
Thanks for reading. Good luck organizing your access credentials.
Useful sources
- KeePass — Wikipedia
- KeePass — Archwiki
- KeePassXC — official website
- KeePassXC — GitHub repository
- KeePassDX — GitHub repository
- Keepass2Android — GitHub repository
👨💻And…
Don’t forget about our Telegram channel 📱 and chat
Or maybe you want to become a co-author? Then click here🔗
💬 All the best ✌️
That should be it. If not, check the logs 🙂

Comments