In this guide I’ll explain how to integrate an AI assistant based on ChatGPT / Gemini / Ollama into your Linux system and interact with it in the terminal using a console application — ShellGPT.
This guide is relevant for Linux Mint 22 / Ubuntu 24.04 / Debian 12 distributions.
🖐️Hey!
Subscribe to our Telegram channel @r4ven_me📱, so you don’t miss new posts on the website 😉. If you have questions or just want to chat about the topic, feel free to join the Raven chat at @r4ven_me_chat🧐.
⚠️ Warning
⚠️ Before we begin, it’s important to note that ShellGPT and Ollama are open source projects, whose source code is hosted on GitHub. Meanwhile, the server-side backends of ChatGPT / Gemini are proprietary software, which means there’s no way to know exactly how they process information on their servers. Don’t send any confidential information to third-party services.
When prompted for an API key, enter any string — the value just needs to be non-empty — and press Enter. The command will fail with an error — this is expected behavior when using Ollama.
Then open the ShellGPT config for editing:
BASH
nvim ~/.config/shell_gpt/.sgptrc
Click to expand and view more
Edit the following parameters:
BASH
# any string, value must not be emptyOPENAI_API_KEY=some_random_string
# disable openai-specific behaviorOPENAI_USE_FUNCTIONS=false# use LLM proxy - litellmUSE_LITELLM=true# define the default modelDEFAULT_MODEL=ollama/deepseek-coder-v2
# choose a display theme (default is dracula)CODE_THEME=nord-darker
Click to expand and view more
Start a dialogue with the model:
BASH
sgpt --repl test_session
Click to expand and view more
This is an interactive mode where you communicate with the bot in a chat format while preserving context.
Optional: if you have spare resources to speed up the model’s response, you can add autoloading of its parameters into memory (without unloading on timeout):
BASH
cat << EOF > ~/.config/autostart/ollama.desktop
[Desktop Entry]
Type=Application
Name=Ollama
Comment=Launch ollama on system startup
Exec=env OLLAMA_KEEP_ALIVE="-1" bash -c 'ollama run deepseek-coder-v2 ping &> /dev/null'
Terminal=false
X-GNOME-Autostart-enabled=true
X-GNOME-Autostart-Delay=60
EOF
Click to expand and view more
Introduction
A bit about ChatGPT
ChatGPT’s own definition of itself:
ChatGPT is an artificial intelligence model used to create chatbots and virtual assistants. It’s based on deep learning technology and neural networks that allow it to understand natural language and generate responses based on analyzing incoming information.
A bit about Gemini
Gemini is also an AI model, but from Google, with a free API. Since ShellGPT by default expects an API compatible with OpenAI, to use it together with Gemini you need to set up a special proxy based on node.js, which will process requests in OpenAI format from ShellGPT and forward them to Google Gemini. Setting up such a proxy is covered below.
I’ll just note that deepseek-code-v2 is used as the local model.
A bit about ShellGPT
ShellGPT — a command line app, a helper program for programming and system administration. It runs in the Linux operating system environment and uses the command shell for interaction: it answers questions, gives advice and recommendations, executes various commands, etc.
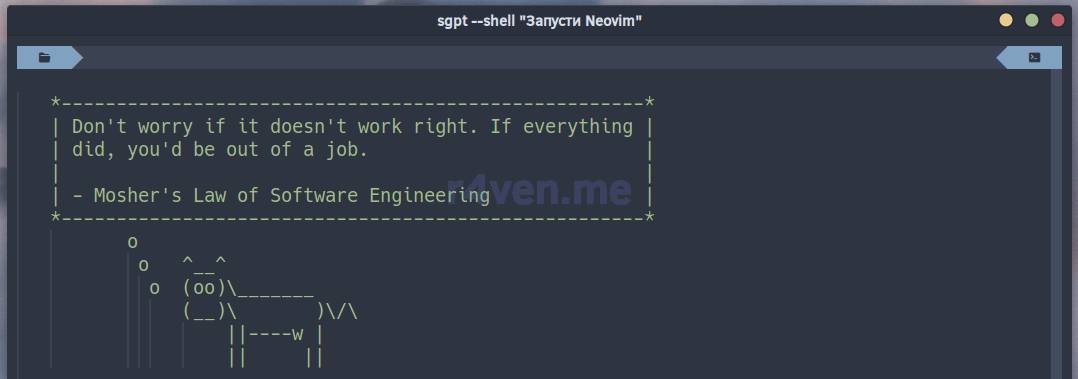
ShellGPT’s output formatting is limited by what the terminal can display. Nevertheless, here’s what one of the latest versions of the program looks like (yes, this is a terminal🔥):
ShellGPT working with Ollama, deepseek-coder-v2 model.
Preparation
The examples in this guide are performed on Linux Mint 22. But I’m sure the same software can be installed and used similarly on other Linux systems.
The ShellGPT program is written in Python3, so for it to work you need to have the latter installed on your system.
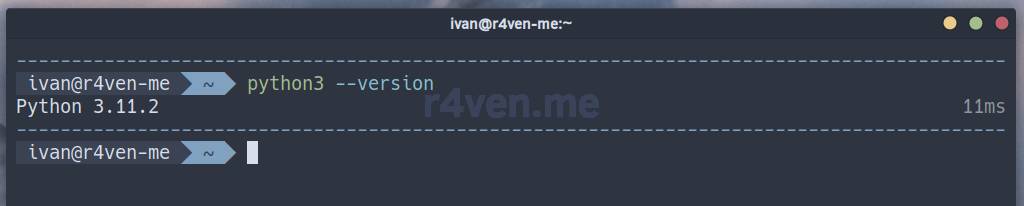
By default, Python3 comes preinstalled on Linux Mint. You can check the current version with the command:
BASH
python3 --version
Click to expand and view more
The preferred way to install ShellGPT is using the pipx utility.
💡 pipx is a tool for installing and running Python applications in an isolated environment (venv), which it automatically creates and configures for each program.
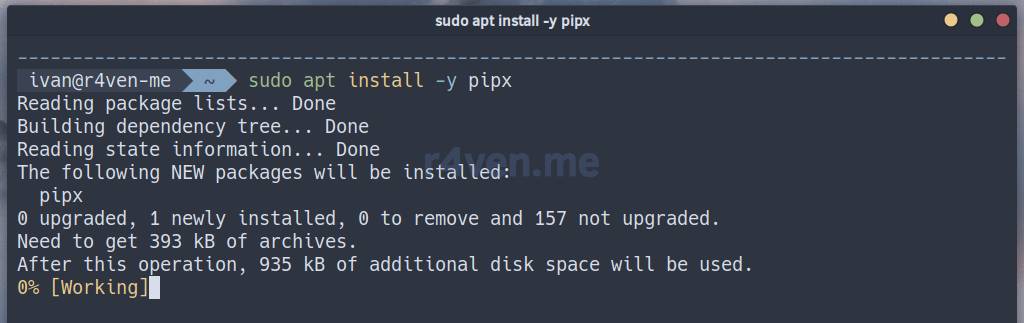
The pipx package is available in the standard Linux Mint repositories. It’s installed the usual way:
BASH
sudo apt update && sudo apt install -y pipx
Click to expand and view more
💡 pipx installs Python applications into a local user directory ~/.local/pipx/venvs/ and creates symlinks to the executables in ~/.local/bin/. For this to work correctly, this directory needs to be included in the system $PATH variable.
If you’re using Gemini
As mentioned earlier, to use ShellGPT together with Gemini you need to additionally install a proxy that will process requests in OpenAI format and forward them to Google Gemini.
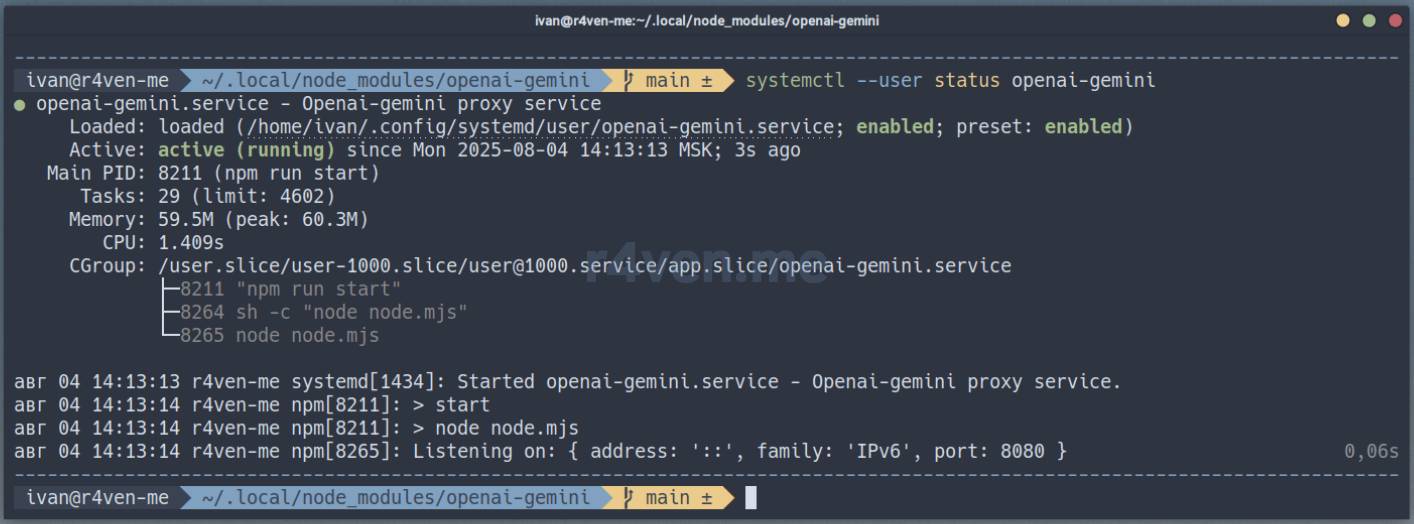
The proxy is installed using npm and runs in the context of a regular user on port 8080:
BASH
# install npmsudo apt install -y npm git
# create a directory for the proxy filesmkdir -p ~/.local/node_modules/openai-gemini
# clone the proxy repositorygit clone https://github.com/PublicAffairs/openai-gemini ~/.local/node_modules/openai-gemini
# navigate to the working directorycd ~/.local/node_modules/openai-gemini
# install dependenciesnpm install
# start the proxynpm run start
Click to expand and view more
💡 To stop the service, use Ctrl+c.
A successful launch will be indicated by this output:
Installing and configuring ShellGPT for use with ChatGPT/Gemini
Getting an API token for ChatGPT
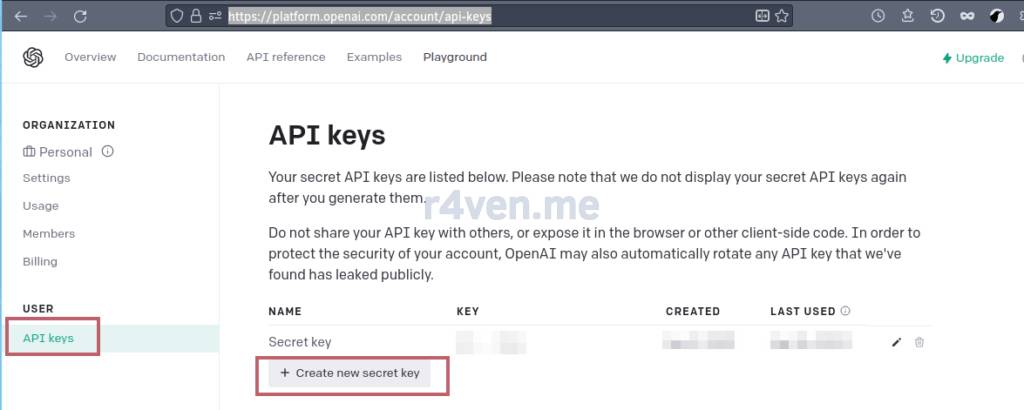
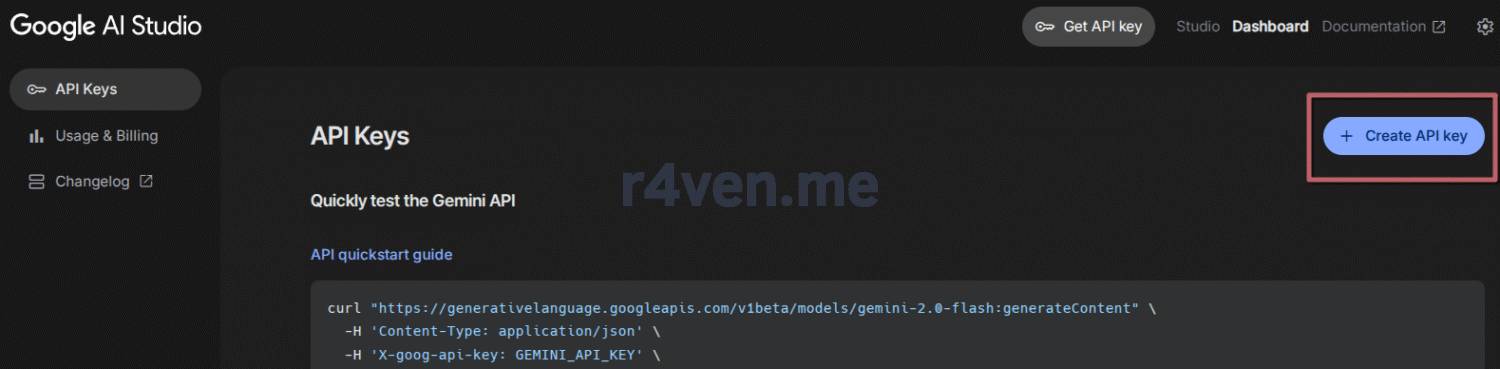
Of course, to use ChatGPT you need an account on the OpenAI portal to get an API key for the ChatGPT bot.
⚠️I want to warn you right away that the use of API keys is limited by OpenAI developers. The free access period is 3 months after account registration (you can find out when it expires here). After it expires, you need to purchase a subscription. Currently this costs ~$20 a month, which isn’t cheap. As a free and confidential alternative, it’s recommended to use ShellGPT together with Ollama (read below).
Unlike ChatGPT, the Gemini service has a free API, and although it has limits on the number of requests, for personal use or a small pet project this is more than enough.
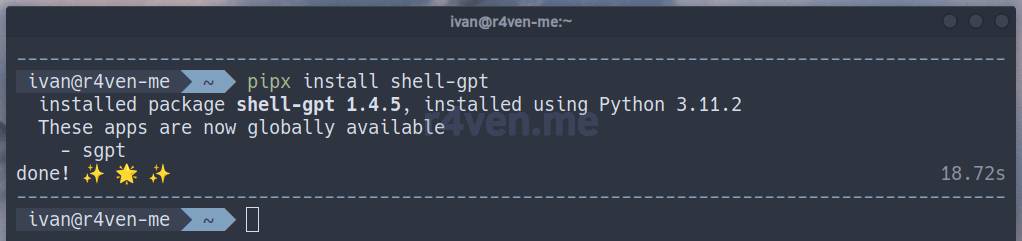
After generating the key, install shell-gpt with pipx:
BASH
pipx install shell-gpt
Click to expand and view more
This part is fairly straightforward😏.
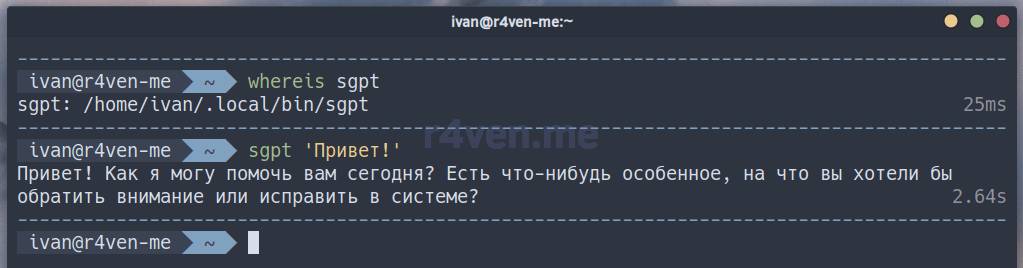
After installation, an executable file sgpt will appear on your system. Let’s check it was installed:
BASH
whereis sgpt
Click to expand and view more
Let’s try running the assistant with the command sgpt "Привет!":
BASH
sgpt 'Привет!'
Click to expand and view more
💡Note that text addressed to the bot from the command line needs to be enclosed in quotes.
The first time you use ShellGPT, it will ask you to enter an API key. Enter the key for the service you need: ChatGPT or Gemini.
☝️In the case of Gemini, the command will fail with an error. This is expected behavior, since data needs to be redirected to the proxy. More on that below.
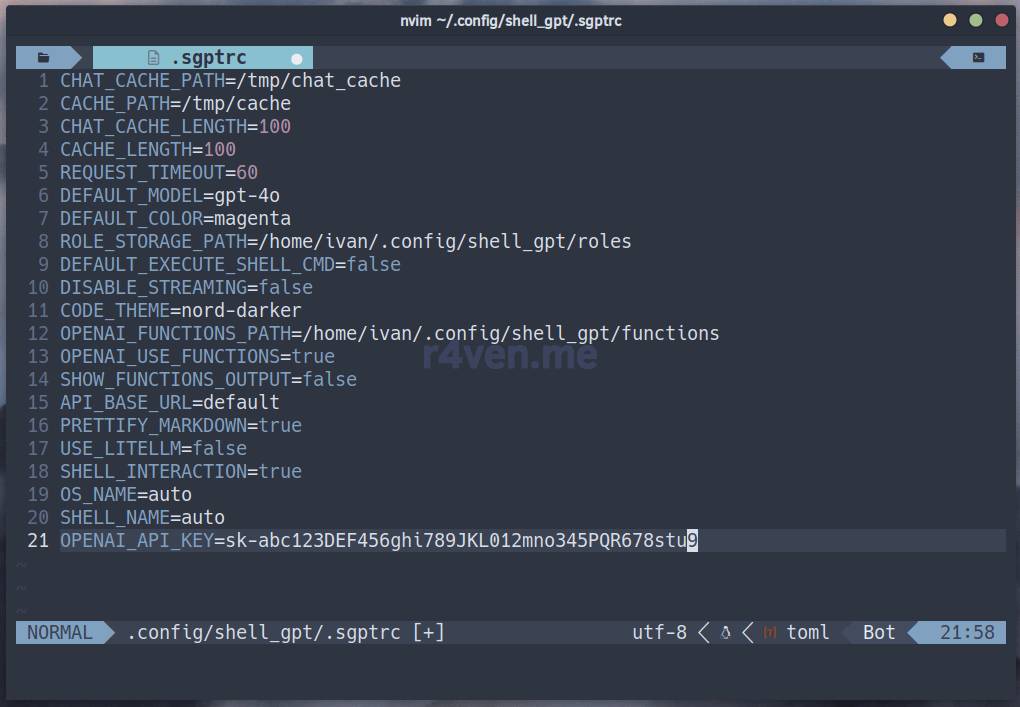
The ShellGPT configuration file, after entering the API key, is automatically generated at the path: ~/.config/shell_gpt/.sgptrc
You can view its contents with the familiar cat command or the console editor nvim:
BASH
nvim ~/.config/shell_gpt/.sgptrc
Click to expand and view more
Let’s look at the contents of the config in a bit more detail:
BASH
# API key, can also be set via the OPENAI_API_KEY environment variableOPENAI_API_KEY=your_api_key
# base URL of the backend server; if set to "default", it will be determined based on --modelAPI_BASE_URL=default
# API_BASE_URL=http://localhost:8080/v1# maximum number of cached messages per chat sessionCHAT_CACHE_LENGTH=100# folder for the chat cacheCHAT_CACHE_PATH=/tmp/chat_cache
# length of the request cache (number of entries)CACHE_LENGTH=100# folder for the request cacheCACHE_PATH=/tmp/cache
# request timeout in secondsREQUEST_TIMEOUT=60# default OpenAI modelDEFAULT_MODEL=gpt-4o
# DEFAULT_MODEL=gemini-2.5-flash# default color for shell responses and code completionsDEFAULT_COLOR=magenta
# when using --shell mode, execute the command by default without promptingDEFAULT_EXECUTE_SHELL_CMD=false# disable response streamingDISABLE_STREAMING=false# pygment theme for displaying markdown (default or for describing roles)CODE_THEME=default
# path to the functions directoryOPENAI_FUNCTIONS_PATH=/home/user/.config/shell_gpt/functions
# print function results, if the LLM uses themSHOW_FUNCTIONS_OUTPUT=false# allow the LLM to use functionsOPENAI_USE_FUNCTIONS=true# force the use of LiteLLM (for local models)USE_LITELLM=false
Click to expand and view more
If you’re using Gemini, specify the address of the openai-gemini proxy we set up during preparation in the API_BASE_URL parameter. By default it’s: http://localhost:8080/v1. And as the model — Gemini, for example: DEFAULT_MODEL=gemini-2.5-flash.
You can adjust the remaining parameters to your preference.
💡The API key can also be set using the $OPENAI_API_KEY environment variable. If it’s set, the key will be taken from it. If not, from the file ~/.config/shell_gpt/.sgptrc. In practice, it’s easiest to use the automatically generated config file.
Installing and configuring ShellGPT for use with Ollama
To implement this combination, you need the Ollama platform installed. See the installation process description in a separate article.
⚠️If you previously installed the standard ShellGPT, it’s best to remove it first:
BASH
pipx uninstall shell-gpt
Click to expand and view more
Note that, according to the ShellGPT developer, working with local models isn’t as optimized as with the online ChatGPT service:
❗️Note that ShellGPT is not optimized for local models and may not work as expected.
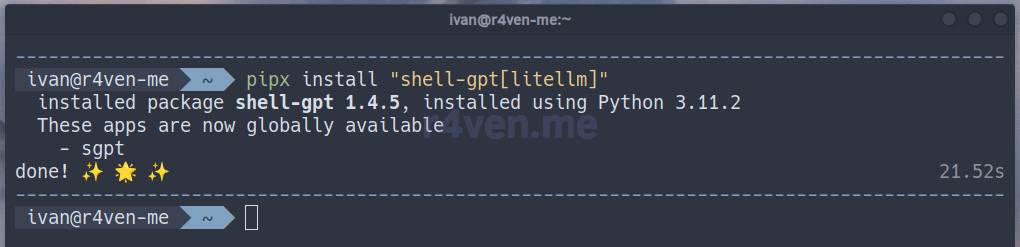
For interacting with Ollama, the ShellGPT install command is slightly different:
BASH
pipx install "shell-gpt[litellm]"
Click to expand and view more
Let’s say hello:
BASH
sgpt 'Привет!' 2> /dev/null
Click to expand and view more
When prompted for an API key, enter any string — the value just needs to be non-empty — and press Enter:
The first command will fail with an error — this is expected behavior when using Ollama.
Now let’s open the config:
BASH
nvim ~/.config/shell_gpt/.sgptrc
Click to expand and view more
And edit/add the following parameters:
BASH
# define the default modelDEFAULT_MODEL=ollama/deepseek-coder-v2
# choose a display theme (optional)CODE_THEME=nord-darker
# disable openai-specific behaviorOPENAI_USE_FUNCTIONS=false# use LLM proxy - litellmUSE_LITELLM=true# any string, value must not be emptyOPENAI_API_KEY=some_random_string
Click to expand and view more
💡Replace deepseek-coder-v2 with your chosen model. 💡You’ll find the list of all available ShellGPT display themes here.
See the description of all parameters in the previous section of the article☝️.
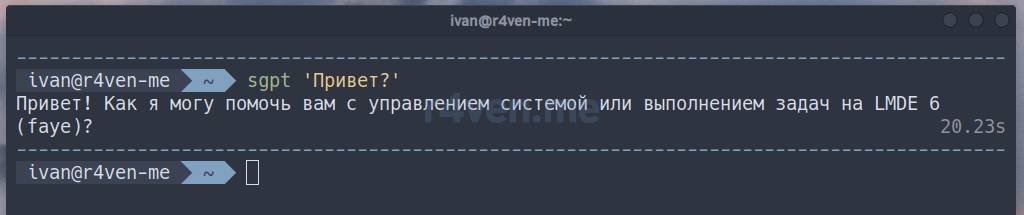
And now let’s finally make the AI say hello:
BASH
sgpt 'Привет?'
Click to expand and view more
Answers a question with a question🤔
Usage
So, what can the ShellGPT assistant installed in our terminal do:
Simple queries;
Performing analysis;
Executing shell commands;
Code generation;
Chat with the bot;
Dialogue mode with the bot (read–eval–print loop), like the web version.
Simple queries
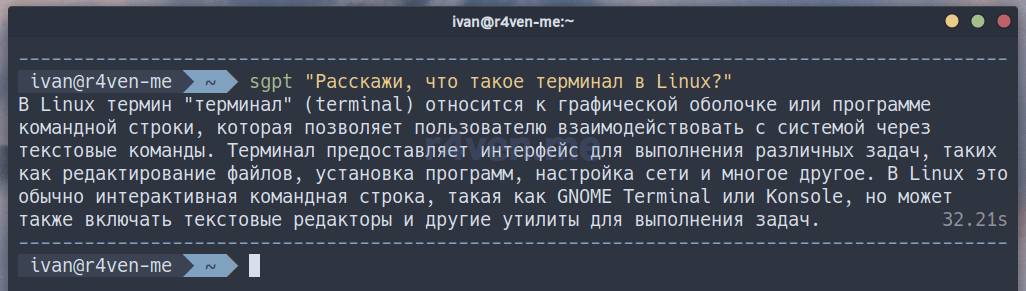
For example:
BASH
sgpt "Расскажи, что такое терминал в Linux?"
Click to expand and view more
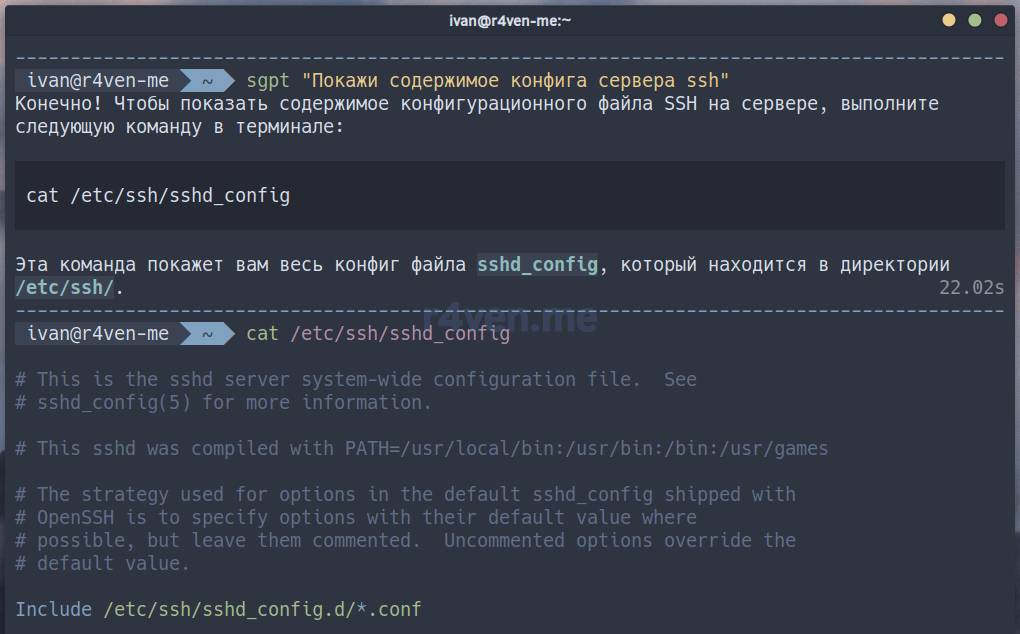
Or:
BASH
sgpt "Покажи содержимое конфига сервера ssh"
Click to expand and view more
Sneaky, it made us look at the config manually. Nevertheless, it told us where it’s located and how to view it. We’ll deal with that in a moment🤨. The machine will do what’s asked of it💪.
Performing analysis
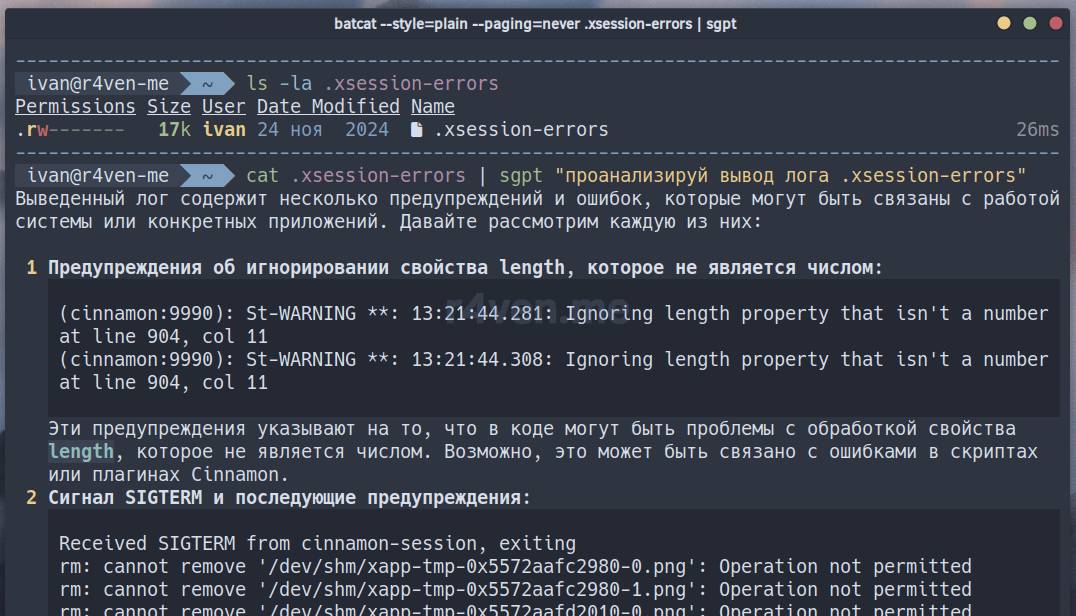
For example, let’s ask the bot to analyze the error log of our Xorg graphical session. This file is hidden (starts with a dot) and is located in the home directory. Using the redirection mechanism (pipeline), we’ll pass the file’s contents to the GPT bot:
In response, it gave us a detailed analysis. You can continue this way, diving deeper and deeper into the topic. Convenient, you’ll agree. No need for extra “googling” around. You’d have to open a browser for that😉.
But that’s not the most interesting part. Let’s move on🚶.
Executing shell commands
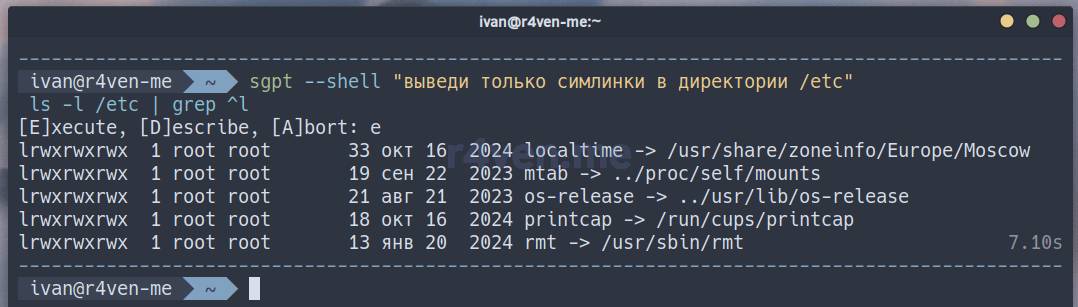
To execute commands on request, the sgpt command needs the --shell flag passed to it. Let’s try asking the bot to show only the symlinks in the /etc directory:
BASH
sgpt --shell "выведи только симлинки в директории /etc"
As you can see, we gave the bot a description of what we wanted it to do, and it offered to run the generated command. After manual confirmation by pressing e and Enter, the command ran in the terminal. Not bad🙄.
💡The command ls -l / | grep ^l lists the contents of the /etc directory and filters the output using the grep command, using the regular expression ^ — which means the beginning of a line, and a filter pattern of the letter l — which, in the output of ls -l, denotes symbolic link files (symlinks).
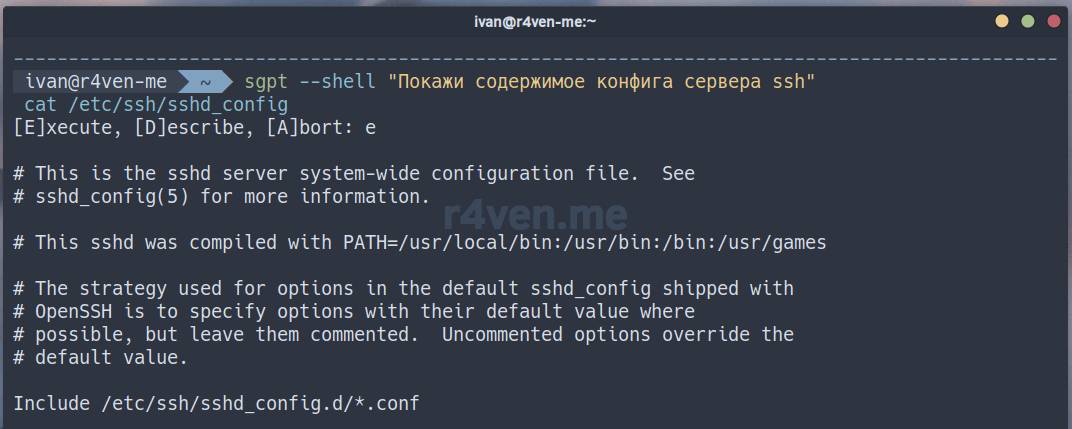
Let’s still make the bot show us the server config for the program (don’t forget the --shell flag):
Well there you go. Totally different story. Thought it up itself, ran it itself. Just don’t get too carried away handing control of your computer over to the bot. Otherwise it might install Windows on it🤷♂️.
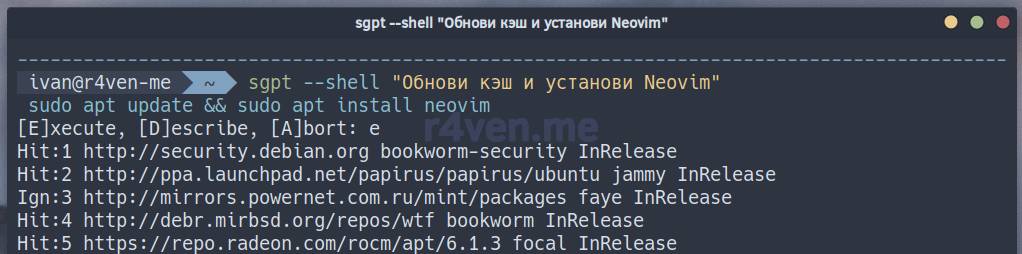
Let’s take a risk and ask the bot to update the package cache and install a program for us, for example the console code editor Neovim:
BASH
sgpt --shell "Обнови кэш и установи Neovim"
Click to expand and view more
And launch it:
BASH
sgpt --shell "Запусти Neovim"
Click to expand and view more
It actually does it😮.
In fact, the bot’s capabilities as a command-line assistant are limited only by your imagination and sometimes by the correctness of the commands it generates. Which absolutely must be checked before execution.
Similarly, the bot can compose and run commands for launching docker containers, put together curl commands with data passed to the bot in json format, edit video/audio files using the console utility ffmpeg, work with files on our system, and much more.
Code generation
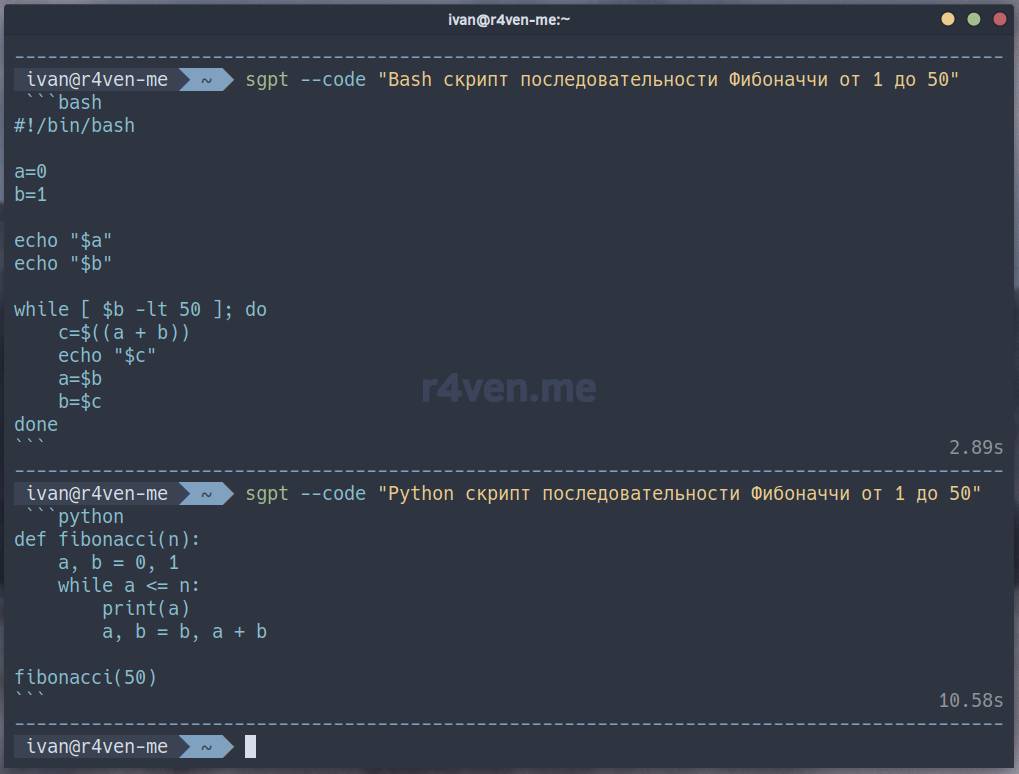
To generate code with ShellGPT, the --code flag is used. Let’s ask it to produce the Fibonacci sequence from 1 to 50 in two ways: Bash and Python. We ask:
BASH
sgpt --code "Bash скрипт последовательности Фибоначчи от 1 до 50"sgpt --code "Python скрипт последовательности Фибоначчи от 1 до 50"
Click to expand and view more
The output can be redirected to a file:
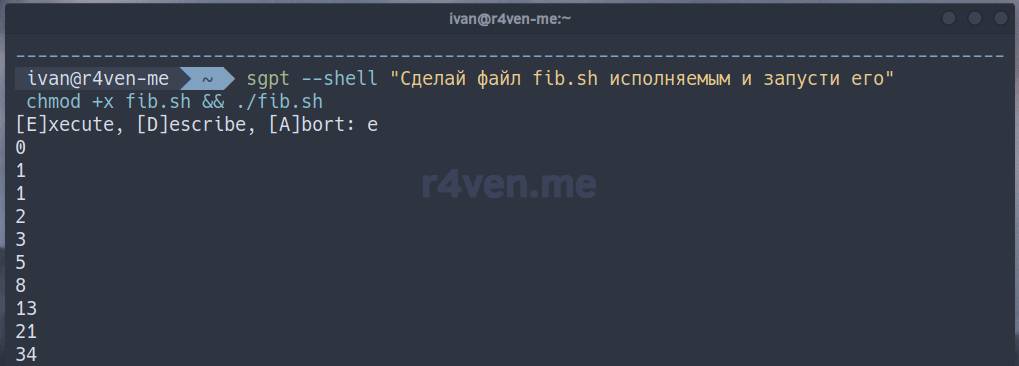
BASH
sgpt --code "Bash скрипт последовательности Фибоначчи от 1 до 50" > fib.sh

sgpt --shell "Сделай файл fib.sh исполняемым и запусти его"
Click to expand and view more
I don’t remember exactly whether the Fibonacci sequence should be counted starting from 0 or from 1, but to me this is a clear example of the bot’s capabilities.
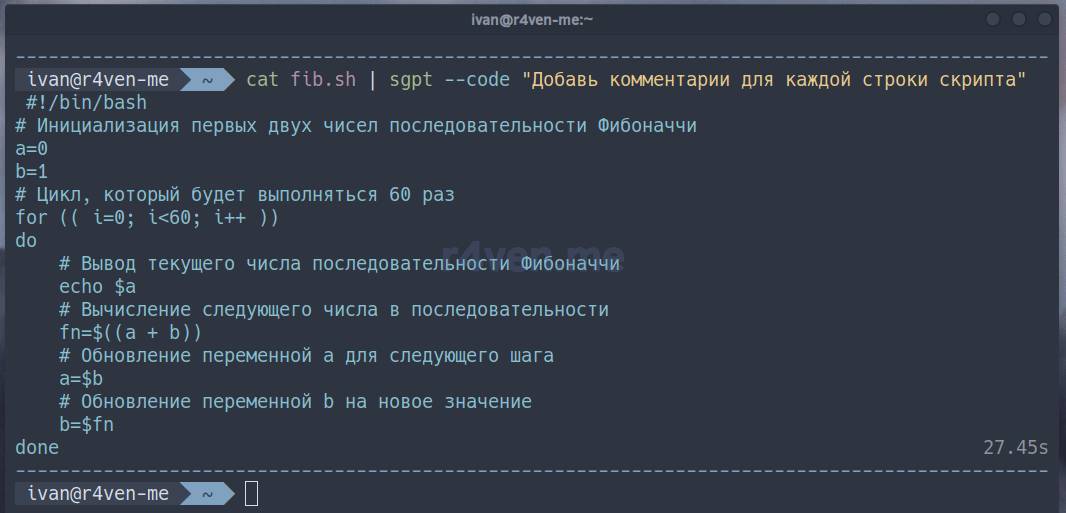
Let’s ask it to add comments for each line of our fib.sh:
BASH
cat fib.sh | sgpt --code "Добавь комментарии для каждой строки скрипта"
Click to expand and view more
Well… Cool! Let’s move on.
Chat
Chat is the GPT bot feature I use most often.
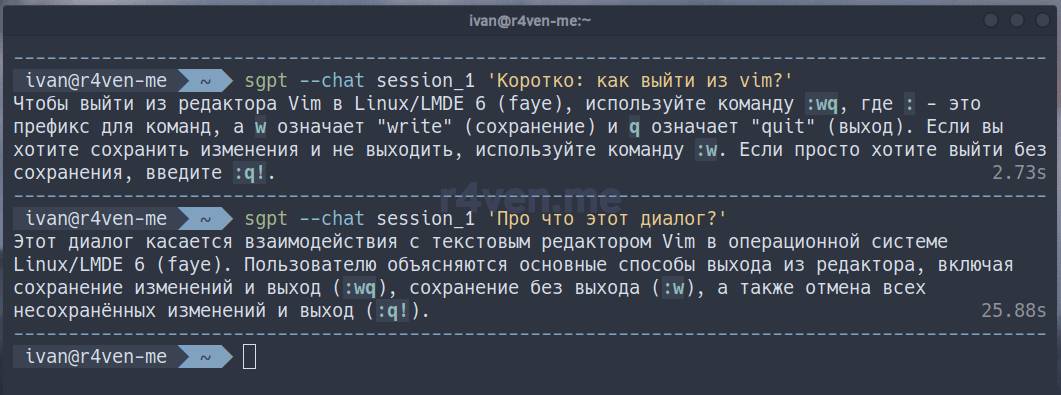
To use chat with the bot from the command line, you need to add the --chat flag, as well as specify a unique chat session name. Our correspondence with the bot will be stored in cache files under that name. Example:
BASH
sgpt --chat session_1 'Коротко: как выйти из vim?'sgpt --chat session_1 'Про что этот диалог?'
Click to expand and view more
We used the session name session_1 to form the chat cache, so we could use previous queries in our conversation.
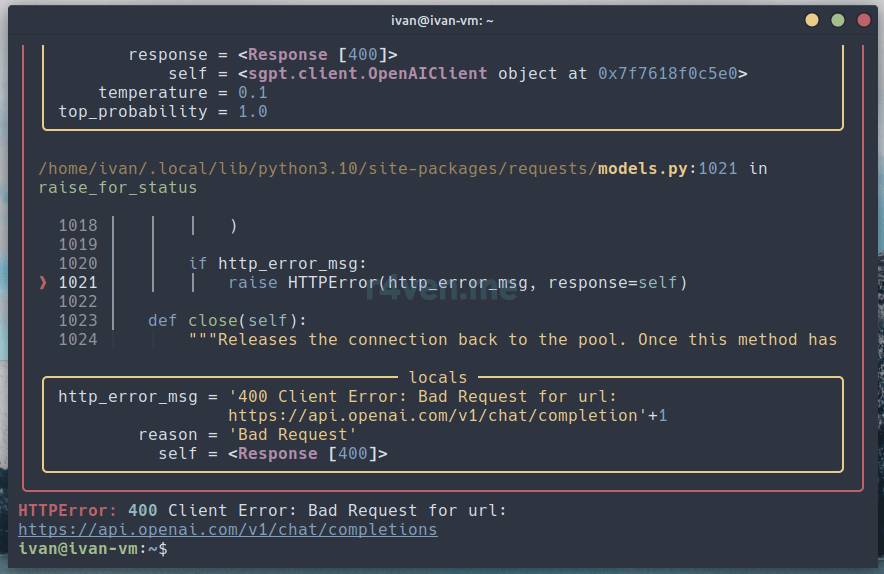
Note that by default the request cache and chat cache are limited (100 entries) in the file ~/.config/shell_gpt/.sgptrc, parameters: CHAT_CACHE_LENGTH=100 and CACHE_LENGTH=100.
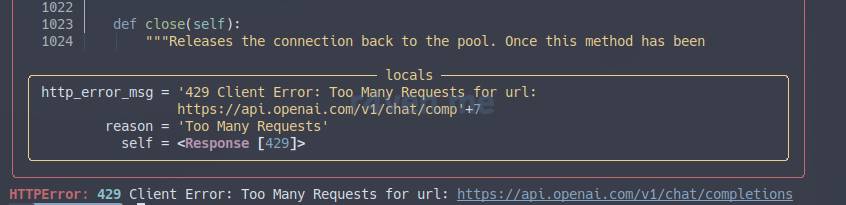
When the limit is reached, the program may throw a 400 client error. If needed, increase these parameters or use a different unique session name to create a new chat.
You can also use a special session identifier: temp to create a temporary session. When this identifier is specified, each session will be new.
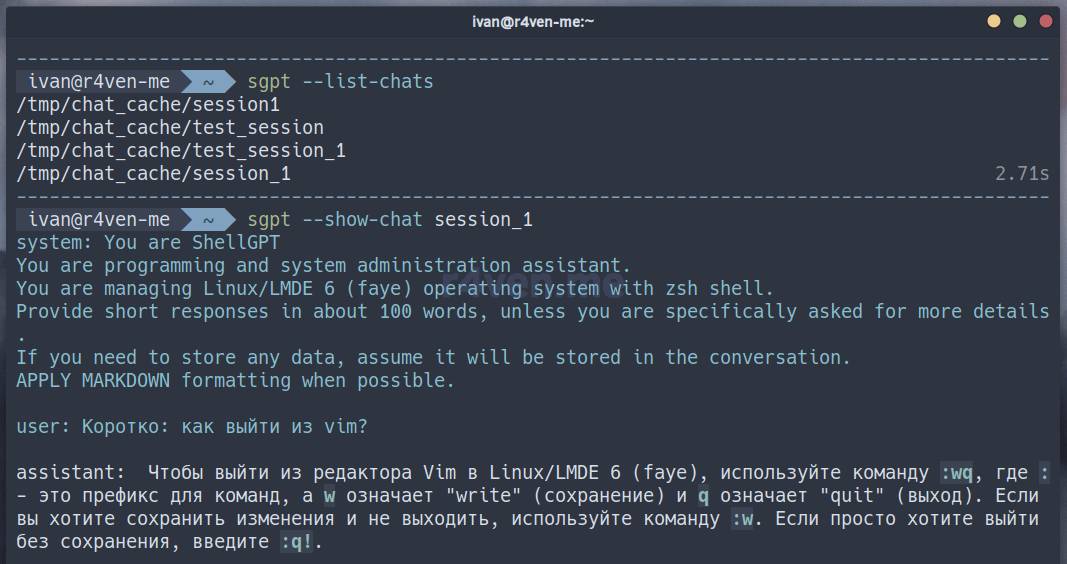
You can view the list of chat sessions with the command sgpt --list-chats, and view the contents of a session with sgpt --show-chat session_name:
BASH
sgpt --list-chats

sgpt --show-chat session1
Click to expand and view more
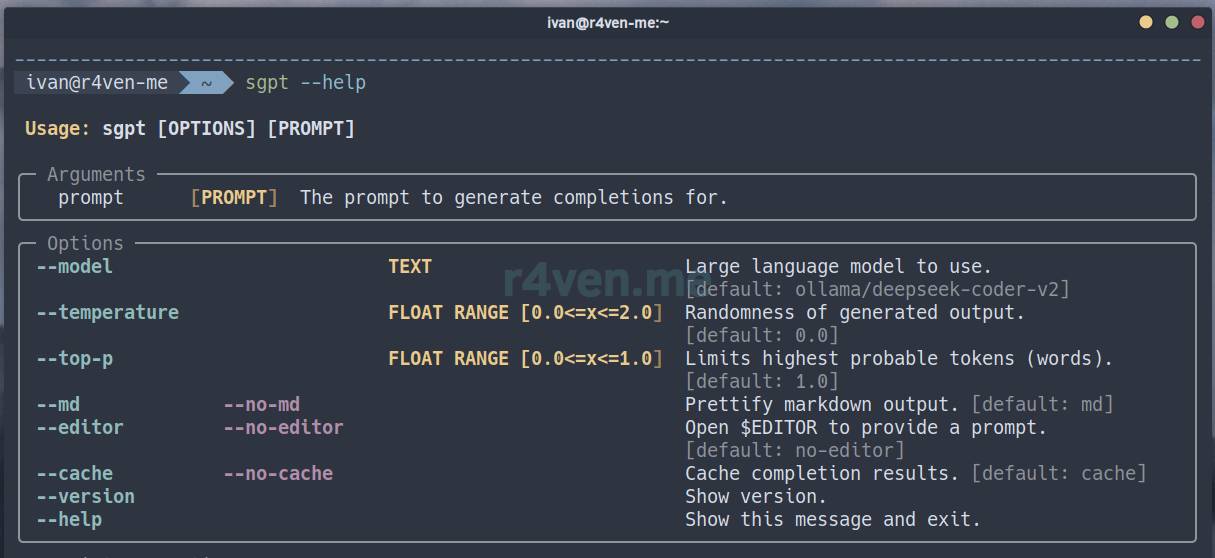
By the way, the sgpt command has a very convenient and nicely presented help section. You can get it by passing the --help flag:
BASH
sgpt --help
Click to expand and view more
It’s worth mentioning the possibility of combining bot roles. For example, to improve code generation, you can use chat history via --chat session_name and then --code for code generation, and so on. This approach also applies to the --shell role. This post is getting long, so we won’t go too deep. At the end of the post you’ll always find links to sources.
Dialogue mode (read–eval–print loop)
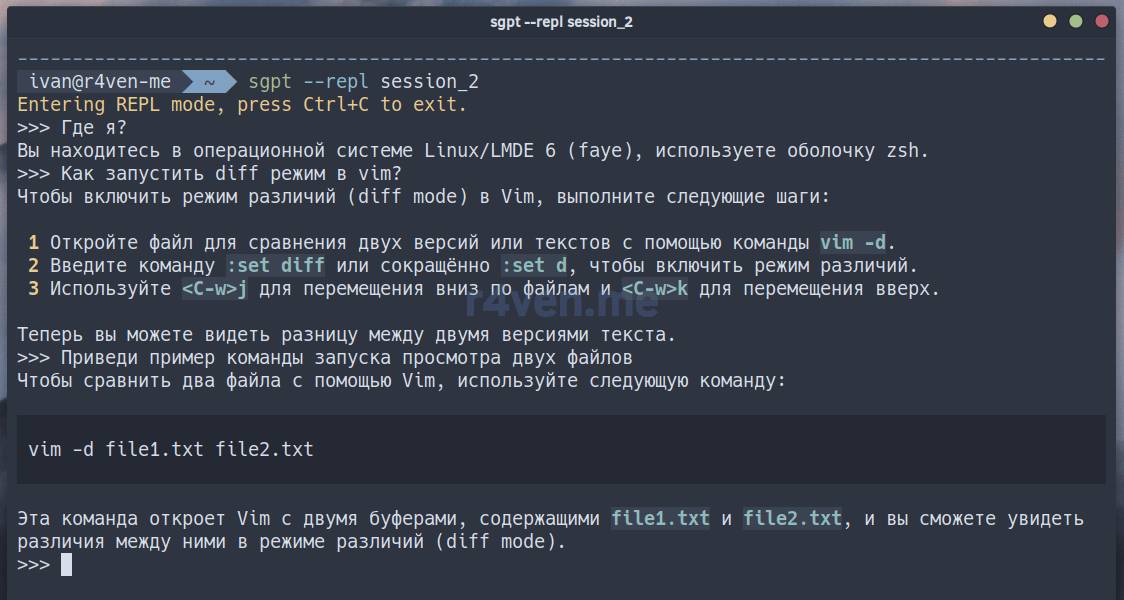
ShellGPT has a real-time chat mode, but in the console. This mode is called repl (read–eval–print loop).
BASH
sgpt --repl session_2
Click to expand and view more
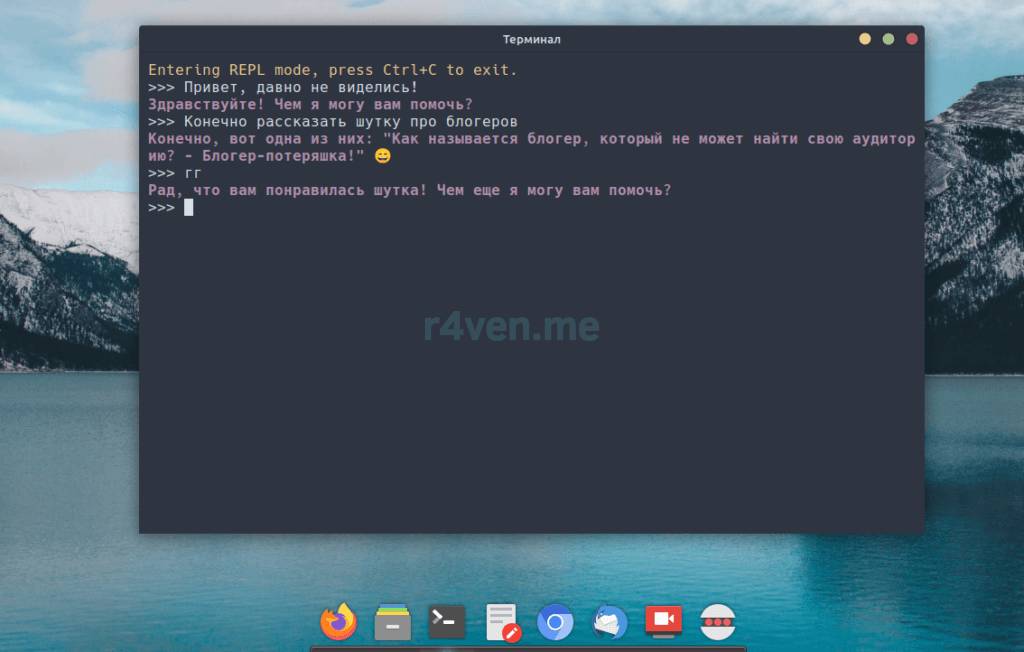
As you can see, after running the command we entered interactive communication mode with the bot. Here you can type text without using quotes. Quite convenient. To exit this mode, use the key combination Ctrl+c or Ctrl+d.
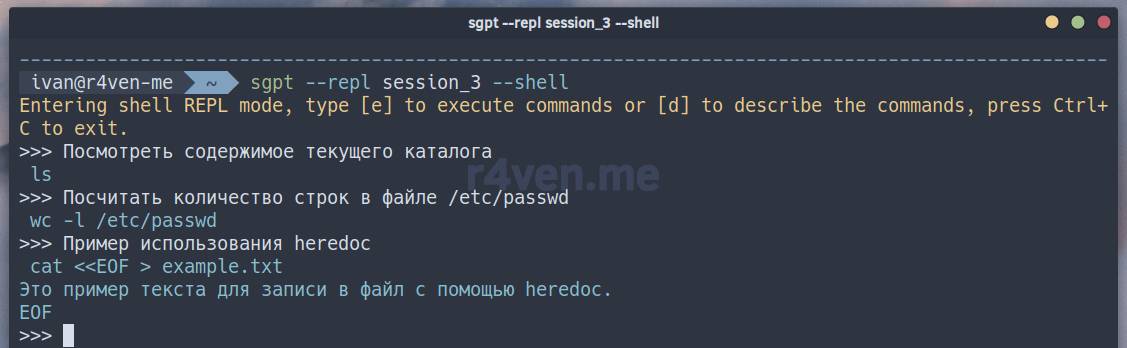
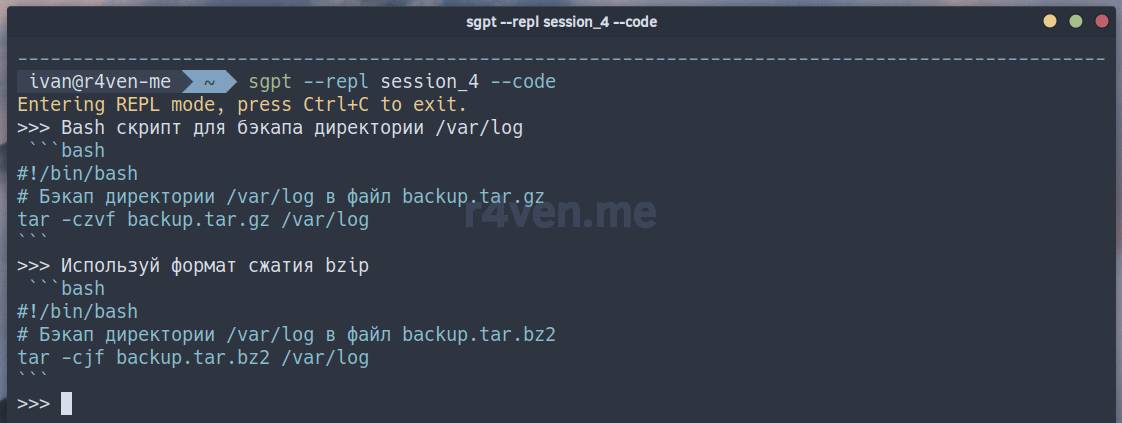
By default, --repl mode uses the chat role, and uses the same session names. To switch to dialogue with the --shell or --code roles, you just need to specify them:
BASH
sgpt --repl session_3 --shell
Click to expand and view more
BASH
sgpt --repl session_4 --code
Click to expand and view more
As you can see, conversation context works successfully.
Short aliases for convenience
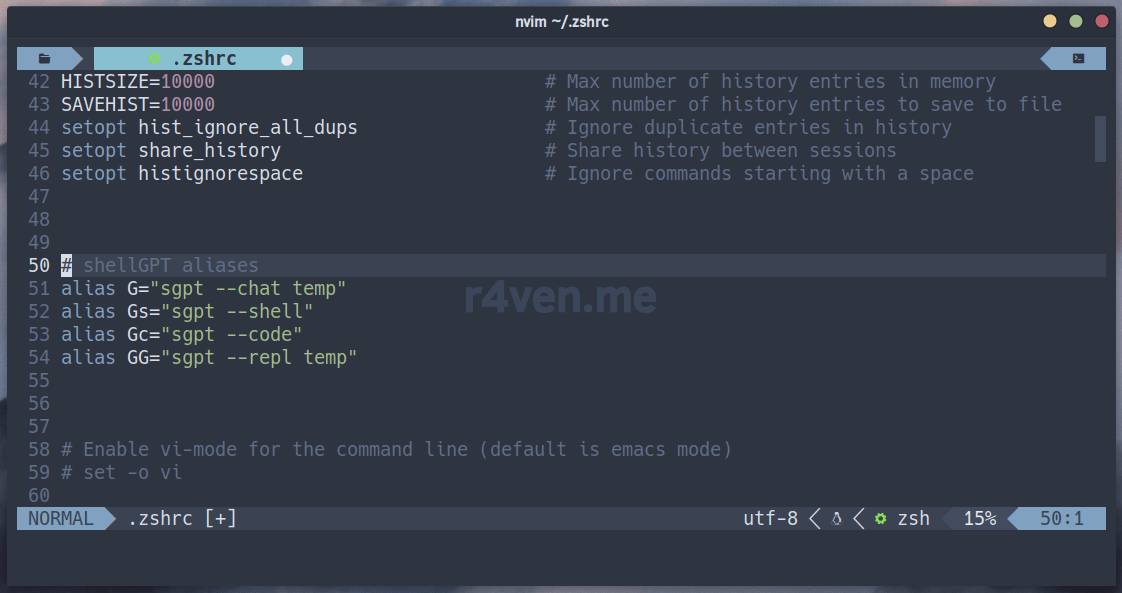
Let’s create short aliases (command aliases) for even greater convenience when using the bot.
Open the shell configuration file for editing, in my case Zsh:
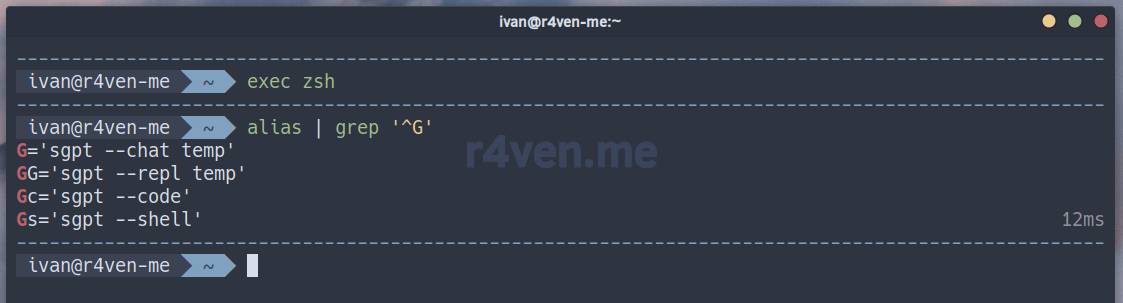
Now let’s re-initialize our shell and use the alias command to display our additions:
BASH
exec zsh
alias| grep '^G'
Click to expand and view more
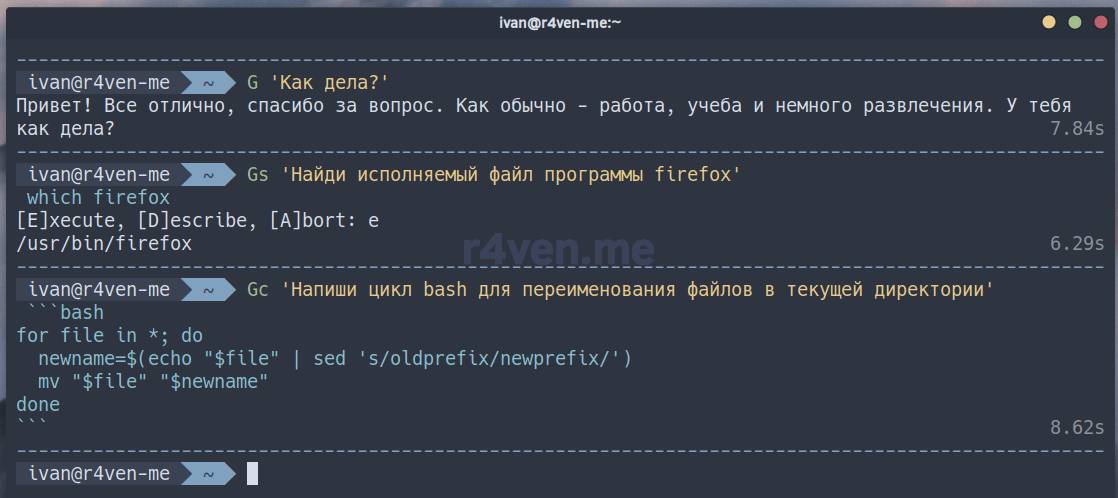
Let’s check:
BASH
G 'Как дела?'Gs 'Найди исполняемый файл программы firefox'Gc 'Напиши цикл bash для переименования файлов в текущей директории'
Click to expand and view more
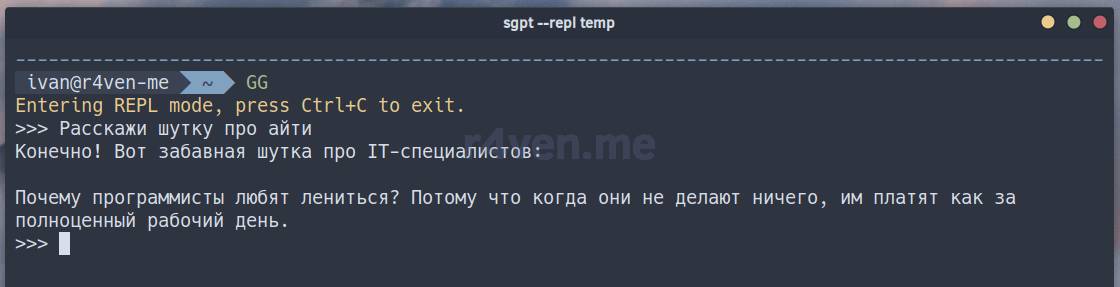
Great, it works. Let’s try repl mode:
BASH
GG
Click to expand and view more
Excellent, now it’s convenient to address the bot with short commands:
G "query_text" — a query in chat mode: --chat
Gs "query_text" — a query in shell mode: --shell
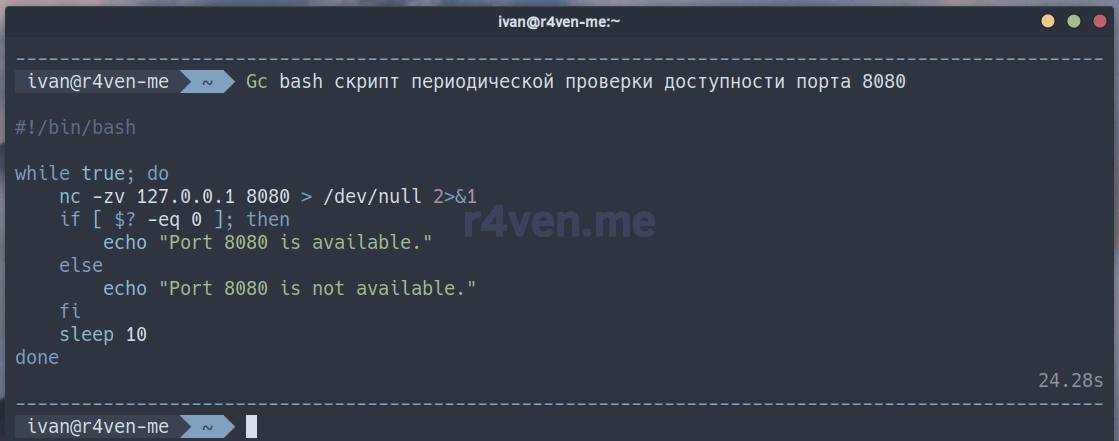
Gc "query_text" — a query in code generation mode: --code
GG — switch to dialogue mode: --repl
💡 Tip
💡If you use bat for syntax highlighting of terminal output, then the code generation alias can be turned into a function, removing the first and last line in code mode (markdown formatting in Ollama):
A terminal with the ChatGPT chatbot as a separate application
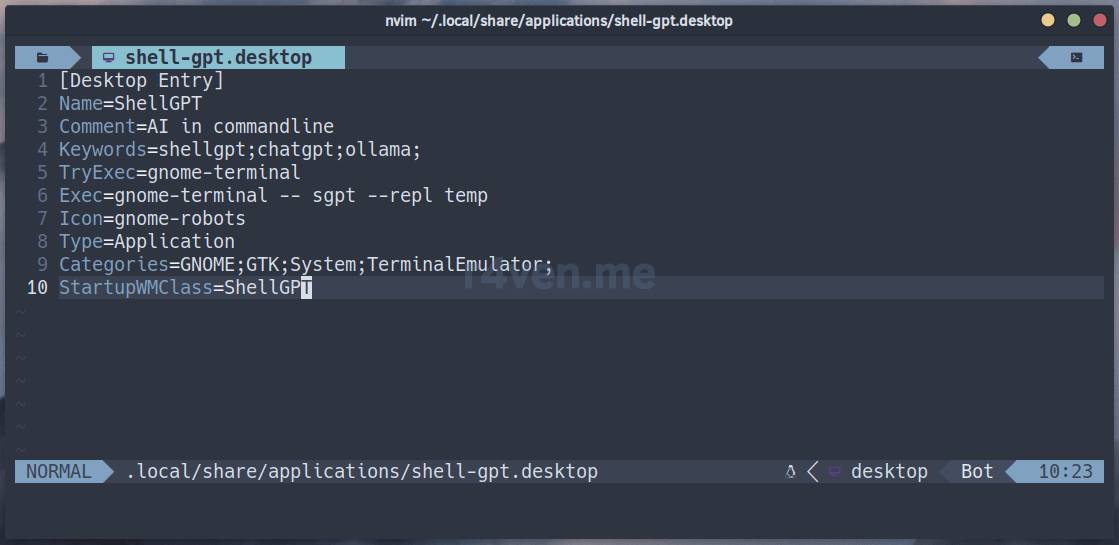
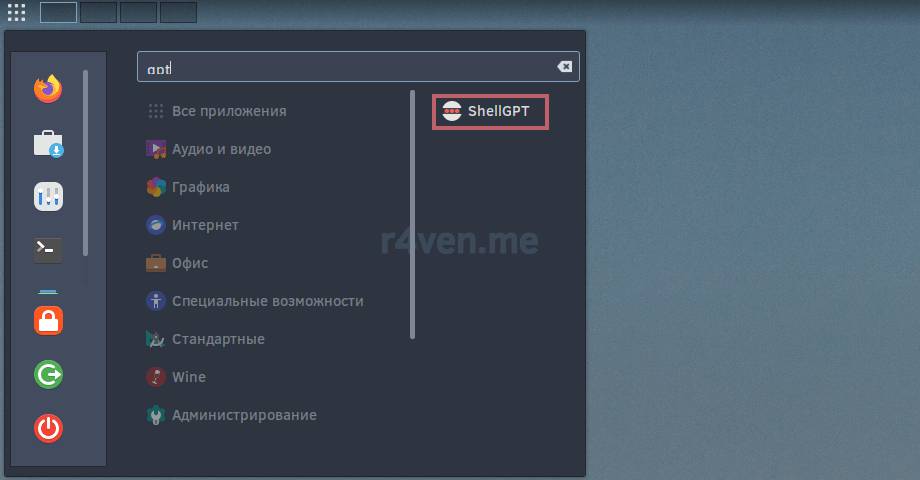
Now let’s make a separate application for communicating with the bot in repl mode. That is, when opening this application, we’ll immediately land in dialogue mode without entering any commands.
Create a .desktop file in the applications directory:
Today we learned how to integrate a progressive AI assistant, ChatGPT / Ollama, using the ShellGPT program and its command-line utility sgpt.
We installed the utility, studied its configuration file and operating modes. We created separate command aliases (alias) for quick access to the bot from the terminal, and also made a separate application for communicating with the bot in a separate window in real-time mode (repl).
Once again, I want to point out that the ShellGPT program is essentially a console client for connecting via API to the online platform OpenAI or the local Ollama.







Comments