
Asciinema is a tool for recording terminal sessions and playing them back with maximum precision. It’s ideal for documenting processes, creating training materials, saving history, or debugging.
🖐️Hey!
Subscribe to our Telegram channel @r4ven_me📱, so you don’t miss new posts on the website 😉. If you have questions or just want to chat about the topic, feel free to join the Raven chat at @r4ven_me_chat🧐.
About Asciinema
Asciinema is open-source software for recording and playing back terminal sessions: unlike video, it saves terminal input/output as text data (JSON format), which means recordings take up very little space, remain sharp at any scale, and the recorded text can be copied; finished recordings can be played back locally in the terminal or embedded/shared via the web (asciinema.org or your own server).
When I first learned about this software, I have to say I was amazed. The magic of pure text in its finest form.
Software Versions
The following versions were used in this article:
| Software | Version |
|---|---|
| Linux Mint/Ubuntu | 22.3/24.04 |
| asciinema | 3.2.1 |
| agg | 1.9.0 |
Demo
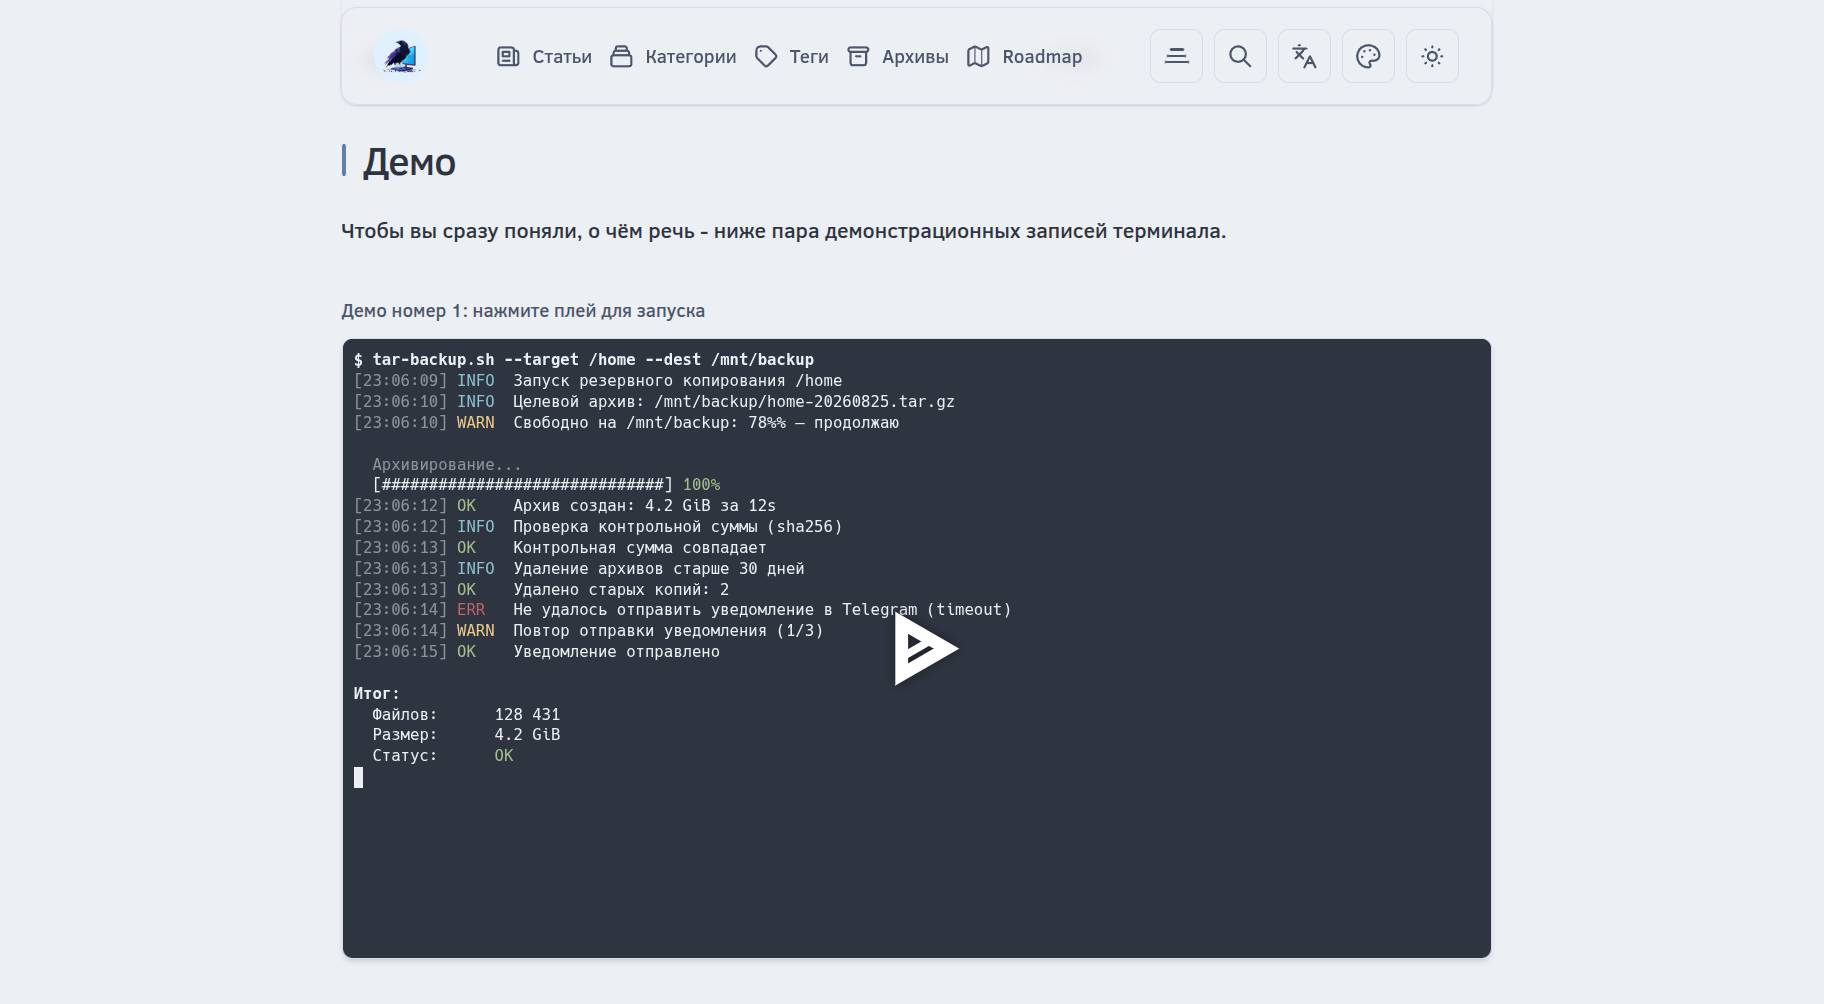
To get a quick understanding of what we’re talking about - here are a couple of terminal session recordings made with Asciinema.
💡 The coolest part is that you can pause the recording at any time and select and copy the text with your mouse 😉.
Installing Asciinema
☝️ Important: official Debian/Ubuntu repositories often contain the old Asciinema version (2.x), written in Python. The new version 3.2+ is rewritten in Rust and adds many capabilities. I recommend installing the new version.
The fastest way is to download the prebuilt binary of the latest version:
mkdir -vp ~/.local/bin

curl -Lo ~/.local/bin/asciinema \
  https://github.com/asciinema/asciinema/releases/latest/download/asciinema-x86_64-unknown-linux-gnu

chmod +x ~/.local/bin/asciinema☝️ Make sure the path ~/.local/bin is in your $PATH.
Check the version:
asciinema --version
Recording a Session
A basic recording session looks like this:
asciinema rec ./demo.castAfter executing the command, the terminal enters recording mode. You see the system prompt, type commands, see results - all of this is recorded. When you’re done, press Ctrl+D or type exit, and the recording is saved to the demo.cast file.
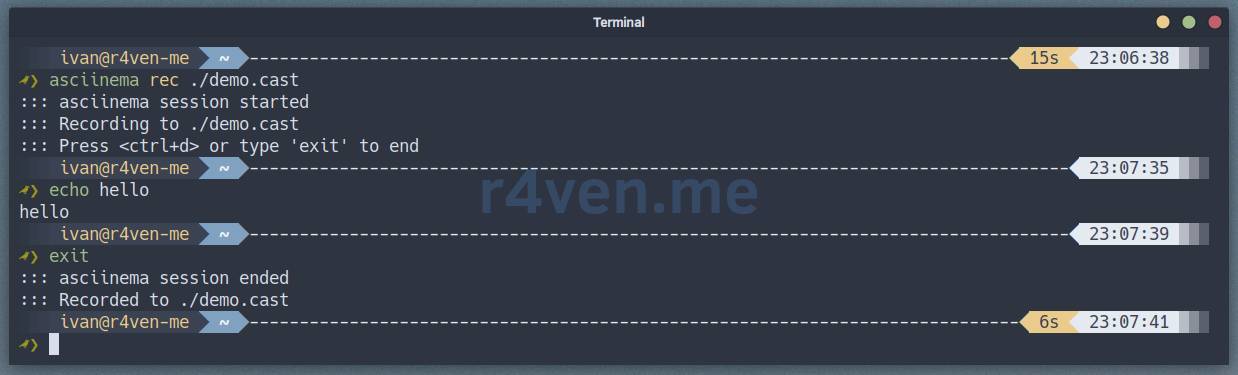
📝 A file with the .cast extension contains information about the time intervals between command input and output results, which allows playback to appear “live”.
If you want to add to a recording or start it over - use the --append and --overwrite parameters (or just delete the file).
asciinema rec ./demo.cast --overwrite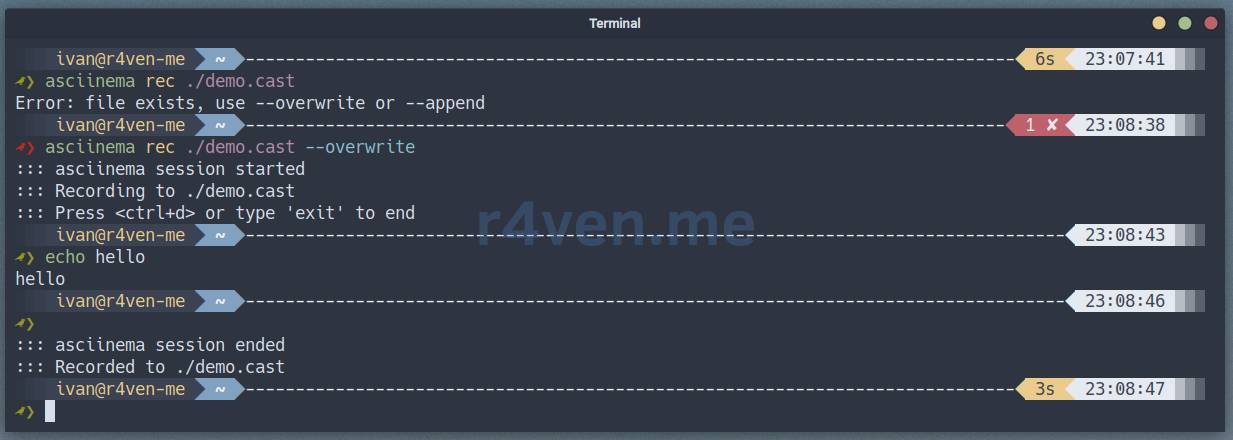
Playback
To view the recording directly in the terminal, use:
asciinema play ./demo.cast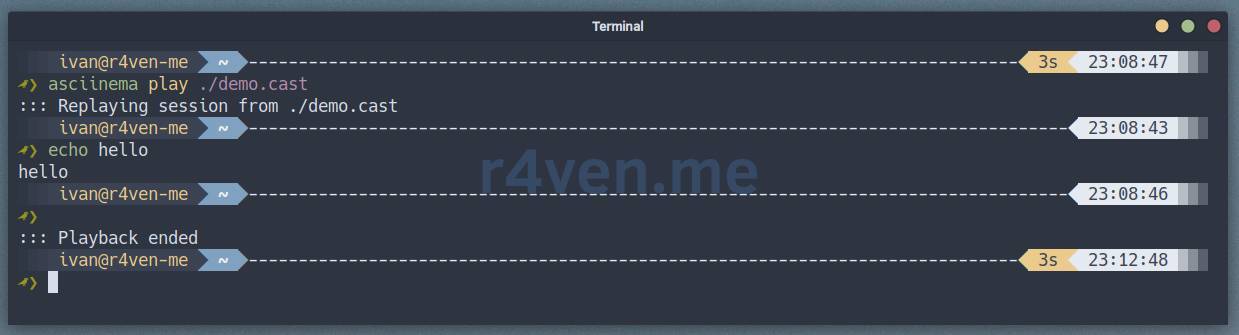
The recording will be played back with the same time intervals as during recording. This is useful for checking that everything was recorded correctly, or for viewing on a machine without a browser.
If you need to speed up playback (for example, if the recording took 10 minutes but you want to watch it in one minute), use the --speed flag:
asciinema play --speed 2 ./demo.castHere 2 means double speed. You can use values like 0.5, 1.5, 3.
Useful Options
When recording a session, there are several flags that might be useful:
--title "Title"- sets the session title, which is displayed during playback;--cols 100 --rows 30- sets the terminal size for recording;--command /bin/bash- explicitly specifies which shell to use for recording;--env TERM=xterm-256color- used to specify which environment variables to save in the recording metadata;--stdin- enables recording of keyboard input (by default only output is recorded).
Example of a complete recording with parameters:
asciinema rec --title "Nginx setup" --cols 120 --rows 30 ./nginx.cast💡 Tip
If you’re recording a demonstration for educational or documentation purposes, I recommend practicing a bit to get comfortable with the commands and avoid typos during the final recording.
Working with Time
Sometimes there are moments in a recording where you typed slowly or waited for a server response, which stretches out the demonstration for viewers. Asciinema lets you edit these delays.
The .cast file is a simple text JSON-like format. Each line contains information about a timestamp, event type, and data. If you open the file in an editor, you’ll see something like:
[0.0, "o", "$ "]
[0.5, "o", "echo hello"]
[0.1, "o", "\r\n"]
[1.2, "o", "hello\r\n"]The first number is the time interval in seconds from the previous event. If you see [5.0, ...] and know it’s a delay you can shorten, you can edit that number manually.
☝️ Be careful when editing .cast files manually - if you break the JSON structure, Asciinema won’t be able to play it back.
The better way is to use the --idle-time-limit parameter. It can be used both during playback (play) and recording (rec). The idea is to prevent long “pauses” during a session - long periods of terminal inactivity - from being recorded or played back. For example, if a recorded session has a moment of waiting for a long process to complete without terminal output, say for 2 minutes, then with --idle-time-limit 2, that moment will be shortened to 2 seconds. Very convenient in my opinion.
Converting cast Files to GIF and MP4
Asciinema is great for embedding in websites, but sometimes you might need a more universal format - like GIF or MP4. The Asciinema team has already taken care of this by writing the agg command-line utility agg (asciinema gif/mp4 generator).
Installing agg
agg is written in Rust, and the simplest installation method is similar to Asciinema:
curl -Lo ~/.local/bin/agg \
  https://github.com/asciinema/agg/releases/latest/download/agg-x86_64-unknown-linux-gnu

chmod +x ~/.local/bin/aggAfter installing agg, check it:
agg --versionCreating a GIF
The most common use of agg is converting a .cast file to an animated GIF:
agg ./demo.cast ./demo.gifDone. GIF size is usually larger than a .cast file, but much smaller than video of the same quality.
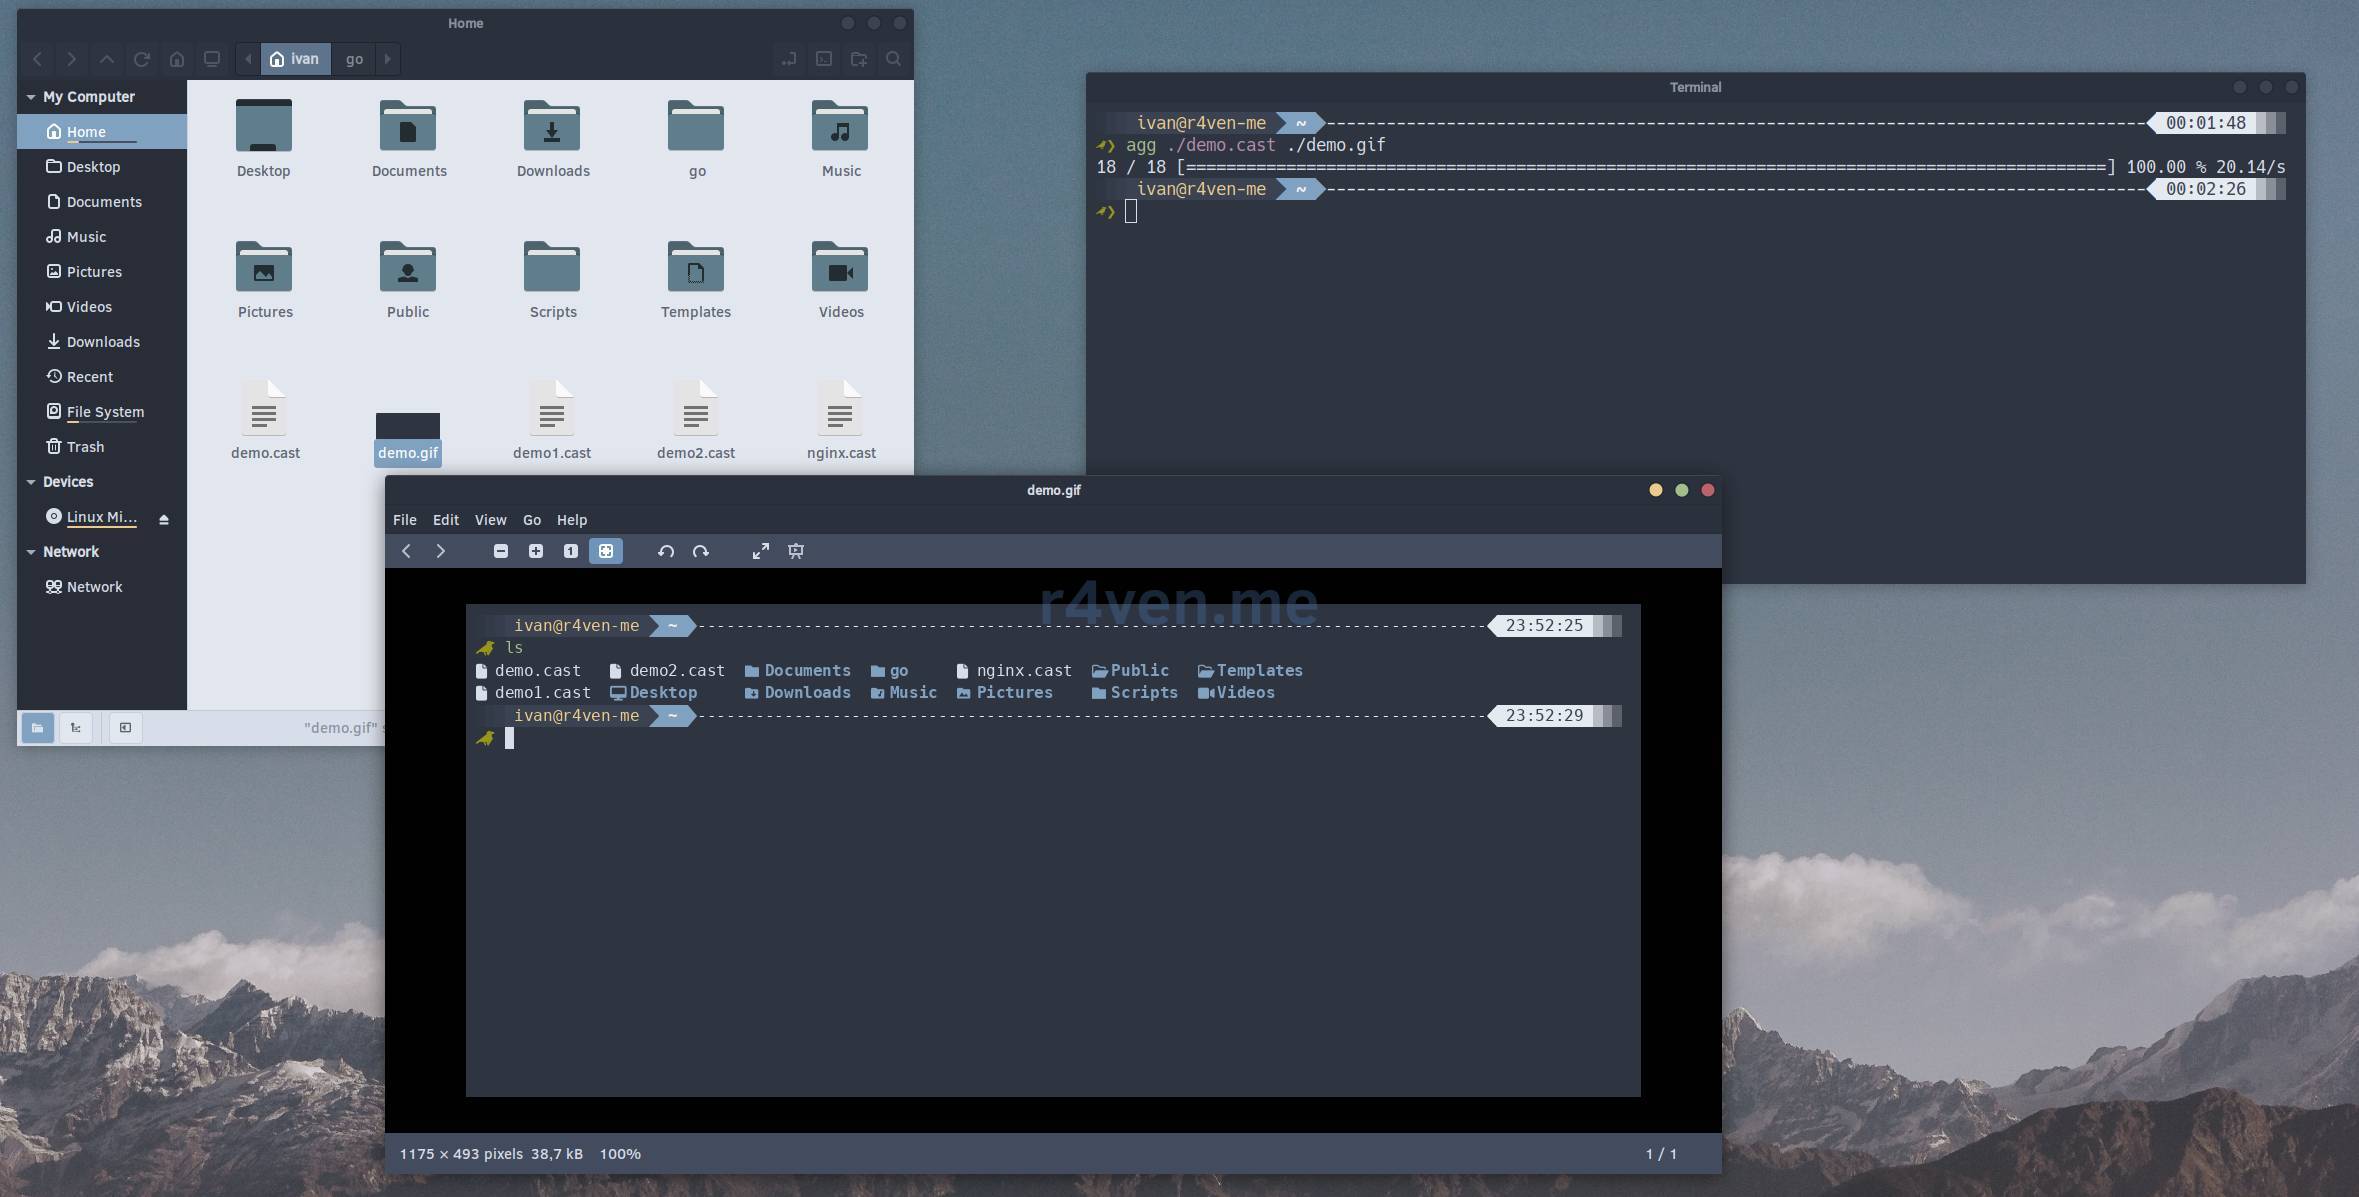
If the recording is too long and the GIF turns out bulky, you can speed up playback:
agg --speed 2 ./demo.cast ./demo.gifThe --speed 2 flag means double speed, just like we saw in Asciinema.
Creating MP4
If you need a video in MP4 format, agg can handle that too:
agg ./demo.cast ./demo.mp4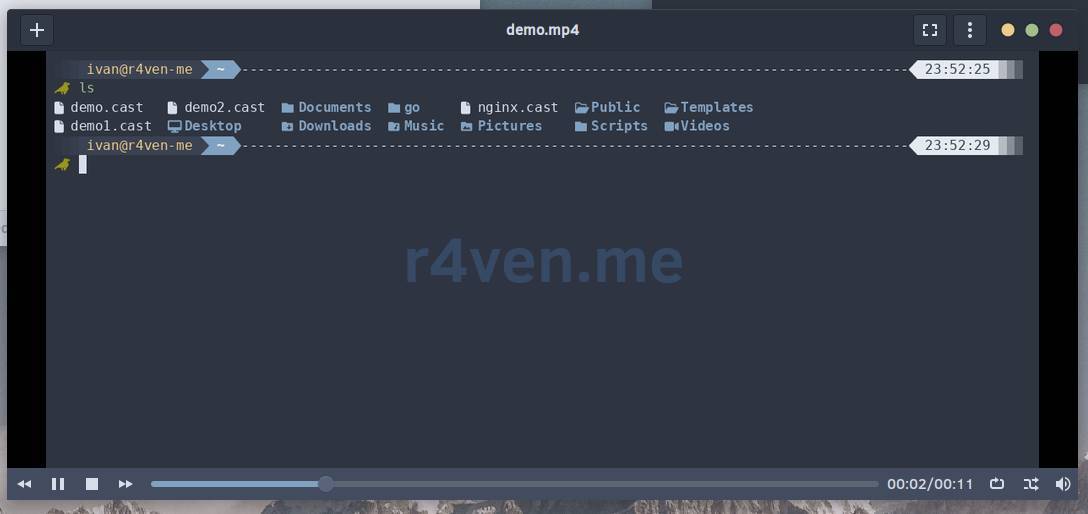
Useful agg Options
agg supports many parameters to control the output:
--speed N- playback speed multiplier (default 1);--theme "solarized-dark"- terminal color scheme selection (available:asciinema,dracula,monokai,solarized-dark,solarized-light);--font-size N- font size in pixels (default 14);--cols N --rows N- window size (usually matches the size at recording);--idle-time-limit N- maximum delay between actions in seconds (if pause is longer - it’s shortened to this value);--last-frame-duration N- how long to show the last frame (in seconds).
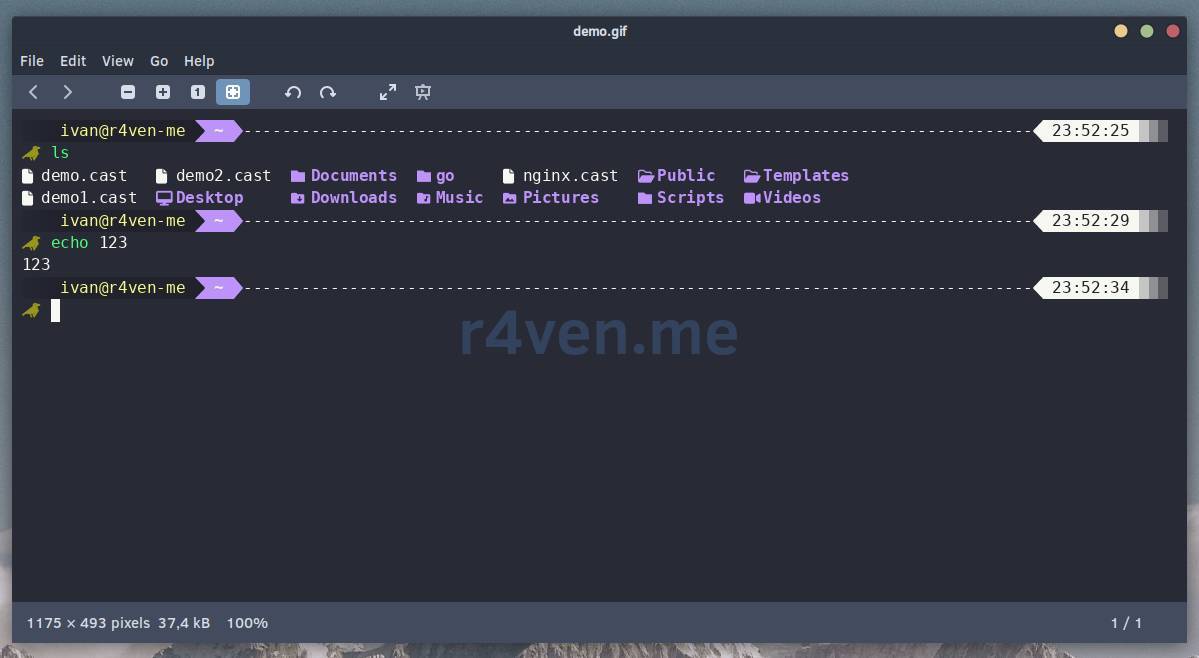
Example with several parameters:
agg --speed 1.5 --theme dracula --font-size 16 --idle-time-limit 2 ./demo.cast ./demo.gifThis command will create a GIF with 1.5x speed, dark Dracula theme, larger font, and a maximum pause between actions of 2 seconds (if the pause was longer, it will be shortened).
Embedding in Web Pages
If you want to display a recording on a website, like at the beginning of this article, Asciinema provides a simple embedding method - a JavaScript script. The browser automatically loads an interactive player, and readers can click Play, watch the recording, and rewind it with a mouse or touchpad. And the recording session files usually take up just a couple of kilobytes.
For installation details, including for different CMS, see the official documentation: https://docs.asciinema.org/manual/asciicast/v3/ or in the GitHub repository: https://github.com/asciinema/asciinema-player.
If you’re embedding in a static HTML page, upload the .cast file to your hosting (or use a URL), and insert the code:
<asciinema-player src="path/to/demo.cast"></asciinema-player>
<script src="https://js.asciinema.org/v3/bundle.js"></script>In this case, even the script will come from a remote source. But for me, this approach is less desirable.
Player parameters you can control:
src- path to the.castfile or direct link;id- recording id onasciinema.org(alternative tosrc);title- caption above the player (optional);cols,rows- terminal size;autoplay- auto-start playback (true/false);loop- loop playback (true/false);speed- playback speed (1/2);idle-time-limit- compress pauses longer than N seconds;start-at- which second to start from;poster- preview frame, for example “npt:0:03”;fit- “width”, “height”, “both” or “none”;theme- player theme:asciinema,dracula,monokai,seti,solarized-dark,solarized-light,tango,gruvbox-dark;font- terminal font, any valid CSSfont-familyvalue;font-size- terminal font size: “small”, “medium”, “big” or custom CSS value, e.g. “20px”.
You can see an example of such embedding on this page in the “Demo” section. Works with all browsers.
Cloud Storage and Sharing
If you want to share a recording with a colleague or upload it to a public server, Asciinema provides integration with its cloud storage at asciinema.org.
Uploading a recording there is simple:
asciinema upload ./demo.castYou’ll get a URL like https://asciinema.org/a/ABC123, which you can give to anyone. Viewers can watch the recording right on the asciinema website, without needing to download the file.
However, if you work on a private network or, like me, prefer not to trust third parties, just keep the .cast file on your own server and embed it via the HTML code we discussed above.
☝️ Sensitive information often appears in terminal output. Please be careful when sharing recordings of your sessions.
Automating Recordings
If you need to run multiple commands without interactive input and record the result right away:
asciinema rec -c "bash -c 'ls -la; df -h; docker ps'" ./demo.castThe -c flag tells asciinema to immediately execute this command as the recorded process.
Conclusion
Asciinema is a tool with a very narrow specialization, but in that specialization it’s nearly perfect! If you’re writing technical documentation, creating training materials, or just capturing your terminal output, this is the best way to do it.
In the next article I’ll tell you how to conveniently and easily record all your terminal sessions. Without taking up much space, with convenient session indexing and file encryption. Subscribe to the Telegram channel so you don’t miss it.
Thank you for reading. Good luck! 🐧
Resources
- Official asciinema repository on GitHub
- agg utility repository on GitHub
- asciinema documentation
- asciinema.org cloud storage
- asciinema HTML5 player
👨💻And…
Don’t forget about our Telegram channel 📱 and chat
Or maybe you want to become a co-author? Then click here🔗
💬 All the best ✌️
That should be it. If not, check the logs 🙂

Comments