

As you might have guessed from the title, today we will install and run in docker a local DNS server Unbound paired with blackjack.. an ad blocker via DNS requests — Pi-hole. All management of this setup will be done through the convenient web GUI of the Pi-hole program. And at the end of the article I’ll show how to connect this local DNS to our VPN server based on OpenConnect, which we set up earlier. It will be interesting and not difficult, almost)
🖐️Hey!
Subscribe to our Telegram channel @r4ven_me📱, so you don’t miss new posts on the website 😉. If you have questions or just want to chat about the topic, feel free to join the Raven chat at @r4ven_me_chat🧐.
All actions were tested in Debian 12 and Ubuntu 22.04 distribution environments.
Introduction
Unbound is an Open source product from NLnet Labs, representing a validating, recursive, and caching DNS server. Distributed under the BSD license.
Pi-hole is a Linux application for blocking ads and internet trackers at the network level, which acts as a DNS sinkhole and, optionally, as a DHCP server. Usually used in private networks. It’s also open source and distributed under the EUPL license.
Those already familiar with Pi-hole know that it also has a lightweight DNS server in its arsenal: Dnsmasq. But it doesn’t support recursive DNS queries. That is, it’s initially designed to forward requests to a third-party, recursive DNS server, which in our case will be Unbound, to get data about unknown addresses. But Dnsmasq is capable of caching responses and managing local DNS records.
Here’s a rough diagram of the interaction:
- Client request —> Pihole:
- The address is in the local cache —> response
- The address is not in the local cache —> forward the request to Unbound —> recursive request through root servers —> response —> save to local cache
- The address is in the local cache —> response
This DNS workflow greatly increases the level of privacy, since the initial resolving is performed through the root servers directly and is then cached on your own server.
However, it’s worth noting that this scheme has an obvious drawback in the form of a delay when performing recursive queries. You can speed up the process by setting up forwarding to the nearest third-party public DNS server. This option is also viable, especially if you encrypt requests using TLS. But in that case you will have to trust the chosen public DNS resolver. It’s up to you.
Please note that this article is not intended to cover all the intricacies of how the domain name system works, and in particular the Unbound server. We are simply deploying personal services 😉. It is assumed that you have a minimal understanding of DNS technology.
Preparation
To deploy the services we need a Docker engine installed. If it’s not installed yet, here’s the guide: Installing Docker engine on a Linux server running Debian
Now let’s perform some preparatory steps:
- get root privileges and, for security purposes, create a limited-rights group and service user —
piholefor running the Pihole and Unbound containers:
sudo -s

addgroup --system --gid 14956 pihole

adduser --system --gecos 'Unbound and Pihole DNS service' \
    --disabled-password --uid 14956 --ingroup pihole \
    --shell /sbin/nologin --home /opt/pihole/data pihole

cd /opt/pihole
Click here to view the description of the command parameters
adgroup — the command to create a group;
--system— marks the group as a system group and applies the established policies to it;--gid 14956— specifies an explicit group identifier (GID) — in this case 14956;pihole— the name of the group being created;
adduser — the command to create a user
--system— marks the group as a system group and applies the established policies to it;--gecos— allows setting the user’s description;--disabled-password— disables the password for the user (in this case, you cannot authenticate under it with a password in the system);--uid 14956— specifies an explicit user identifier (UID) — in this case 14956;--ingroup pihole— adds the user to the previously created pihole group;--shell /sbin/nologin— sets nologin as the user’s shell — you cannot authenticate in the system under it;--home /opt/pihole/data— sets (and creates) the user’s home directory, in our case this is the directory with the pihole and unbound service files;pihole— the name of the user being created.
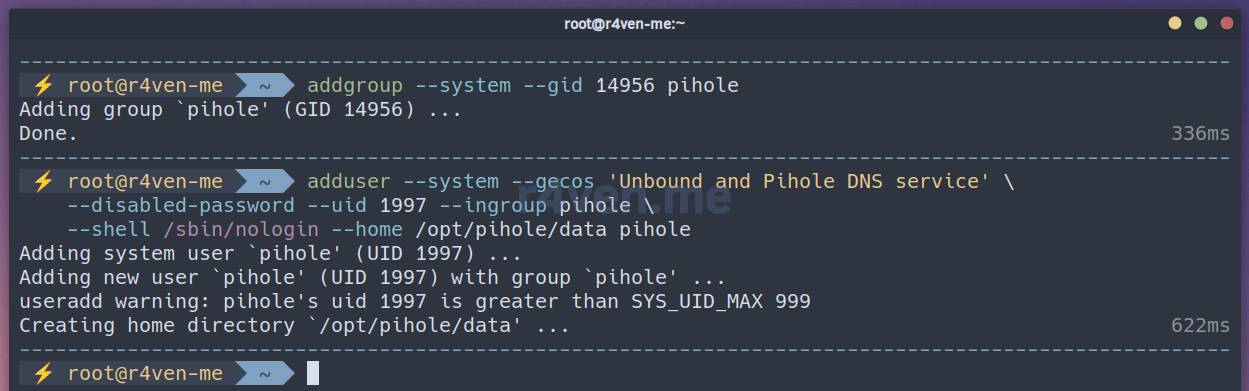
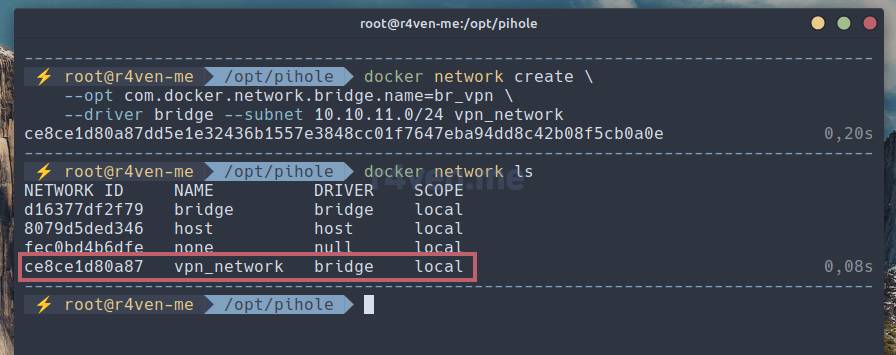
- next let’s create a separate external docker network, which allows it to be used by containers from different docker compose files:
docker network create \
    --opt com.docker.network.bridge.name=br_vpn \
    --driver bridge --subnet 10.10.11.0/24 vpn_network

docker network lsAs you can see, we created a network with addressing 10.10.11.0/24, named vpn_network, and with the name of the virtual network bridge device — br_vpn:
At this stage the preparation is complete, let’s move on to creating the docker container-services description file.
Creating docker-compose.yml
While in the /opt/pihole directory, open a new file for editing with any console editor you prefer. My readers know that I prefer Vim/Neovim for this.
I can’t help but mention that I have a series of articles about this editor on my site. You’ll find them
at the old oakvia 😉
vim docker-compose.ymlAnd insert the following content into it:
---

networks:
  vpn_network:
    external: true

services:

  unbound:
    image: r4venme/unbound:1.17
    container_name: unbound
    restart: on-failure
    stop_grace_period: 30s
    # healthcheck:
    #   disable: true
    deploy: &default_deploy
      resources:
        limits:
          cpus: '0.70'
          memory: 512M
        reservations:
          cpus: '0.2'
          memory: 256M
    logging: &default_logging
      driver: json-file
      options:
        max-size: "50m"
        max-file: "5"
    cap_add:
      - NET_ADMIN
    hostname: "unbound"
    environment:
      TZ: "Europe/Moscow"
      PUID: 14956
      PGID: 14956
    volumes:
      - "./data/unbound/:/etc/unbound/"
    expose:
      - "53/udp"
      - "53/tcp"
    # ports:
    #   - "53:53/udp"
    #   - "53:53/tcp"
    networks:
      vpn_network:
        ipv4_address: 10.10.11.200
        aliases:
          - unbound-server

  pihole:
    # depends_on: [unbound]
    container_name: pihole
    image: pihole/pihole:2025.03.0
    restart: on-failure
    stop_grace_period: 30s
    deploy: *default_deploy
    logging: *default_logging
    cap_add:
      - NET_ADMIN
      # - SYS_TIME
      # - SYS_NICE
    hostname: pihole
    dns:
      - 10.10.11.200
      - 10.10.11.200
    environment:
      TZ: "Europe/Moscow"
      PIHOLE_UID: 14956
      PIHOLE_GID: 14956
      FTLCONF_webserver_api_password: 'pihole_password'
      FTLCONF_dns_listeningMode: 'all'
      FTLCONF_dns_upstreams: 10.10.11.200;10.10.11.200
    volumes:
      - "./data/pihole/:/etc/pihole/"
      # - "./data/dnsmasq/:/etc/dnsmasq.d/"
    expose:
      - "53/tcp"
      - "53/udp"
      - "80/tcp"
    ports:
      - "127.0.0.1:8081:80"
      # - "53:53/tcp"
      # - "53:53/udp"
      # - "80:80/tcp"
      # - "443:443/tcp"
      # - "67:67/udp"
      # - "123:123/udp"
    networks:
      vpn_network:
        ipv4_address: 10.10.11.100
        aliases:
- pihole-dnsNote that the containers described in the
docker-compose.ymlfile are deliberately limited in hardware resource usage tocpus: '0.70'andmemory: 512M, i.e. the maximum allowed CPU usage is 70% of one core and 512 MB of RAM + reserve. Explicit limits are also set for storing container logs: 5 files of 50 MB each per container. If necessary, adjust these parameters according to your needs. Read more about service resource limits when using docker compose here, and about logging here.
The current version of the docker-compose.yml file is also available on GitHub.
Let’s briefly go through the contents.
Just in case, I’ll leave a link to the reference for compose file contents here and at the end of the article.
- In the networks block we define the network parameters for our services’ environment. Everything here is standard, except for the
external: trueparameter, which is why we created our network during the preparation stage. This allows combining container networks from different docker compose files. - Next comes the services block. Here we describe the parameters of our Unbound DNS server and Pi-hole program container services. It’s best not to change anything here, except perhaps your addressing and mounted volumes.
- It’s important to explicitly set an IP address for each container in the networks parameter, and specify these addresses as environment variables in the pihole service. All of this is needed for correct interaction between these two containers.
- Note that with the ports directive of the pihole service we forward port 80 (web GUI) to the host system, which will listen on it at 127.0.0.1:80, i.e. access to the GUI will only be from the server environment itself.
- If you’ll be configuring access to the web GUI for access from the local network or from a VPN, replace 127.0.0.1 with an existing host network interface address. In the case of access via the internet — set up port forwarding over a secure channel, for example SSH. Which we will do a bit later.
- If you don’t specify a specific address, 0.0.0.0 will be used, which will automatically open this port to the outside. And this, as we know, is insecure if your server is accessible via an external IP.
- In the volume block,
/data/*directories are mounted, which will store service files such as server configs and historical data.
Oh yes, one more thing. The FTLCONF_webserver_api_password: 'pihole_password' variable sets the admin password when logging into the pihole GUI. If you leave it empty, the password will be generated automatically.
💡 Tip
By default, in the unbound container the service health check mechanism is implemented as resolving the address opennameserver.org once a minute. If desired, this check can be disabled with the corresponding parameter in docker-compose.yml:
healthcheck:
disable: trueNow let’s save the file and move on to starting the containers.
Running Pihole + Unbound
In the project directory, let’s start our containers with this command:
docker compose up -d && docker compose logs -f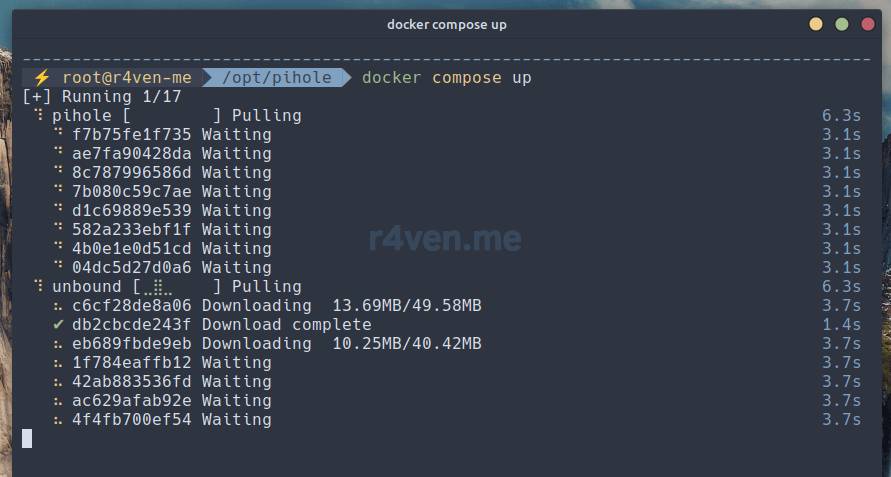
You should see the startup status of Pi-hole and the operation of the name resolution process passing through Unbound:
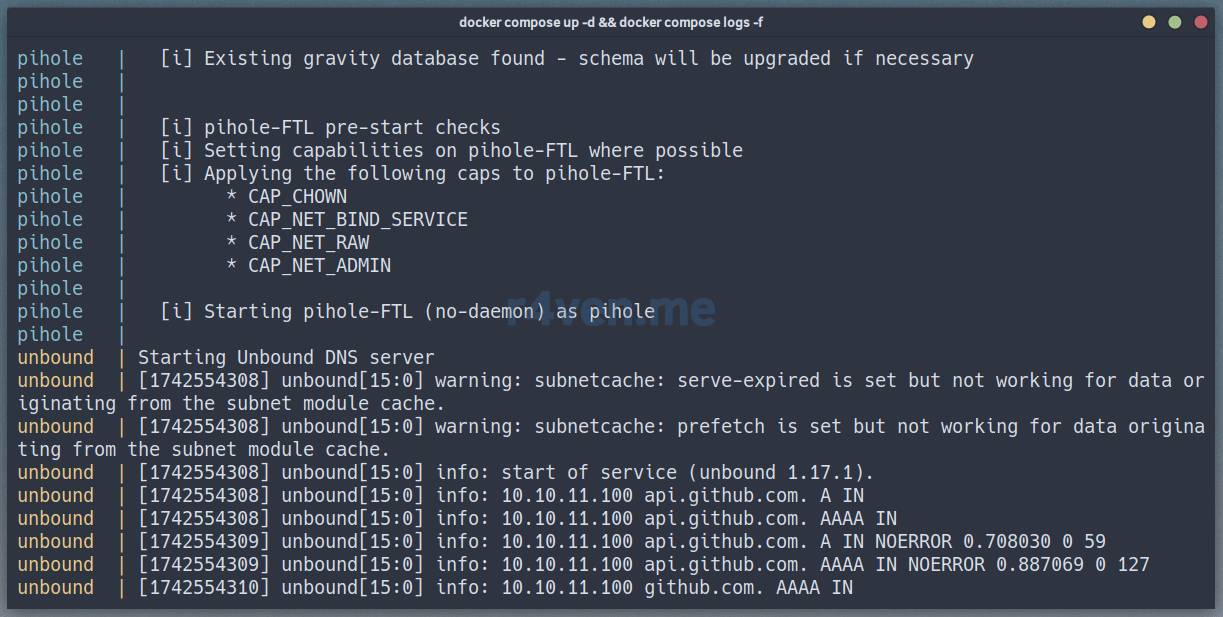
If everything started correctly, exit the container output viewing mode by pressing Ctrl+c.
To view the status of the running containers, let’s use the command:
docker compose ps
The services are running, let’s continue.
A bit about Unbound configuration
An attentive reader may have noticed that the compose file uses my Unbound image, the build of which I’ll describe in a separate article.
On the first launch of the Unbound container, files necessary for its operation are created in the /opt/pihole/data/unbound directory:
root.key— stores the DNSSEC root key for validating signed responses from root servers. It’s updated on every container start, with data taken from the official website of IANA (Internet Assigned Numbers Authority): https://data.iana.org/root-anchors/root-anchors.xml;root.hints— contains a list of IP addresses of root DNS servers for the initial loading of Unbound. This file is also updated on every container start from the official resource of the InterNIC organization (controlled by IANA): https://www.internic.net/domain/named.cache;unbound.conf— the main Unbound configuration file, defining the resolver’s operating parameters. By default, the container uses a configuration file I prepared, which defines Unbound’s operation as a recursive (sending requests to root servers) and caching DNS server. It’s well commented, albeit in English. Edit it according to your needs.
The following files are not used by default and are provided as examples. They can be included via the include directive in the main unbound.conf config:
forward-records.conf— an example of rules for forwarding requests to third-party DNS servers (for example8.8.8.8), including using TLS;srv-records.conf— an example SRV record, pointing to the location of services on the network;a-records.conf— an example A record, mapping domain names to IPv4 addresses.
For example, to set up forwarding of all requests to a third-party server, include the forward-records.conf file in the unbound.conf file:
include: "/etc/unbound/forward-records.conf"In which set up the forwarding. Below is an example of forwarding to opennameserver.org using TLS encryption (DOT):
forward-zone:
    name: "."
    forward-tls-upstream: yes
    forward-addr: 217.160.70.42@853#ns1.opennameserver.org
forward-addr: 213.202.211.221@853#ns2.opennameserver.orgTo apply the settings you need to restart the Unbound container:
docker compose restart unboundChecking DNS operation from the local host
You can check DNS operation with an explicit resolver specified using the dig utility from the dnsutils package:
# install dig
apt update && apt install dnsutils

# request via pihole
dig @10.10.11.100 r4ven.me +short +answer +identify

# request via unbound
dig @10.10.11.200 r4ven.me +short +answer +identify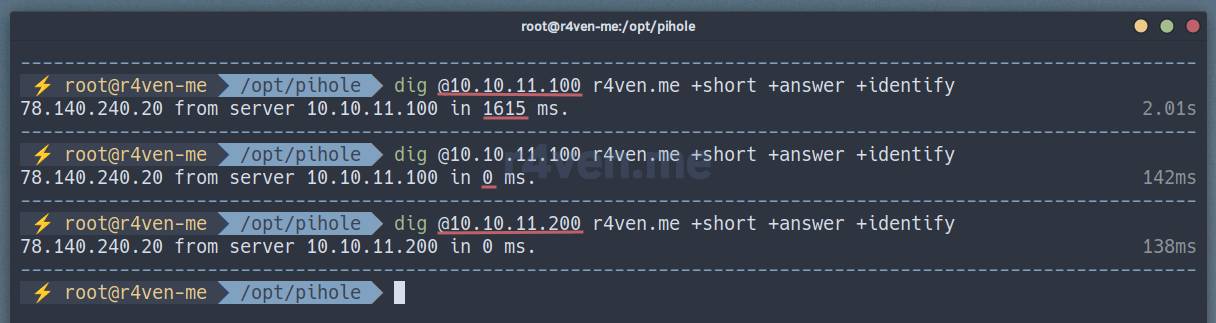
Pay attention to the response time of the first request and the subsequent one: this is the DNS caching mechanism at work.
In the Unbound logs you should see requests from the Pihole container (10.10.11.100) and our direct request from the host, which goes to Unbound (10.10.11.200) through the bridge (10.10.11.1) connection we created earlier:

If you enable a verbose logging level for Unbound (the verbosity: 3 parameter in unbound.conf), then on initial requests you’ll see how recursive requests from Unbound to the root DNS servers happen.
I mentioned earlier that the Unbound configuration used in this article supports DNSSEC, which ensures the authenticity of received responses (if the domain has a corresponding signature) by verifying their signature with the root.key key.
You can check that Unbound uses DNSSEC by executing a request with the dig command directly through the Unbound container. The response should have the ad (authenticated data) flag:
# no dnssec (should add it)
dig @10.10.11.200 r4ven.me +answer +identify +dnssec | grep ';; flags'
# will output nothing
dig @10.10.11.200 r4ven.me +short DNSKEY

# has a dnssec signature
dig @10.10.11.200 opennameserver.org +answer +identify +dnssec | grep ';; flags'
# will output the signature key
dig @10.10.11.200 +short DNSKEY opennameserver.orgNote that DNSSEC does not imply encryption of transmitted data. That’s the responsibility of the DNS over TLS (DOT) or HTTPS (DOH) transmission mechanism.
Checking DNS operation from external hosts
If you need to send requests to your DNS server from outside, for example from the local network, uncomment these lines for the pihole service in docker-compose.yml:
...
ports:
  - "53:53/tcp"
  - "53:53/udp"
...And restart the services:
docker compose down

docker compose up -dNow your DNS server can be reached by the available IP of your host. In my example, the host on which Unbound+Pihole is deployed is accessible from the local network at 192.168.122.192:
# request via pihole
dig @192.168.122.192 r4ven.me +short +answer +identify
Everything works 👌.
If your system running Pihole + Unbound uses systemd-resolved, you most likely won’t be able to bind port 53, since it’s already being listened on the local interface: 127.0.0.1:53. In that case, the pihole container won’t start. We have two options here:
- disable systemd-resolved;
- change the local listening IP address to an external one and redirect systemd-resolved to our pihole and unbound containers — let’s consider this option.
Let’s open the config:
vim /etc/systemd/resolved.confAnd change the following parameters:
[Resolve]
DNS=10.10.11.100
FallbackDNS=10.10.11.200
DNSStubListenerExtra=192.168.122.192Where:
- DNS — the address of our pihole container;
- FallbackDNS — the address of the unbound container as a fallback DNS;
- DNSStubListenerExtra — the address of the external network interface, accessible from the local network.
Let’s restart the systemd-resolved service and check whether the address changed:
systemctl restart systemd-resolved

ss -tuln | grep 53
If you have a firewall installed on your server, you need to open access to port 53.
Let’s also check DNS resolving from the outside:
dig @192.168.122.192 r4ven.me +short +answer +identify
There’s a response.
Closer to the end of the article we’ll look at ways to configure DNS on clients. But for now let’s set up autostart of our compose file from the pihole service user using the Systemd initialization system.
Setting up autostart with Systemd
We’ll run services on behalf of the service account, to which we’ll grant the ability to run two strictly defined commands on behalf of the privileged docker group.
Let’s create the service unit file:
vim /etc/systemd/system/pihole.serviceAnd fill it in:
[Unit]
Description=Pihole and Unbound DNS service
Requires=docker.service
After=docker.service

[Service]
Restart=on-failure
RestartSec=5
User=pihole
Group=pihole
ExecStart=/usr/bin/sudo --group=docker /usr/bin/docker compose -f /opt/pihole/docker-compose.yml up
ExecStop=/usr/bin/sudo --group=docker /usr/bin/docker compose -f /opt/pihole/docker-compose.yml down

[Install]
WantedBy=multi-user.targetNow let’s create a file with the list of restricted sudoers permissions:
visudo -f /etc/sudoers.d/90_piholeThe
visudocommand allows you to safely editsudoersfiles: in case of a syntax error, it will display a warning and won’t let you save the file.
And fill it in:
Cmnd_Alias PIHOLE_DOCKER = \
    /usr/bin/docker compose -f /opt/pihole/docker-compose.yml up, \
    /usr/bin/docker compose -f /opt/pihole/docker-compose.yml down

pihole ALL = (:docker) NOPASSWD: PIHOLE_DOCKERFor a better understanding of how
sudoandsudoersfiles work, I recommend reading my article: Linux command line, privilege escalation: su, sudo commands 😌.
Let’s stop the manually started services and enable {auto}start already via Systemd:
docker compose down

systemctl enable --now pihole

systemctl status pihole

docker compose ps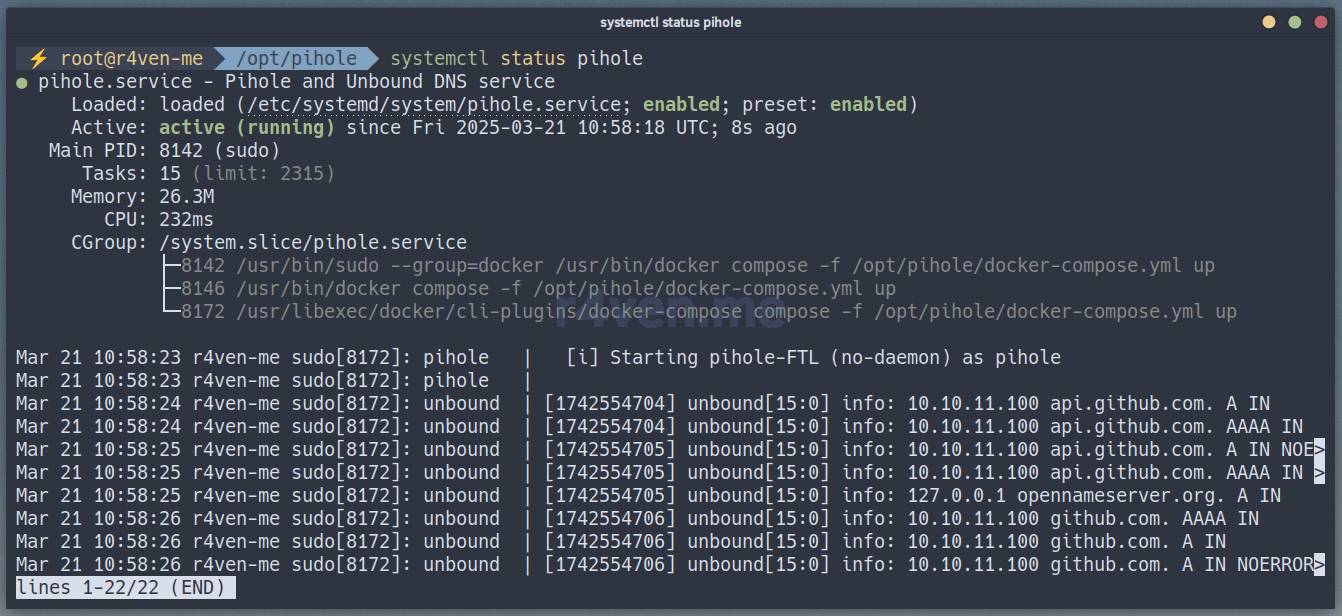

Looks like everything’s working 👍 well done us, let’s move on to the Pihole web GUI.
Connecting to the Pihole web GUI
If you deployed the DNS server on the same machine you’re working from, simply go to http://localhost/admin.
If your DNS server is remote, given that our GUI listens on port 80 on the local port of the server, you need to set up port forwarding using SSH. This is done for secure access to the web interface.
On the client machine, open a terminal and run:
# forwarding the port
ssh -4 -f -N -L 8081:localhost:8081 user@example.comWhere:
-4— use only IPv4, disables attempts to bind to IPv6;-f— sendssshto the background after authentication;-N— don’t execute commands on the remote server, only establish the tunnel;-L— the local port forwarding key;8081— the port that the client machine will listen on and forward to port 8081 on the server;localhost— the address of the server on which it listens on the port;8081— respectively, the port we’re forwarding to;user@example.com— the SSH user and server address.
💡 Tip
On Windows use the forwarding command without sending the process to the background:
ssh -L 8081:localhost:8081 user@example.comAnd let’s check:
ss -tln | grep 8081In my example the port forwarding command is:
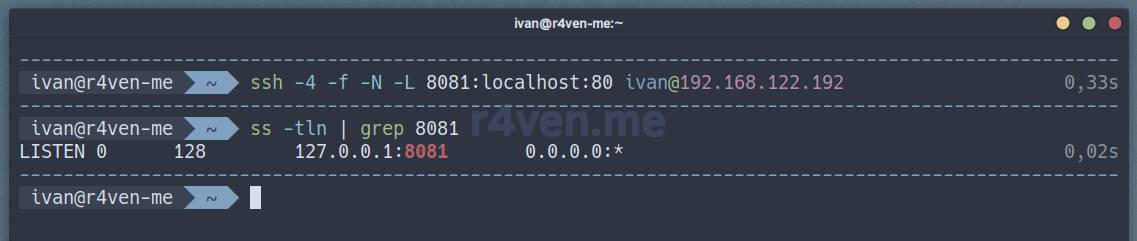
Now let’s open a browser and go to: http://localhost:8081/admin
Enter the password set in the FTLCONF_webserver_api_password variable, in my example this is pihole_password:

And we end up in our web GUI:
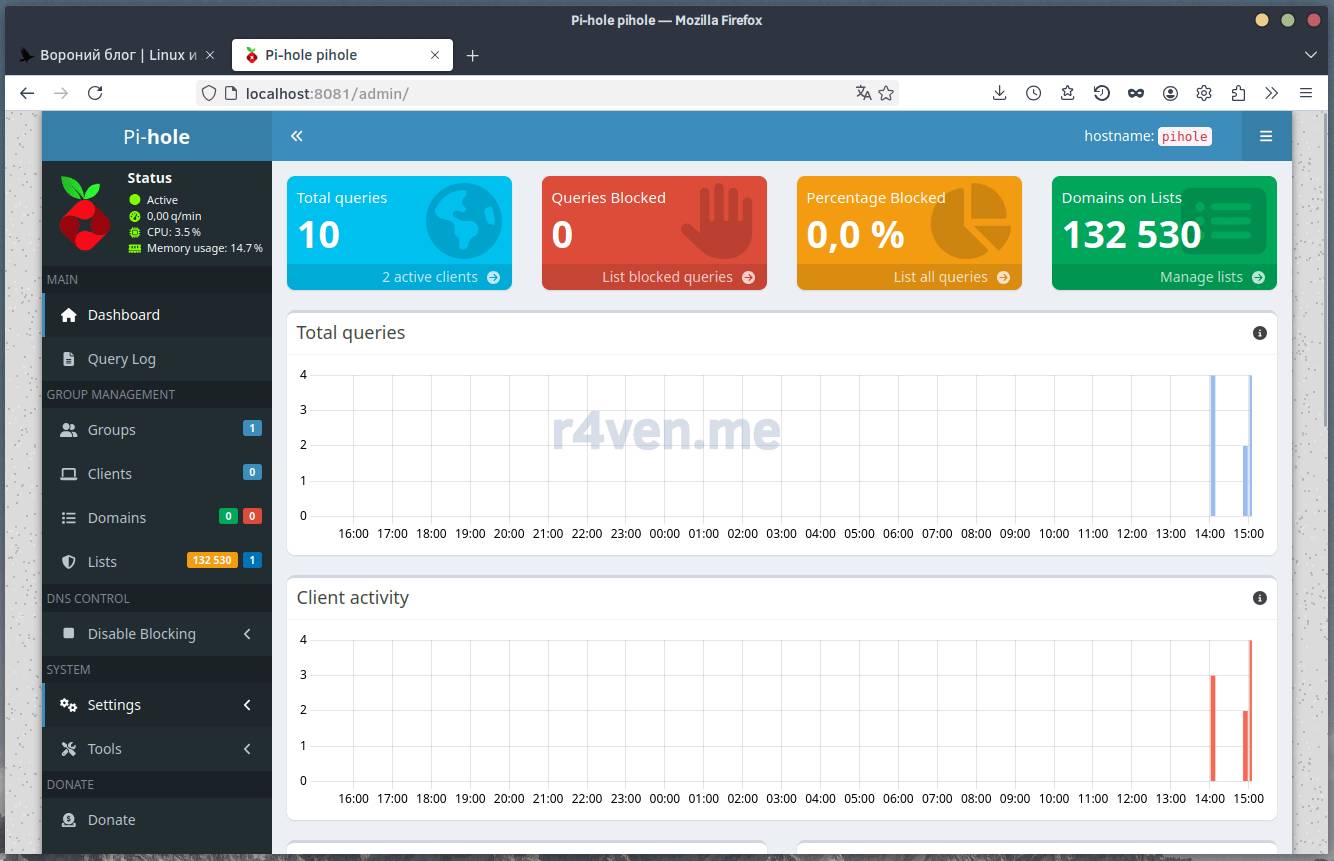
💡 Tip
If IPv6 is disabled on your system (as it is on mine), the web interface will probably not start, and the pihole container logs will show these entries:
2025-03-26 10:10:00.913 MSK [51M] ERROR: Start of webserver failed!. Web interface will not be available!
2025-03-26 10:10:00.913 MSK [51M] ERROR:        Error: Failed to setup server ports (error code 10.0)
2025-03-26 10:10:00.913 MSK [51M] ERROR:        Hint: Check the webserver log at /var/log/pihole/webserver.log

# and in the /var/log/pihole/webserver.log file:
[2025-03-26 10:10:00.898 MSK 51] Initializing HTTP server on ports "80o,443os,[::]:80o,[::]:443os"
[2025-03-26 10:10:00.906 MSK 51] cannot create socket (entry 3)
[2025-03-26 10:10:00.912 MSK 51] cannot create socket (entry 4)
[2025-03-26 10:10:00.912 MSK 51] Failed to setup server portsTo fix this, you need to disable the use of http ports on the IPv6 address in the pihole config:
vim /opt/pihole/data/pihole/pihole.tomlIn the [webserver] block replace:
# replace this line:
port = "80o,443os,[::]:80o,[::]:443os"

# with this one:
port = "80o,443os"And restart the container:
docker compose restart piholeAfter that try going to http://localhost:8081/admin on the client again.
The pihole interface, as they say, is intuitive. In the context of the article, we’re interested in local DNS records and ad domain blocklists.
Local DNS records
DNS records are located in the Local DNS section 😉. Let’s add a few new ones for testing:
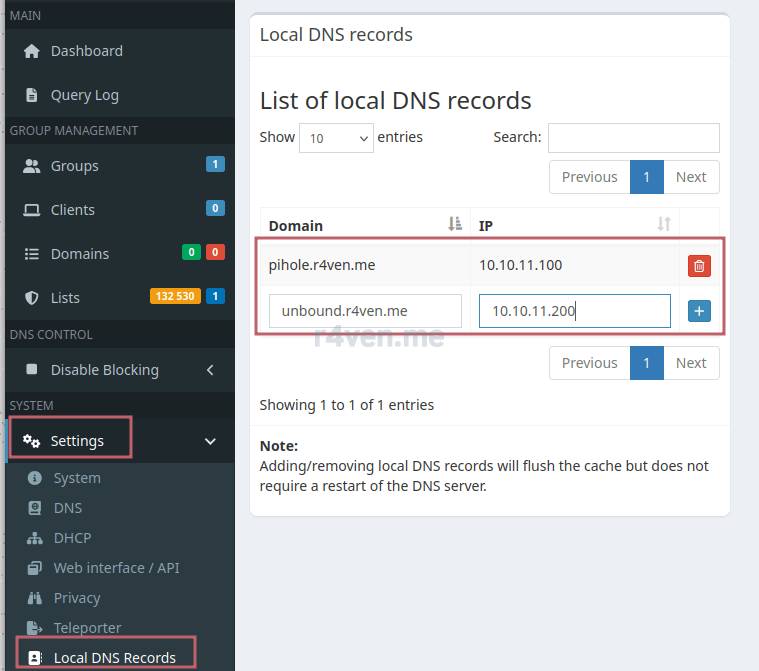
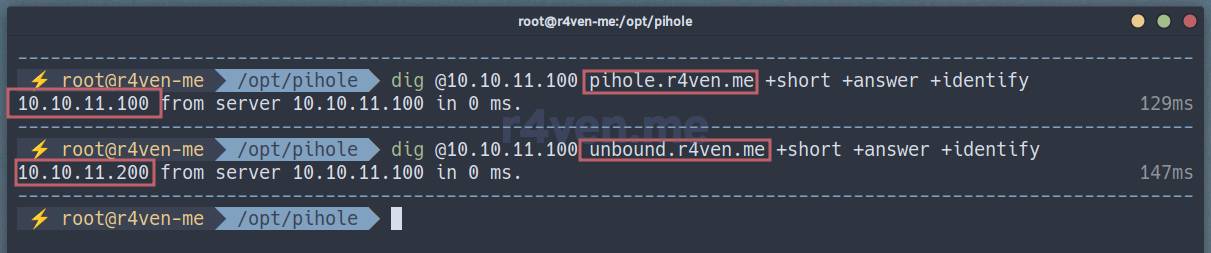
And let’s immediately check the name resolution:
dig @10.10.11.100 pihole.r4ven.me +short +answer +identify

dig @10.10.11.100 unbound.r4ven.me +short +answer +identifyAd domain blocklists
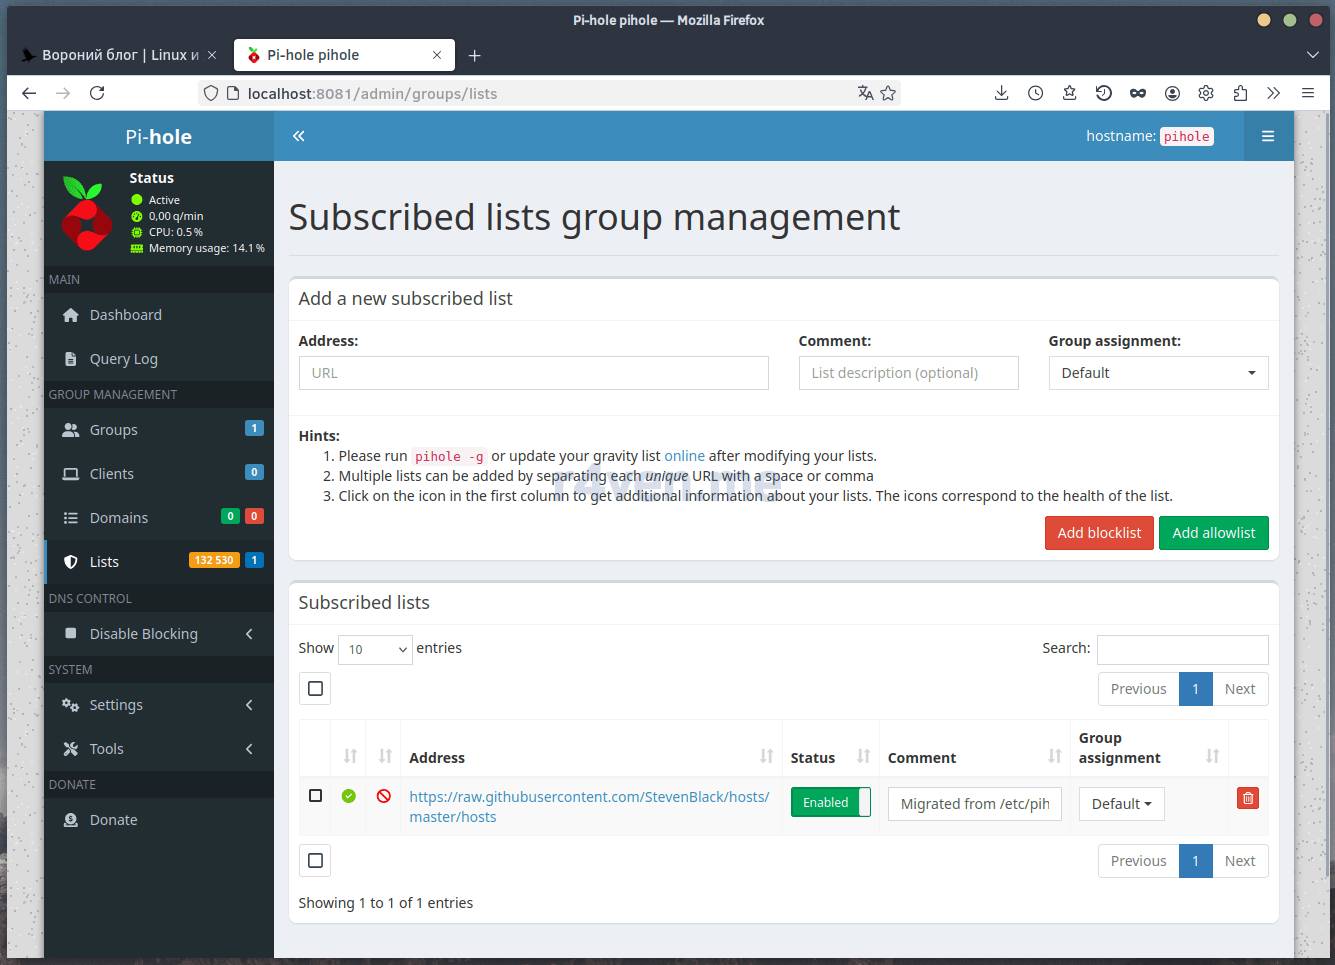
Lists of domains to block are set in the Adlists section. They are a link to a text file with the list itself in hosts format: ip_address domain_name
Blocking is achieved by simply redirecting the unwanted domain name to a stub address 0.0.0.0. Everything ingenious is simple)
As you can see in the screenshot, one public list is already added in Pi-hole. You can easily add your own here:
Or in the /opt/pihole/data/pihole/adlists.list file.
Let’s move on to configuring DNS on clients.
Setting up DNS on clients
In the Linux world there are many ways to configure DNS on clients, which only confuses many users. I’ll cover just the most popular ways.
The resolv.conf file
The most classic way to configure DNS in Linux is the resolv.conf file. Let’s open it for editing:
vim /etc/resolv.confAnd add a record. It’s important that it’s above the already existing nameserver parameters:
nameserver 192.168.122.192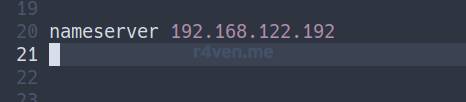
Save, close. The settings are picked up on the fly.
Systemd-resolved
In many modern Linux distributions, DNS management is done using one of the systemd modules — systemd-resolved, which we’ve already discussed.
To edit DNS parameters, let’s open the configuration file:
vim /etc/systemd/resolved.confAnd in the Resolve block change (or add) the DNS= directive:
[Resolve]
DNS=192.168.122.192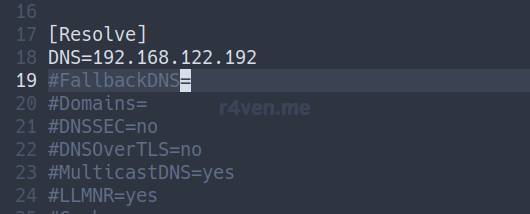
Save and restart the service + clear the DNS cache:
systemctl restart systemd-resolved

resolvectl flush-cachesFrom experience, in the case of systemd-resolved, it’s preferable to reboot the entire system)
rebootAlso, for compatibility with applications that don’t use library calls but access the DNS server directly, it’s recommended to create such a symlink (with a preliminary backup of the resolv.conf file):
mv /etc/resolv.conf{,.backup}

ln -sv /run/systemd/resolve/stub-resolv.conf /etc/resolv.confNetworkManager
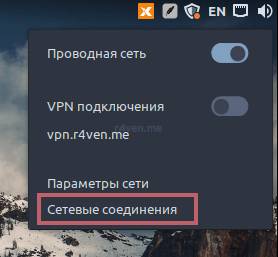
On desktop Linux systems, the network, including DNS parameters, is managed by NetworkManager. Here you’ll have to do some clicking around.
Let’s go into network connections via the desktop applet or through the application menu:
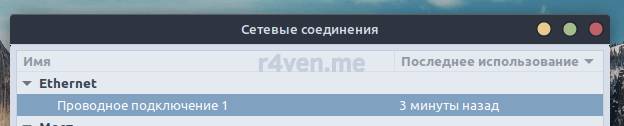
Next select our main physical connection:
Go to the IPv4 settings tab and set the DNS server address:
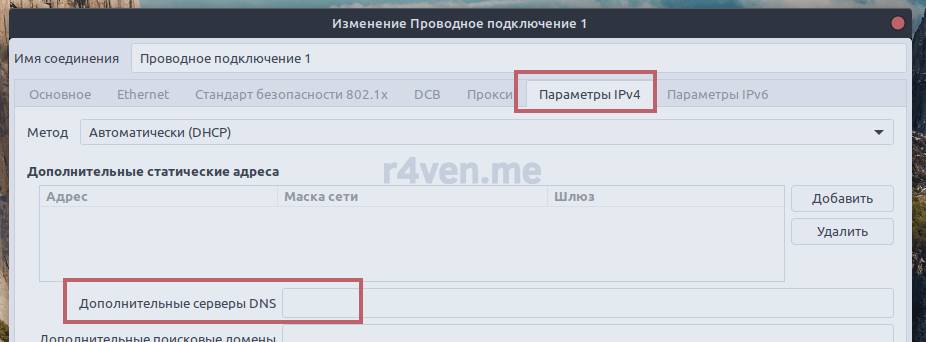
Done)
Final check
To check the correctness of the DNS settings in the case of resolve.conf and NetworkManager, execute:
nslookup r4ven.me

dig r4ven.me +short +answer +identify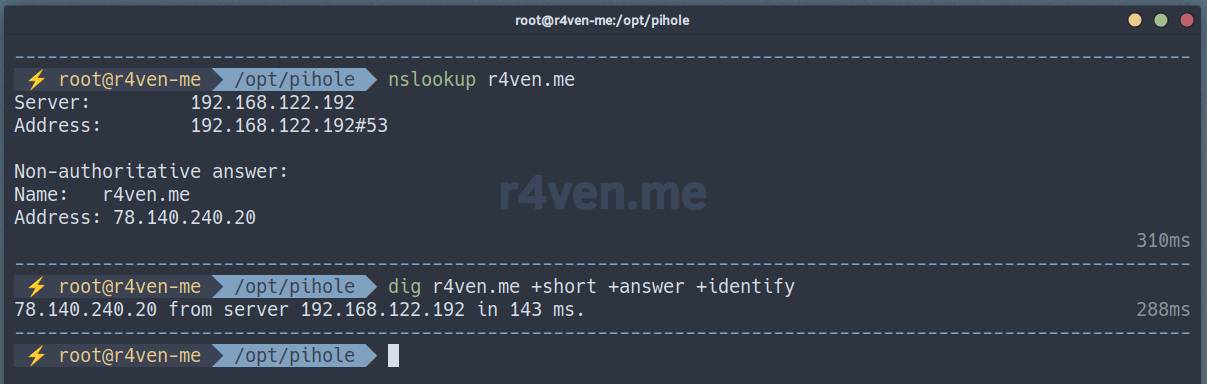
The name resolves through the local DNS, exactly what’s needed.
And in the case of systemd-resolved the commands are:
resolvectl dns

resolvectl query r4ven.me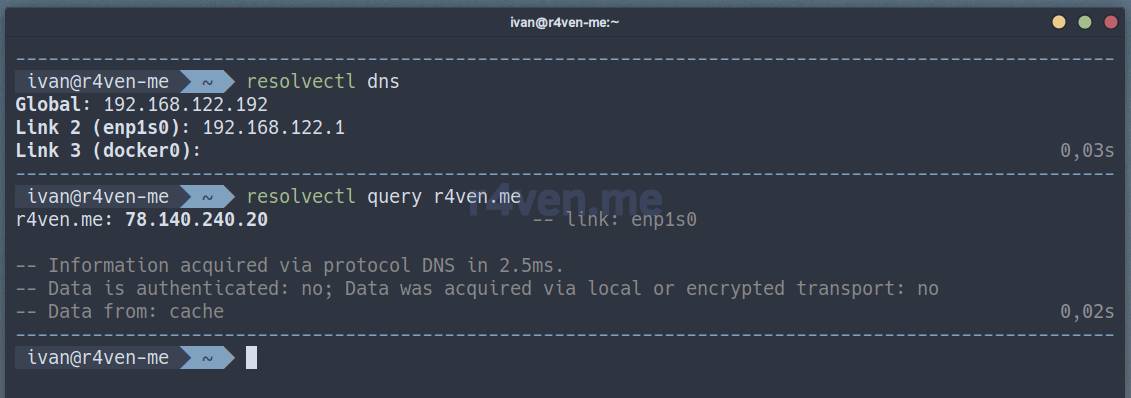
Excellent.
Now let’s check the DNS records we added earlier in the Pi-hole web interface:
ping -c3 unbound.r4ven.me

ping -c3 pihole.r4ven.me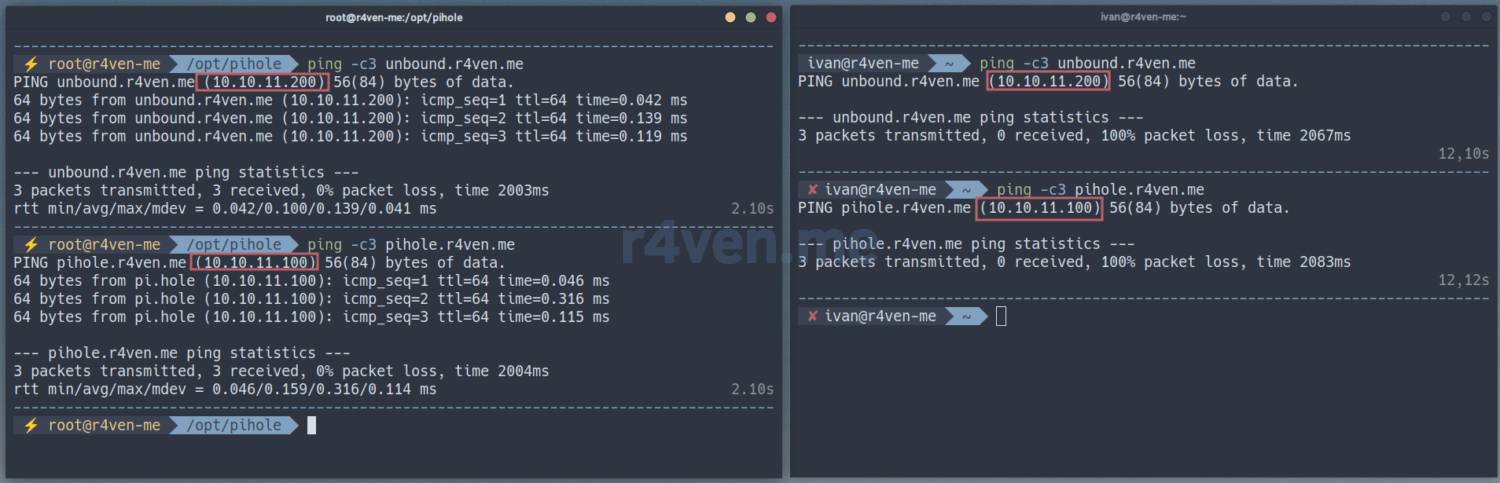
On the left, the host on which pihole + unbound is deployed, on the right, a host from the local network.
As we can see, names resolve correctly on different clients, even if they are unreachable 😌.
Now let’s move on to setting up DNS parameters on the VPN server (if you have one).
Setting up DNS in the OpenConnect (ocserv) config
If you configured ocserv according to my article, then after adding a DNS server to the diagram, it will look like this:
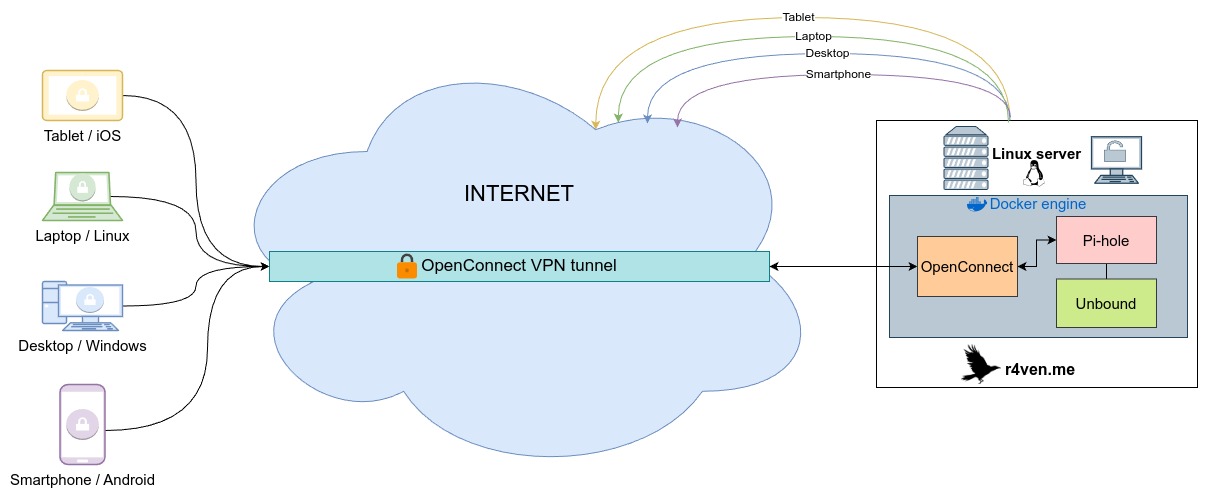
It’s assumed that openconnect and pihole + unbound are deployed on the same machine. So, to set up the pairing, the first thing to do is add to the openconnect project’s compose file:
vim /opt/openconnect/docker-compose.ymlNetwork definition:
networks:
  vpn_network:
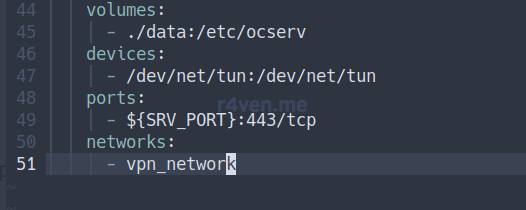
external: trueAnd to the openconnect container parameters, add the networks: directive
...
networks:
  - vpn_network
...
Now we need to edit the config file of the ocserv server itself:
vim /opt/openconnect/data/ocserv.confAdding the value of the dns parameter (the first one):

The
tunnel-all-dnsparameter must betrue.
After that, you need to reload the config or restart the OpenConnect service by any method:
# reloading the config
docker exec -it openconnect occtl reload

# restarting the container
docker restart openconnect

# or
systemctl restart openconnectAnd also reconnect on the clients and that’s it. Now all DNS requests from ocserv clients will go through the local resolver, which in turn will query the root servers directly and build its own cache.
Conclusion
So we’ve set up our local DNS server based on Unbound + Pi-hole. We’ve also configured clients to use it. Additionally, we set the DNS server address in the OpenConnect server config, thereby getting a complete VPN solution.
Of course, we haven’t covered all the capabilities of this stack. But as I said, that wasn’t the goal. Pi-hole has many interesting features out of the box, such as a DHCP server configurable in the web GUI, and so on. But that’s beyond the scope of this article. You’ll find all documentation sources below.
Subscribe to our Telegram channel @r4ven_me to not miss new posts on the Raven Blog website)
And if you still have questions, join our chat at the same place: @r4ven_me_chat. I try to always answer there, in my free time.
Thanks for reading! Good luck with your name resolving 😉
Useful sources
- Project files in my repo on GitHub
- Official Unbound project website (EN)
- Article about Unbound on ArchWiki
- Example Unbound docker image (EN)
- Official Pi-hole project website (EN)
- Pihole docker image repository (EN)
- Reference for docker-compose.yml (EN)
- My article on setting up the OpenConnect VPN server (ocserv)
- Installing Docker engine on a Linux server running Debian
👨💻And…
Don’t forget about our Telegram channel 📱 and chat
Or maybe you want to become a co-author? Then click here🔗
💬 All the best ✌️
That should be it. If not, check the logs 🙂

Comments
Question from the Telegram chat: “What’s the difference between dnsmasq and unbound?”
📝 Note
They differ in functionality. Unbound is a full-fledged DNS solution, a resolver, recursive, caching server and so on + support for security protocols such as DNSSEC, DoT, DoH. A modern analog of the popular bind server.
At the same time, dnsmasq is a lightweight DNS server, but without recursive resolving, only forwarding and caching. And it includes a DHCP server. A small combo)
I chose unbound as the DNS server to cover all the needs for such a tool
If you’re interested specifically in this combination, here’s an article from the official pihole docs
https://docs.pi-hole.net/guides/dns/unbound/
Unbound communicates directly with the root servers, ultimately providing the true address in the response. This increases privacy, but due to recursion, there may be a small delay on initial requests. But afterwards the data will still be saved in the cache.
Comment from Telegram from Dmitry:
📝 Note
For unbound you can easily put together a whitelist of domains (as well as basically any other filter), see https://github.com/endrepavel/unbound-domainfilter as an example.
Might be useful to someone.
Comment from Telegram:
📝 Note
Many thanks for the guide on setting up Pi-hole and Unbound in Docker. It was a great starting point.
During setup on Ubuntu Server 24.04.2 I ran into a few points that required some rework on my part. My main changes.
Set up direct access to the host network (network_mode: “host”). Direct network access removes the Docker NAT layer, allowing Pi-hole to see the real IP addresses of clients and handle them correctly without complex configuration.
As the Docker image for Unbound I chose ghcr.io/klutchell/unbound. Reason: mvance/unbound is a minimalistic image that didn’t support DNS-over-HTTPS (DoH) for me. The klutchell/unbound image is full-featured, supports all modern protocols (including DoH and DoT), and has a built-in health check.
When I added a few aggressive blocklists (Hagezi, AdGuard), the gravity update process started failing. Analysis showed it was running out of memory. Setting a memory: 1G limit for the pihole service in docker-compose.yml (deploy: resources: limits: …) completely solved this problem.
Comments