
In this short guide, I will explain how to configure name resolution (DNS) over the encrypted HTTPS protocol, also known as DNS over HTTPS (DoH), on a router running OpenWrt.
🖐️Hey!
Subscribe to our Telegram channel @r4ven_me📱, so you don’t miss new posts on the website 😉. If you have questions or just want to chat about the topic, feel free to join the Raven chat at @r4ven_me_chat🧐.
Using this technology allows you to improve privacy and also protect against response “spoofing”, reducing the risk of DNS spoofing attacks.
☝️ВImportant
Starting with OpenWRT 25.12, a different package manager, apk, is used instead of opkg. Package management commands for newer versions will differ.
Preface
DNS over HTTPS (DoH), as the name suggests, is a technology in which DNS requests (to obtain an IP address by domain name) are transmitted through the encrypted HTTPS protocol instead of regular unencrypted DNS.
In OpenWrt firmware, DoH is implemented using a special proxy service - https-dns-proxy. The principle is simple: DNS requests from clients are accepted as usual by the router’s local DNS server - dnsmasq; after that, they are redirected to https-dns-proxy, which encrypts them and then sends them to an external server with DoH support, for example Google.
Below is a simplified visual diagram of how DoH works in OpenWrt:

When DoH is configured on the router, all connected devices automatically start using it, except in cases where the devices themselves explicitly specify their own DNS settings.
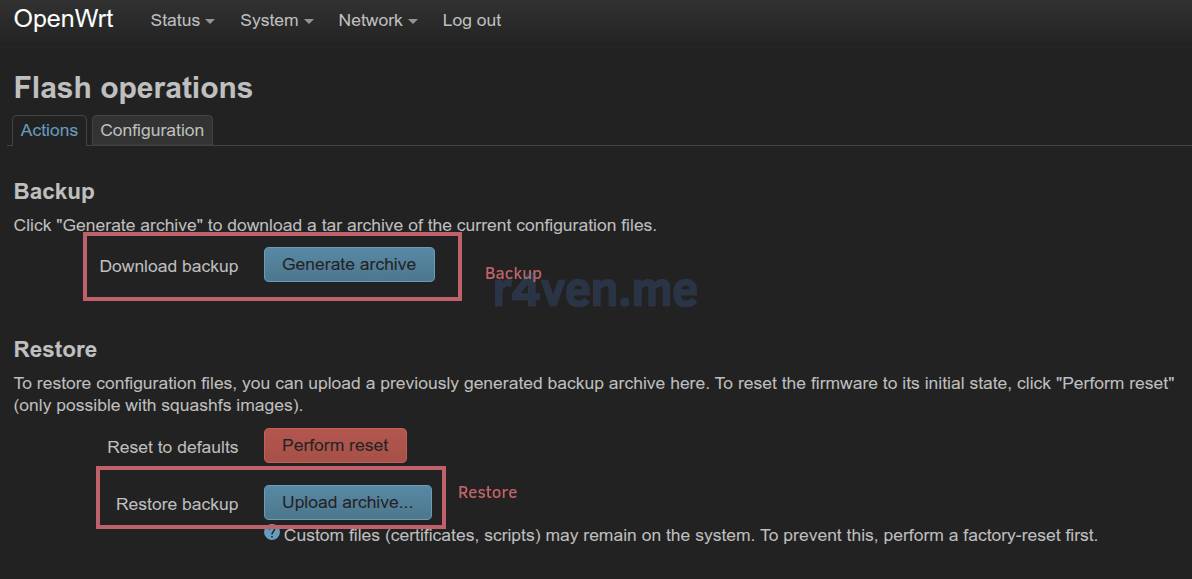
Before starting any work with OpenWrt, you need to make a backup copy of the current router configuration and know how to restore from it: (instructions under the spoiler):
Router configuration backup
Like many other operations, a backup in OpenWrt can be made in two ways: using the console (SSH)🖥️ and the web interface (LUCI)🌐.
Obviously, backups should not be stored on the router itself. Below is a command for backing up the OpenWrt config using the console:
☝️Connecting to the router console over SSH is performed under the root account and the password you use to connect to the Web GUI.
ssh root@openwrt.lan 'sysupgrade --create-backup -' | cat > ./backup.tar.gz💡This command uses
sysupgradeto create atararchive and pass its contents through the stream redirection mechanism to the localcatcommand, which in turn saves the received output to a file named./backup.tar.gzin the current directory on your computer.
It is recommended to restore from a backup followed by a router reboot.
If such a need arises, run the commands:
cat ./backup.tar.gz | ssh root@openwrt.lan 'sysupgrade --restore-backup -'

ssh root@openwrt.lan reboot💡Here, similarly, the
catcommand passes the contents of thebackup.tar.gzarchive to the input of the remotesysupgradecommand, which performs the configuration restore.
It is also convenient to create and restore a backup through the router’s graphical interface. Section: System — Backup / FLash firmware — [Generate archive | Upload archive]
Good, we have dealt with backup and restore. Let’s proceed to making configuration changes.
Configuring DoH in the Console
Connect to the router via SSH:
ssh root@openwrt.lanInstall the proxy:
opkg update

opkg install https-dns-proxyAfter installation, the service is ready and already running. Check it:
netstat -uln

pgrep -af https-dns-proxyThe output should be approximately like this:
udp        0      0 127.0.0.1:53            0.0.0.0:*
udp        0      0 127.0.0.1:5053          0.0.0.0:*

6542 /usr/sbin/https-dns-proxy -r https://dns.google/dns-query -a 127.0.0.1 -p 5053 -b 8.8.8.8,8.8.4.4 -4 -u nobody -g nogroup💡The proxy config is stored at
/etc/config/https-dns-proxy.
Out of the box, https-dns-proxy is already configured to use Cloudflare and Google DNS servers.
Below I will show how to change the default settings to your own; perhaps you have your own local DNS server with DoH support. But first you need to decide on DNS providers. In my example, I will use Google’s address.
You can view a list of public ones on Wikipedia: DoH provider.
Clear the current configuration of the https-dns-proxy service:
while uci -q delete https-dns-proxy.@https-dns-proxy[0]; do :; doneAnd fill it again with your own values:
uci set https-dns-proxy.dns="https-dns-proxy"
uci set https-dns-proxy.dns.bootstrap_dns="8.8.8.8,8.8.4.4"
uci set https-dns-proxy.dns.resolver_url="https://dns.google/dns-query"
uci set https-dns-proxy.dns.listen_addr="127.0.0.1"
uci set https-dns-proxy.dns.listen_port="5053"
uci set https-dns-proxy.dns.user="nobody"
uci set https-dns-proxy.dns.group="nogroup"Save the changes and restart the proxy:
uci commit https-dns-proxy

service https-dns-proxy restartDone. You can move on to the DoH operation check.
Configuring DoH in the Web Interface
You can also install and configure DoH in OpenWrt using the web GUI.
Go to the router address in the browser, most often 192.168.1.1.
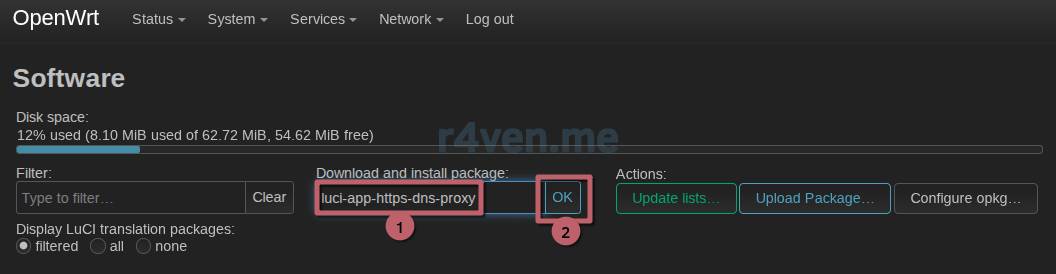
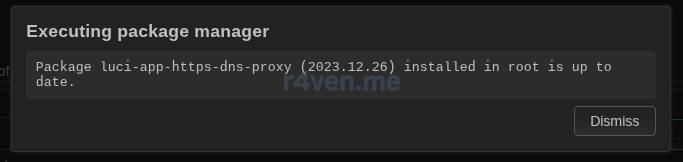
Then go to System — Software and install the luci-app-https-dns-proxy package:
The service has working settings out of the box. If you need to change them, go to Services — HTTPS DNS Proxy and configure it according to your preferences:

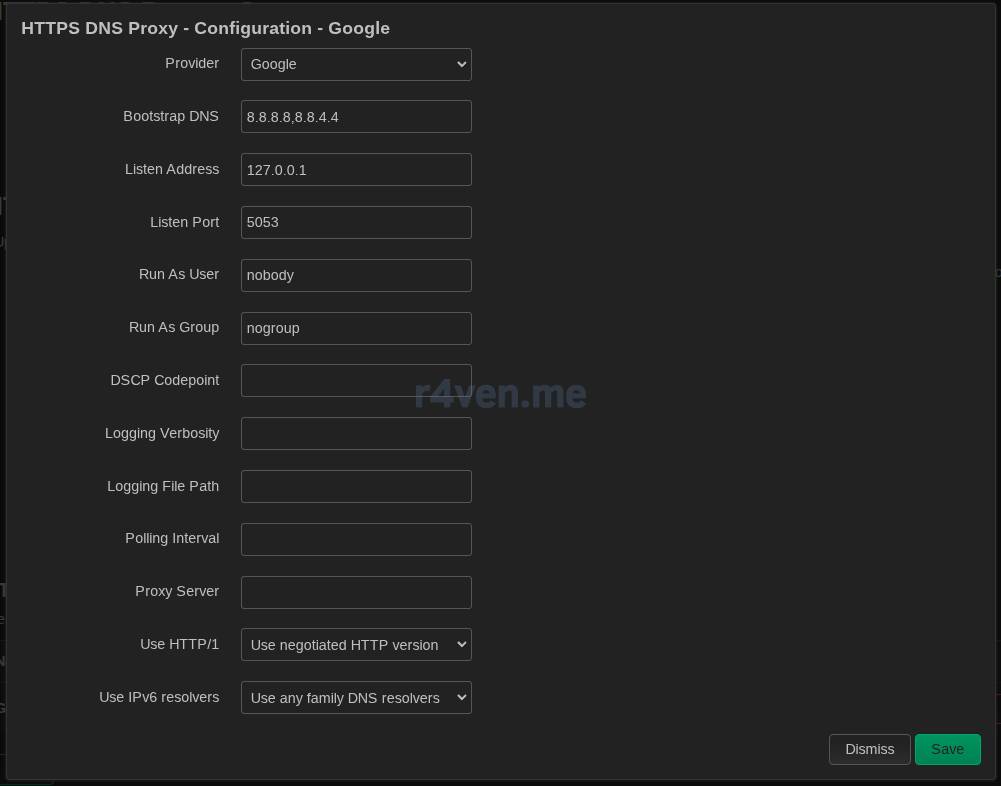
After that, do not forget to save and apply the changes.
Checking DNS over HTTPS Operation
Install the tcpdump utility on the router:
opkg install tcpdumpUse it to start listening to traffic, for example for host 8.8.8.8 and HTTPS port 443:
tcpdump -i any host 8.8.8.8 and port 443In parallel, in the terminal of a client connected to the router, for example Linux, resolve any domain:
nslookup r4ven.meIn the tcpdump output on the router, you should see something like this:
15:47:32.414726 eth0  Out IP 12.34.56.78.58458 > dns.google.443: Flags [P.], seq 452:562, ack 1107, win 1002, options [nop,nop,TS val 2274319017 ecr 2648832844], length 110
15:47:32.456023 wan In IP dns.google.443 > 12.34.56.78.58458: Flags [P.], seq 1312:1350, ack 562, win 1050, options [nop,nop,TS val 2648832889 ecr 2274319017], length 38And since data transfer is encrypted with HTTPS, you will not see the DNS requests/responses themselves in the output, unlike with regular DNS.
In the sources used at the end of the article, there are links to online resources for publicly checking your DNS operation.

No, this is not an ad, this is Ryan Gosling😅
Materials Used
- Documentation for configuring https-dns-proxy | openwrt.org
- Documentation for configuring DNS | openwrt.org
- List of public DoH servers | en.wikipedia.org
- DNS leak test | dnsleaktest.com
- DNS check | dnscheck.tools
👨💻Ну и…
Don’t forget about our Telegram channel 📱 and chat 💬 All the best ✌️
That should be it. If not, check the logs 🙂