
Continuing the topic of using SSH in Linux🐧. Today we’ll talk about fine-tuning the client using the ~/.ssh/config 📄 configuration file, as well as automatic key import into ssh-agent 😎 without entering passwords.
🖐️Hey!
Subscribe to our Telegram channel @r4ven_me📱, so you don’t miss new posts on the website 😉. If you have questions or just want to chat about the topic, feel free to join the Raven chat at @r4ven_me_chat🧐.
Preface
This note is the 2nd in a small series about working with SSH in Linux. If you’re not very familiar with this software, I recommend checking out my introductory part: 🔐 SSH – Secure connection to remote hosts: introduction.
All examples in the note were performed in a distribution environment of Linux Mint 22 Cinnamon. But you can easily extrapolate them to other popular Linux systems 😌.
So, the initial data: I have 3 servers with the following names, IP addresses and SSHD ports:
| Server Name | IP Address | SSHD Port |
|---|---|---|
| database | 192.168.122.105 | 22 |
| backup | 192.168.122.70 | 2222 |
| monitoring | 192.168.122.112 | 3333 |
SSH authentication on the specified servers is done using the account password. This connection method is not always convenient, and is also considered insecure, so…
Using SSH keys

The recommended way is to use SSH keys 🔑. Let’s create one and add it to the database server:
# first generate without encryption, just press Enter twice
ssh-keygen -t ed25519

# copy the new key to the database server, password entry required
ssh-copy-id -i ~/.ssh/id_ed25519 ivan@192.168.122.105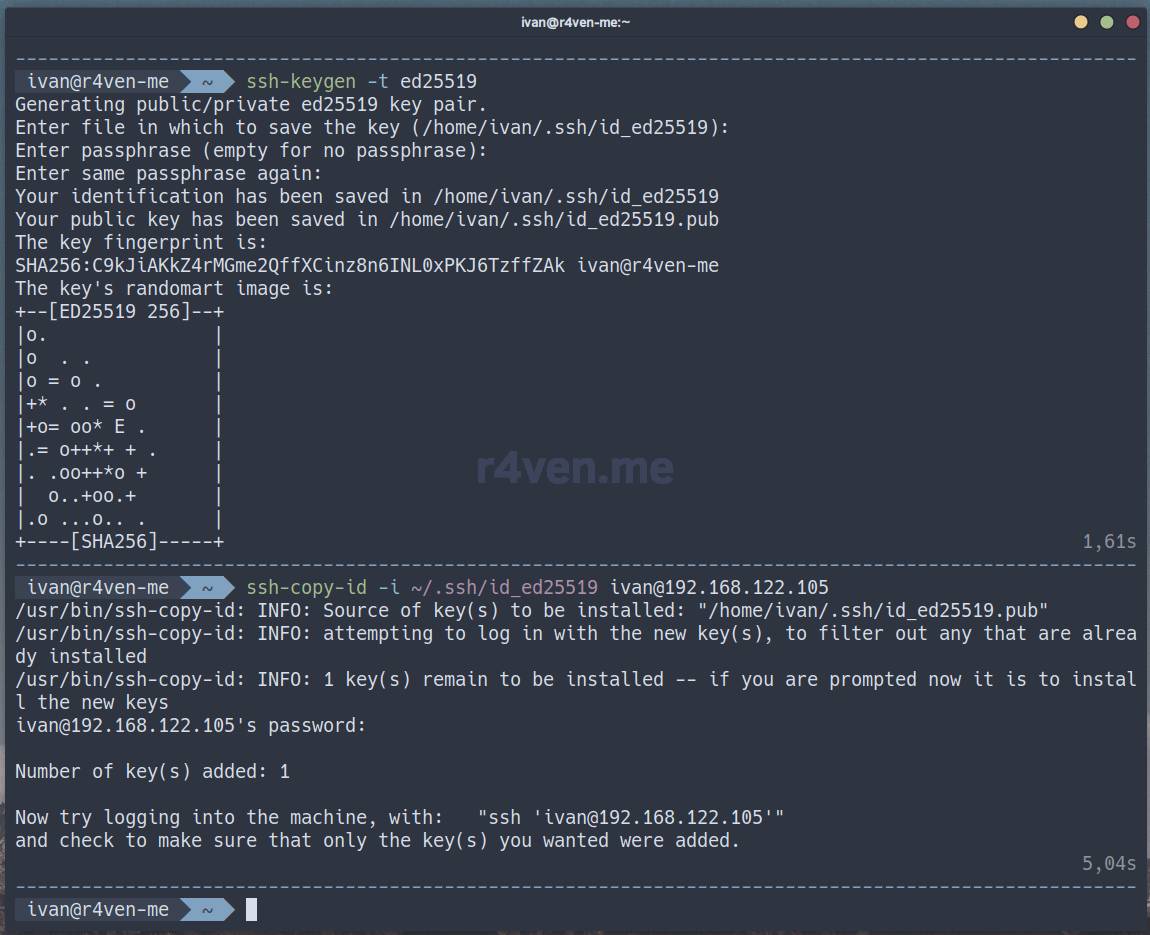
Now when connecting to the server (⚠️ if key-based access is allowed), we won’t need to enter the account password:
ssh ivan@192.168.122.105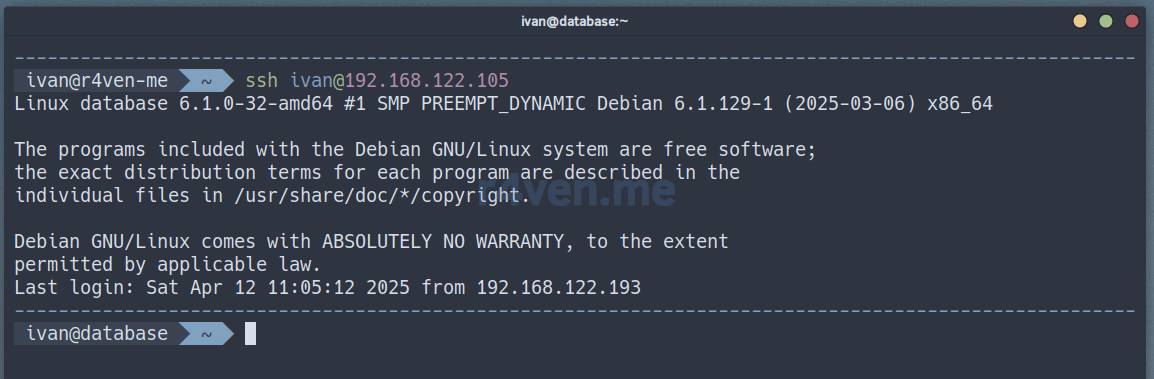
Note that password-based access to the remote server is still preserved. After adding keys, password login should preferably be disabled on the server side. See how to do this in a separate article.
By default, ssh tries to authenticate on the server by iterating through keys with standard names (id_<algorithm>) in the ~/.ssh directory. If a key has a non-standard name or location, it will be ignored. But it can be specified explicitly using the -i parameter. For example:
ssh ivan@192.168.122.105 -i /some/path/database.keyIt’s considered good practice to use different keys for different servers or projects☝️. With this approach, if one of the keys is compromised, you won’t have to delete/replace it on all servers. So let’s generate a key for each of the remaining 2 servers and configure connection through them:
ssh-keygen -t ed25519 -f ~/.ssh/id_ed25519_backup

ssh-keygen -t ed25519 -f ~/.ssh/id_ed25519_monitoring

ssh-copy-id -i ~/.ssh/id_ed25519_backup -p 2222 ivan@192.168.122.70

ssh-copy-id -i ~/.ssh/id_ed25519_monitoring -p 3333 ivan@192.168.122.112Let’s check the connection:
ssh ivan@192.168.122.70 -i ~/.ssh/id_ed25519_backup -p 2222

ssh ivan@192.168.122.112 -i ~/.ssh/id_ed25519_monitoring -p 3333These commands look cumbersome, and remembering all the server IP addresses and their key names is even more inconvenient. This is where the following will help us…
The ~/.ssh/config file
This config file allows you to set individual SSH parameters for each separate host🖥️.
We create a new config using any code editor, for example vim or neovim:
nvim ~/.ssh/configAnd fill it with approximately the following content:
Host database
    HostName 192.168.122.105
    User ivan
    Port 22
    IdentityFile ~/.ssh/id_ed25519

Host backup
    HostName 192.168.122.70
    User ivan
    Port 2222
    IdentityFile ~/.ssh/id_ed25519_backup

Host monitoring
    HostName 192.168.122.112
    User ivan
    Port 3333
    IdentityFile ~/.ssh/id_ed25519_monitoring
    Compression yes

Host github.com
    HostName github.com
    User git
    Port 22
    IdentityFile ~/.ssh/id_ed25519_github

# default parameters for all other hosts
Host *
    #User root
    Port 22
    IdentityFile ~/.ssh/id_ed25519
    ForwardAgent yes
    ForwardX11 yes
    ForwardX11Trusted yes
    #Compression yes
    #ServerAliveInterval 60
- ⚠️The
#character defines comments, which are ignored by SSH commands.- 💡See the full list of available client parameters on the man page:
man ssh_configor here.
As you can see, each block is responsible for the settings of a separate host, in which we explicitly defined: a short alias, an address (IP or DNS), a connection port, a username, and a path to the key file!
💡Note that this file can also describe connection parameters for remote Git services, such as GitHub.
The last block deserves special mention: Host * — its parameters will be applied to all hosts that are not explicitly defined in the config. It’s recommended to place this block at the end of the file🔚.
We save the changes made💾 and return to the terminal🧑💻. Now you can connect to hosts simply by their aliases. All parameters will be pulled in automatically🤖.
Example:
ssh database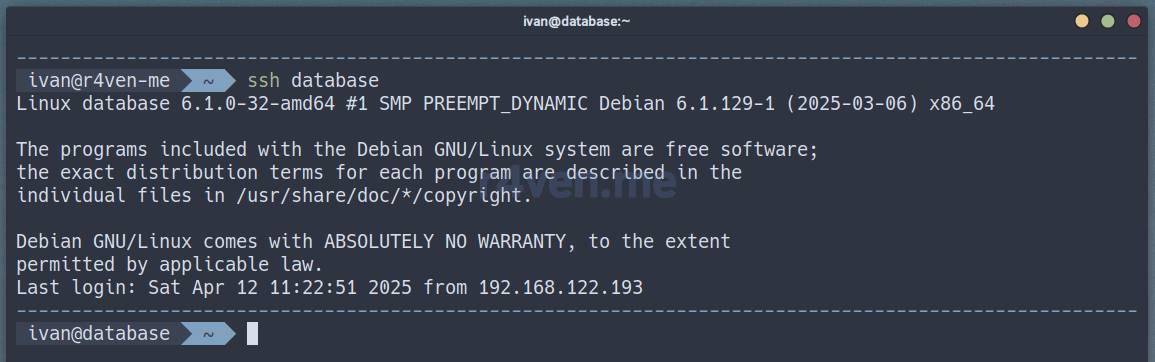
You’ll agree, quite a different matter😉.
💡The list of hosts can be “tabbed” through. Just enter part of the host name in the connection command and press
Tab.
The config applies to all utilities in the OpenSSH package. Example:
hostname > /tmp/test.txt

scp /tmp/test.txt database:/tmp

ssh database cat /tmp/test.txt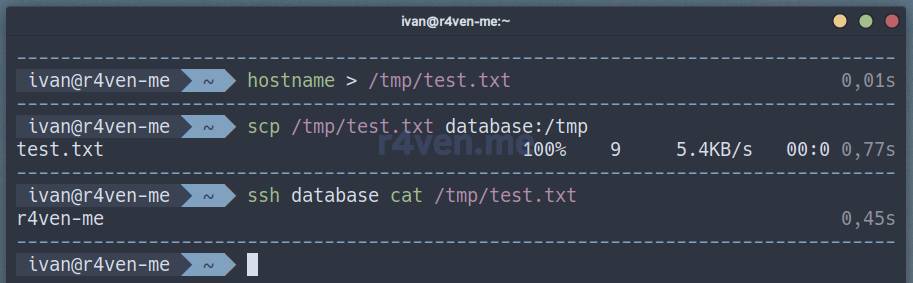
This also includes sftp:
sftp database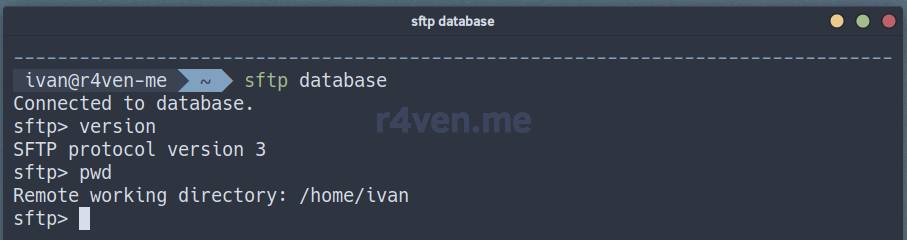
By the way, most often other applications, including graphical ones, also pick up settings from the SSH config file. For example, the Nemo file manager from Linux Mint. If you enter in the path bar:
sftp://databaseWe’ll end up in the root of the remote server’s file system:
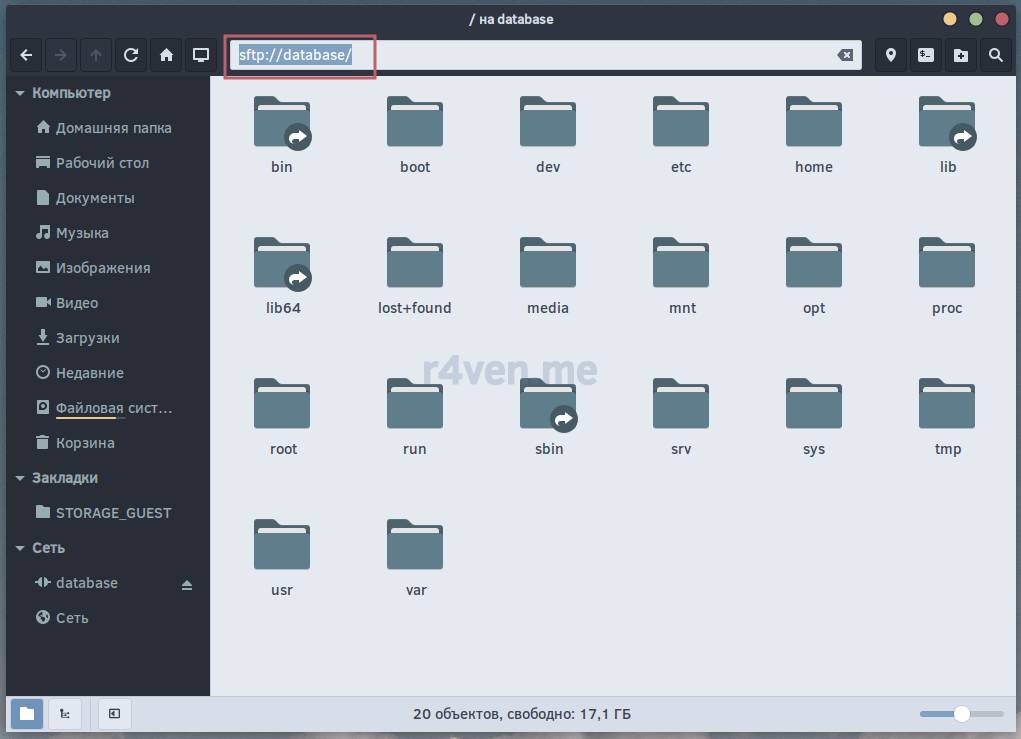
Convenient? In my opinion, yes!
You can have several SSH client config files. To explicitly specify which one to use when connecting, add the -F <path_to_file> parameter to the command.
This parameter can be used if you suddenly need to ignore the current config file:
ssh -F /dev/null user@example.comIn this case, only the system-wide default parameters set in the /etc/ssh/ssh_config file will be applied:
cat /etc/ssh/ssh_configSo, we’ve more or less figured out the config.
The ssh-agent utility

I’m sure that among the readers there are users who prefer not to store key files in the clear. That is, to use a passphrase to decrypt the key before using it. Which is equivalent to entering a password on every connection to remote hosts — personally, for me, this is inconvenient🤷♂️. But there is a secure and almost convenient solution.

I’m glad to introduce you to agent Smith SSH — ssh-agent. This utility is included in the openssh-client package. When started, it runs in the background and can store private keys in memory in decrypted form. Working principle:
- the agent is started once, example:
eval $(ssh-agent); - keys are added to it, example:
ssh-add ~/.ssh/id_ed25519; - the agent caches the key in memory;
- if the key is protected with a passphrase, it’s requested once before caching;
- the SSH client, when connecting to hosts, contacts the agent without requiring a password.
Working with the agent happens through a socket, using the SSH_AUTH_SOCK and SSH_AGENT_PID environment variables. Keys remain in memory until explicitly removed or OS reboot.
The key point here is “until OS reboot”, i.e., the password for protected keys still needs to be entered, though only once per session😥.
But! If you are a Linux Desktop user — there is a way out. And there is more than one:
- Keyring mechanism with SSH component: relevant for users of distributions with Gnome/KDE desktops and their derivatives (including Cinnamon🍃);
- Bash script (ssh-agent + Keyring (secret-tool) + expect): a universal option for any desktop😉.
⚠️Below we’ll discuss automating ssh-agent operation in GUI systems. Achieving similar functionality in systems without a GUI is somewhat more complicated; I may write a separate note on this topic.
In the case of the 1st option, you practically don’t need to do anything. Everything is already configured for you😨. I’ll just describe the details of how the mechanism works. If this isn’t your method and you prefer more control, then consider my implementation of the 2nd method.
For now, let’s talk about…
Automatically adding keys (including encrypted ones) to ssh-agent
In modern desktop Linux distributions such as Linux Mint, Ubuntu, Manjaro, etc., a so-called “keyring” service, also known as Keyring, works out of the box.
Keyring is a mechanism for securely storing sensitive data (passwords, keys, tokens). Internally it’s an encrypted storage (usually in ~/.local/share/keyrings/), access to which is granted after user authentication (upon desktop login). Applications such as browsers, email clients, file managers, etc. access it through a standardized API to save and retrieve secrets✍️.
There are 2 popular implementations of the keyring mechanism🔑:
| Desktop Environment | Backend | Frontend |
|---|---|---|
| Gnome | gnome-keyring | Seahorse |
| KDE | kwallet | KWalletManager |
Today we’ll look at how gnome-keyring works, since it’s used by default in Linux Mint.
Method #1: gnome-keyring with SSH component
How is this related to ssh-agent? Directly: in Linux Mint, the gnome-keyring program can act as a wrapper over ssh-agent and manage it. This combination saves SSH keys from ~/.ssh in a protected storage, access to which is granted at system login — convenient and secure.
Let me show you how this works. But first you need to make sure that the Keyring service is running and working on your system:
echo $SSH_AUTH_SOCK

pgrep -af ssh-agentIf the commands above have similar output:
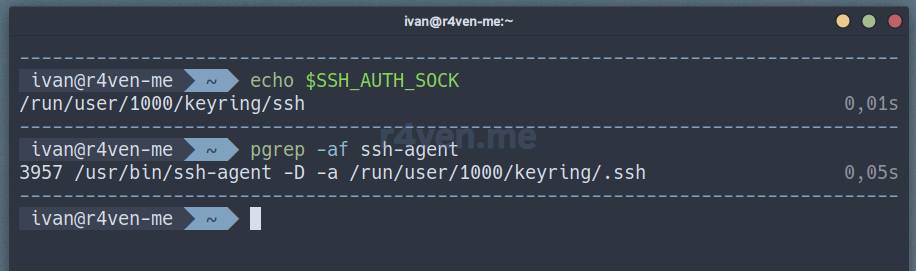
That means you have ssh-agent running, managed by gnome-keyring. Most often, the gnome-keyring service with the SSH component is started by a special .desktop file: /etc/xdg/autostart/gnome-keyring-ssh.desktop when the user’s graphical session starts.
Below is an example of such a file’s contents:
[Desktop Entry]
Type=Application
Name=SSH Key Agent
Comment=GNOME Keyring: SSH Agent
Exec=/usr/bin/gnome-keyring-daemon --start --components=ssh
OnlyShowIn=GNOME;Unity;MATE;
X-GNOME-Autostart-Phase=PreDisplayServer
X-GNOME-AutoRestart=false
X-GNOME-Autostart-Notify=true
X-Ubuntu-Gettext-Domain=gnome-keyringYou can also see the gnome-keyring autostart settings in the application autostart section:
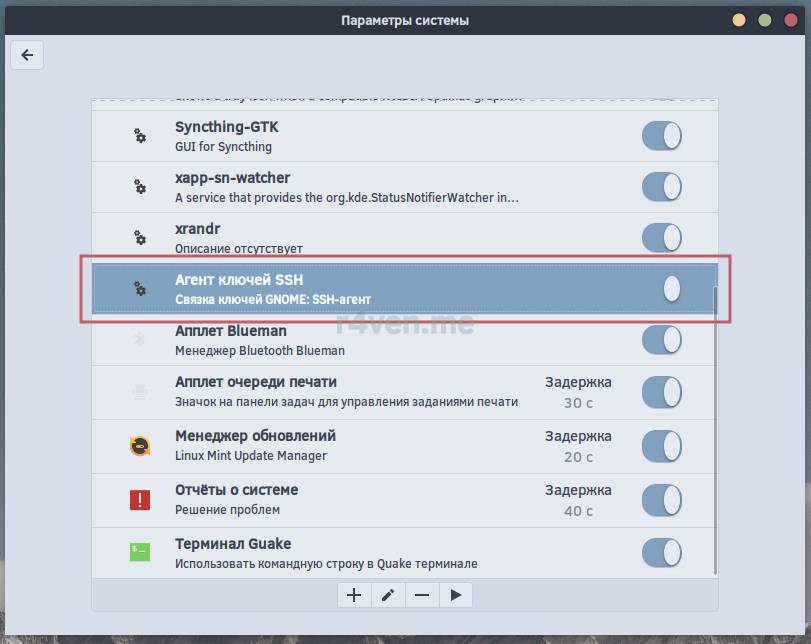
If you store keys in the ~/.ssh directory and gnome-keyring is running on your system, then most likely your keys are already automatically added to ssh-agent. How to check? In the preinstalled Seahorse application, also known as “Passwords and Keys”:
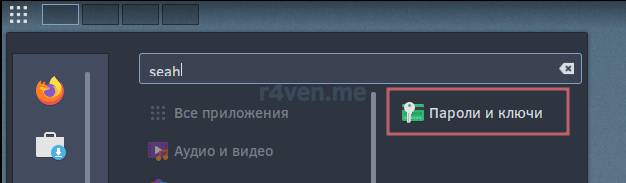
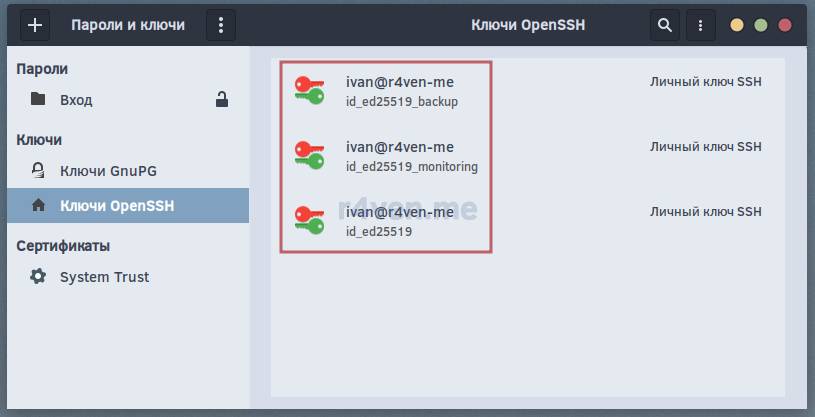
⚠️According to the documentation, for
gnome-keyringto work correctly, it’s important that in the~/.ssh/directory the public keys have the same name as the corresponding private ones, but with the.pubextension.
The presence of keys in the agent can be checked with a console command:
ssh-add -l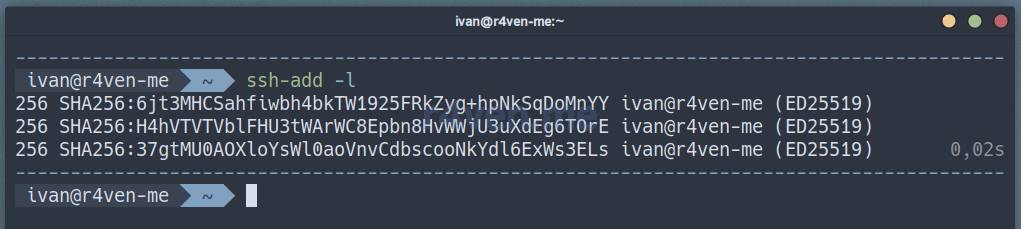
We see that the agent automatically detects keys in ~/.ssh and adds them to itself. This is also true for keys protected with a passphrase, ☝️if they were generated while gnome-keyring with the SSH component was running. Quite bold initiative🤔.
For demonstration purposes, let’s protect some of our keys with a password:
ssh-keygen -p -f ~/.ssh/id_ed25519

ssh-keygen -p -f ~/.ssh/id_ed25519_backup💡This same command can be used to change this password, having first specified the old one.
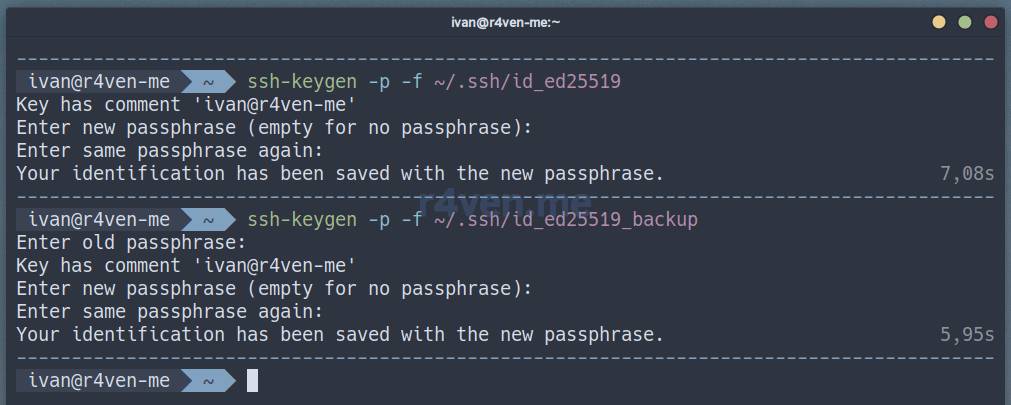
Now let’s try to authorize using them on remote hosts:
ssh database hostname

ssh backup hostname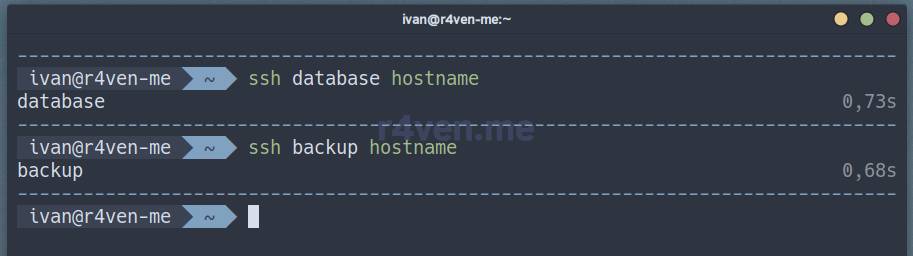
You can see that there’s no request for a passphrase to decrypt the password, even though we didn’t add anything to ssh-agent🪄. You can verify that the key is password-protected like this:
ssh-keygen -y -f ~/.ssh/id_ed25519If the key is encrypted, you’ll see a passphrase prompt, after which the public part of the key will be printed to the console. If the password is not set, the public part will be printed immediately:
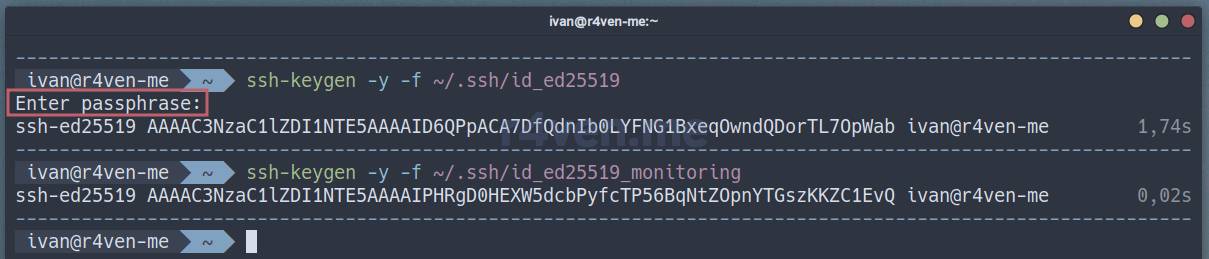
There is one nuance when ssh-agent is managed by the gnome-keyring daemon: if password-protected keys were generated at a time when gnome-keyring with the ssh component was not running, or the generation happened on another server, then the key’s password won’t end up in the Keyring storage🤷♂️.
To illustrate the above, let’s generate a new password-protected key on the remote server, copy it to our local host, and set up a connection using it:
ssh -t database ssh-keygen -t ed25519 -f ~/id_ed25519_test

scp database:./id_ed25519_test{,.pub} ~/.ssh/

ssh database cat ./id_ed25519_test.pub \>\> ./.ssh/authorized_keysNow, with gnome-keyring running and authentication using the new key:
ssh -i ~/.ssh/id_ed25519_test databaseYou should see a ⚠️ graphical window prompting for a passphrase. Specifically graphical, not console-based. In this window there will be an option to check a box to save the passphrase in the keyring:
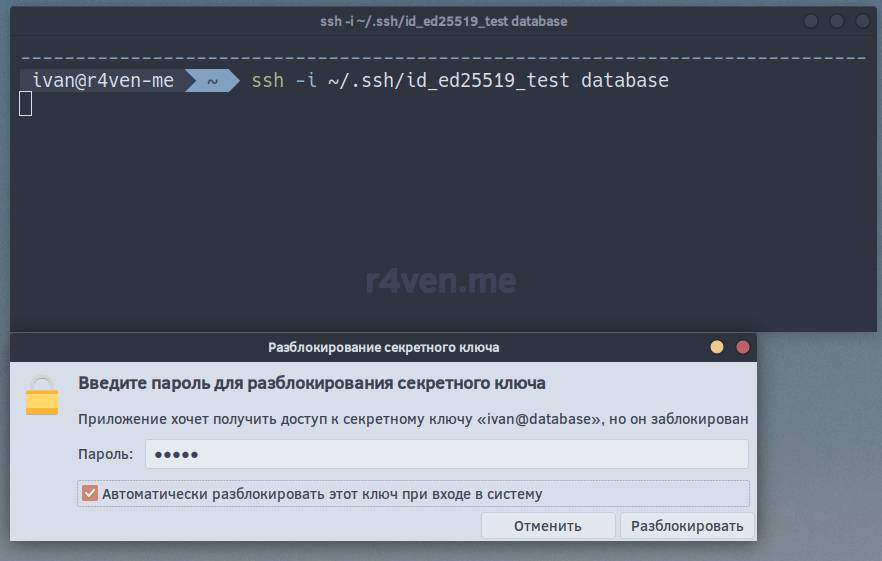
Now, even after a system reboot, when using encrypted SSH keys, you’ll always connect to remote hosts without entering any passwords:
ssh -i ~/.ssh/id_ed25519_test database hostname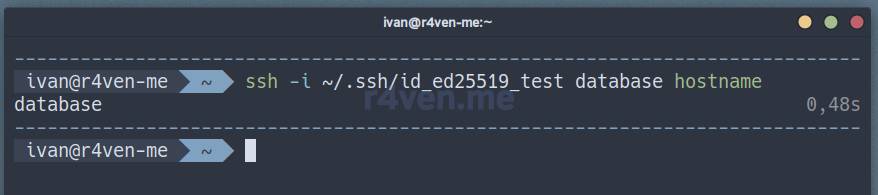
All this management happens in the background, and the convenience of such automation becomes a bit eerie. Because of this, many prefer to keep the whole process under control, including me.
So we move on to the classic and proven, but not the simplest way of implementing the automation described above — using a shell script.
Method #2: Bash script

I’ve prepared a Bash script ssh_agent.sh, which automates the actions described in the first method, but using console utilities and the Bash shell language. First you need to additionally install a couple of packages📦:
sudo apt install -y curl libsecret-tools expectcurl— a utility for interacting with the web: needed to download the script from GitHub;libsecret-tools— a package with the utility needed for the script to work —secret-toolexpect— a utility for automating interactive input: needed to add password-protected SSH keys tossh-agent.
⚠️If your system doesn’t have a “keyring”, you can install the same
gnome-keyring:BASHsudo apt install -y gnome-keyring
We download the script to /usr/local/bin and make it executable:
sudo curl -fL https://raw.githubusercontent.com/r4ven-me/bash/main/ssh_agent.sh \
    -o /usr/local/bin/ssh_agent

sudo chmod +x /usr/local/bin/ssh_agent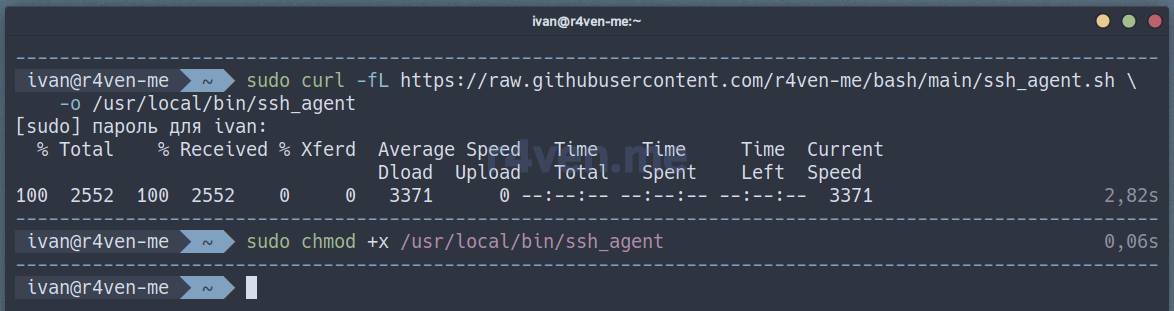
Click on the spoiler to view the ssh_agent.sh code
#!/usr/bin/env bash

# Set system PATH
export PATH="/usr/local/bin:/usr/bin:/bin:/usr/local/sbin:/usr/sbin:/sbin"

# Strict script execution mode
set -euo pipefail

# Common variables
IFS=$'\n\t'
SSH_ENV="$HOME/.ssh/environment"
UTILS=("ssh-agent" "ssh-add" "ssh-keygen" "expect" "secret-tool")

# Check for required utilities on the system
for util in "${UTILS[@]}"; do
    if ! which "$util" > /dev/null; then
        echo "$util not found or not installed"
        exit 1
    fi
done

# Function for adding protected SSH keys to the agent
ssh_add() {
    local key="$1"
    local pass="$2"

    if ! expect << EOF
spawn ssh-add $key
expect "Enter passphrase for $key"
send -- "$pass\r"
expect {
    "Bad passphrase" {
        exit 1
    }
    "Identity added" {
        exit 0
    }
    eof
}
EOF
    then
        return 1
    fi
    return 0
}

# Main logic for loading SSH keys
load_keys() {
    echo "Loading SSH keys..."

    local pass
    local keys
    readarray -t keys < <(find "$HOME/.ssh" -type f \( \
        -name 'id_rsa*' -o -name 'id_dsa*' -o \
        -name 'id_ecdsa*' -o -name 'id_ed25519*' \
        \) ! -name '*.pub')

    for key in "${keys[@]}"; do
        if ! ssh-keygen -y -P "" -f "$key" &> /dev/null; then
            if pass=$(secret-tool lookup unique ssh-store:"${key}"); then
                ssh_add "$key" "$pass" &> /dev/null && echo "Loaded: $key" || echo "Failed to load: $key"
            else
                echo "Failed to get passphrase for $key"
                if [[ -t 0 ]]; then
                    echo "Let's add it to keyring:"
                    secret-tool store --label="$(basename "$key")" unique ssh-store:"${key}"
                    pass=$(secret-tool lookup unique ssh-store:"${key}")
                    ssh_add "$key" "$pass" &> /dev/null && echo "Loaded: $key" || echo "Failed to load: $key"
                fi
            fi
        else
            ssh-add "$key" >/dev/null 2>&1 && echo "Loaded: $key" || echo "Failed to load: $key"
        fi
    done
}

# Initializing the SSH agent
start_agent() {
    echo "Initializing new SSH agent..."
    ssh-agent | sed 's/^echo/#echo/' > "$SSH_ENV"
    chmod 600 "$SSH_ENV"
    # shellcheck disable=SC1090
    source "$SSH_ENV" > /dev/null
    echo "SSH agent started successfully."
    load_keys
}

# Checking the agent process
is_agent_running() {
    if [[ -n "${SSH_AGENT_PID:-}" ]]; then
        ps -p "$SSH_AGENT_PID" -o comm= 2>/dev/null | grep -q '^ssh-agent$'
    else
        return 1
    fi
}

# Main execution flow
if [[ -f "$SSH_ENV" ]]; then
    # shellcheck disable=SC1090
    source "$SSH_ENV" > /dev/null

    if ! is_agent_running; then
        echo "Stale SSH agent found. Restarting..."
        start_agent
    fi
else
    start_agent
fiDescription of the script logic:
- Environment setup:
- the
PATHvariable is set for guaranteed access to executable files; - strict execution mode is enabled (
set -euo pipefail); - common variables are defined:
IFS,SSH_ENV(path to the SSH environment file),UTILS(list of required utilities);
- the
- Dependency check:
- checks for the presence of all required utilities (
ssh-agent,ssh-add,ssh-keygen,expect,secret-tool); - if any utility is missing, the script exits with an error;
- checks for the presence of all required utilities (
ssh_addfunction:- adds a protected SSH key to the agent using
expect, automatically entering the password retrieved from the Keyring;
- adds a protected SSH key to the agent using
load_keysfunction:- searches for all private SSH keys in
~/.ssh/(except files with the.pubextension); - for each key:
- checks whether a password is required (
ssh-keygen -y); - if a password is needed, retrieves it from the storage in the “Passwords —> Login” section using the
secret-toolutility; - if the password is not found, offers to save it in the Keyring;
- adds the key to the agent (using the
ssh-addutility or thessh_addfunction);
- checks whether a password is required (
- searches for all private SSH keys in
start_agentfunction:- starts a new
ssh-agent, saves its environment variables in~/.ssh/environment; - loads keys (
load_keys);
- starts a new
is_agent_runningfunction:- checks whether the current SSH agent is running (using the
SSH_AGENT_PIDvariable);
- checks whether the current SSH agent is running (using the
- Main logic:
- if the environment file (
~/.ssh/environment) exists, loads it; - if the agent process is not present, restarts it (
start_agent); - if the environment file doesn’t exist, starts the agent for the first time.
- if the environment file (
It’s worth separately noting the situation when an SSH key is password-protected, and the passphrase is not in the keyring. What happens in this case when the script runs:
- In interactive mode (for example, when run in a terminal):
- the script will detect the protected key and ask the user for a password;
- after a single entry, the password will be saved in
gnome-keyringusingsecret-tool; - on subsequent runs, the script will automatically retrieve the password from storage and pass it to
ssh-agentusingexpect;
- In non-interactive mode (for example, via
cronor ansshcommand), the script will simply ignore this key.
Before the demonstration, it’s worth warning that if ssh-agent is already running, launching a second instance will create a new agent with a different socket, and the keys from the first one will be unavailable☝️.
Let’s run the downloaded script:
ssh_agent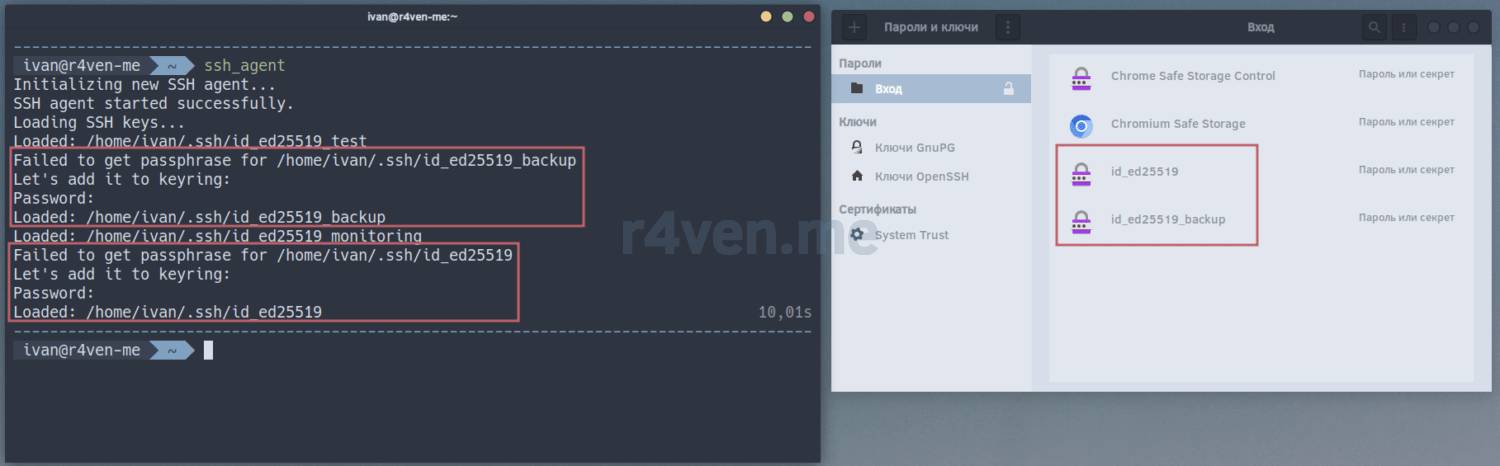
The agent started successfully, having first requested a password for two protected keys. These passwords were saved in gnome-keyring using secret-tool.
⚠️Note that the script saves passwords in gnome-keyring in the “Passwords —> Login” section, not in “OpenSSH Keys” — these are two different storages!
To access ssh-agent’s data in the current terminal session, you need to load the environment variables from ~/.ssh/environment. We also check for the presence of the ssh-agent process and the list of loaded keys:
pgrep -af ssh-agent

source ~/.ssh/environment

ssh-add -l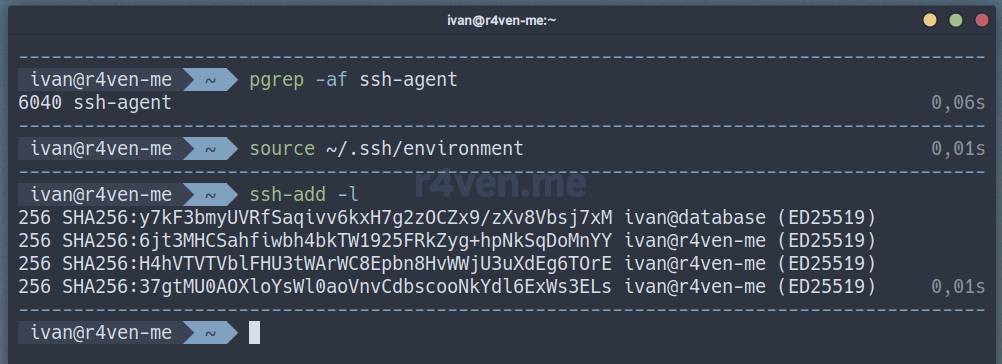
If you need to add a protected key to the Keyring manually, so that it’s correctly read by the script, use the command:
secret-tool store --label=id_ed25519 unique ssh-store:/home/ivan/.ssh/id_ed25519Where label specifies the name of the private key itself without the path to it, and the unique parameter, on the contrary, must specify the absolute path to the key file.
⚠️If the passphrase on one of your SSH keys has changed, you need to update it in the keyring. Either via the “Passwords and Keys” GUI, or with a similar command as above.
It remains to configure autostart of the ssh_agent script. This can be done via a .*rc file:
# for bash
echo '( { sleep 5 && ssh_agent } & ) > /dev/null 2>&1' >> ~/.bashrc

# for zsh
echo '( { sleep 5 && ssh_agent } & ) > /dev/null 2>&1' >> ~/.zshrcOr better, in the system settings:
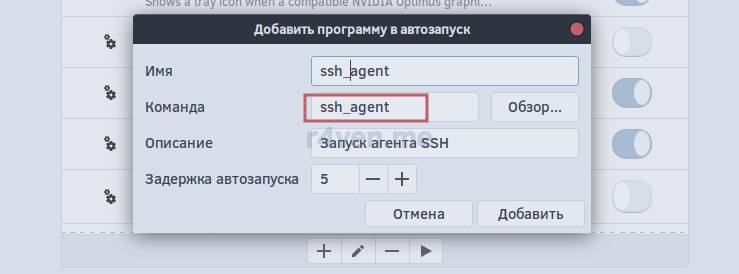
The difference is that with autostart via system settings, the script will run once, whereas with the .*rc file, the script will run every time, but ssh-agent won’t be started again — the script’s logic accounts for this👌.
Ah yes, so you don’t have to run source $HOME/.ssh/environment in every terminal session, add the following command to your .*rc file:
# for bash
echo 'if [[ -f "$HOME/.ssh/environment" ]]; then source $HOME/.ssh/environment; fi' >> ~/.bashrc

# for zsh
echo 'if [[ -f "$HOME/.ssh/environment" ]]; then source $HOME/.ssh/environment; fi' >> ~/.zshrc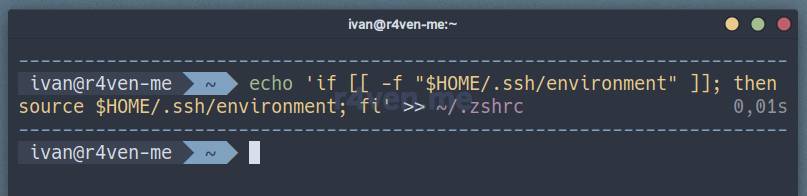
For the final check, I recommend logging back in or rebooting the OS:
rebootLet’s check the agent’s operation with authorization on the host using the protected key:
ssh-add -l

ssh database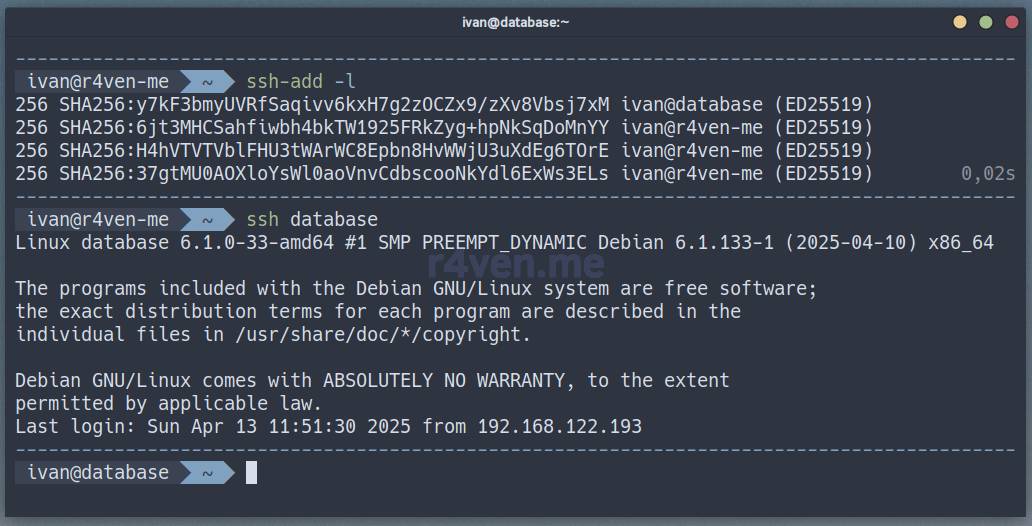
No passwords🔥.
Useful materials
- ssh_agent.sh script | GitHub
- List of available SSH config parameters | Ubuntu manpages
- GNOME Keyring documentation | Wiki GNOME
- GNOME Keyring source code | GitLab GNOME
- Working with SSH keys in gnome-keyring | Arch Wiki
👨💻And…
Don’t forget about our Telegram channel 📱 and chat
Or maybe you want to become a co-author? Then click here🔗
💬 All the best ✌️
That should be it. If not, check the logs 🙂

Comments