
Today I’ll show you how you can upgrade from Linux Mint 20 to the current latest version, Linux Mint 21.1, using built-in tools, without reinstalling the system.
DISCLAIMER!
I’d like to point out right away that all the actions described in this guide are done at your own risk. The author is not responsible for the actions you perform. The information in this post is purely for informational and recommendational purposes.
Just in case, before you start, back up your important files to another partition, or better yet, to a removable drive.
P.S. Backing up the OS itself will be described in this post.
Ivan Cherniy
Updating the current system, preparation
Before starting the transition to the new version of Linux Mint 21, you need to update the current system to its latest state.
🖐️Hey!
Subscribe to our Telegram channel @r4ven_me📱, so you don’t miss new posts on the website 😉. If you have questions or just want to chat about the topic, feel free to join the Raven chat at @r4ven_me_chat🧐.
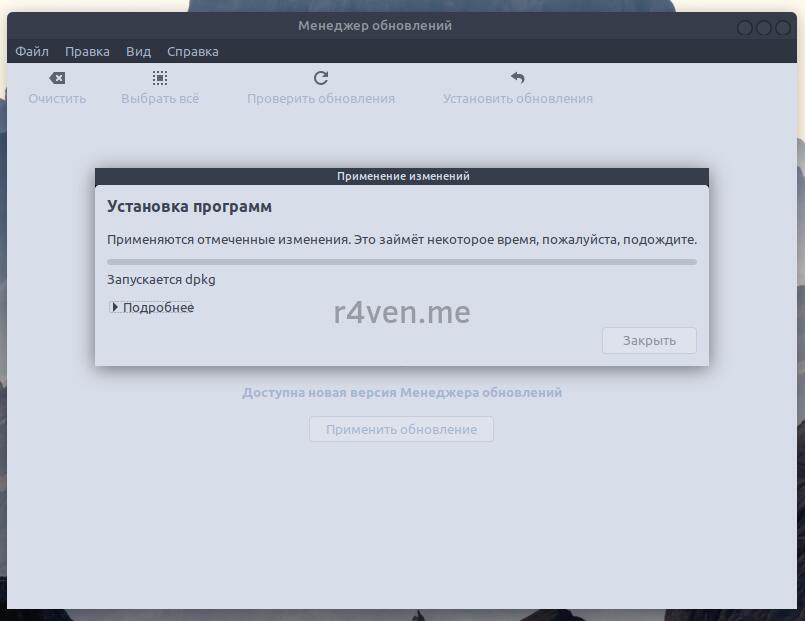
To do this, launch the “Update Manager” from the main menu and update as usual:
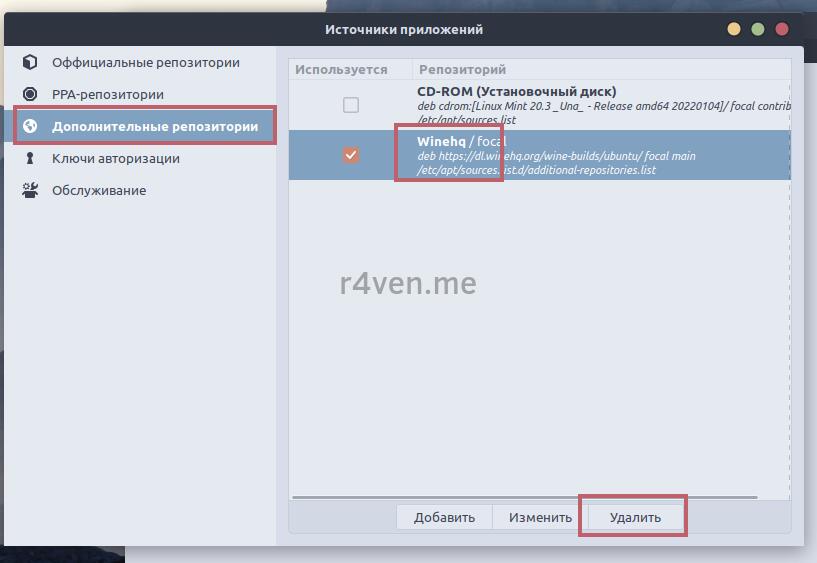
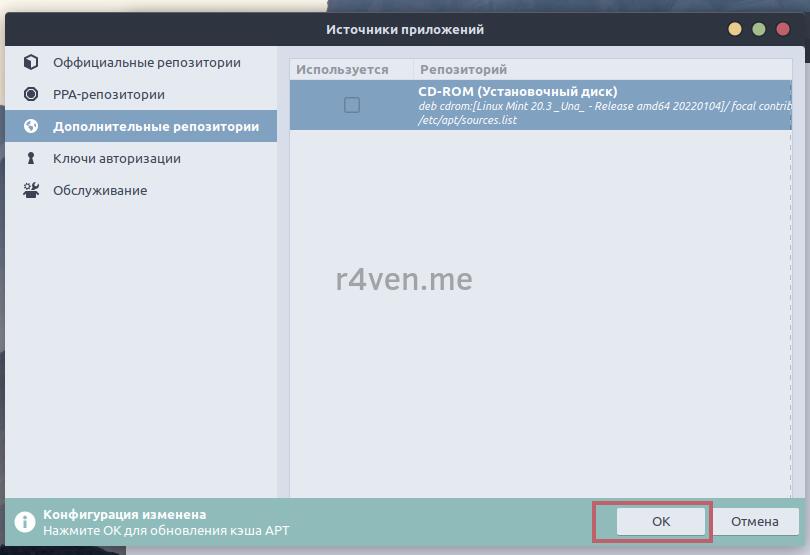
I also recommend disabling third-party repositories right away, since when upgrading to the new system version they become outdated, and can later cause an error.
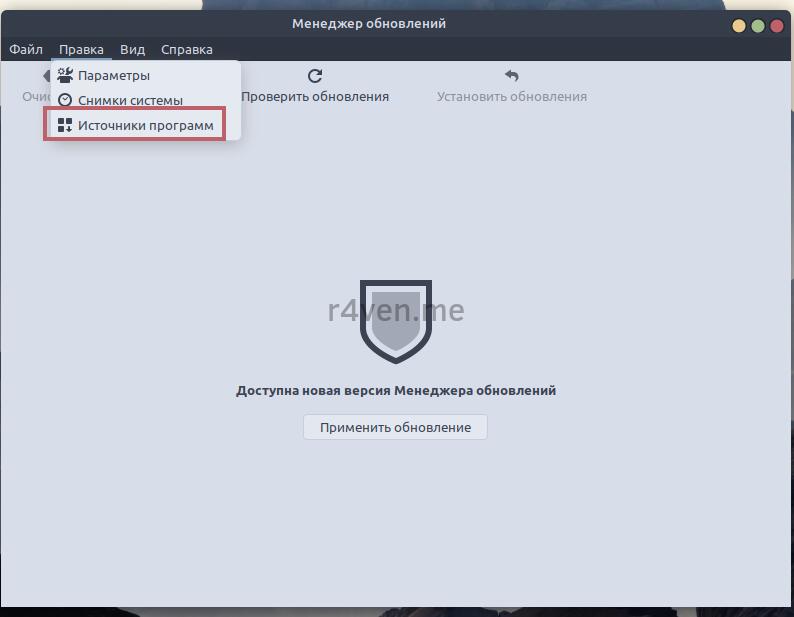
This is also done via the “Update Manager”, menu “Edit”, item “Software Sources”. Here we remove the additional repositories, after which we confirm the package cache update:
Creating a system snapshot (backup)
Now let’s back up using the utility built into Linux Mint: Timeshift.
I described the setup of this utility in more detail in a separate step of the post — Initial setup of Linux Mint 20: Step 2. Setting up operating system backup with Timeshift
If you don’t do the backup now, the system upgrade utility to version 21 will still make you do it.
Don’t forget that people are divided into two types: those who make backups, and those who will make them 😉
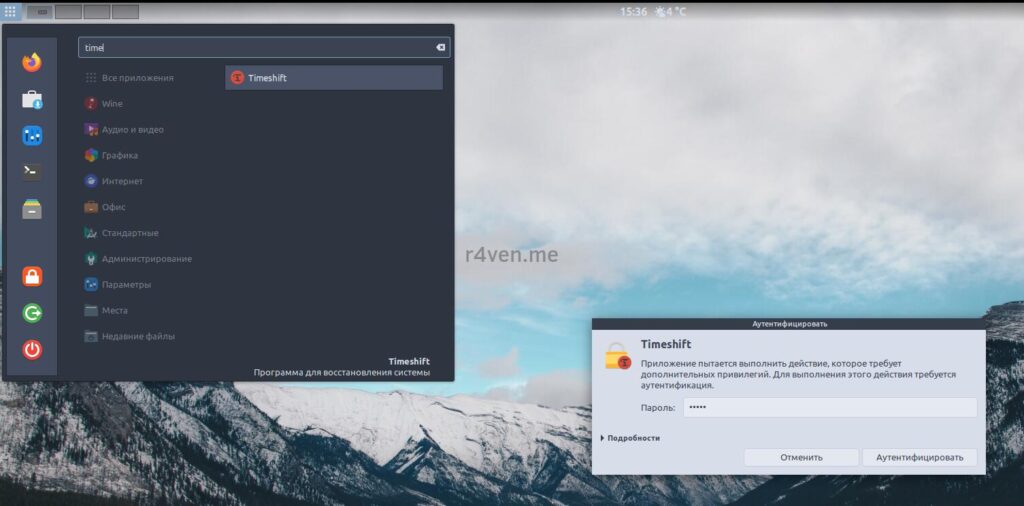
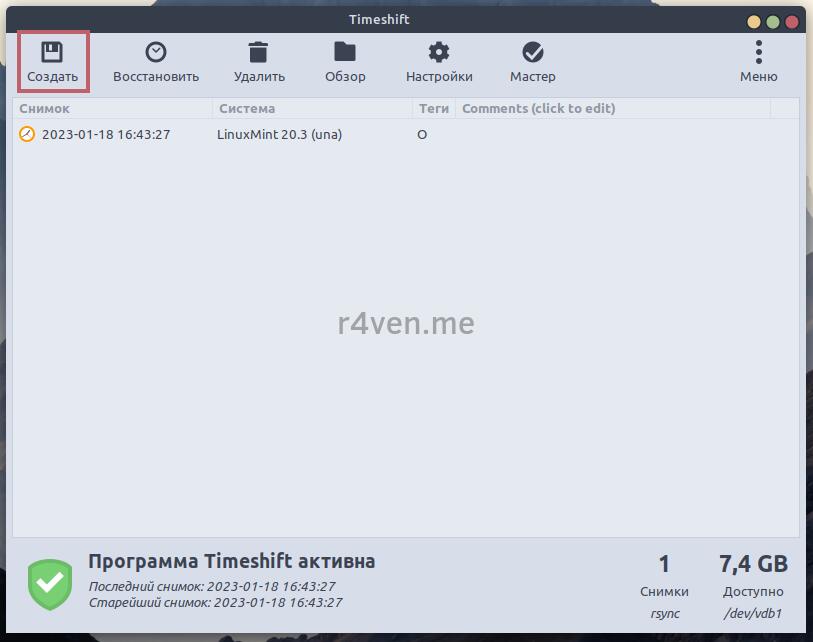
Launch Timeshift and create a new system snapshot:
Installing the upgrade utility and running it
After we’ve made the backup, we can safely install and run the upgrade utility to version 21 of the system. Open a terminal and enter this command:
sudo apt update && sudo apt install -y mintupgrade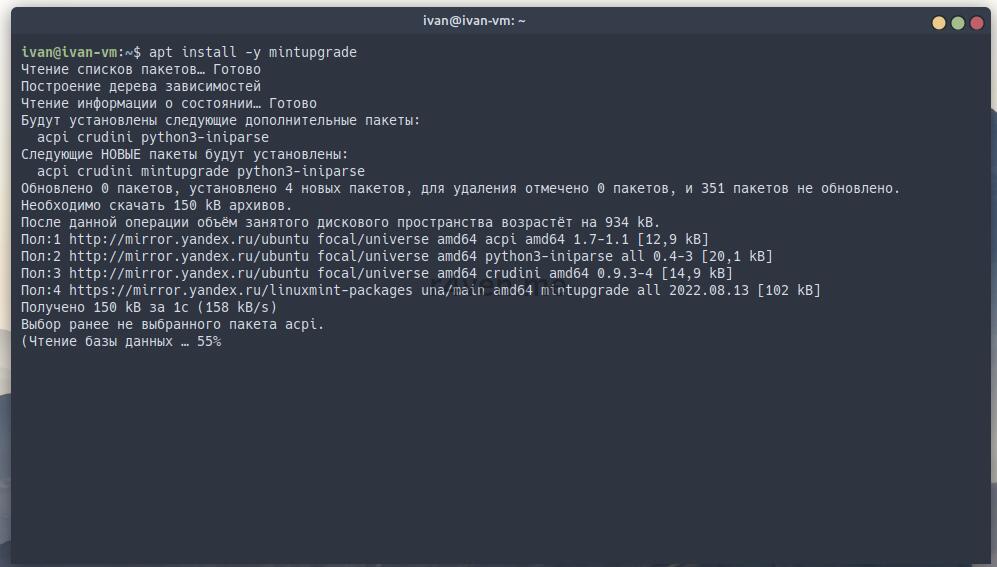
After it finishes, run the installed utility as an administrator:
sudo mintupgradePerforming the upgrade to Linux Mint 21
After running the command in the terminal, the graphical window of the upgrade utility will open:
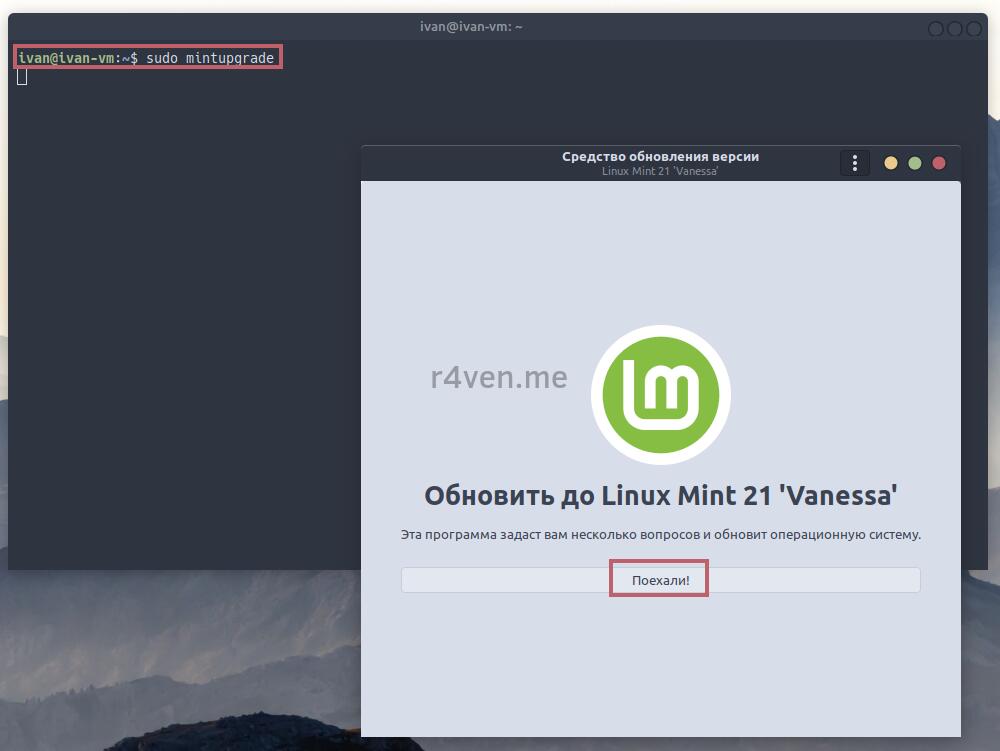
Confidently click the “Let’s go!” button.
At this stage, the further actions boil down to the principle of “click Next, Next, Next”.
After clicking, the utility will check the state of your system, and during the analysis it will inform you of possible nuances and offer solutions. For example, this could be:
- Rolling back to the official versions of packages installed on the system;
- Programs are installed that are absent from the official repositories (they will be removed during the upgrade).
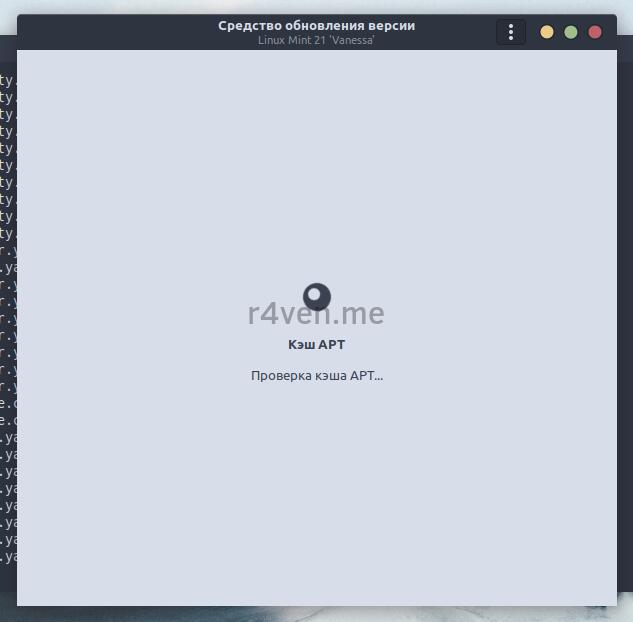
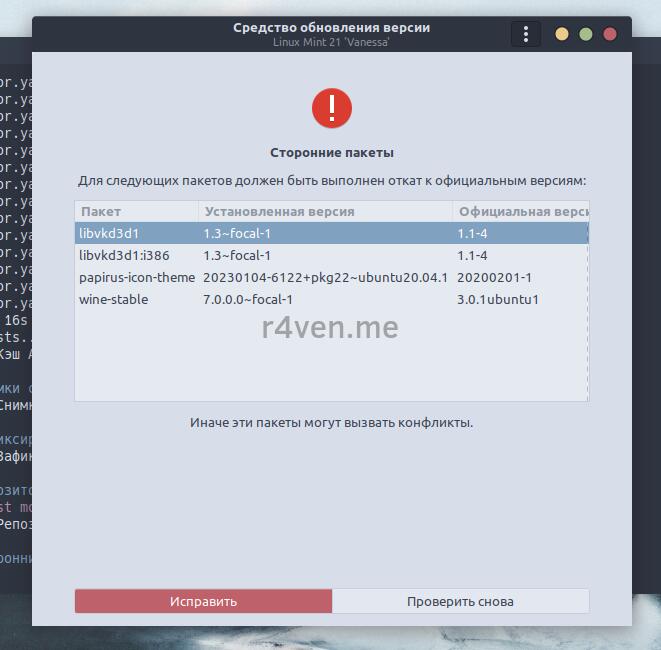
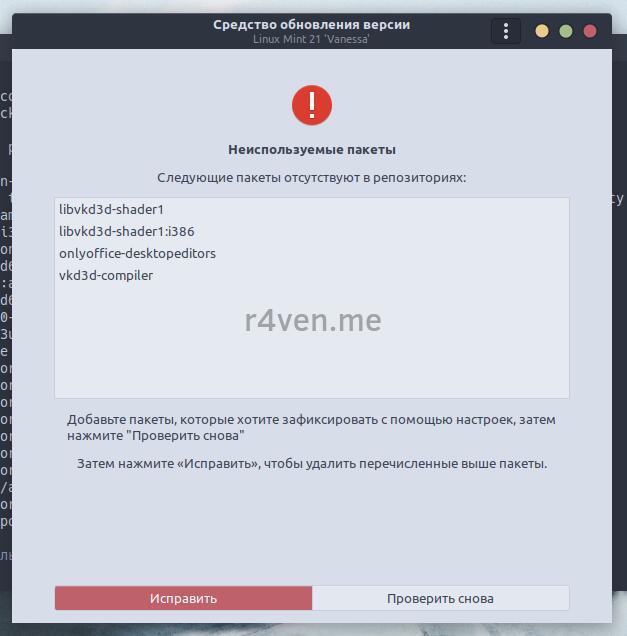
Just save the list of programs you need so you can install them manually after the update.
Next, the system will run a series of tests and simulate downloading packages and installing the update:
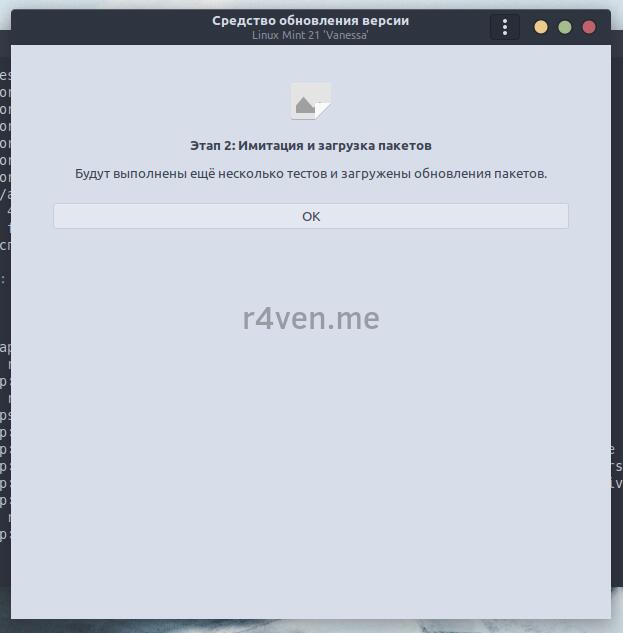
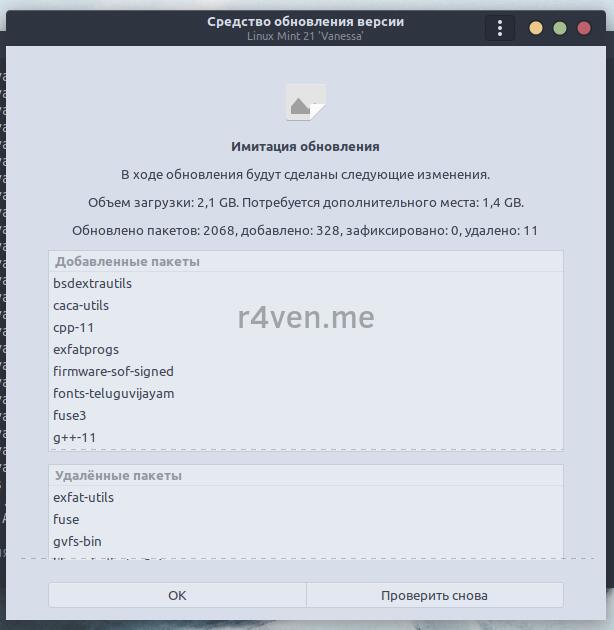
If everything is fine, the program will offer to proceed with the actual update:
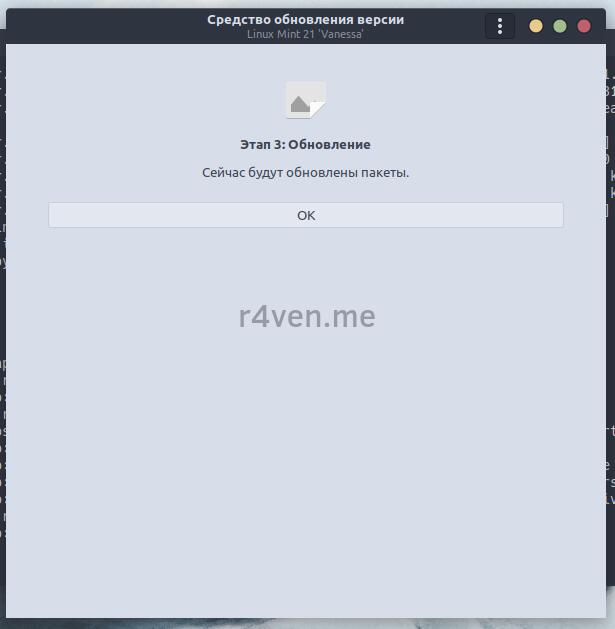
The whole process can take a long time, especially if you have an HDD.
Finishing the update and rebooting
After a successful update, you’ll see the corresponding message offering to reboot the system.
The same text will be printed in the terminal window:
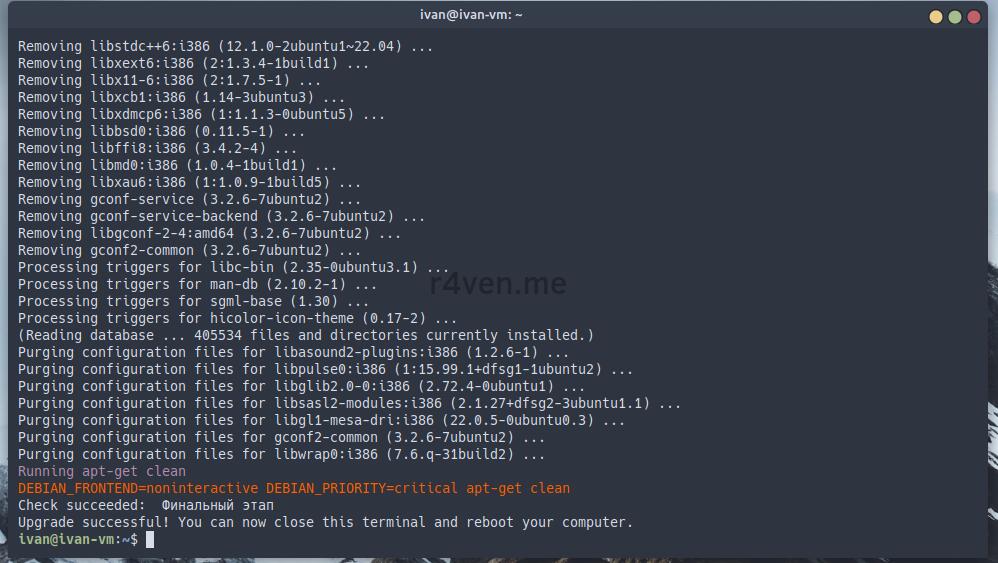
Reboot the system:
sudo rebootIf the stars align and everything went smoothly, you’ll see your usual desktop ;) You can check that the update to the latest version of Linux Mint was successful in two ways:
- using the “About the system” utility via the main menu:
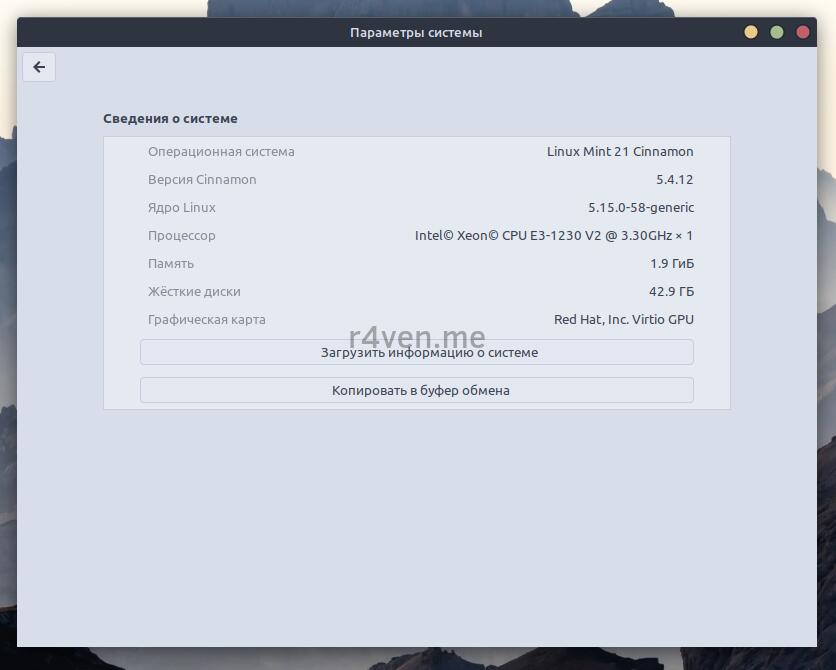
- and, of course, via the terminal, by running the command:
cat /etc/os-release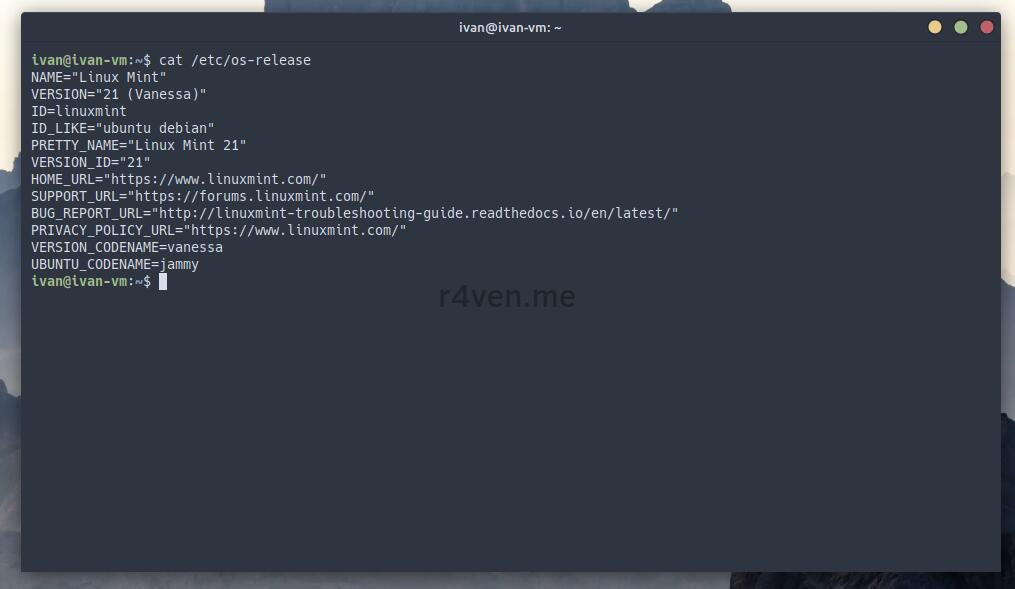
Updating from Linux Mint 21 to Linux Mint 21.1
At the time this post was published, the Linux Mint 21.1 update was released with a lot of interesting new features. You can read the patch notes and learn more at the resources listed at the end of the post.
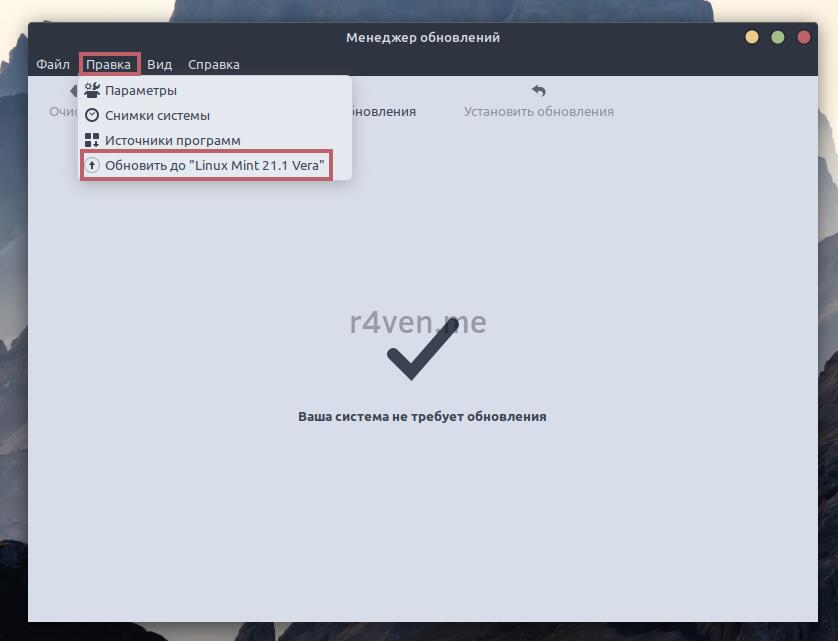
Let’s get started. Launch the “Update Manager” again, menu “Edit”, and the last line will be the item: “Upgrade to Linux Mint 21.1 Vera”:
In the window that appears, you’ll also be able to read the release notes.
Click “Next” (probably referring to the page :)), then check the box that you accept the possible risks and start the update by clicking the “Apply” button:
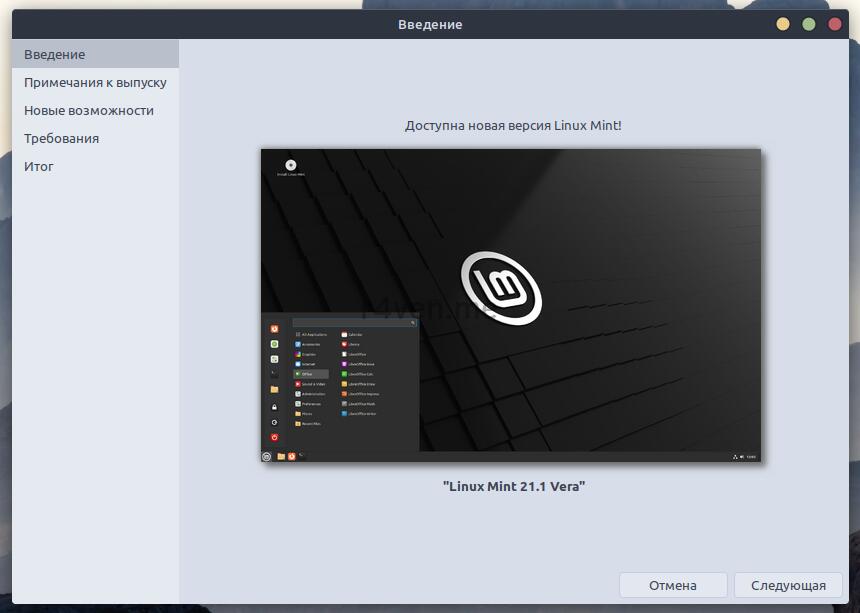
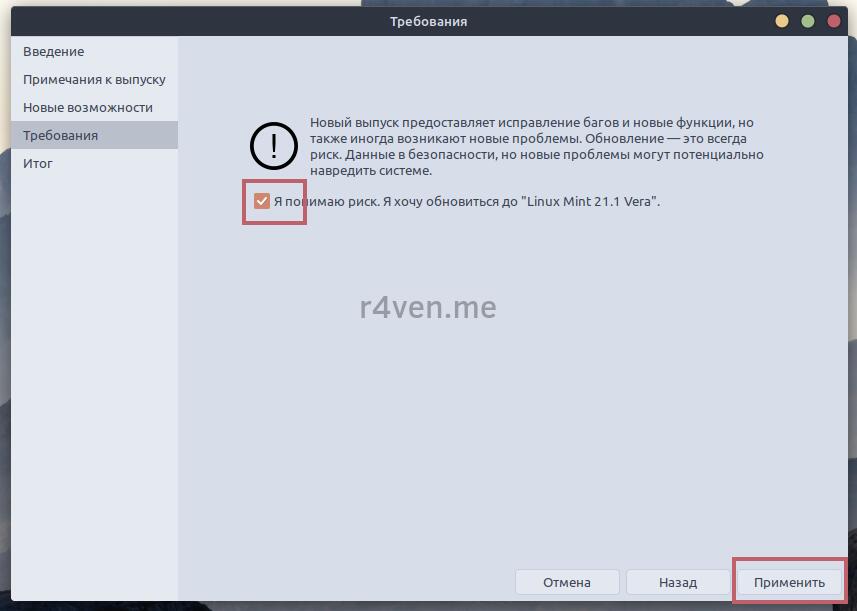
This update will also take some time. Once finished, you’ll get this message:
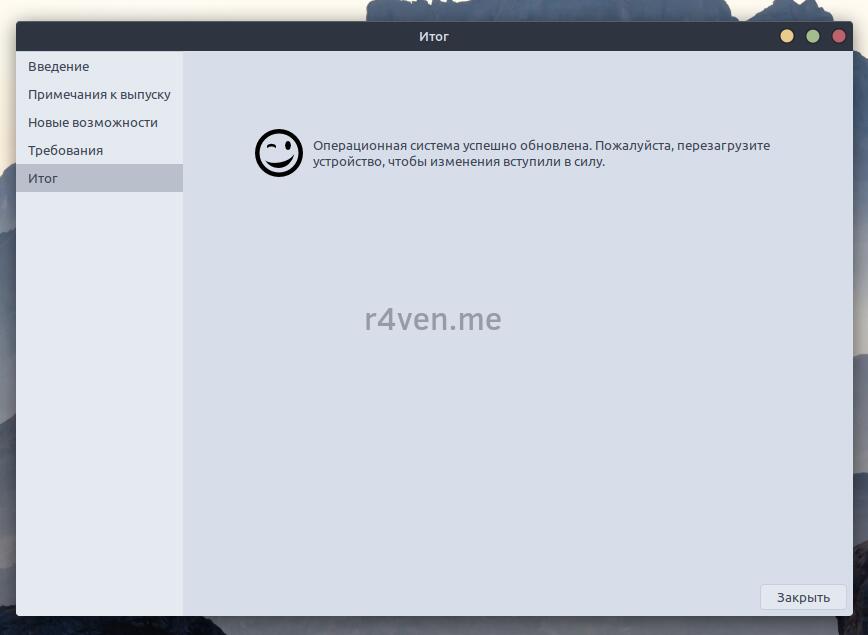
Follow the recommendation and reboot the system.
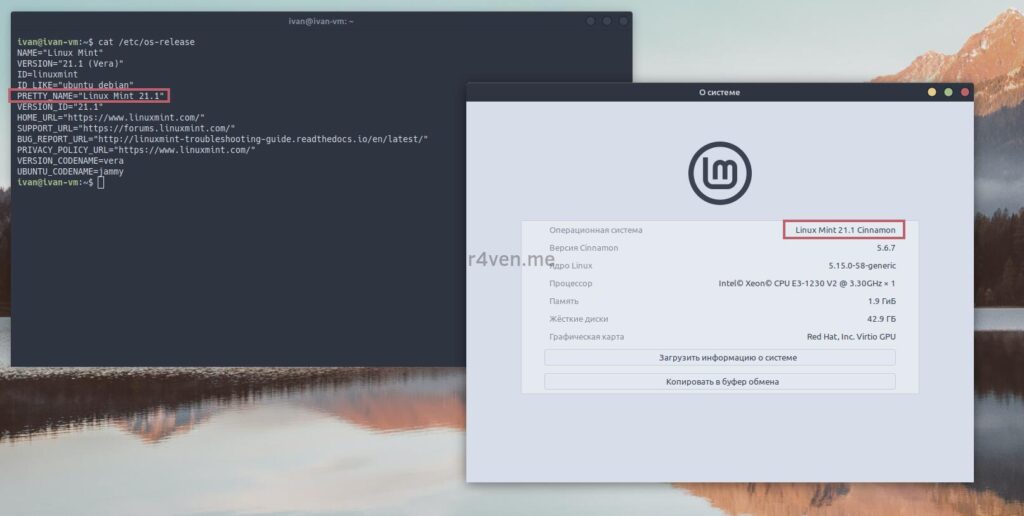
You can check your OS version the same way we did earlier: in the “About the system” program from the main menu, or with the cat /etc/os-release command in the terminal:
Chief, everything’s gone!
Working with Linux systems regularly, you have to deal with various quirks in how they behave. Especially when it comes to global changes.
A bit of troubleshooting 🙂
The system doesn’t boot (emergency console mode)
In this case, you can look for the problem and try to solve it yourself, or simply roll back to the last state of the system from the backup we made at the very beginning with Timeshift.
For example, after the update, my system booted into emergency mode:
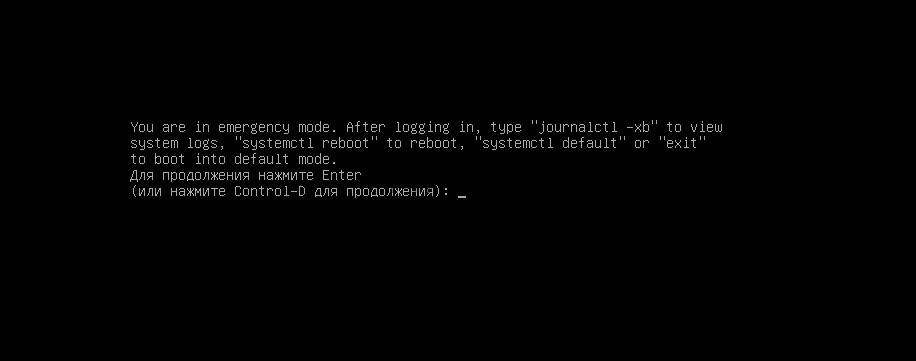
The shell kindly suggested I run the journalctl -xb command to view the system boot log.
To avoid reading the whole log, I searched by keywords: error, failed, warning.
Here’s how to do it: while viewing the log, press the slash / and you’ll enter the input mode for search values in the log.
Remember that Unix-like operating systems are case sensitive.
So I searched for several values separated by a vertical bar, for example:
failed|FailedThen you need to press Enter. The found matches will be highlighted. Pressing the n key will move the search cursor forward through the text, and pressing N (Shift+n) will search backwards.
It turned out that during system startup there was a problem mounting an external folder specified in /etc/fstab. I had mounted this folder into the system to exchange files with a virtual machine.
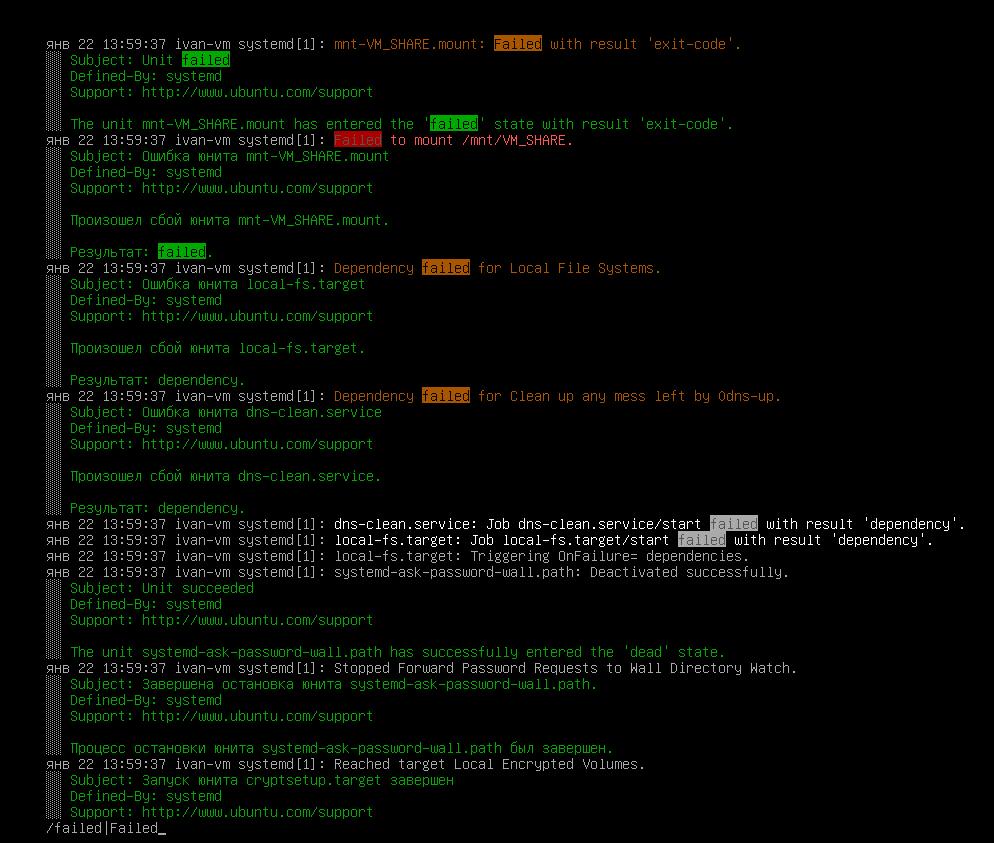
To check, I commented out the line mounting this folder in the /etc/fstab file and rebooted the system. After that, everything started up successfully 🙂
The reasons for the system not starting can vary. So it’s often necessary to simply roll back changes.
Restoring the system from a Timeshift backup
If you also ended up in the emergency console, run this command to start the restore process from a Timeshift backup:
timeshift --restore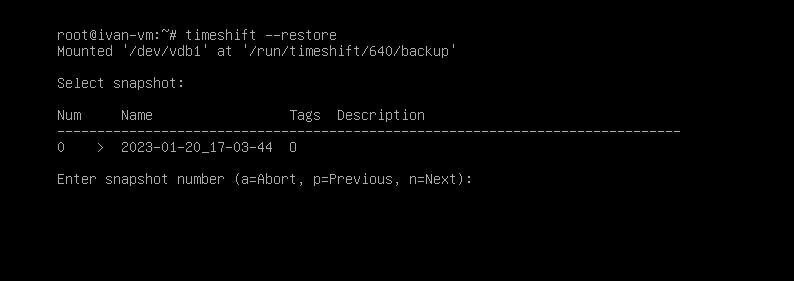
Next, in interactive mode, select the backup number and confirm reinstalling the Grub bootloader, pointing to the partition where it was previously installed (or press Enter to select the default value), usually this is the disk or partition where the OS itself is installed. Confirm the disclaimer, after which the system rollback process will start:
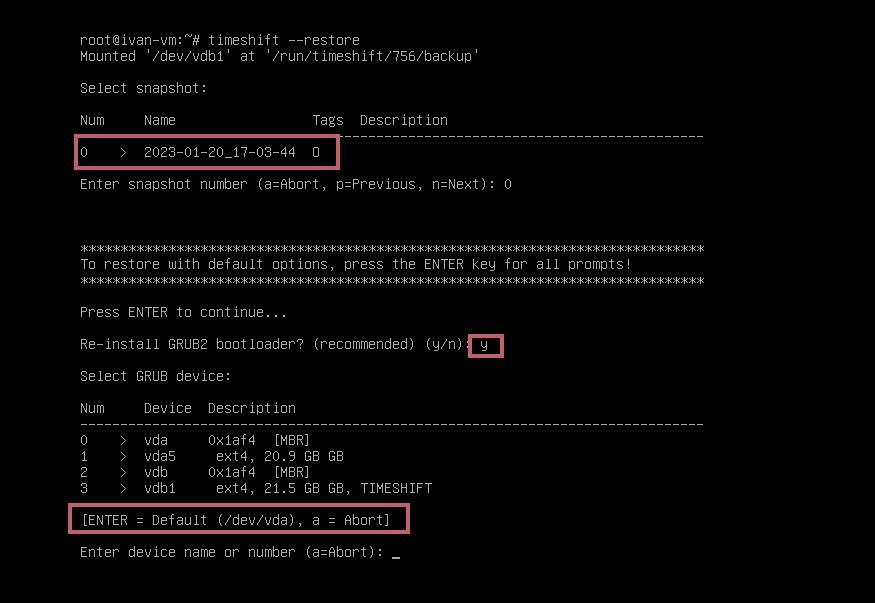
After the restore, the system will reboot on its own.
If your OS doesn’t boot at all, you need to boot from a USB flash drive with a Linux Mint LiveCD image and run the Timeshift utility there in graphical mode. I described how to create such a flash drive in the article: Installing Linux alongside Windows.
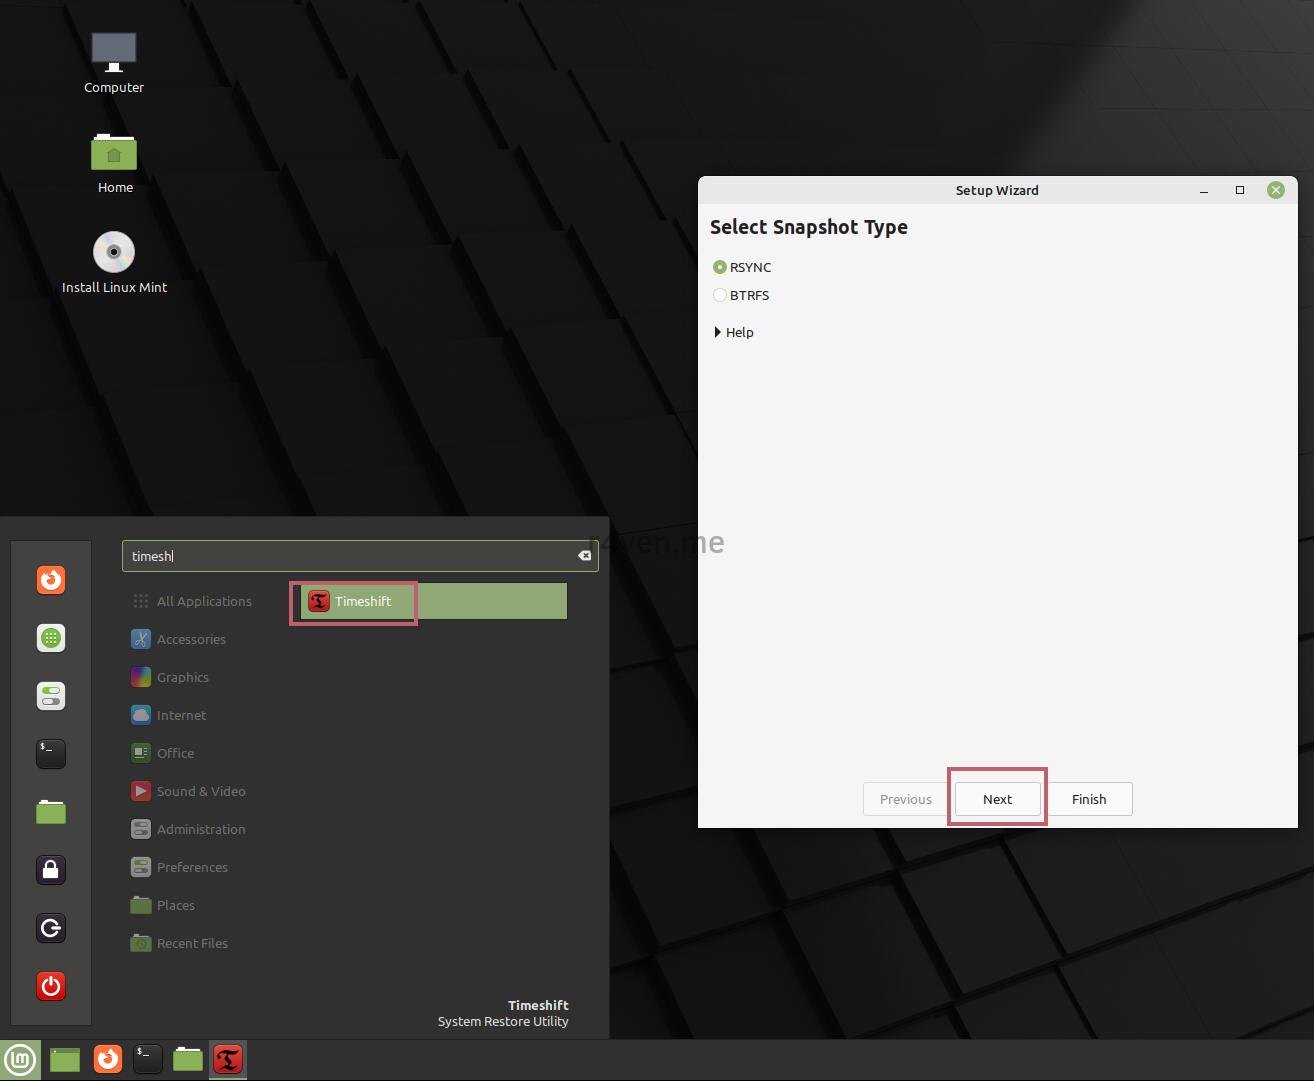
When restoring the system this way, in the Timeshift program you’ll need to specify the partition with the backups, as well as the mount points and where to install the Grub bootloader (or leave all values at their defaults).
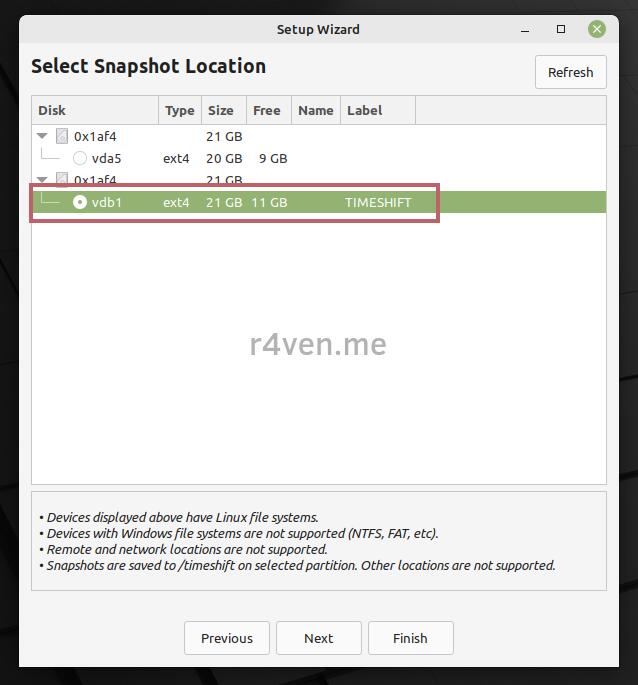
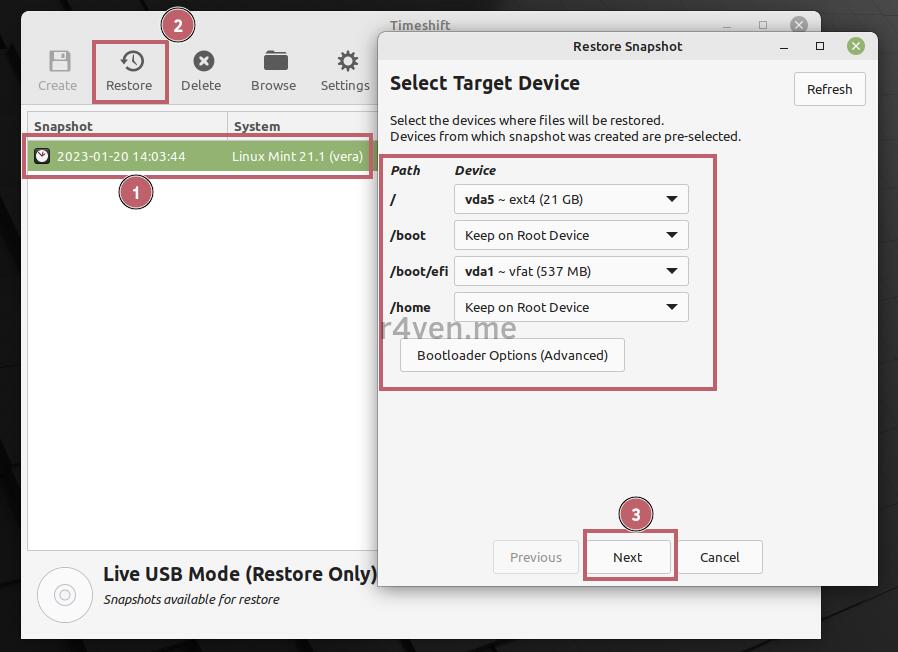
I’ll make a separate post about backup and recovery in the future.
Conclusions
Today we performed an upgrade of Linux Mint 20 to Linux Mint 21.1 using the OS’s built-in tools — the official mintupgrade update utility.
We also did a bit of debugging and looked at how to restore from a backup.
Of course, it’s always more correct to do a clean install, but there isn’t always time or opportunity for that. Especially if you have two OSes on one disk and don’t really want to repartition the disk again.
Study Linux. Good luck 😉
Useful sources
- Official instructions (ENG);
- Linux Mint 21 release notes (RU);
- Linux Mint 21.1 release notes (RU);
- GitHub repository of the Timeshift utility.
👨💻And…
Don’t forget about our Telegram channel 📱 and chat
Or maybe you want to become a co-author? Then click here🔗
💬 All the best ✌️
That should be it. If not, check the logs 🙂
