
We continue the gradual transition to free Linux-based operating systems.
To refresh your memory, or in case you missed them, here are two previous articles:
So, we tried Linux Mint 20 in Windows using virtualization technology, then installed it as a second OS side by side with Windows. And now it’s time for the initial setup of the Linux Mint operating system.
🖐️Hey!
Subscribe to our Telegram channel @r4ven_me📱, so you don’t miss new posts on the website 😉. If you have questions or just want to chat about the topic, feel free to join the Raven chat at @r4ven_me_chat🧐.
Don’t be scared by the length of this guide — most of it is screenshots, and the setup itself is very simple and clear.
DISCLAIMER!
Right away, I want to point out that everything described in this guide, you do at your own risk. Please understand this. My blog is just a platform where I talk about my experience and share my opinion on various things and phenomena.
This guide demonstrates how I perform the initial setup of my desktop environment, based on my own preferences. I in no way claim to hold any ultimate truth or exclusive opinion.
Thanks for understanding 😉
Ivan Cherniy
Step 1. Updating the system
1.1 Launching the update manager and choosing mirrors for downloads
Boot into the previously installed OS.
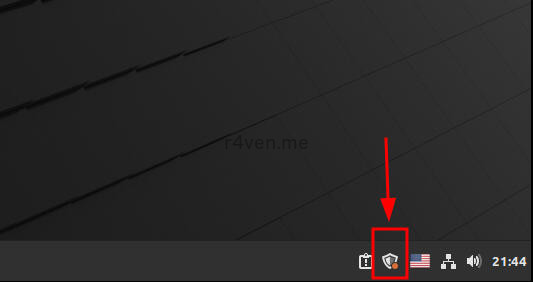
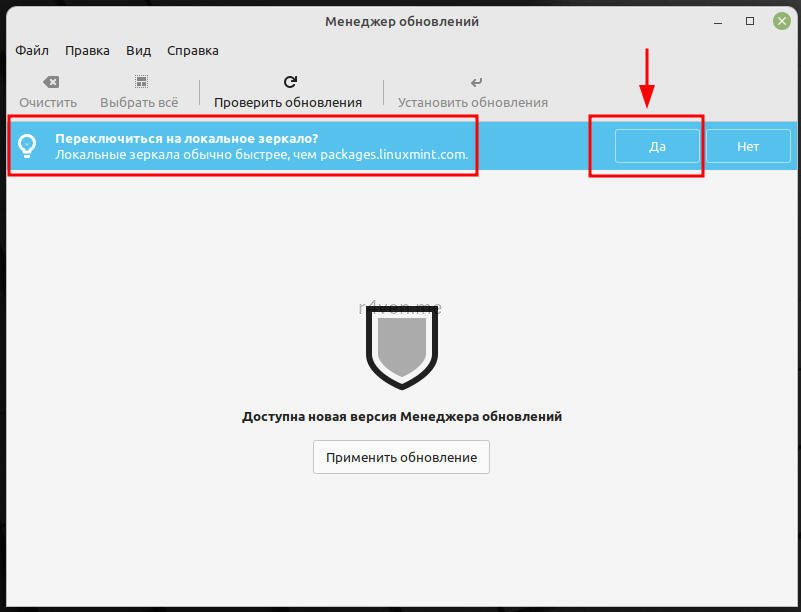
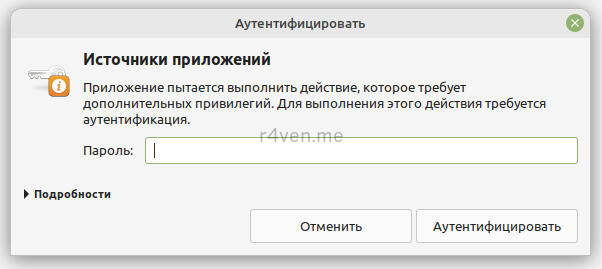
At the bottom right, in the system tray, you’ll have the update manager icon. Click it. Next, accept the suggestion to switch to a “local mirror” (needed for faster file downloads) and enter the admin password, since these are system changes:
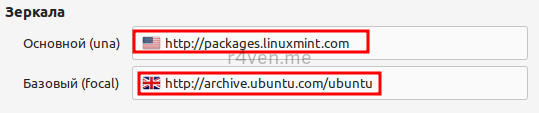
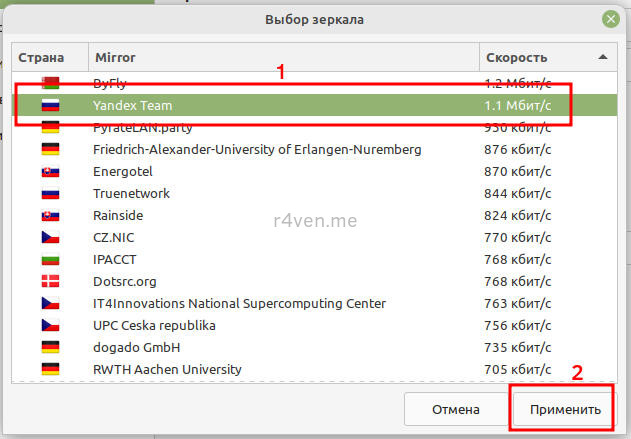
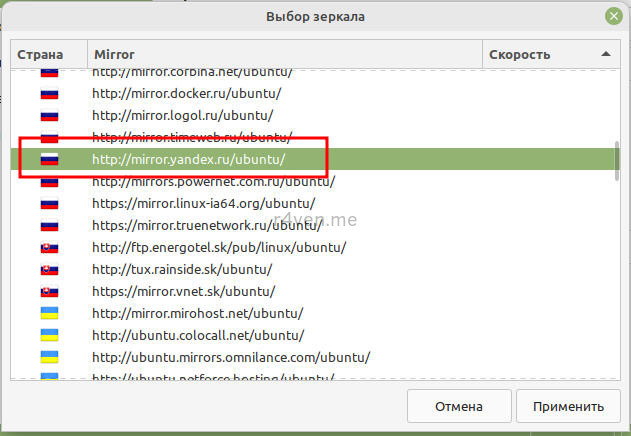
At this step we need to select preferred mirrors for downloads:
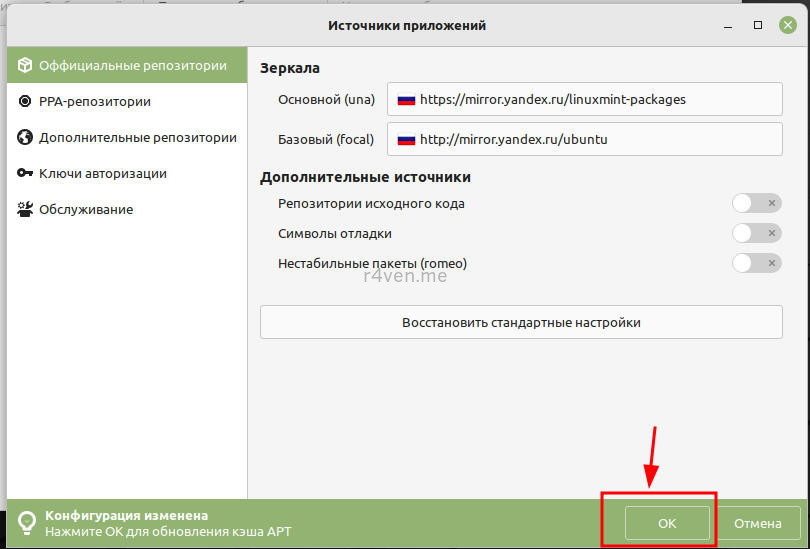
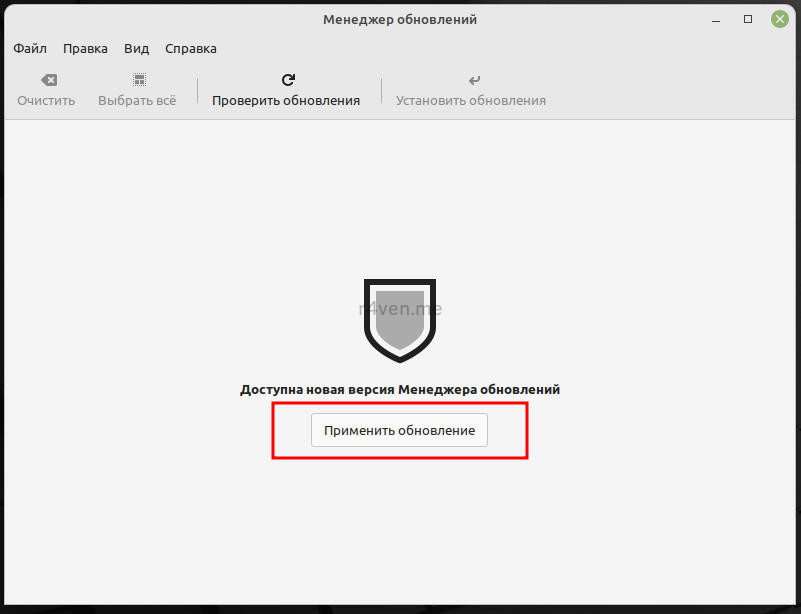
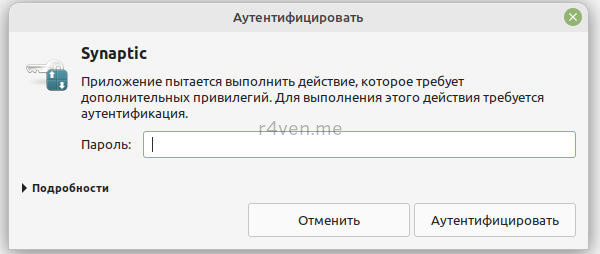
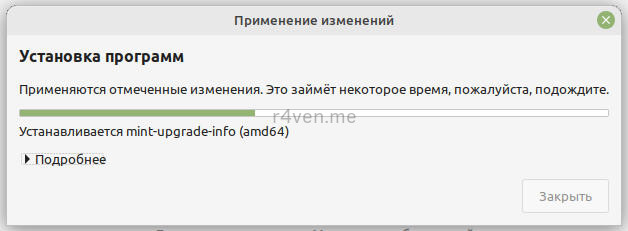
And update the package cache. Afterward, close the “Software Sources” window and apply updates to the Update Manager itself. Click “Apply Updates,” enter the password, and wait for the installation to finish. Screenshots:
1.2 Downloading and installing updates
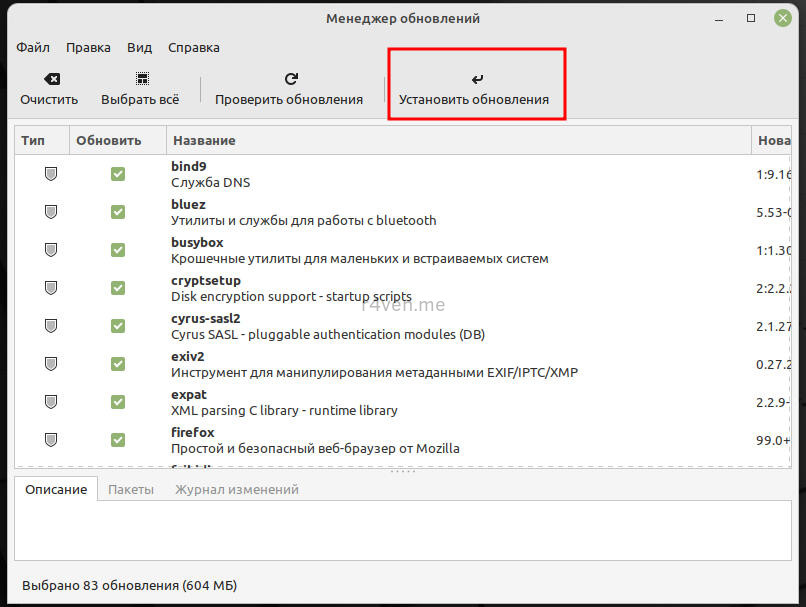
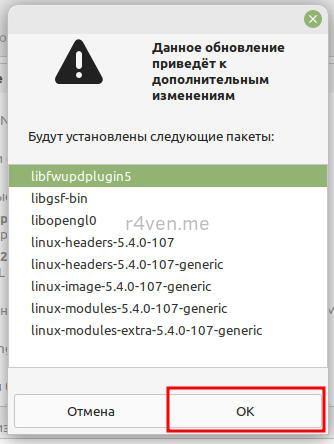
After the manager updates itself, updates for the system and installed programs will become available. Here we click “Install Updates” and confirm the installation, and enter the password again — this is Linux, get used to it 😉
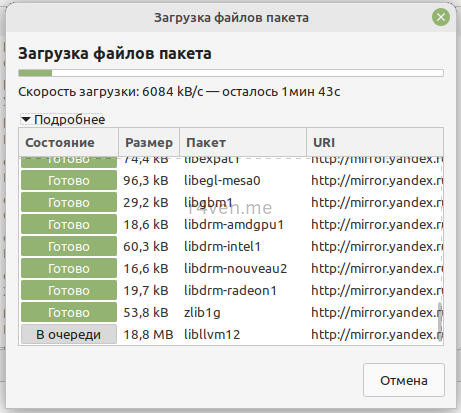
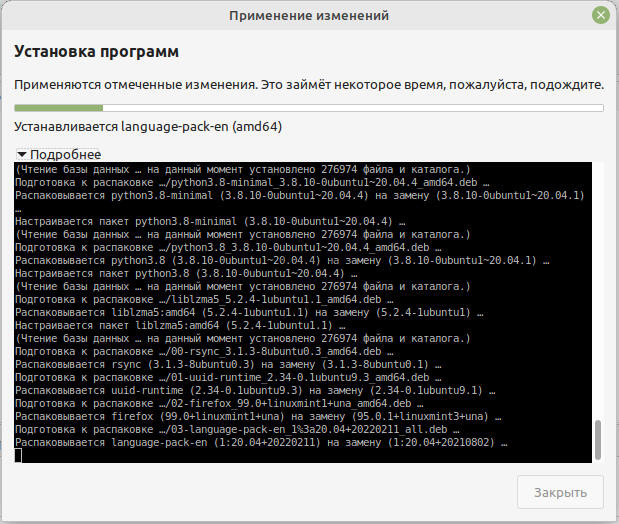
After the installer files download, their installation will begin:
1.3 Rebooting the OS
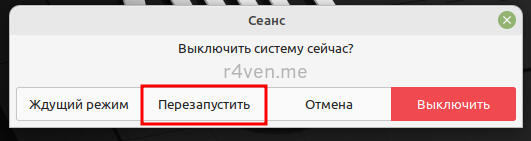
At the end of the process, if any system-critical components were updated, the Manager will warn us that the OS needs to be rebooted:
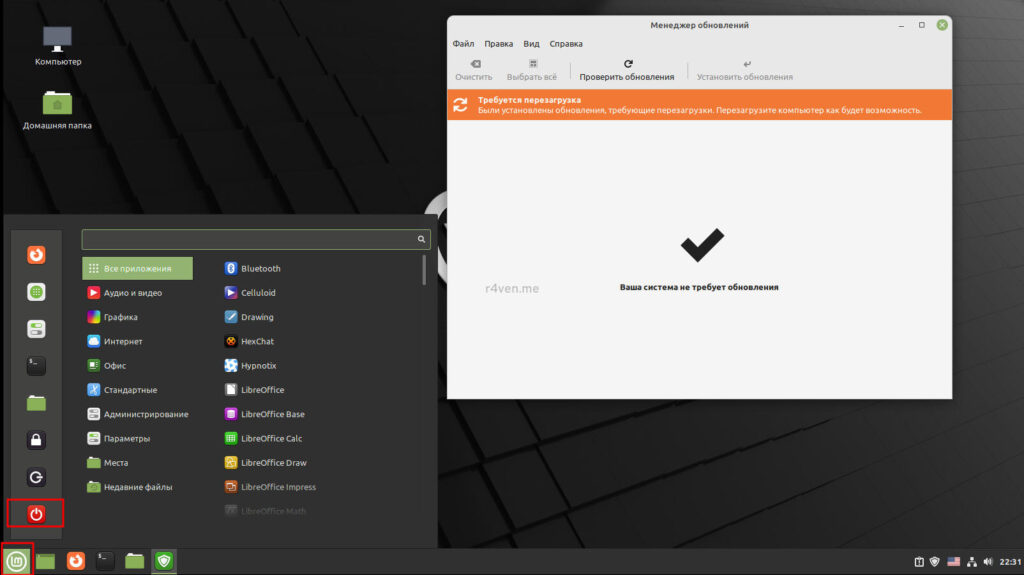
So, our system is updated and rebooted.
1.4 Configuring the update manager
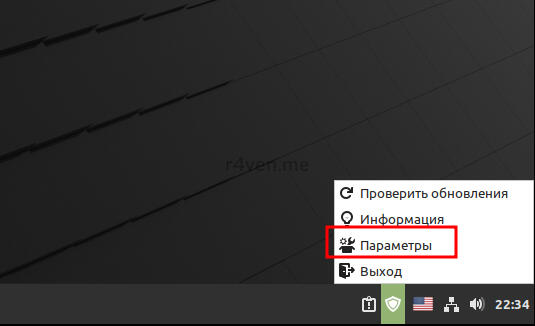
After rebooting, let’s finish configuring the update manager. Right-click its icon in the system tray again and select “Preferences”:
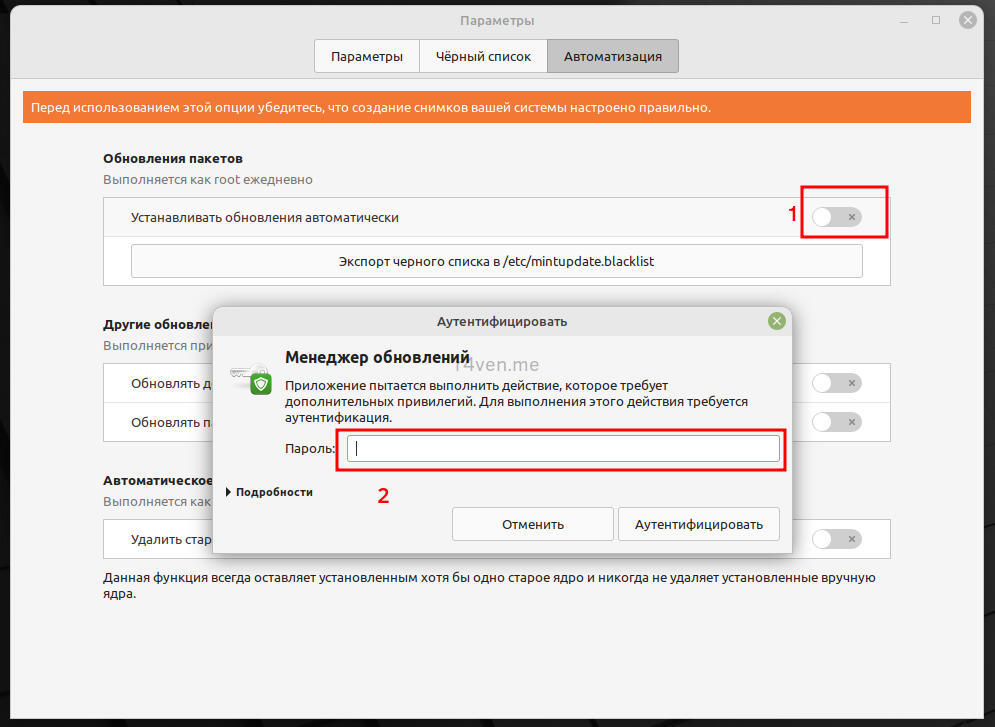
Check the box “Only show the icon in the system tray when there are updates or errors,” then go to the “Automation” tab. Here you can enable automatic installation of updates, but I recommend doing this manually, as needed or desired. This lets you control your system. Otherwise, we turn it into Windows, which is exactly what we’re trying to get away from 😉
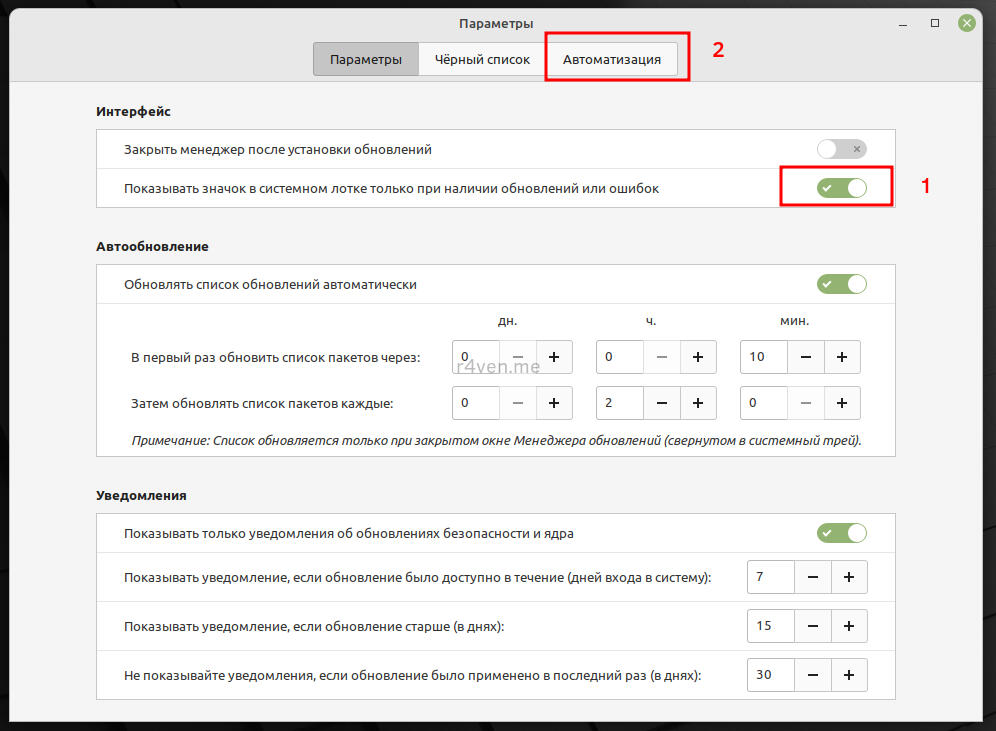
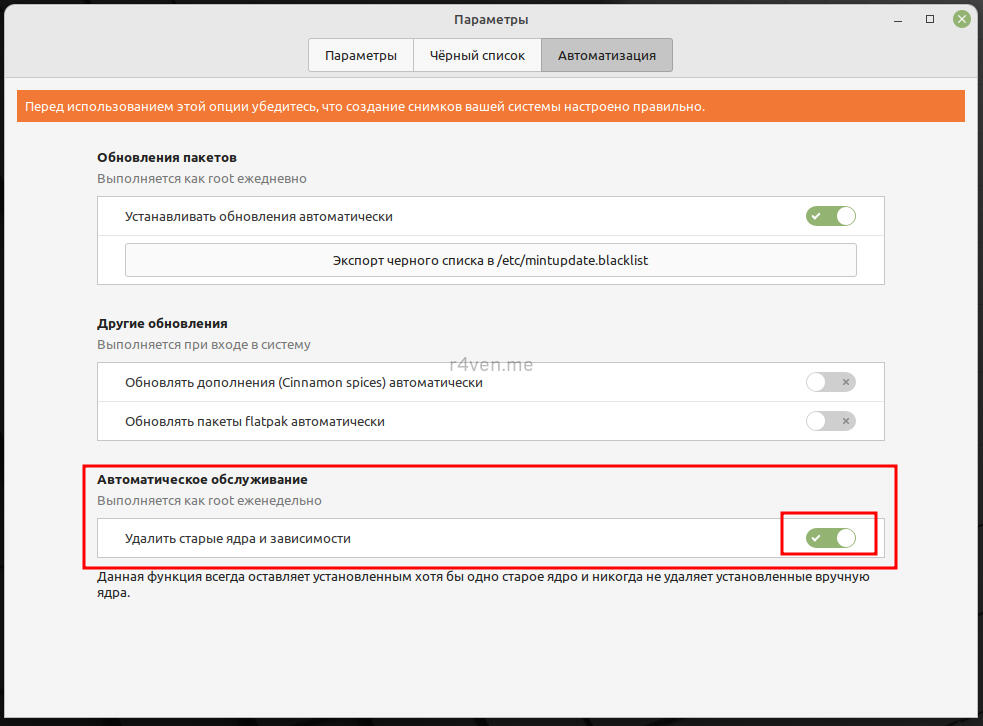
Here you can also set a parameter that will automatically remove old Linux kernels, while the manager keeps one old kernel and doesn’t touch manually installed kernels. This parameter also automatically removes dependencies no longer used by the system, left over from programs installed or removed at some point. I usually enable this option.
So, that’s it for updates. Now, when updates are available for your system, you’ll see the update manager icon in the system tray, which is convenient and not particularly intrusive.
Let’s move on to step two.
Step 2. Setting up operating system backups with Timeshift
Not too long ago, an interesting utility appeared in Linux Mint that monitors the system for errors or critical situations, for example: the absence of a system backup configuration. We’ll configure it now.
The utility responsible for system backups is called Timeshift. You can launch it either from the main menu, via the icon on the bottom-left panel, or through the diagnostics utility mentioned above.
2.1 Launching Timeshift
You’ll see an icon like this in the system tray:
It displays existing issues. In this example, it’s about backup not being configured:
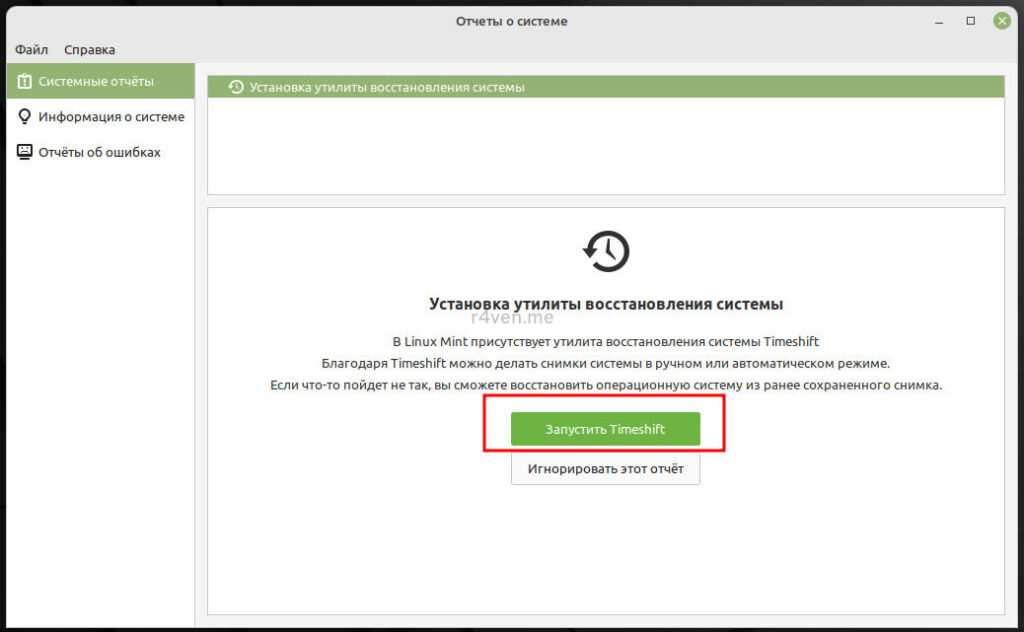
Click “Launch Timeshift,” enter the root user password, and you’ll land in the setup wizard. We’re interested in the first option, RSYNC:
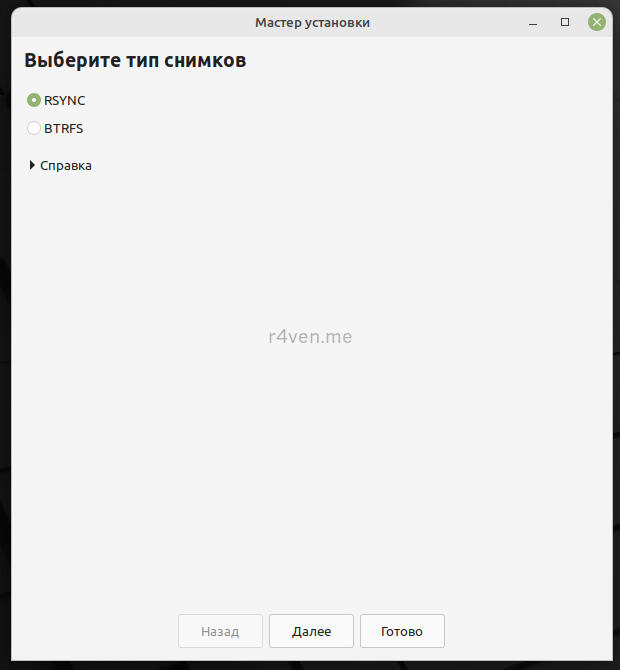
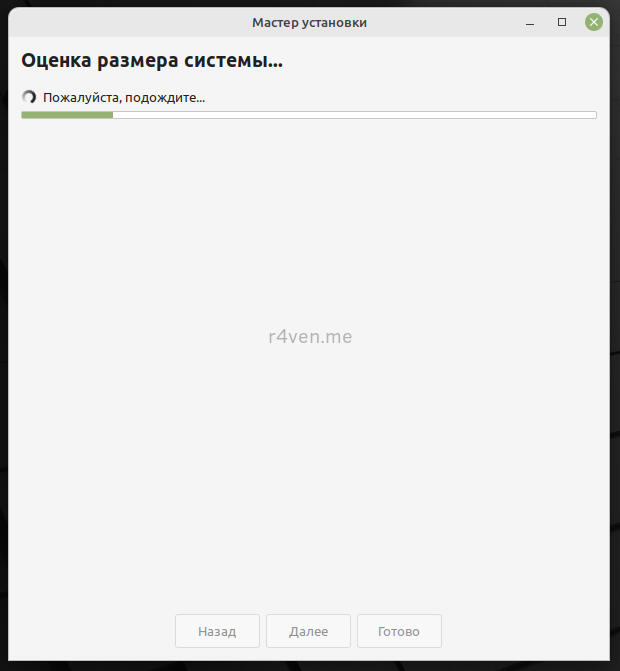
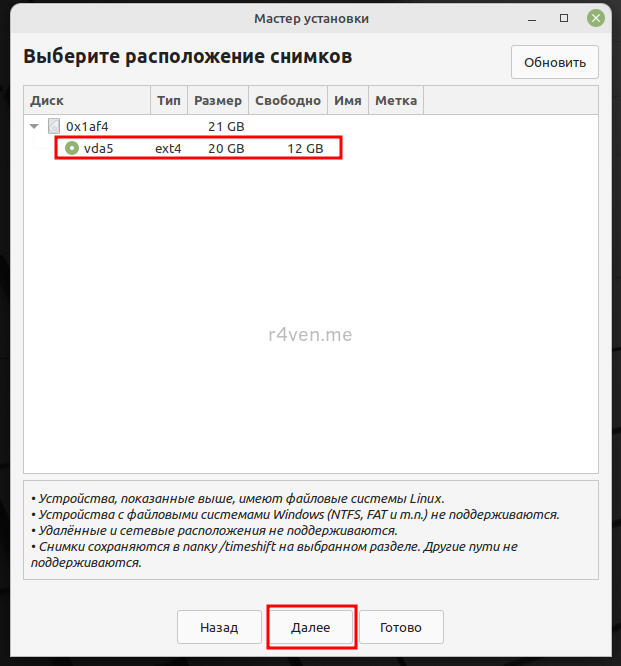
At the next step, you need to choose the location for storing backups. I’ll warn you right away that this program can only store copies on Linux filesystems: ext3, ext4, btrfs, etc.
2.2 Choosing where to store backups
Copies can be stored on the same partition or on another one. The ideal option would be to allocate a separate partition on the same or a different hard drive, format it as ext4, and store copies there. Here, choose based on your own capabilities and preferences. In this example, we’ll store copies on the same partition where the system is installed, but this isn’t recommended;)
2.3 Choosing a schedule
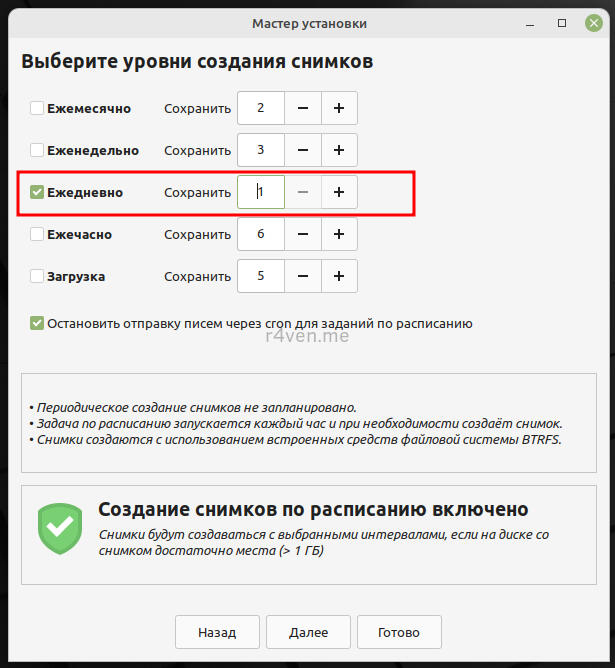
Choose the schedule and number of copies. It’s recommended to keep at least two copies. But in this example only one will be kept. Frequency: daily, and click Next.
2.4 Configuring filters
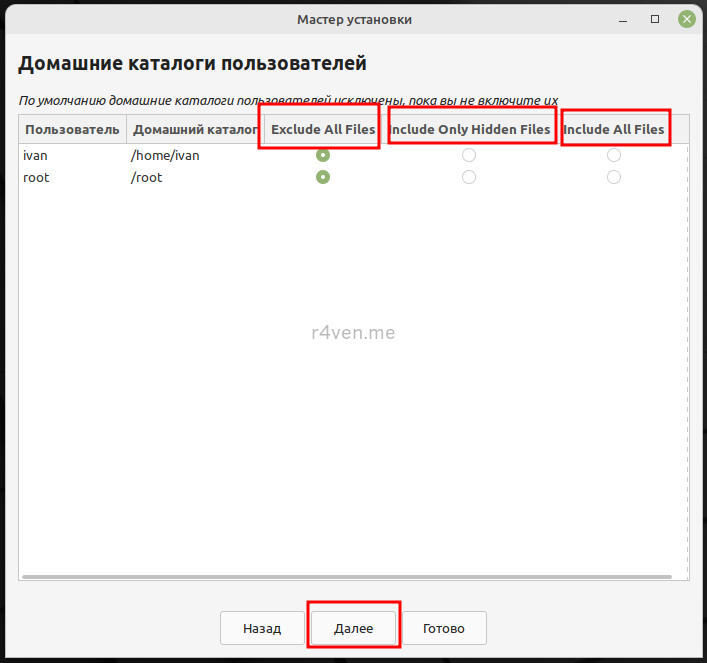
At the next step, filters are configured. Here you can specify whether to save files from the user’s home directory, save only hidden files, or both. You can also add or exclude any other directories here. I usually leave the default choice — save only hidden files (Include only hidden files).
Afterward, confirm the disclaimer, since free software usually doesn’t come with any guarantees.
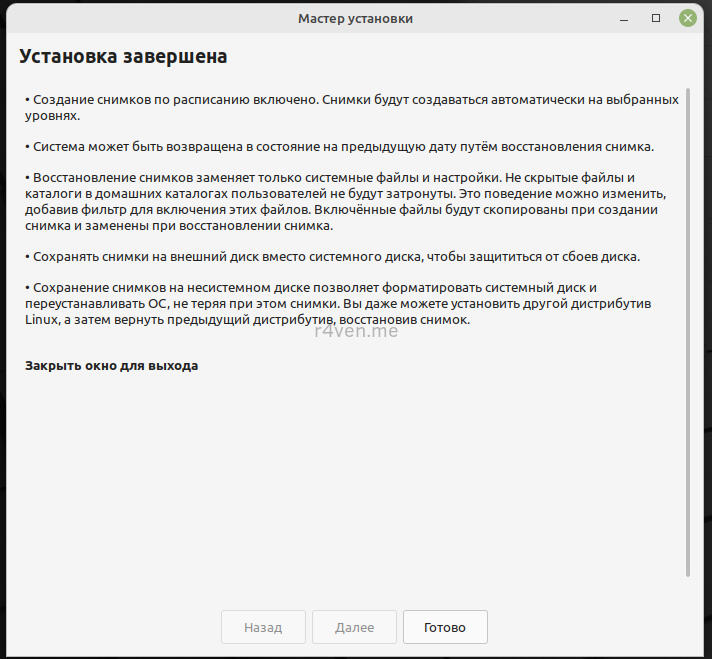
Done. The system is configured. Now it will automatically create and store one system backup daily.
How does this work? Every hour, a script runs to check the backups made in the current day. If the last copy was created less than a day ago, the script finishes its work until the next hour. If the copy’s age is more than a day, the backup process is initiated. Simple as that.
2.5 Manually creating copies
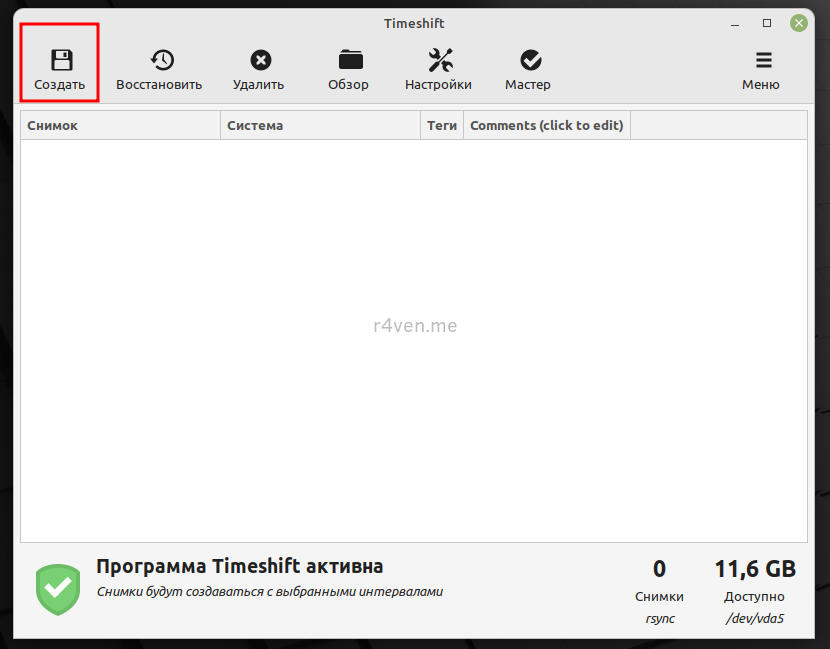
For the first time, we can create a copy manually. By the way, manually created copies are not overwritten. A copy created manually is indicated by a corresponding marker in the tags column: marker O — created manually.
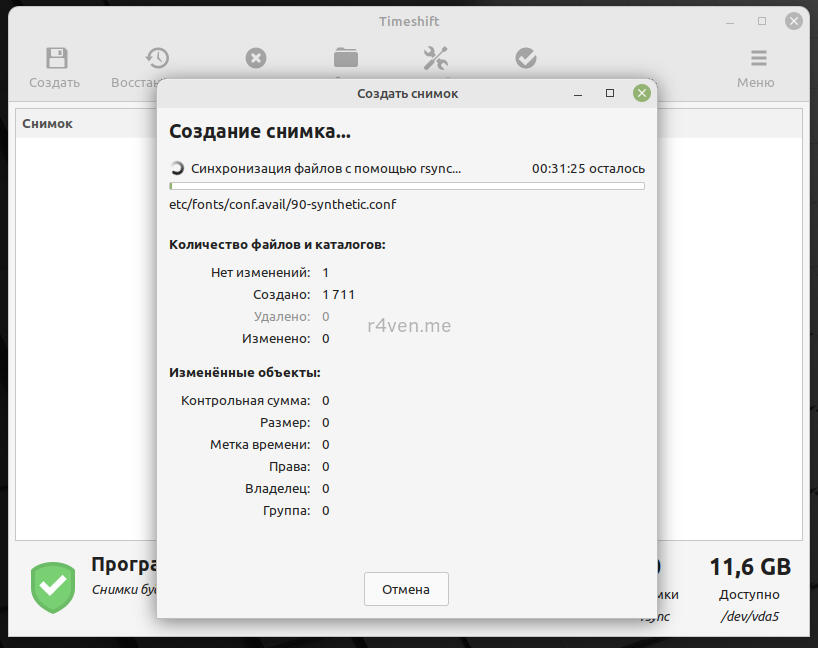
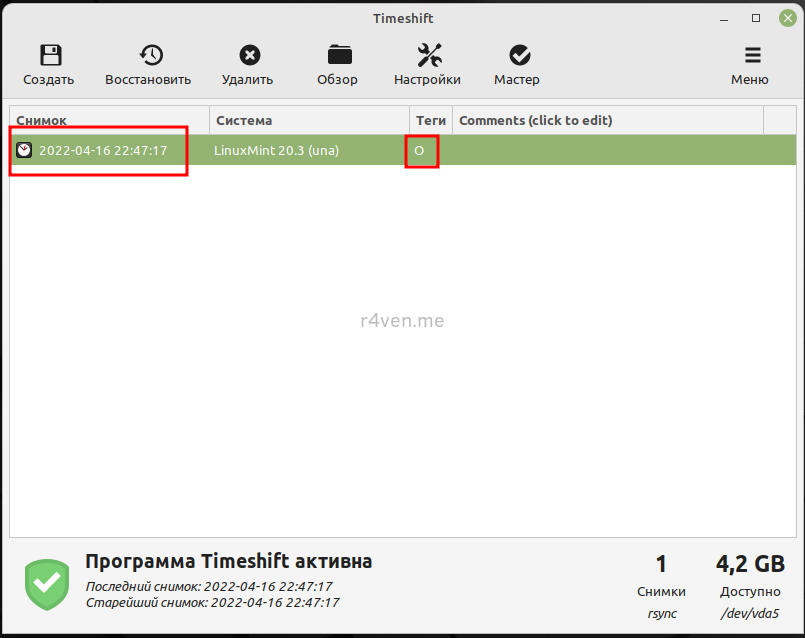
To restore from this copy, you need to select the desired instance and click the restore button. You can leave the requested parameters at their defaults, confirm, after which the system will reboot into its previous state.
2.6 In case the system breaks
By the way, if you break the system so badly that it won’t start, you just need to boot from the installation flash drive, the creation of which is described in the article about installing Linux Mint. Select Timeshift in the application menu, specify the location of the backups, click the restore button, choose which partitions need to be restored, and wait for the restoration to finish. A visual example will be in a separate article.
Step 3. Installing video drivers (nvidia)
Installing video drivers in Linux Mint is extremely simple. There’s a dedicated item for this in the settings menu:
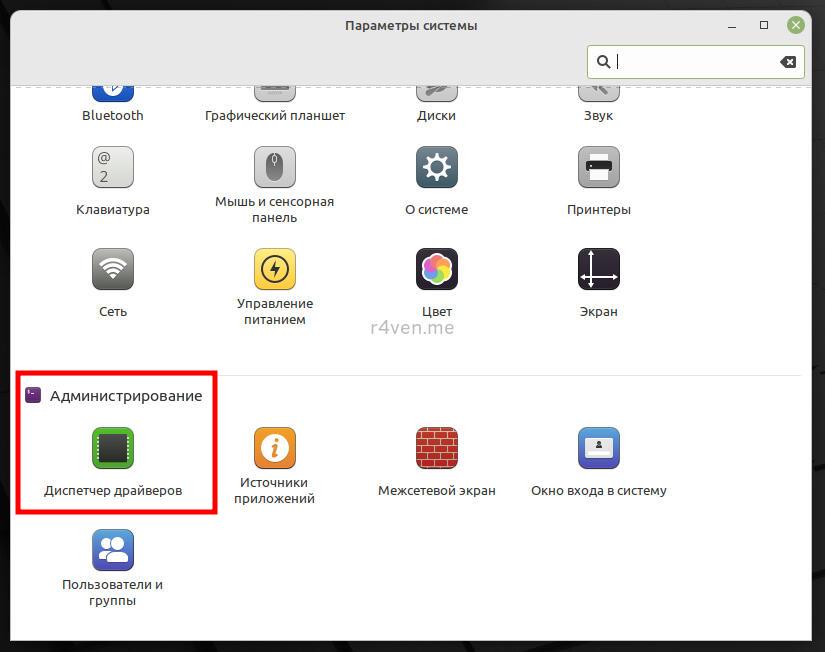
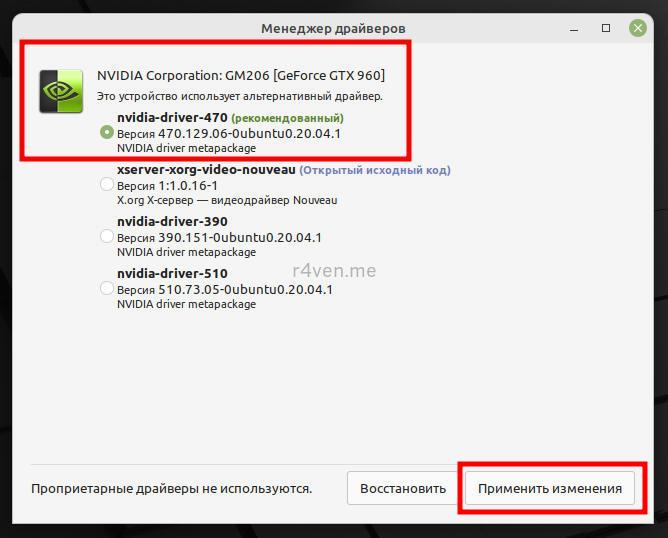
After that, reboot. If everything installed correctly, you’ll see your desktop again. If you weren’t so lucky, grab your installation flash drive with the LiveCD image of Linux Mint and restore the system with Timeshift. Just be very careful when choosing which partition to restore.
Step 4. Configuring the keyboard layout
It’s time to configure the keyboard. To do this, look at the system tray again and click on the “flag” icon for the English or Russian layout:
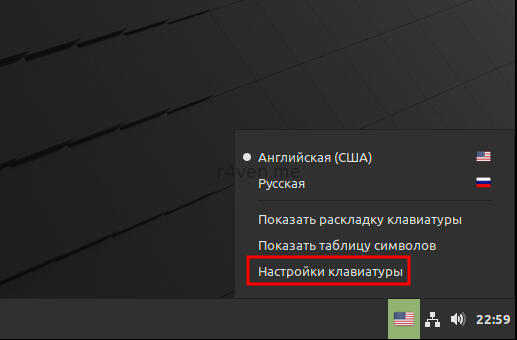
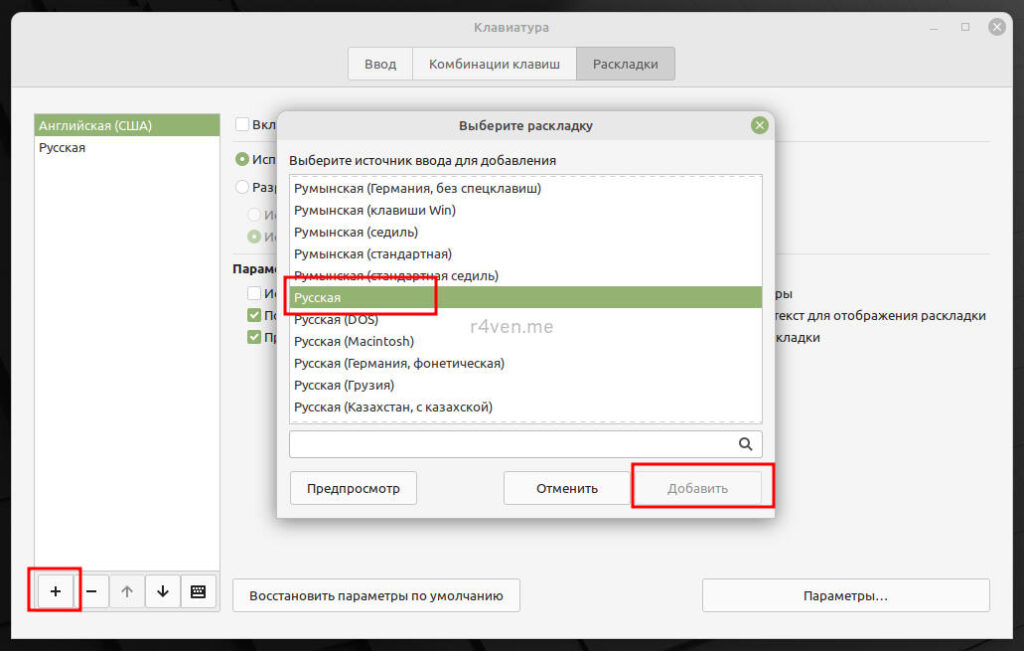
Go to the “Layouts” tab. Here you can add the language you need, if you didn’t do so during OS installation:
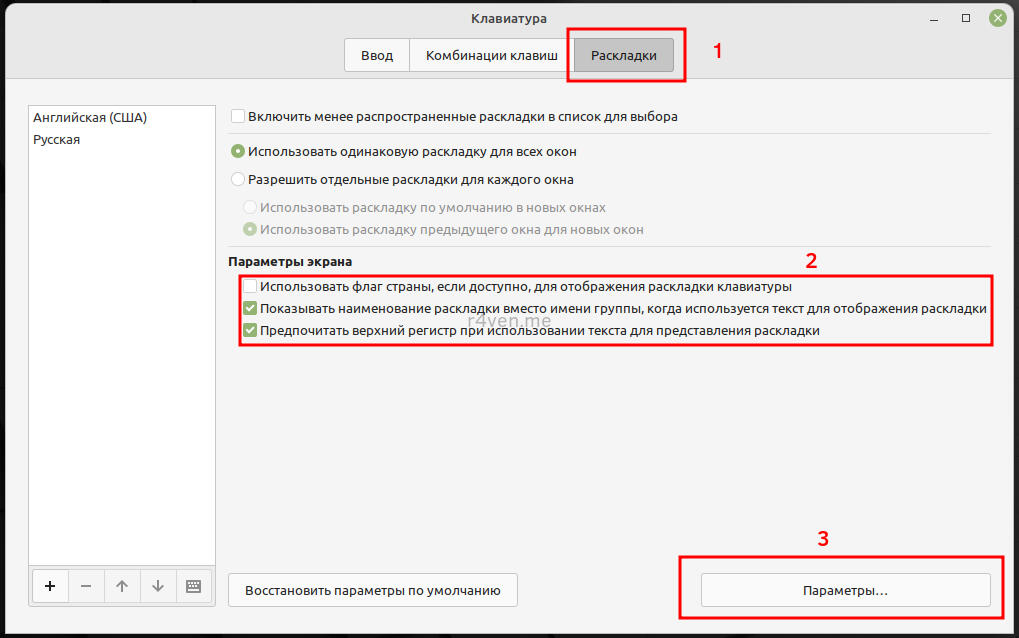
Next, set the desired display settings for the icon in the system tray:
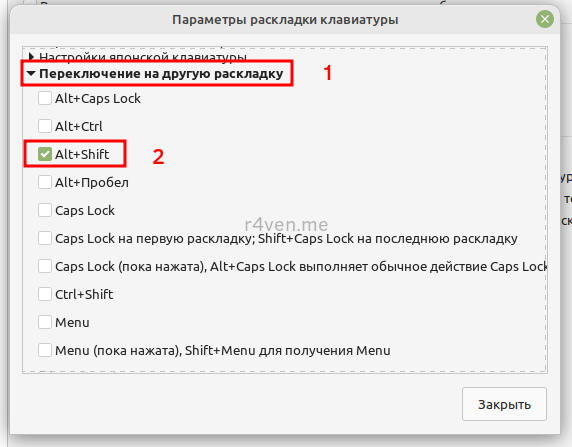
In the options section, set a keyboard shortcut for switching the language layout
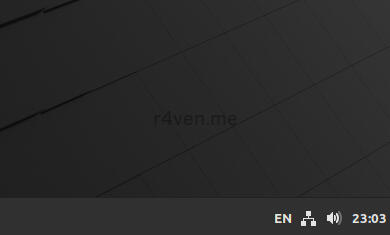
As a result, we’ll get an applet like this, and switching keyboard layouts by pressing the key combination Alt+Shift:
Step 5. Configuring the Nemo file manager
5.1 Configuring appearance
There’s nothing special about configuring the file manager. Just a small adjustment to your own preferences. Go into the settings and set the parameters as shown in the screenshots, or however you like. I have Nemo configured like this:
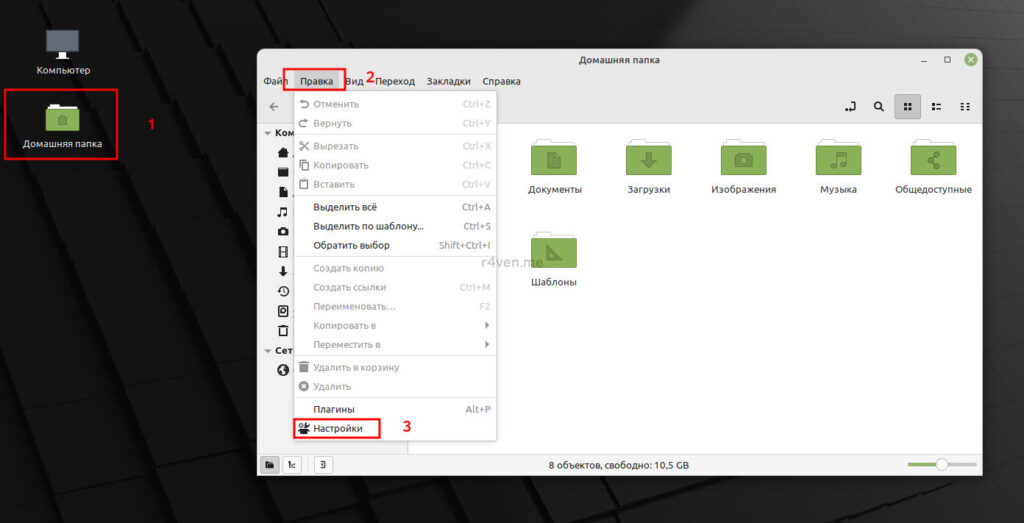
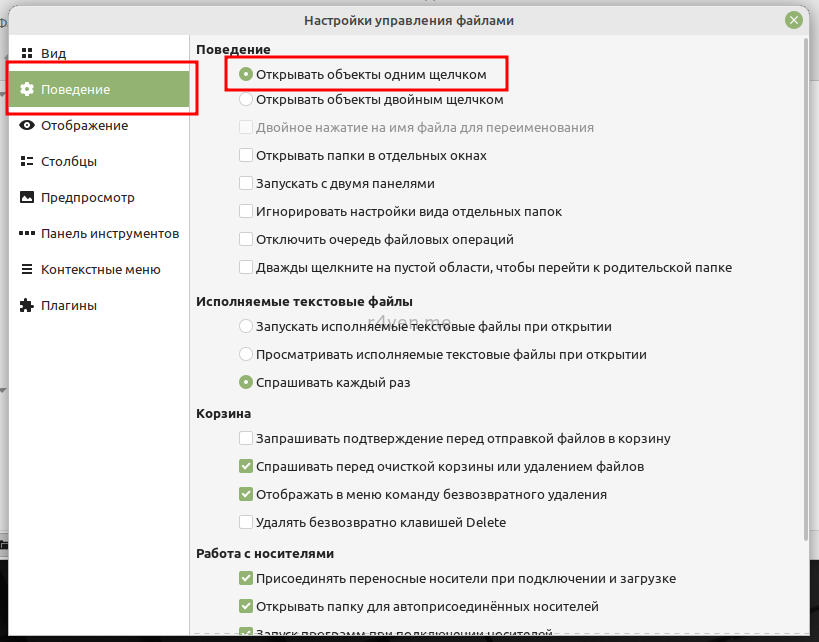
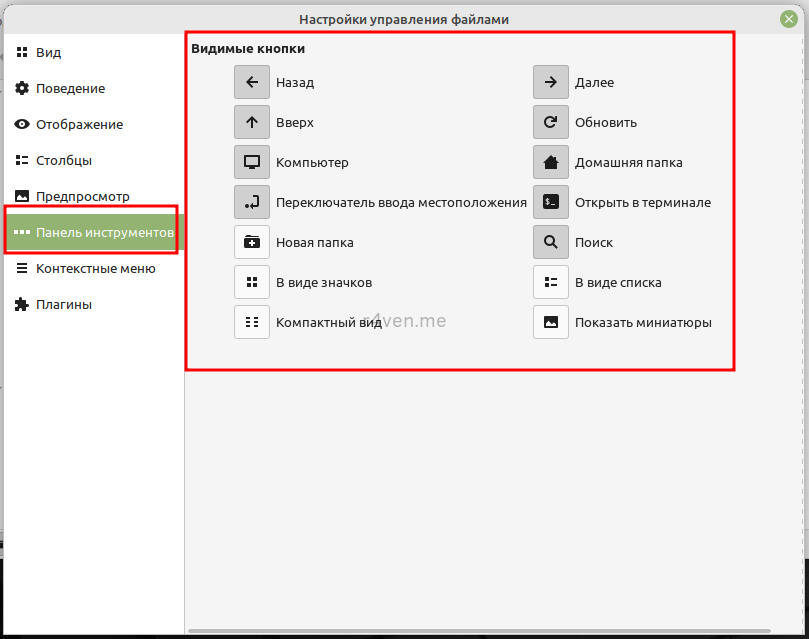
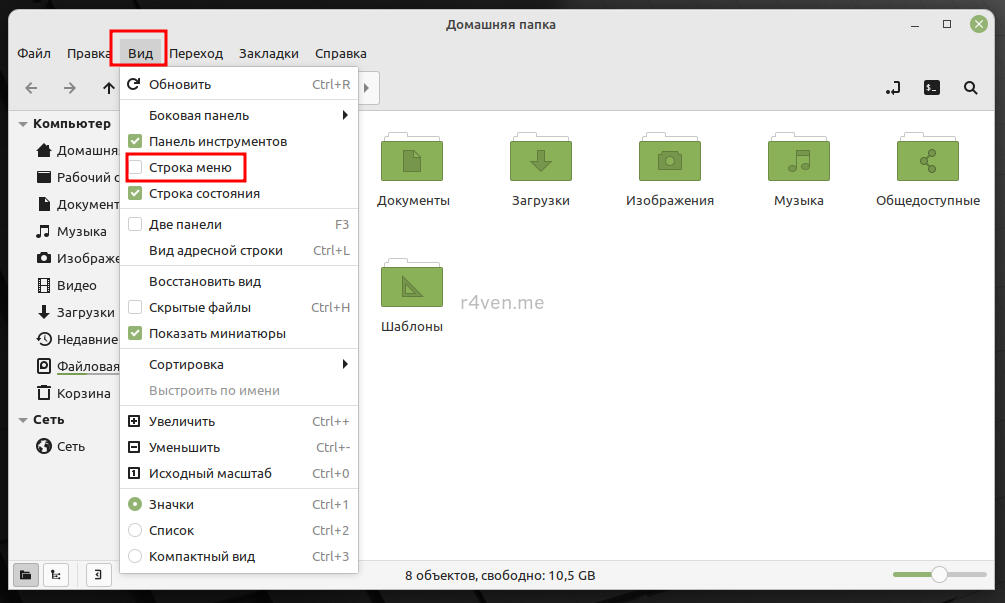
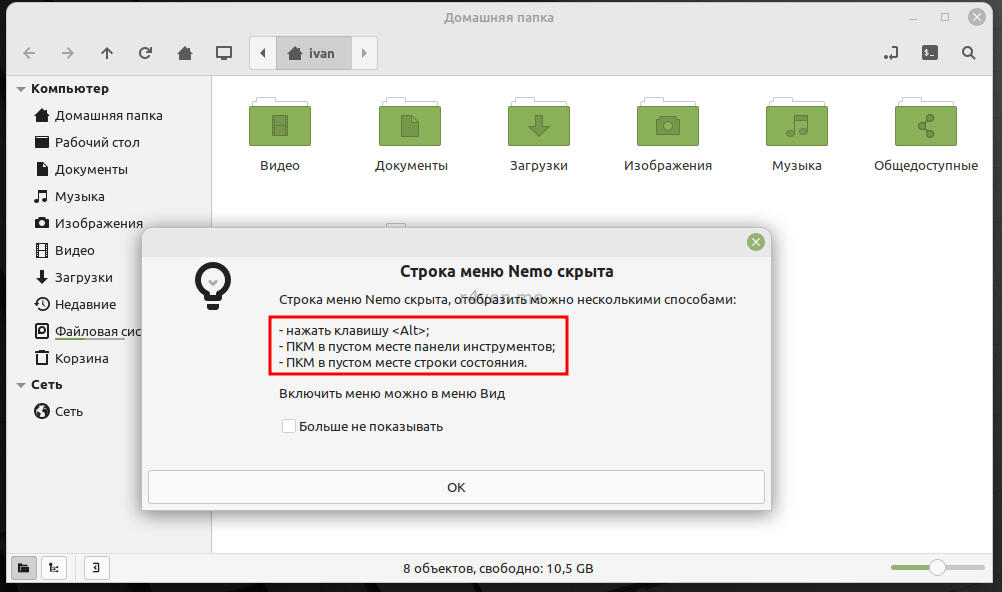
I set up single mouse click to open files/folders, the toolbar, and remove the menu bar from view (to see it you need to press alt, which, incidentally, is what it warns us about). There, a neat, concise, stylish, and functional file manager. By the way, it supports tabs, as well as dual-pane mode: triggered by pressing F3.
Actually, even though this Nemo file manager looks simplified, it’s quite functional. For example, it easily connects to various network storages, be it an smb share from Windows, sftp, ftp, or webdav storage (you can connect to Yandex Disk over it). It supports bulk renaming, searching through folders and file contents within folders. It also supports batch image processing (there’s a separate plugin for that) and much more. It’s worth exploring in more detail. But let’s move on.
5.2 Configuring templates for files created from the context menu
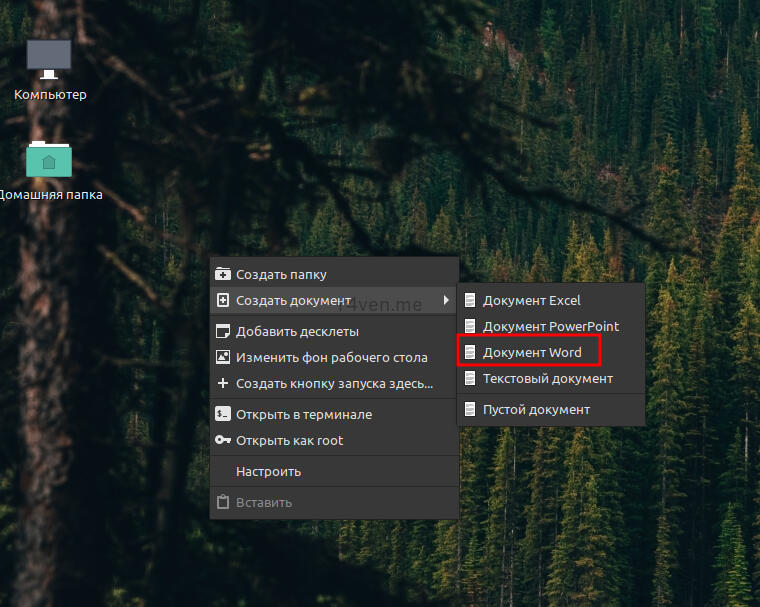
To create template files that appear when creating files via the right-click context menu in Nemo and on the desktop, you need to go to the “Templates” folder and create the files you need with the appropriate extensions in it. For example, office document files: docx, xlsx, pptx, etc.
(there’s a typo in the screenshot with pttx — the correct extension for PowerPoint is pptx)
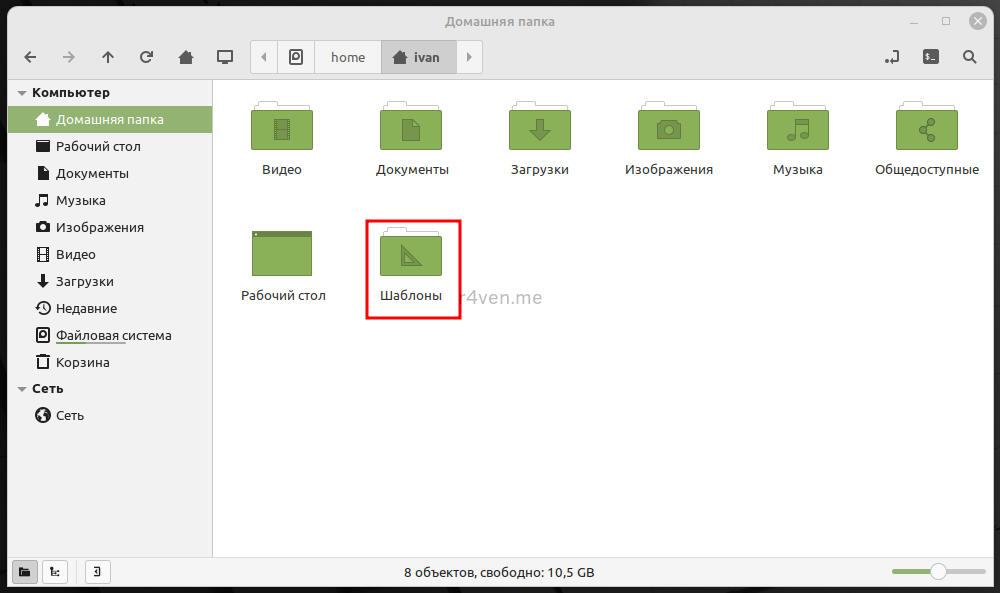
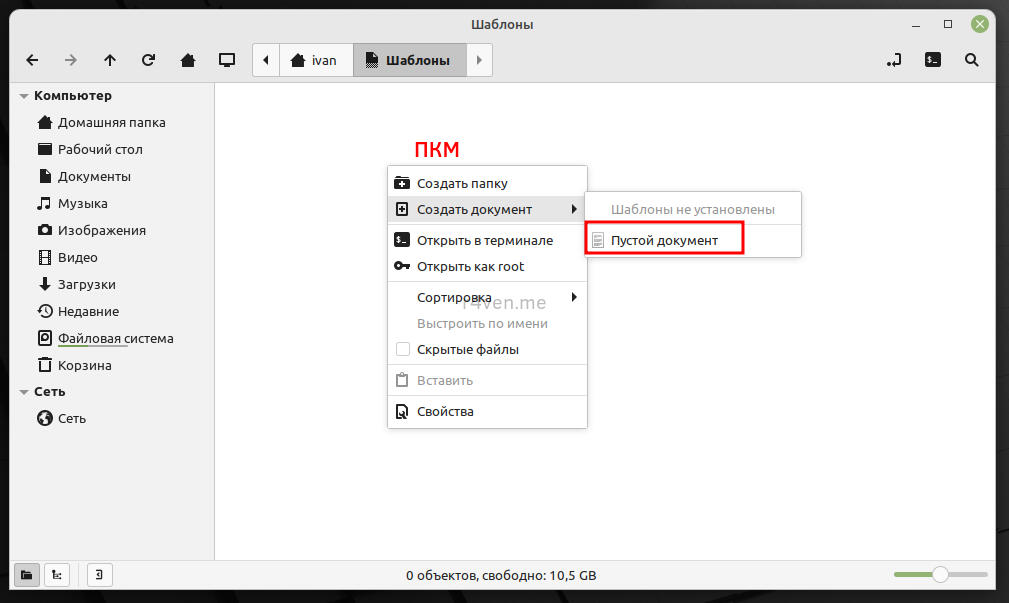
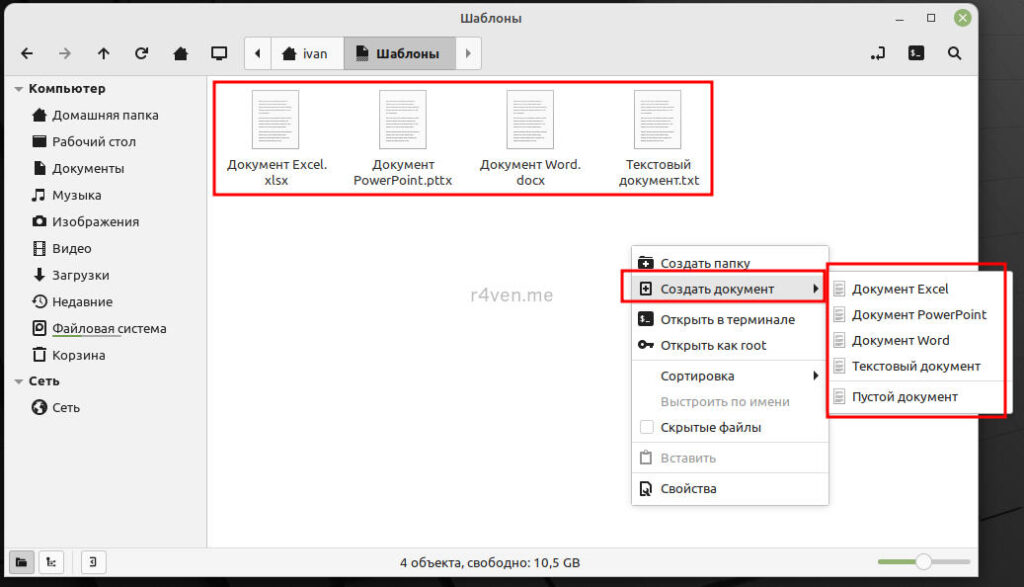
After creating them, check that they appear in the context menu.
Step 6. Configuring the appearance theme
Next, let’s configure the appearance of our OS.
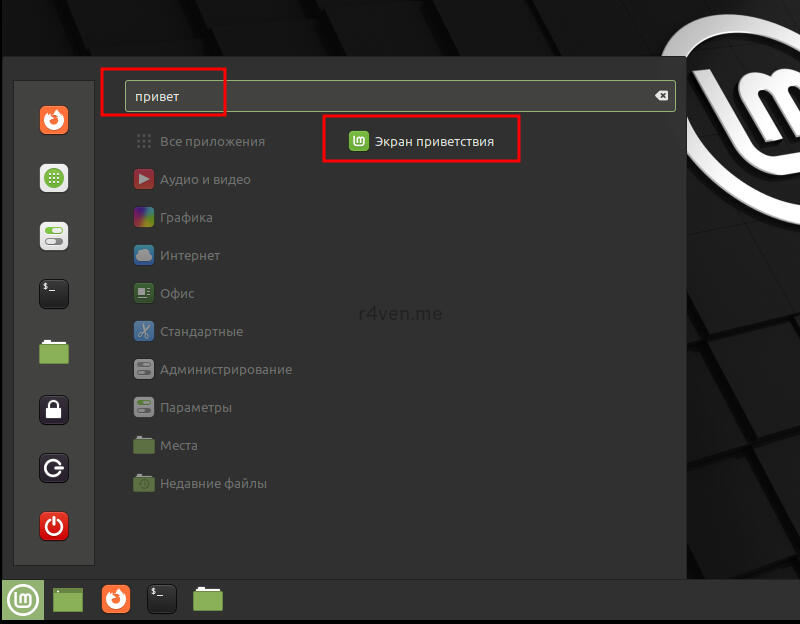
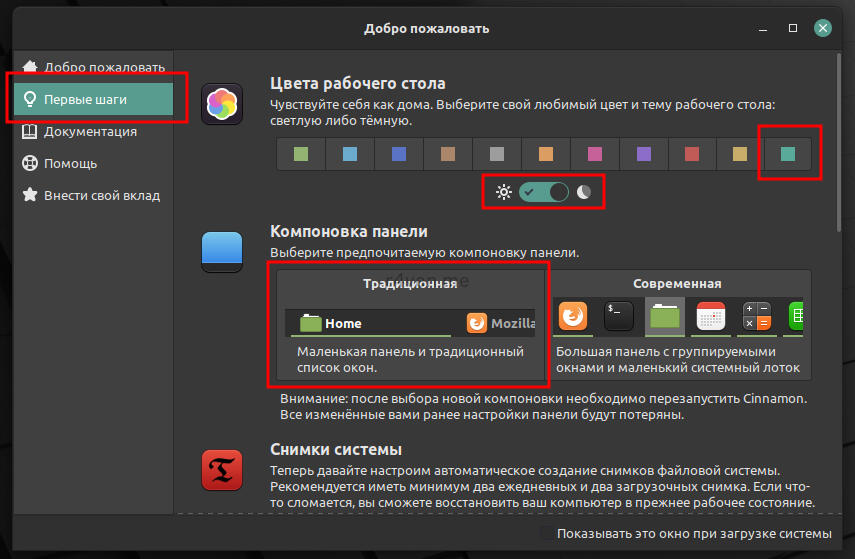
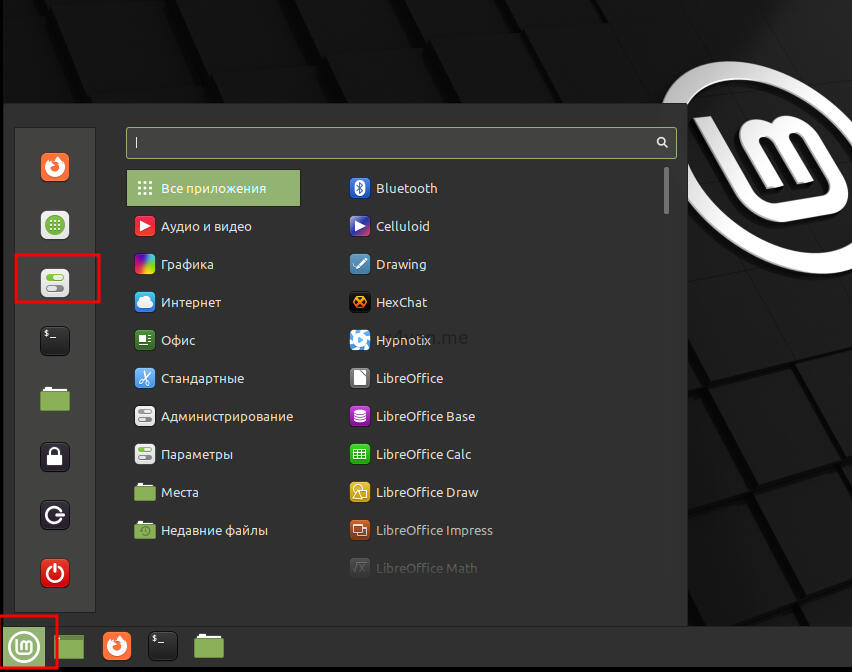
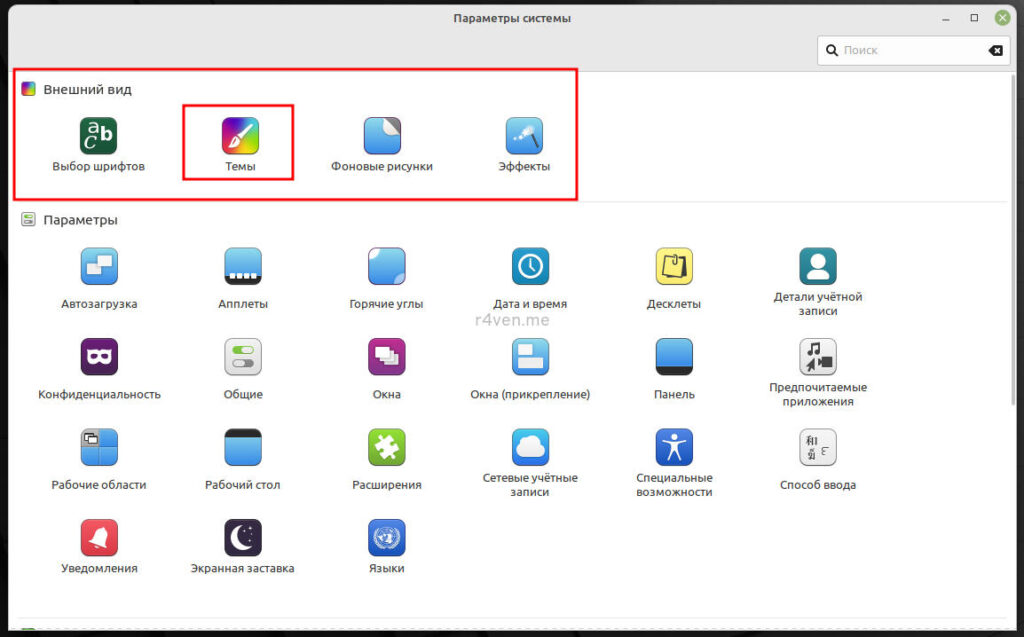
To customize the appearance of Linux Mint, you can go two routes: use ready-made presets on the welcome screen, or manually configure each element.
The first (simple) way:
The second (advanced) way:
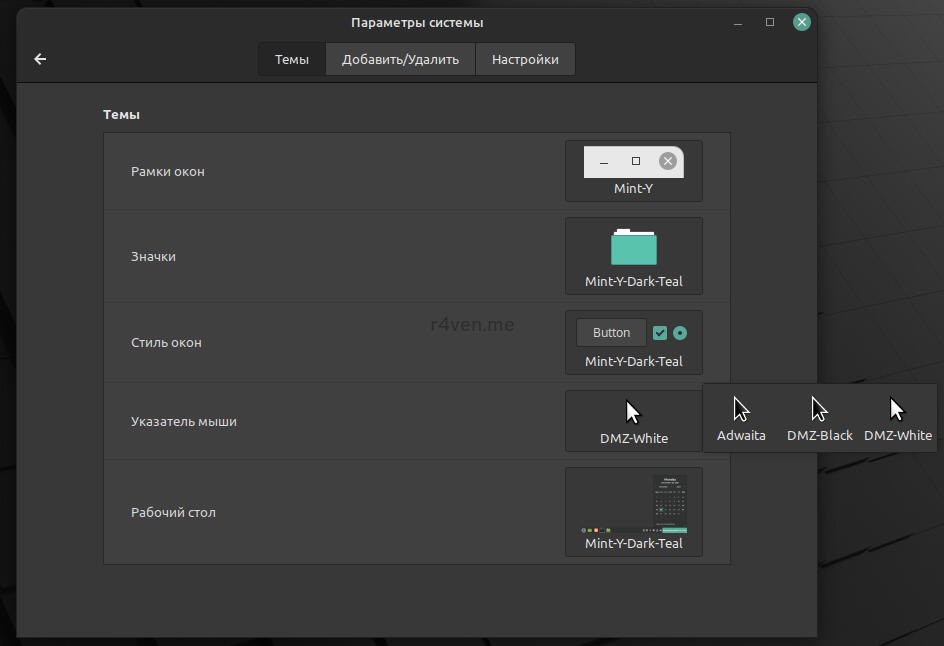
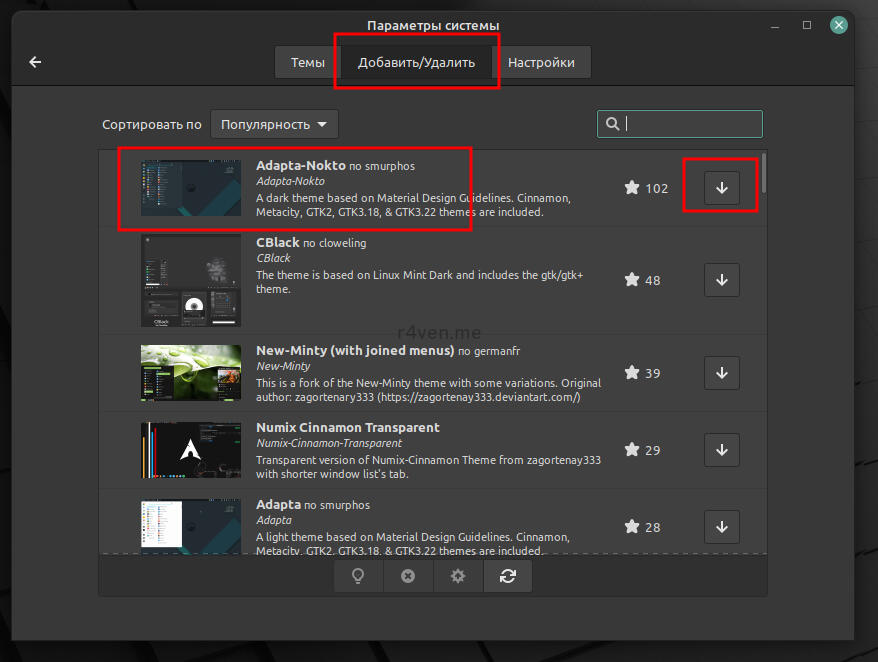
There are also some theme packs available for download in the Linux Mint repositories. As an example, let’s download and configure the Adapta Nokto theme. To do this, go to the “Add/Remove” tab and download the theme. Then, on the previous tab, select the downloaded theme and change the color of the standard icons:
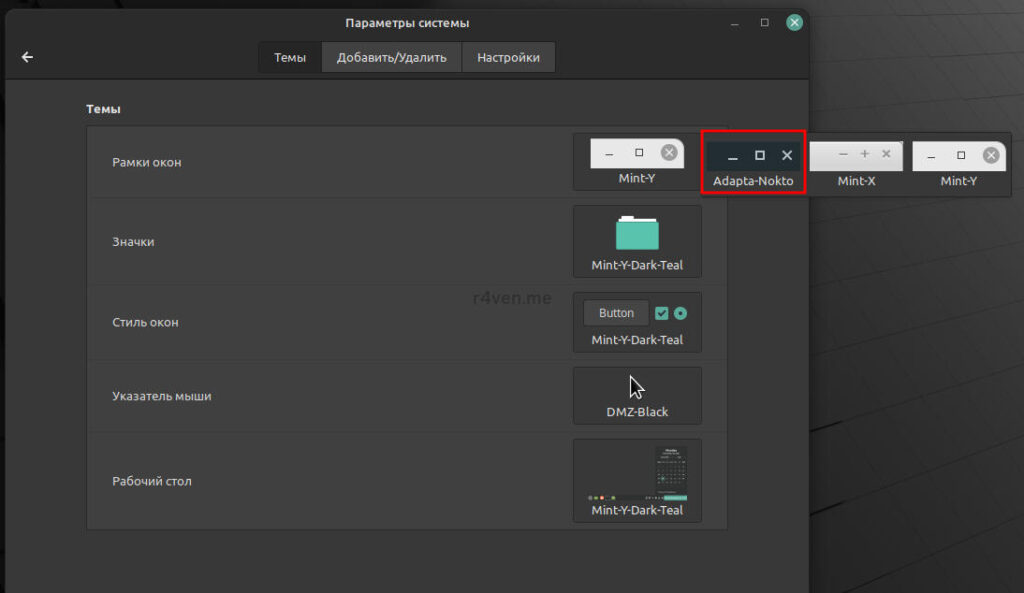
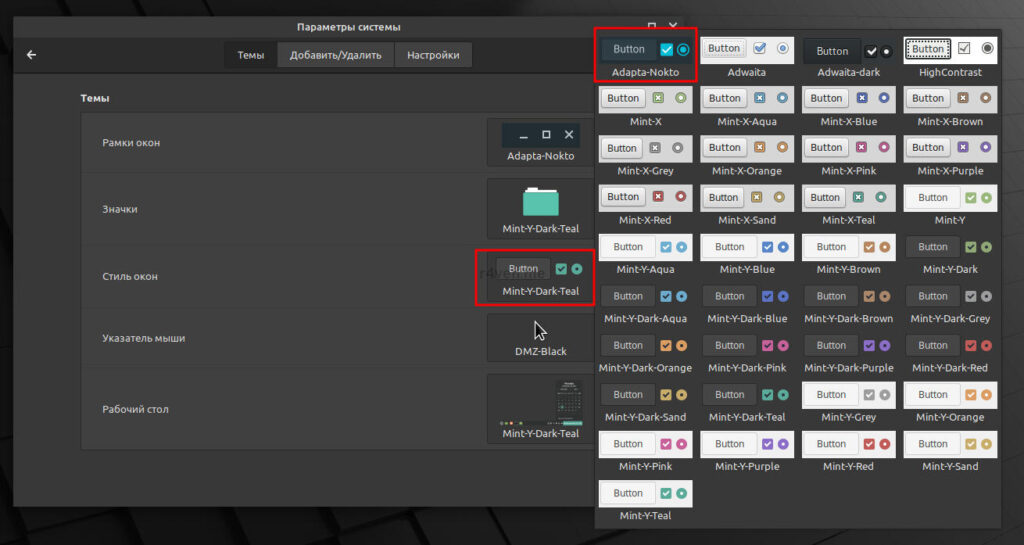
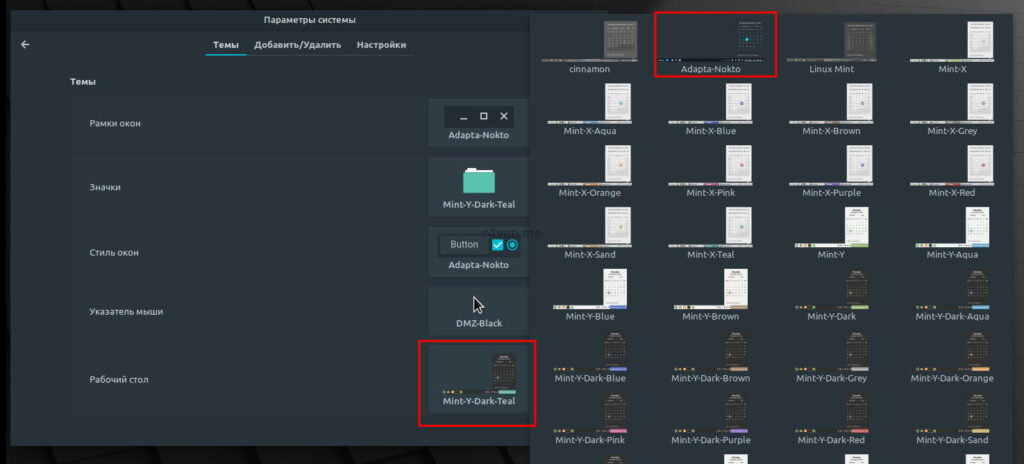
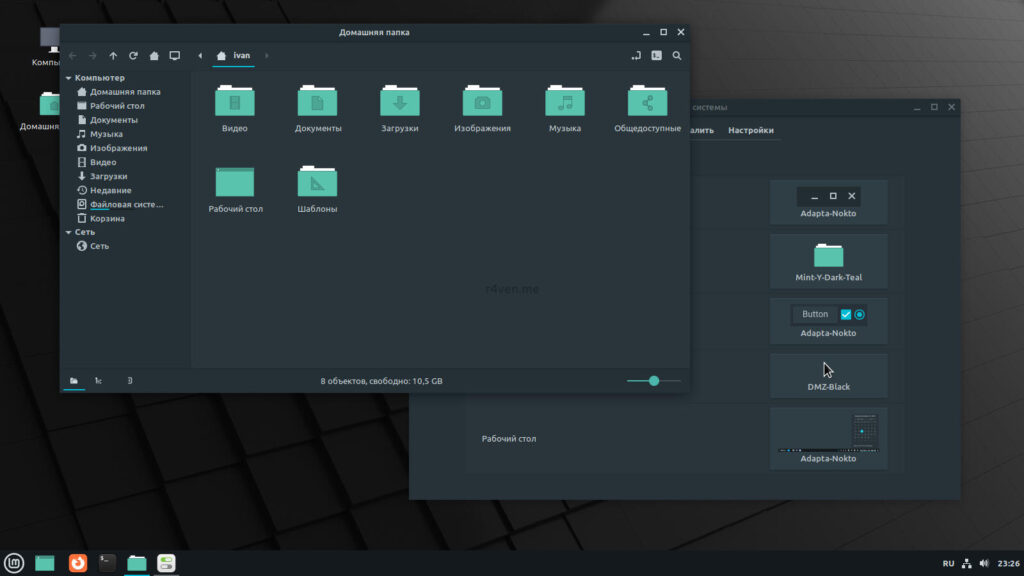
And we get a cool, dark-themed system appearance:
Step 7. Configuring the power manager and screen lock
Now let’s configure the power manager and screen lock. It’s all simple here, just go to system settings:
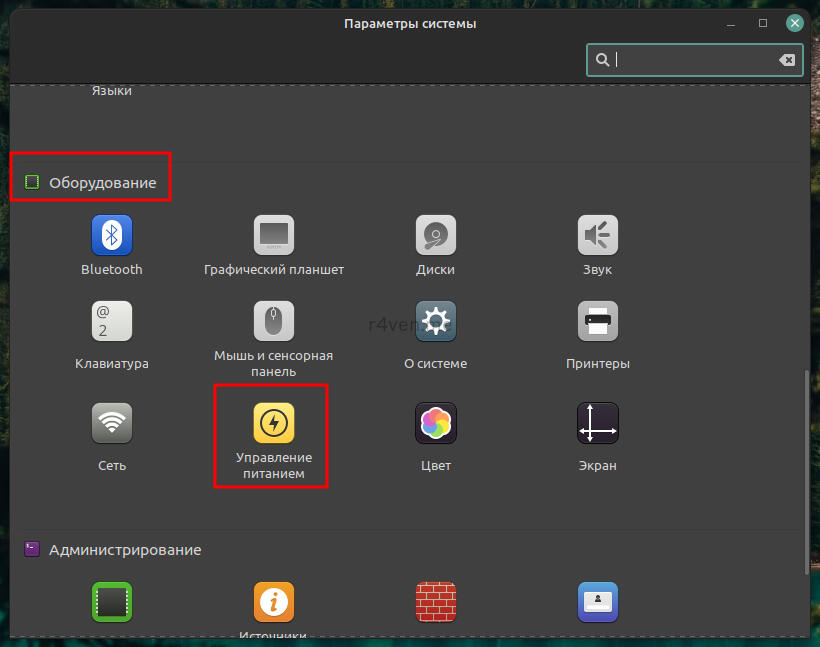
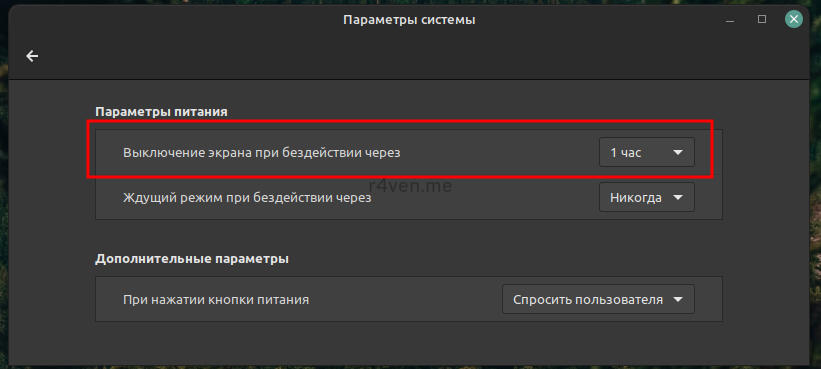
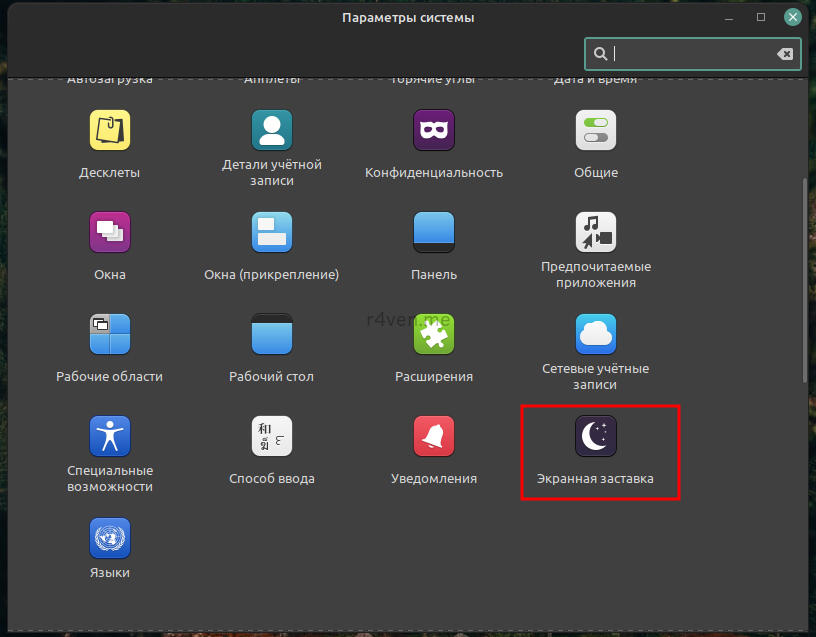
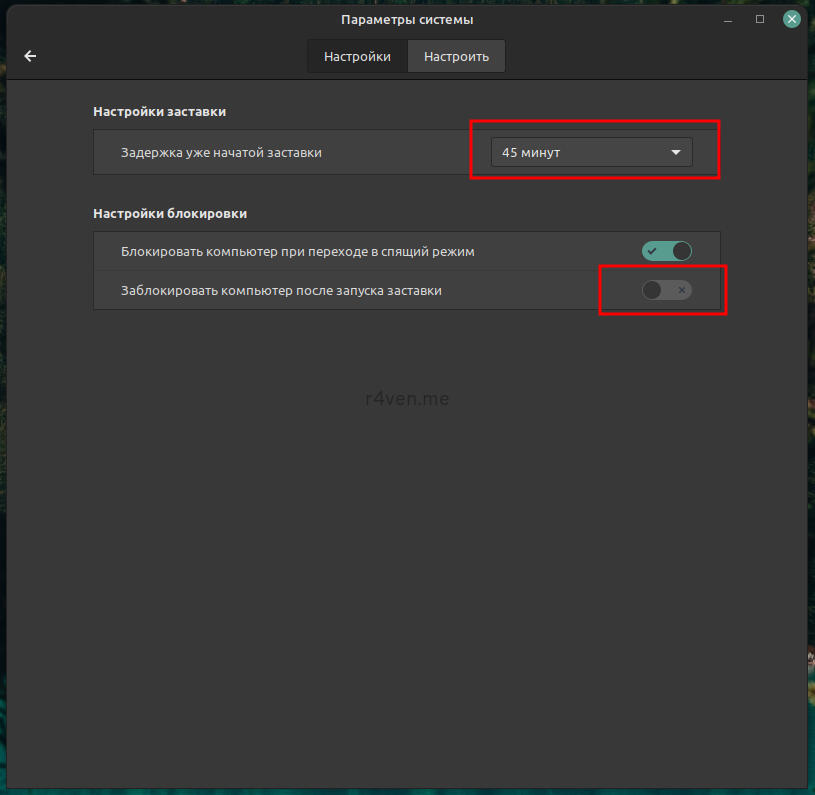
Step 8. Configuring the login screen
8.1 Login screen appearance
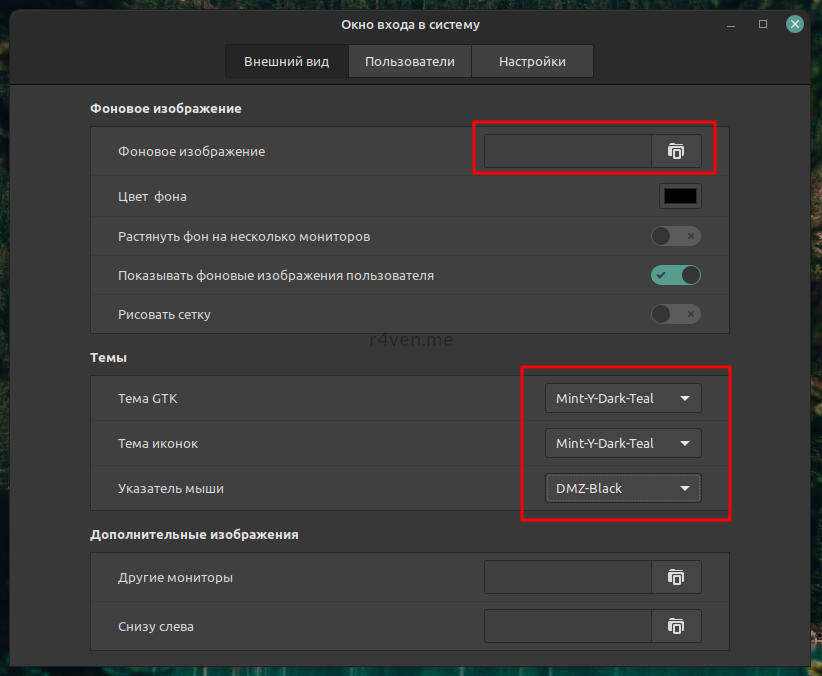
Now let’s configure the login screen. Since the Linux Mint login service (lightdm) runs as the root user, the settings logically require a password. Configure everything as shown in the screenshots. To keep the appearance consistent, I recommend clearing the path to the login screen background image and leaving only the user’s wallpaper displayed:
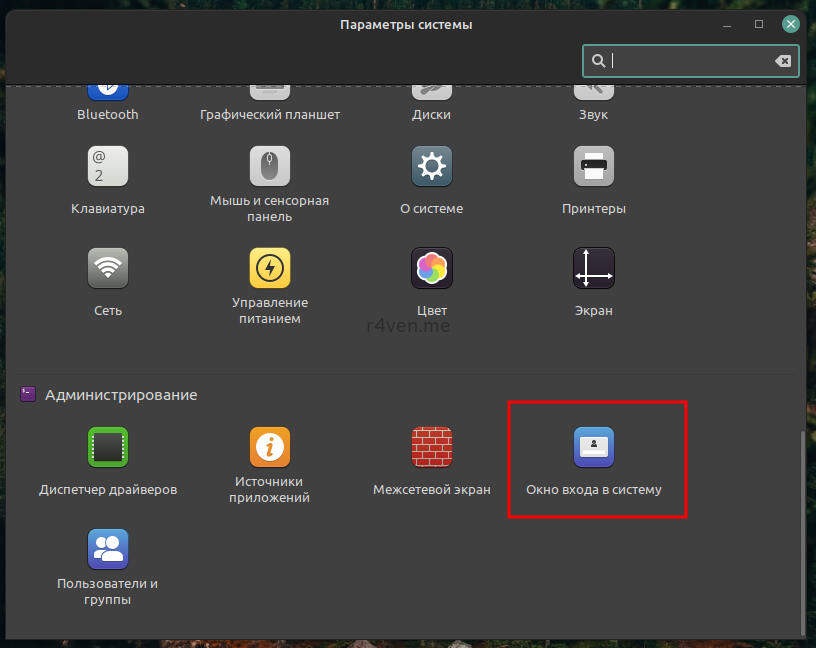
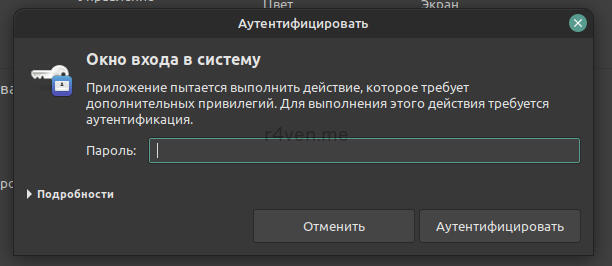
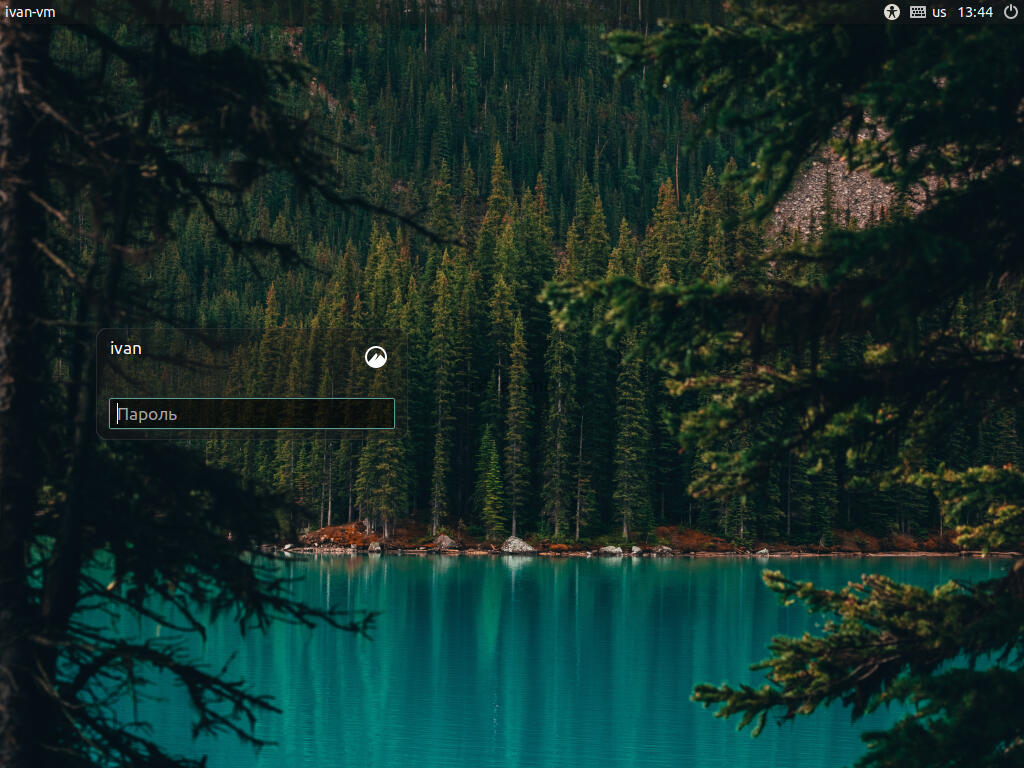
As a result, we get this appearance:
8.2 Enabling automatic login (optional)
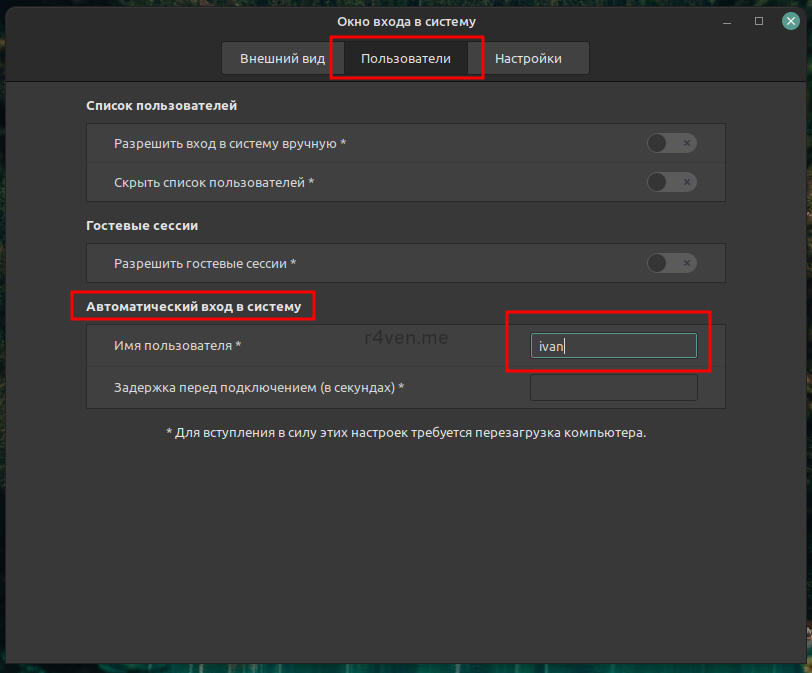
To avoid entering a password every time you log in, in the “Login Screen” settings you can specify your user in the corresponding field. Now, after the OS boots, you’ll land directly on the desktop.
Step 9. Installing Chromium, Google Chrome, Yandex Browser
Since Linux is developing by leaps and bounds, practically all popular browsers have a Linux port, in particular for deb-based distributions.
Open source browsers are found in the standard Linux Mint repositories. Proprietary ones can be installed via separate deb packages (an analog of .exe installers in Windows).
9.1 Installing Chromium
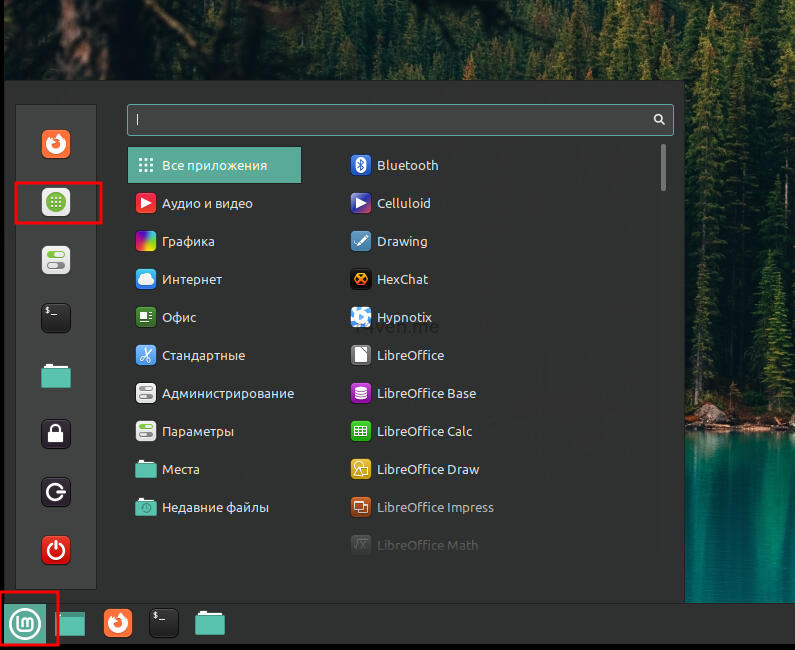
Firefox comes preinstalled, and Chromium can be installed from the repos. To do this, go to the app “store,” find, and install it:
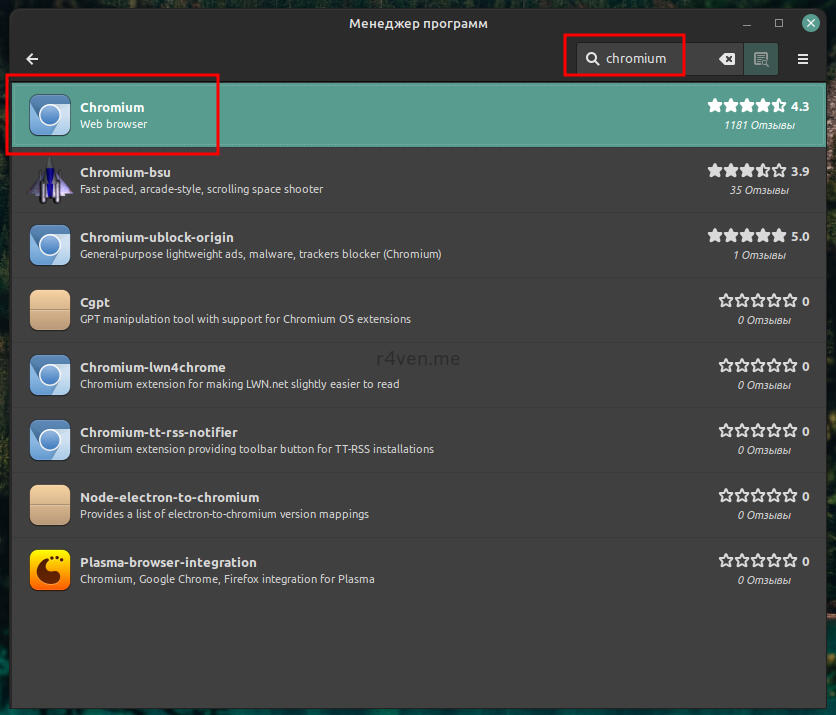
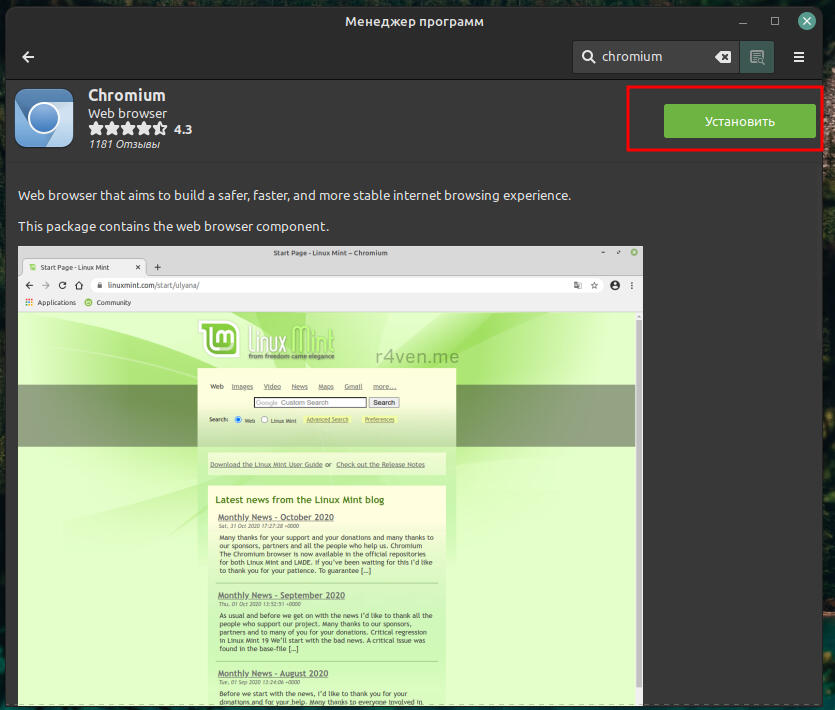
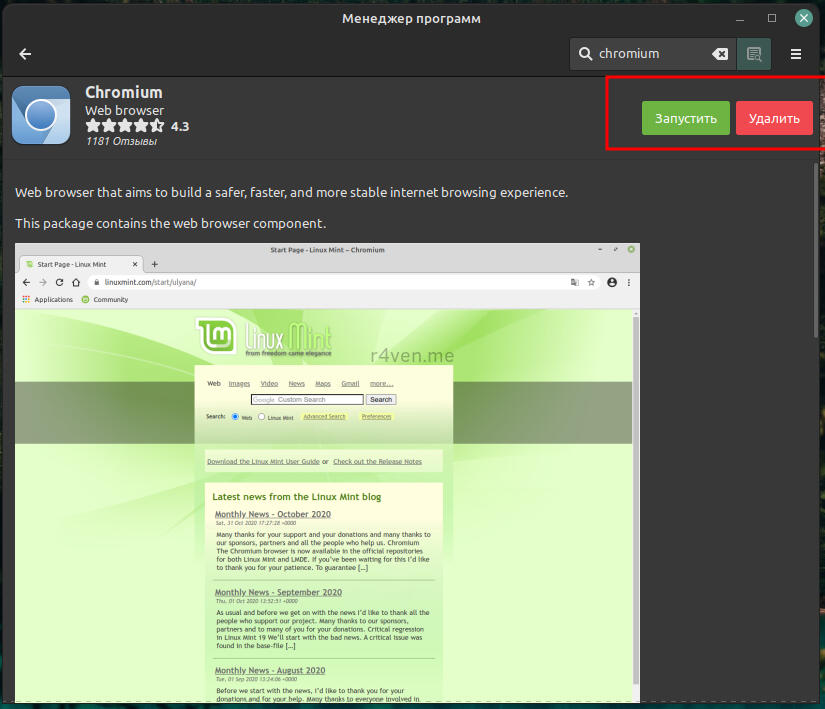
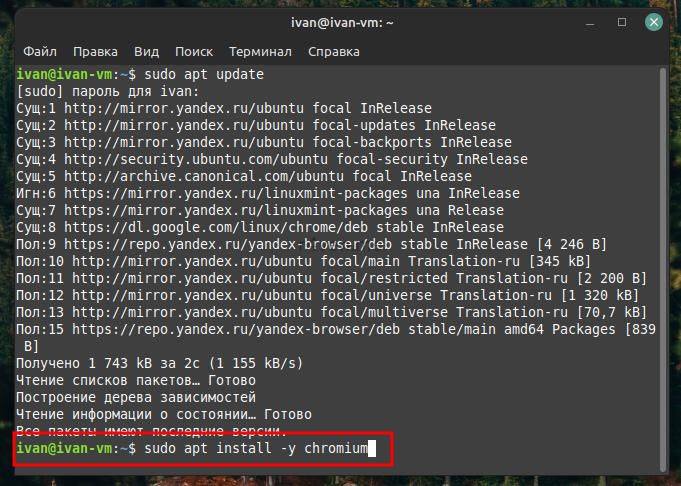
The same action can be done with two commands in the terminal:
sudo apt update
sudo apt install -y chromium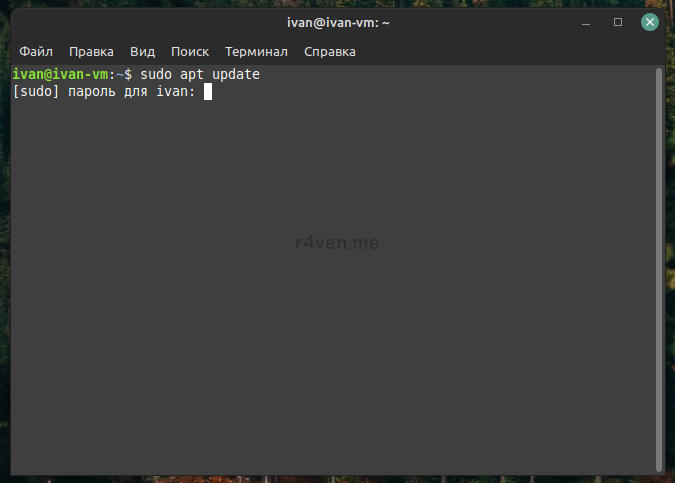
9.2 Installing Google Chrome
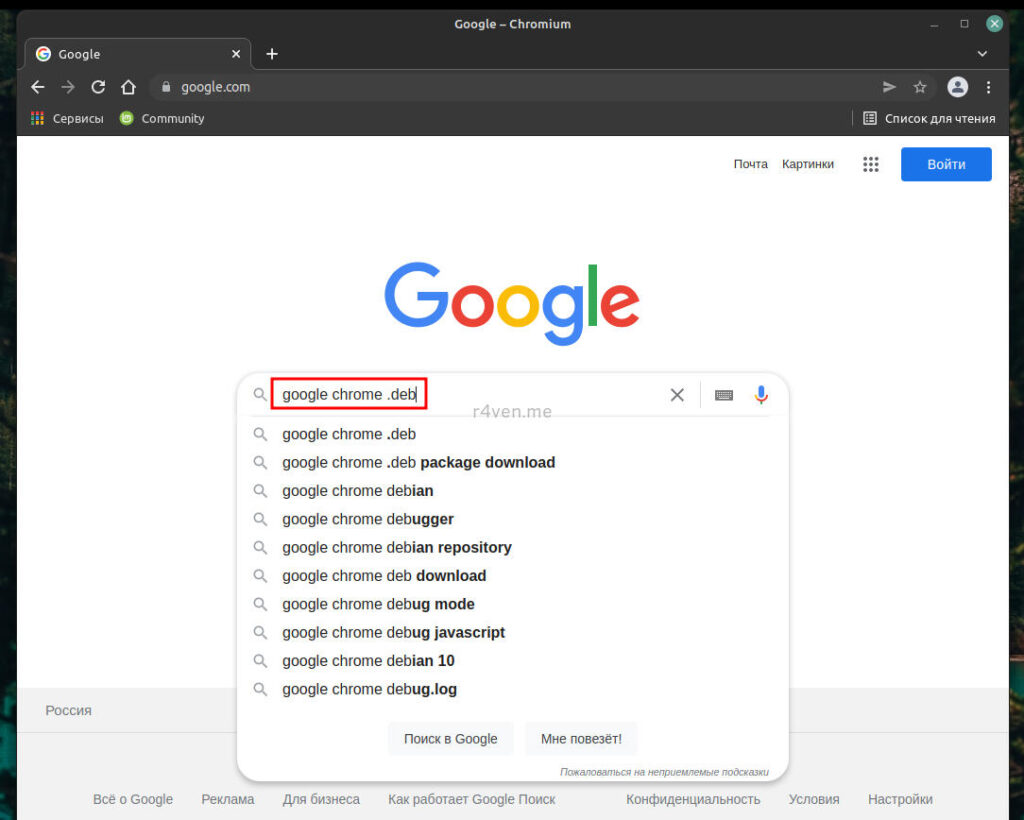
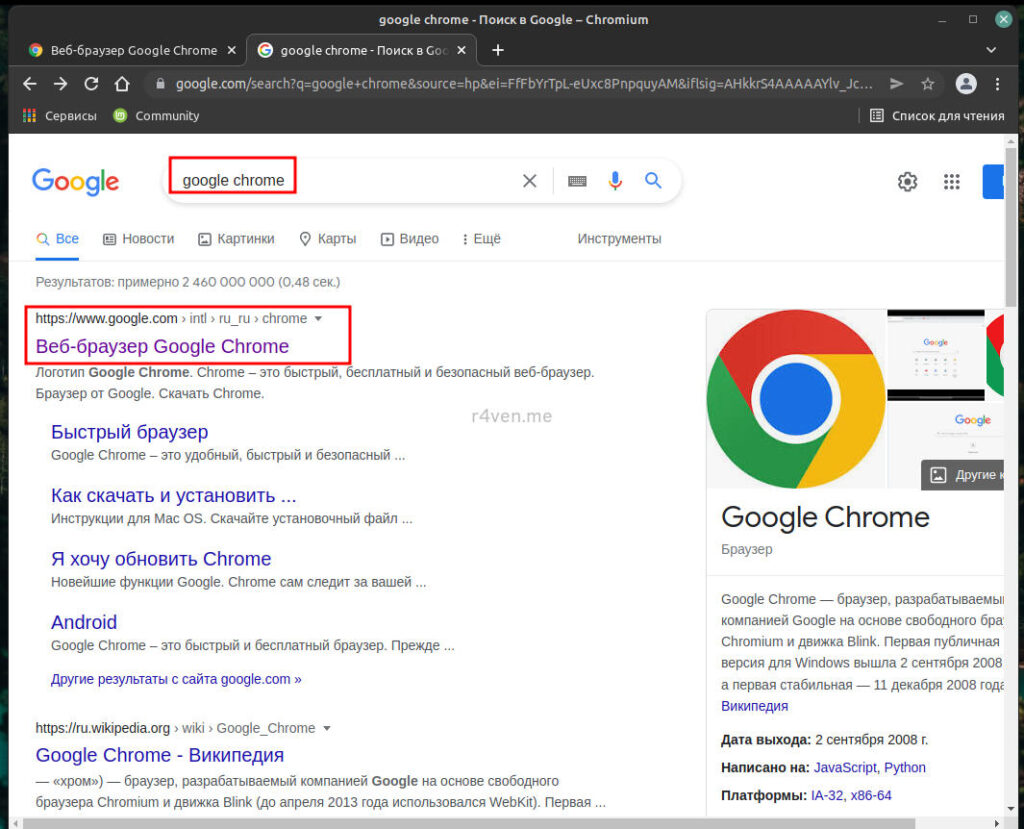
Go online and download the deb package from the official website:
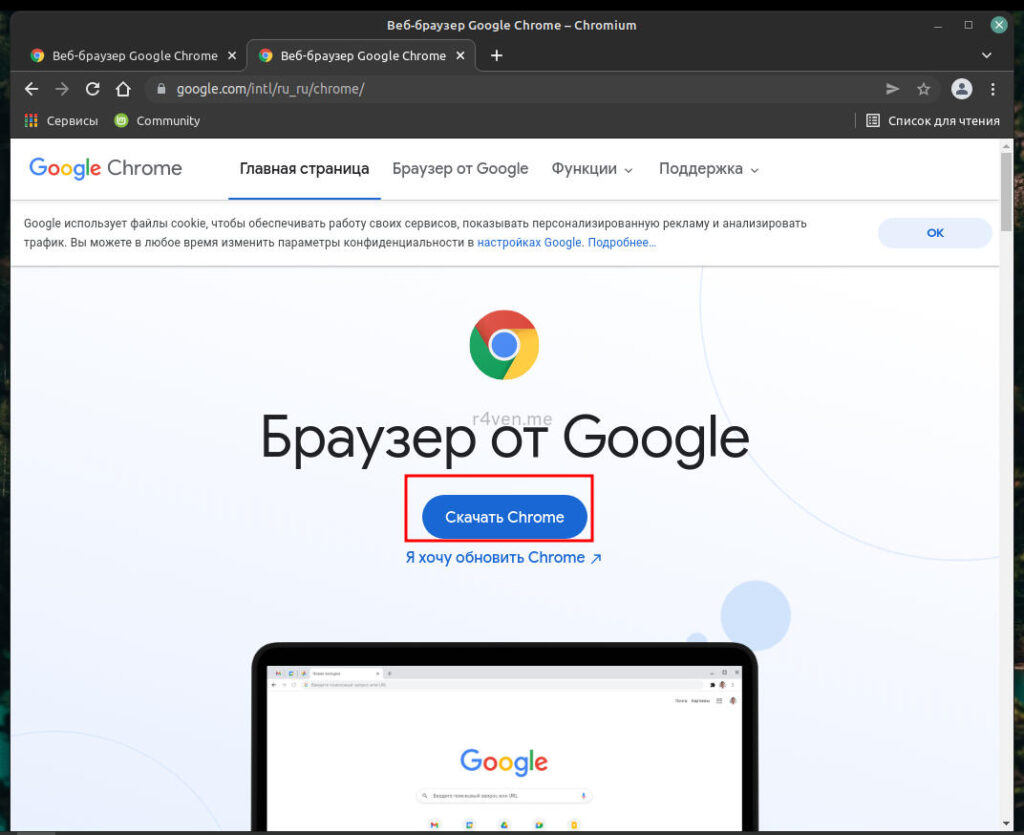
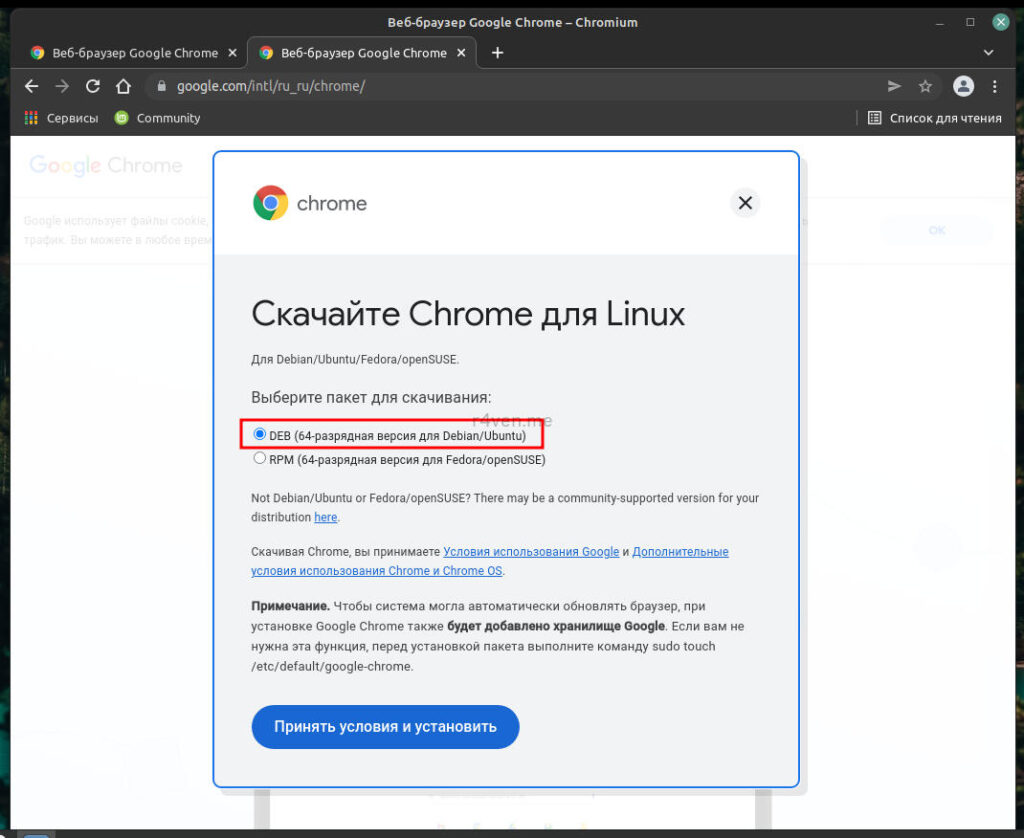
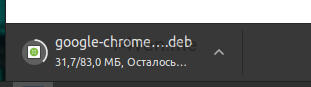

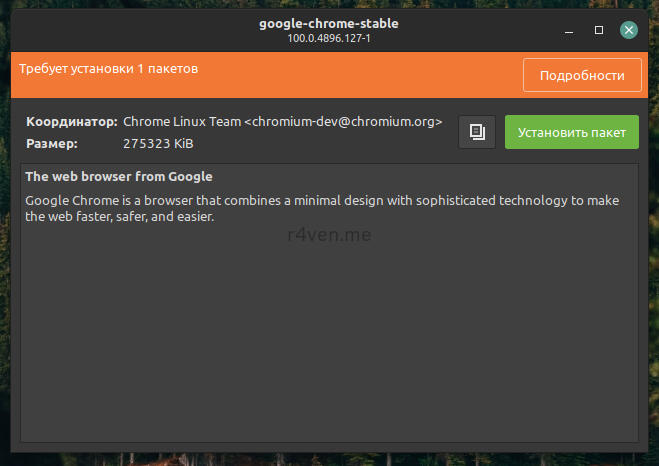
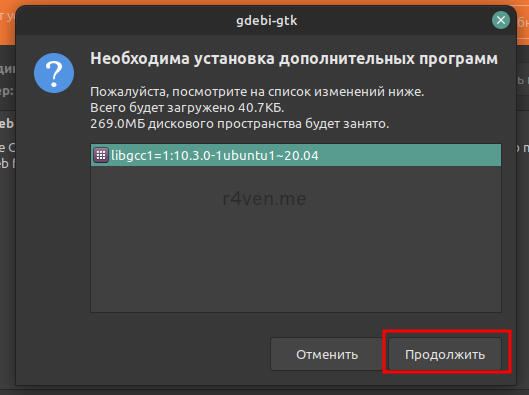
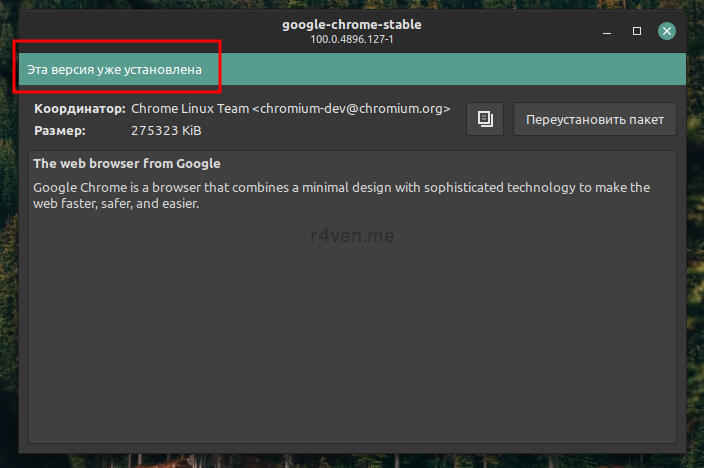
After downloading — launch it, wait a couple seconds for the dependency and compatibility check, then click install and confirm by entering the admin password:
9.3 Installing Yandex Browser
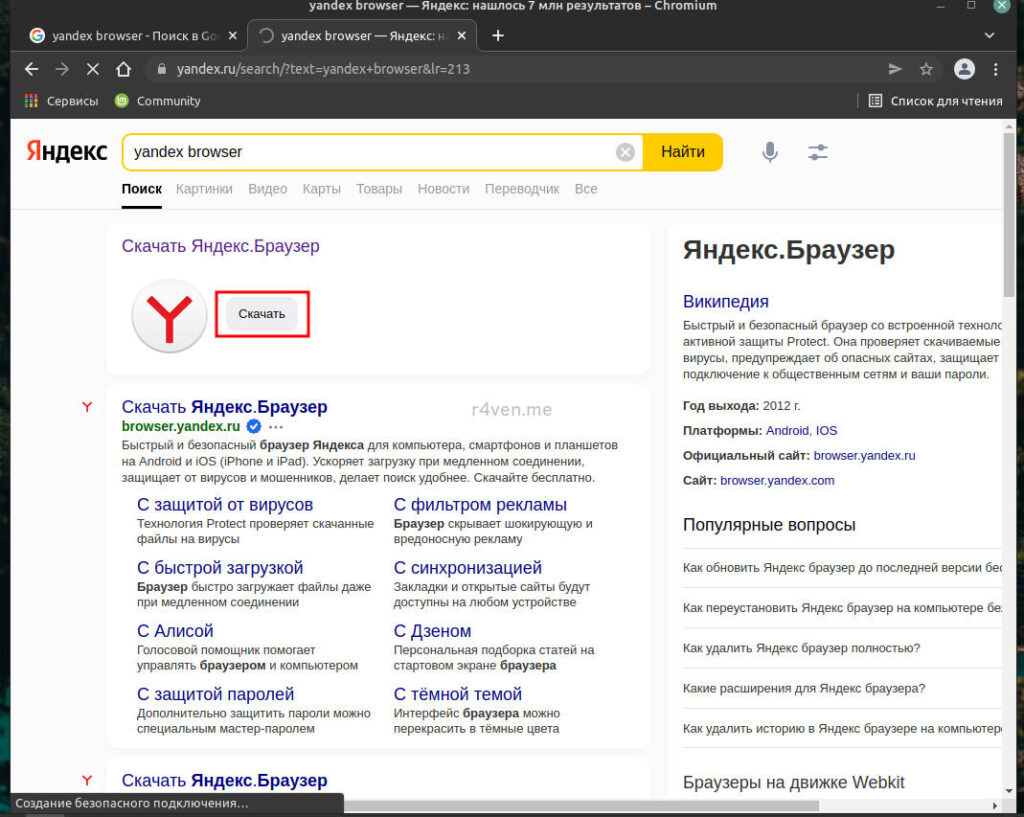
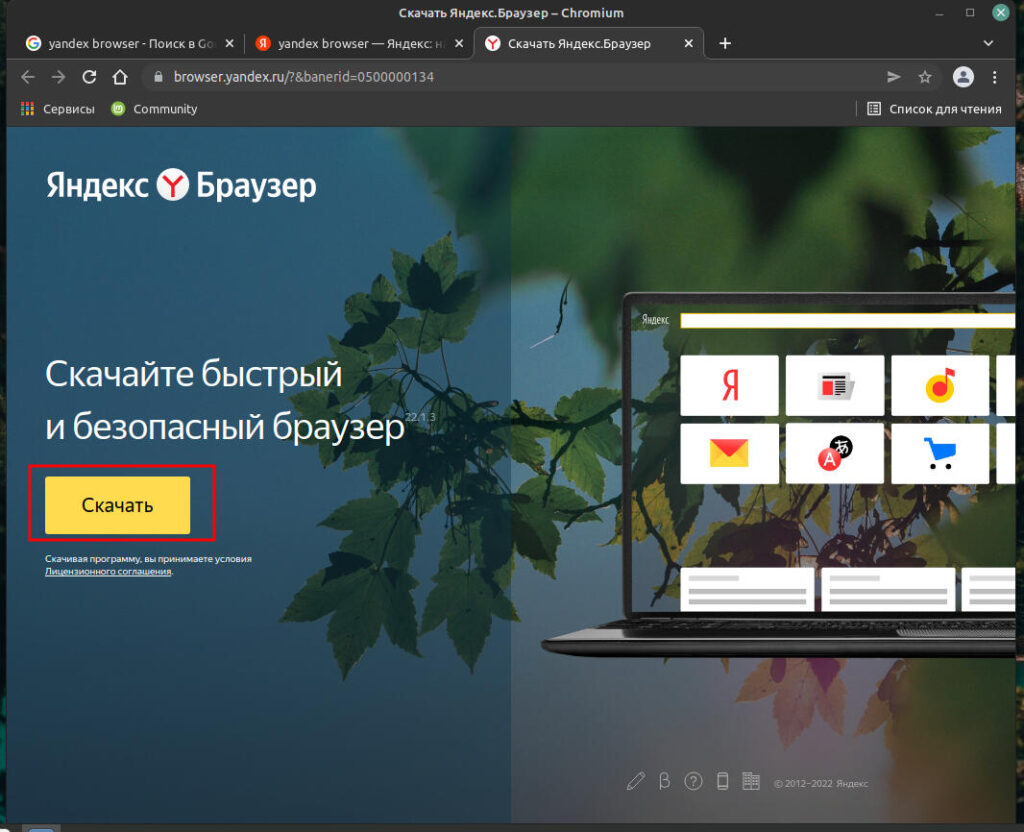
Same story with Yandex:
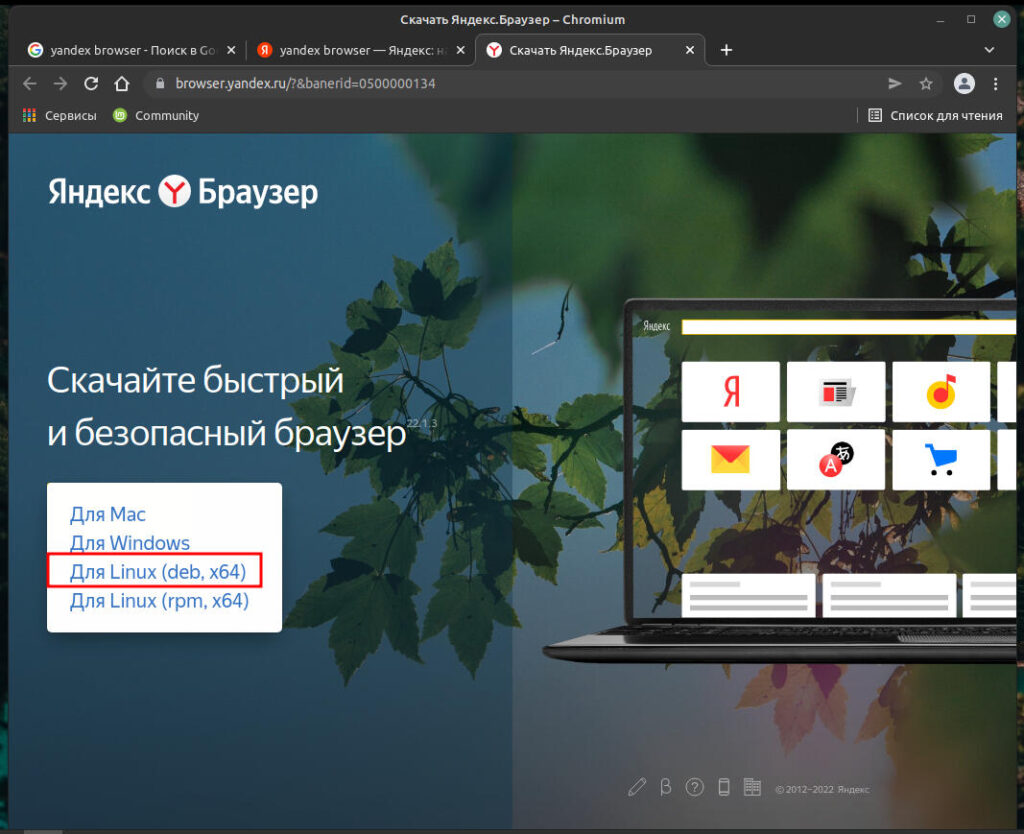
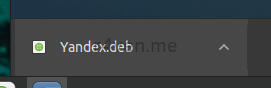
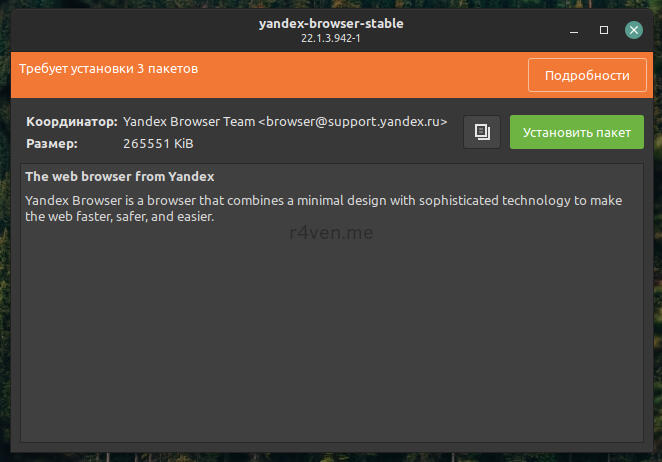
As a result, in the “Internet” section of the main menu, you’ll get the corresponding applications:
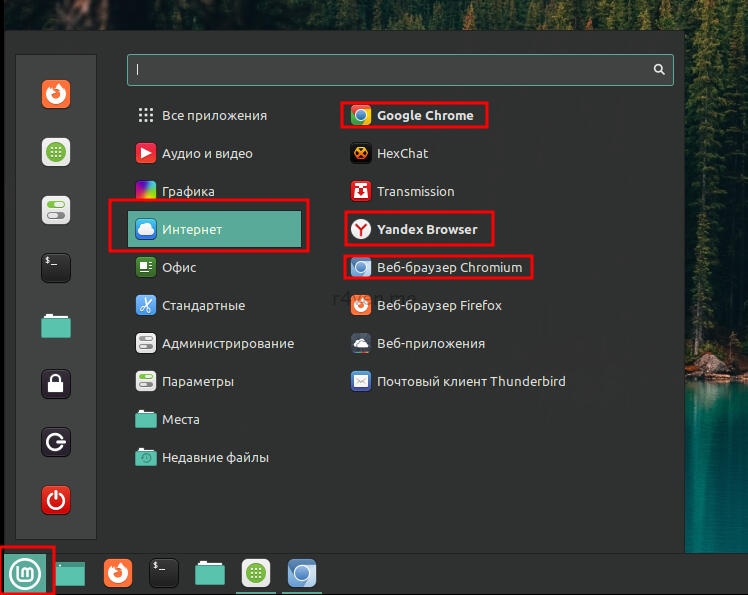
Step 10. Installing the OnlyOffice office suite for better compatibility with Microsoft documents
Now let’s install an office suite that has good compatibility with MS Office document formats. Plus it’s free, open source, and available for all modern OSes: Windows, Linux, Android — I don’t know about MacOS, not an apple guy 😉
By the way, LibreOffice comes preinstalled in Linux Mint. And although it’s decent on its own, multifunctional, and supposedly able to work with Microsoft formats, I still recommend using OnlyOffice.
10.1 Installing OnlyOffice
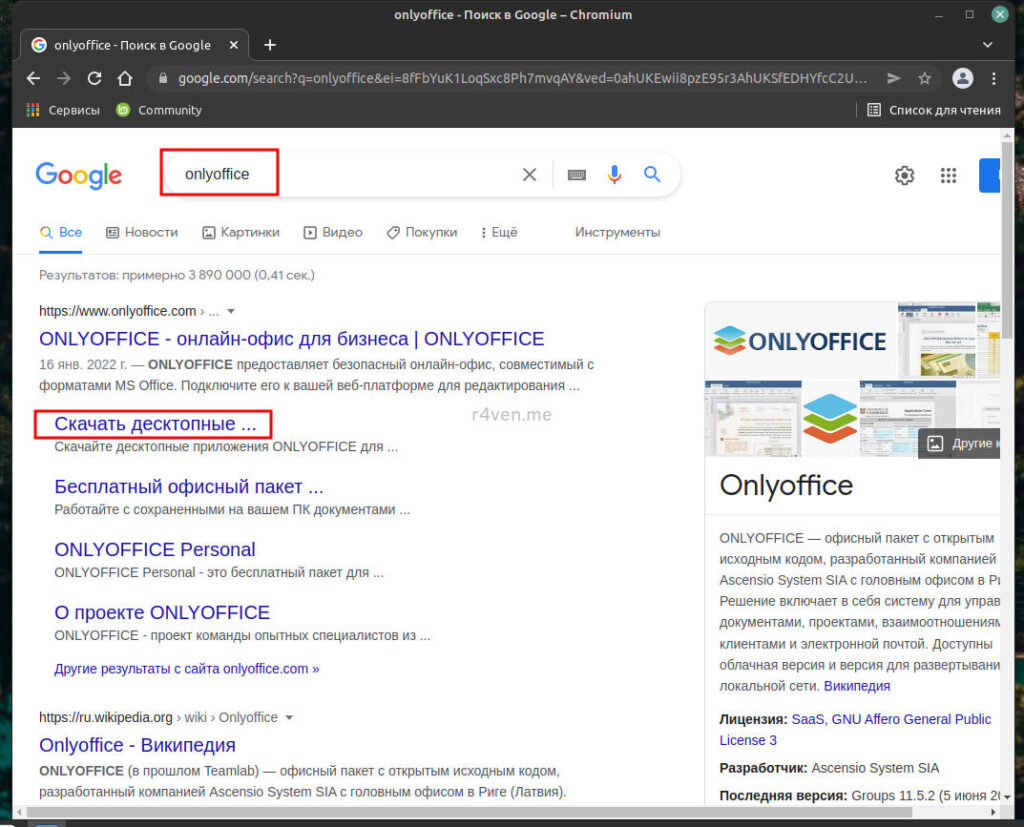
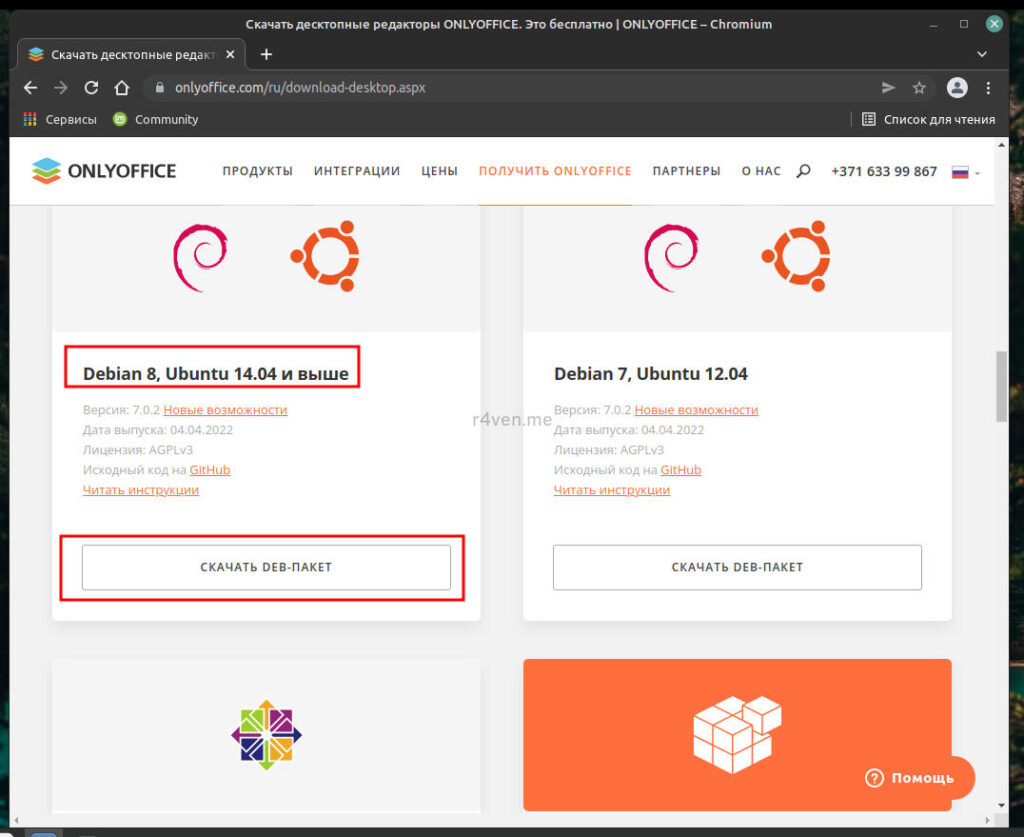
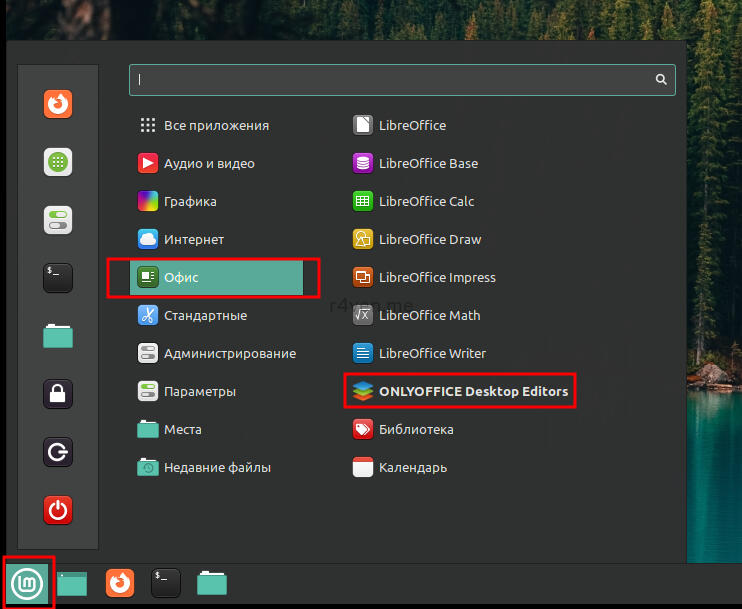
So, let’s go online for the deb package of the desktop version, download it, install it (it’ll think for a minute), and launch it:
10.2 Configuring the default program for opening office documents
Now let’s configure opening template files in OnlyOffice. Go to the “Templates” folder and set the default program to open them:
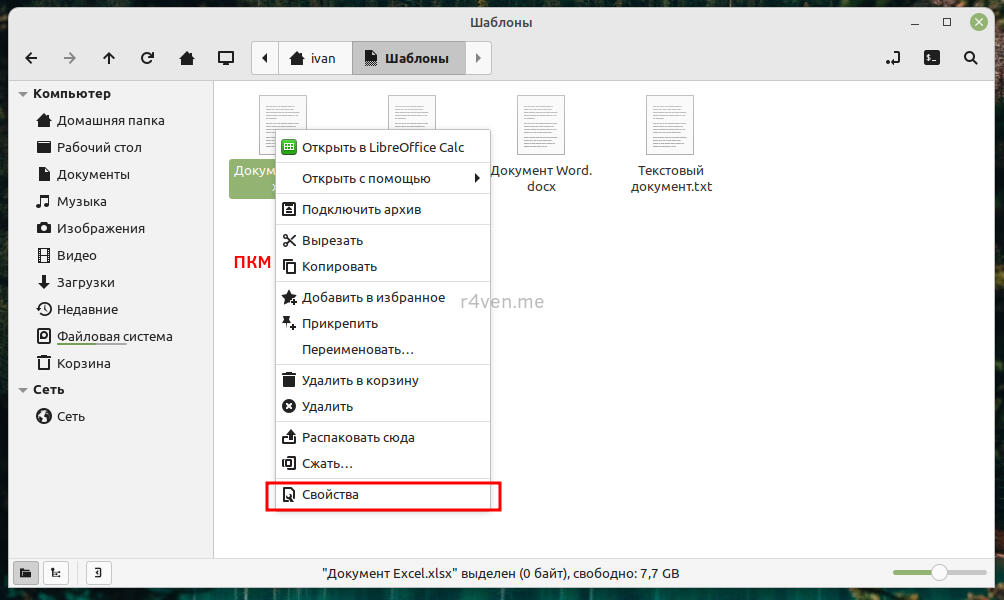
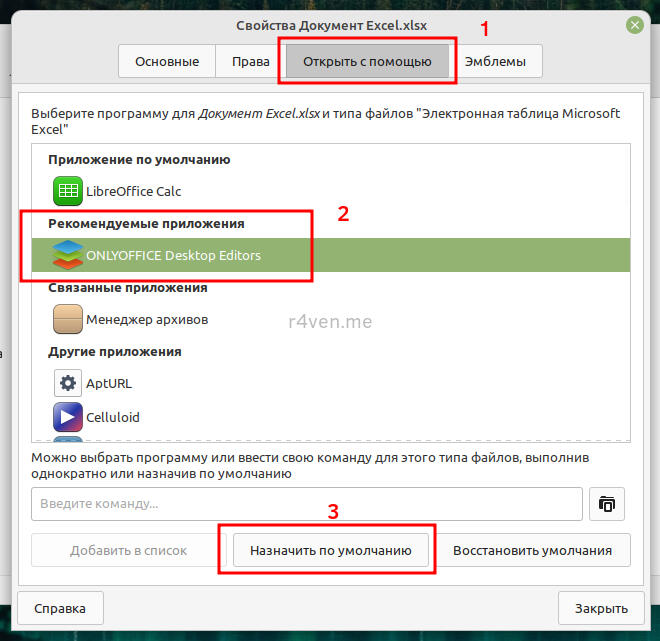
Do the same for the other template files.
10.3 Launching OnlyOffice and enabling the dark theme
Check it on the desktop, launch it:
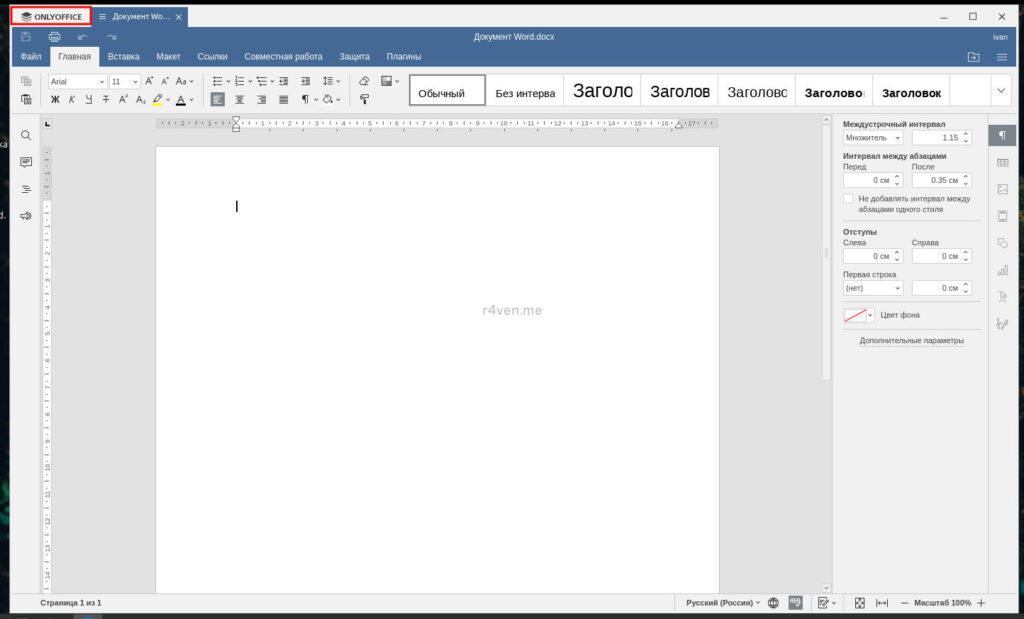
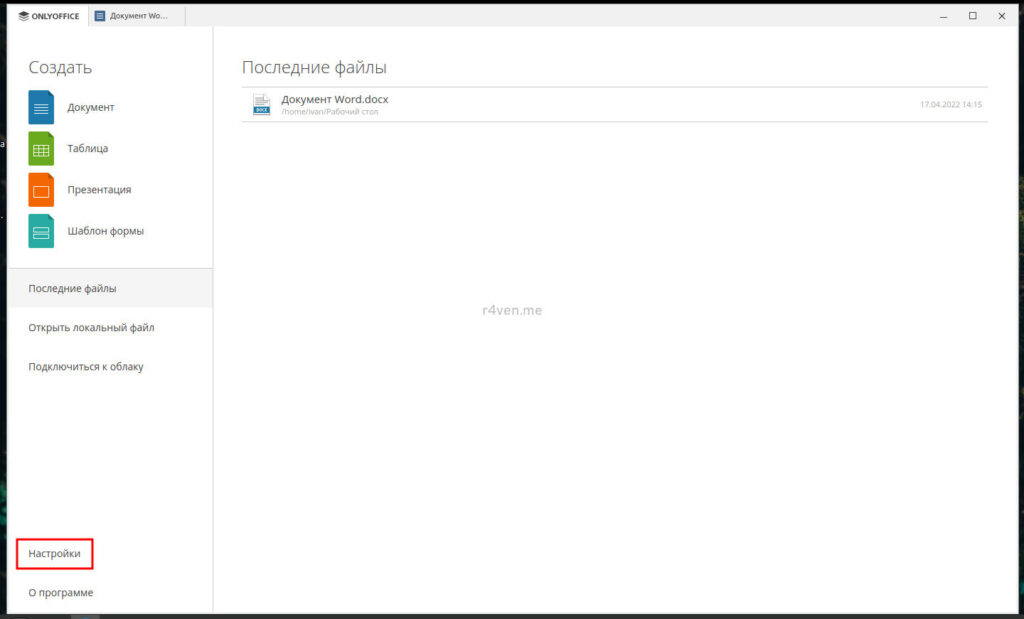
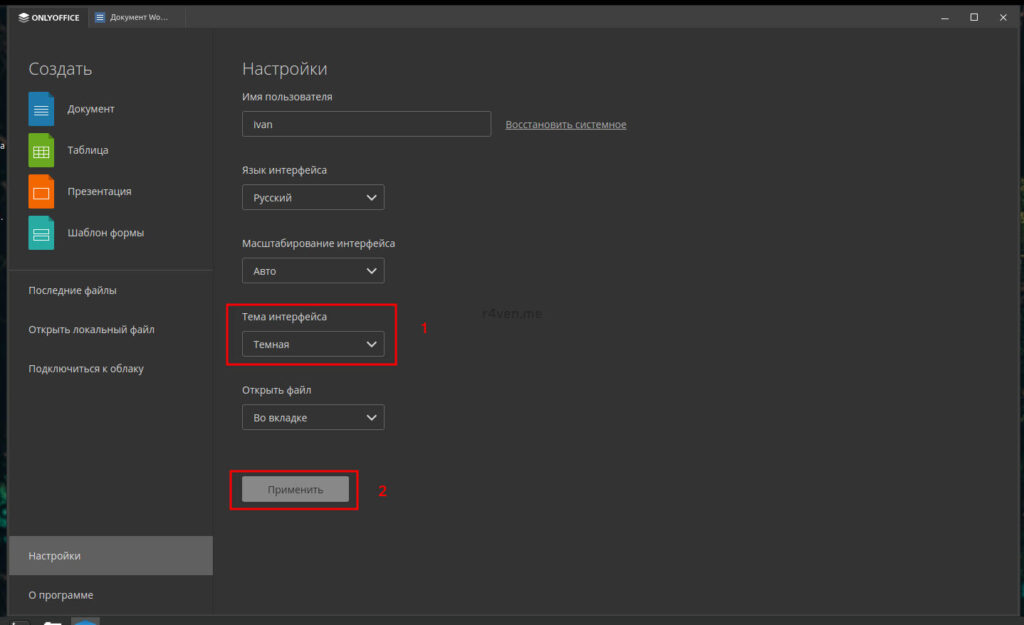
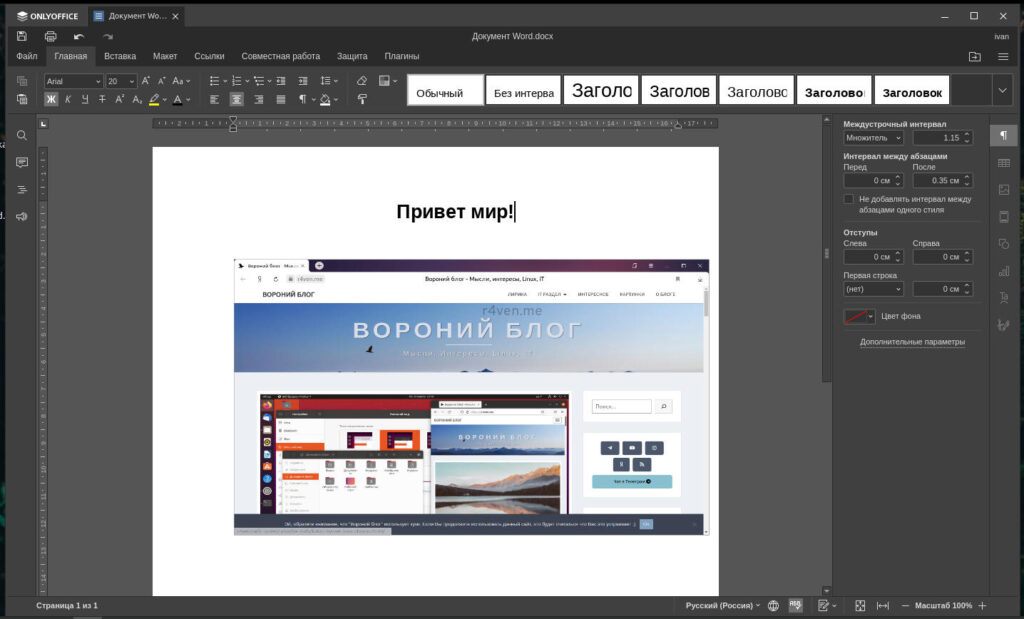
Let’s immediately switch on the dark theme in the office suite:
10.4 Installing the Times New Roman font
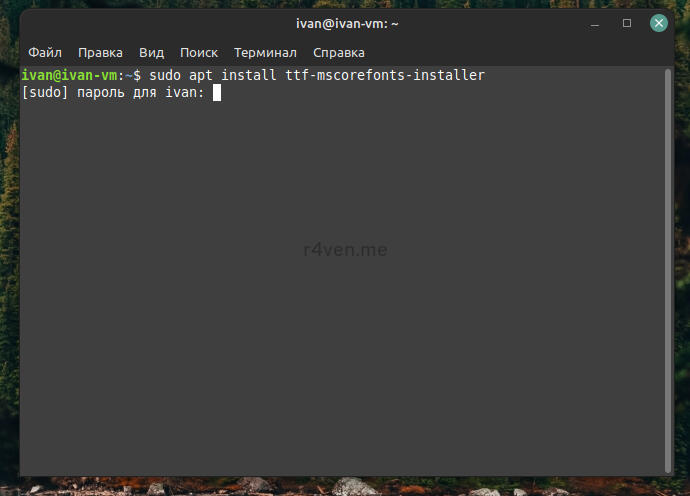
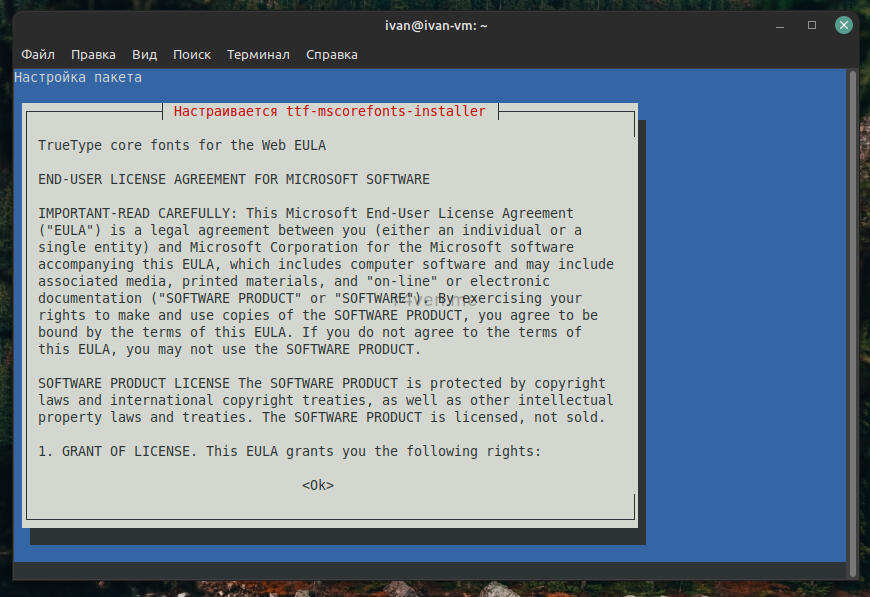
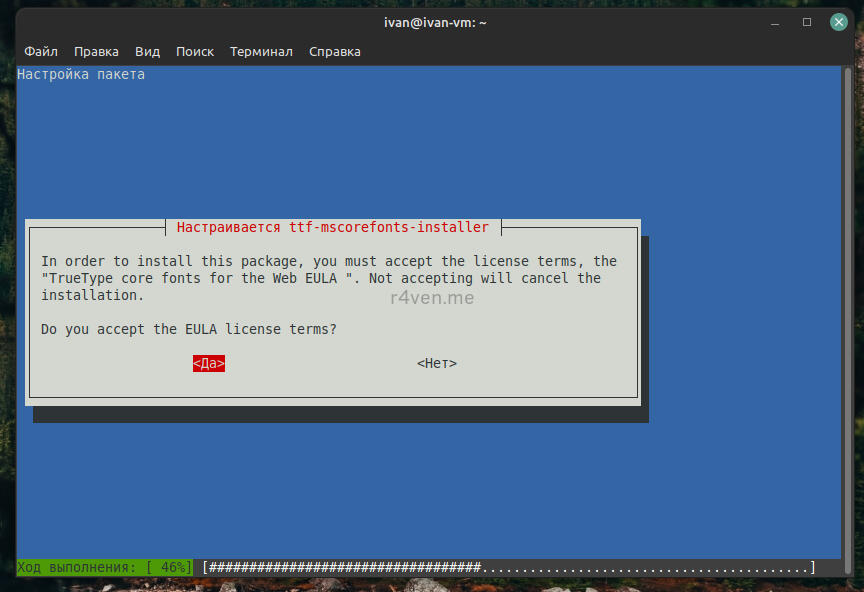
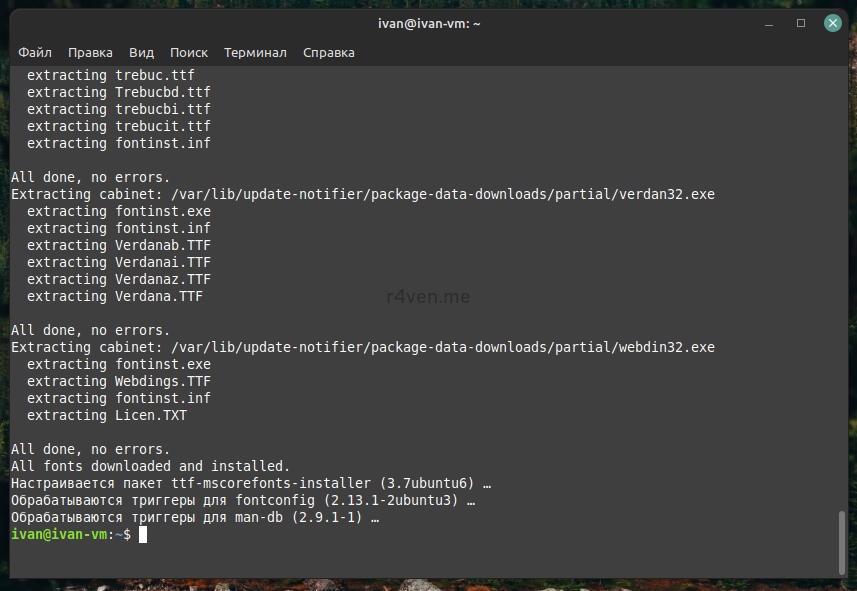
The easiest way to get this font is to install it from the Linux Mint repositories. Note that during installation you’ll have to accept a license agreement, because this is Microsoft. We’ll install it via the terminal. I highly recommend gradually learning this universal tool. It’s not scary at all, and like everything in this world, it just takes some time and learning.
So, the installation:
sudo apt update
sudo apt install -y ttf-mscorefonts-installerAfter that, accept the agreement and wait for the installation to finish. To move the cursor in the terminal to the Ok button, use the Tab key and the arrows for the Yes button:
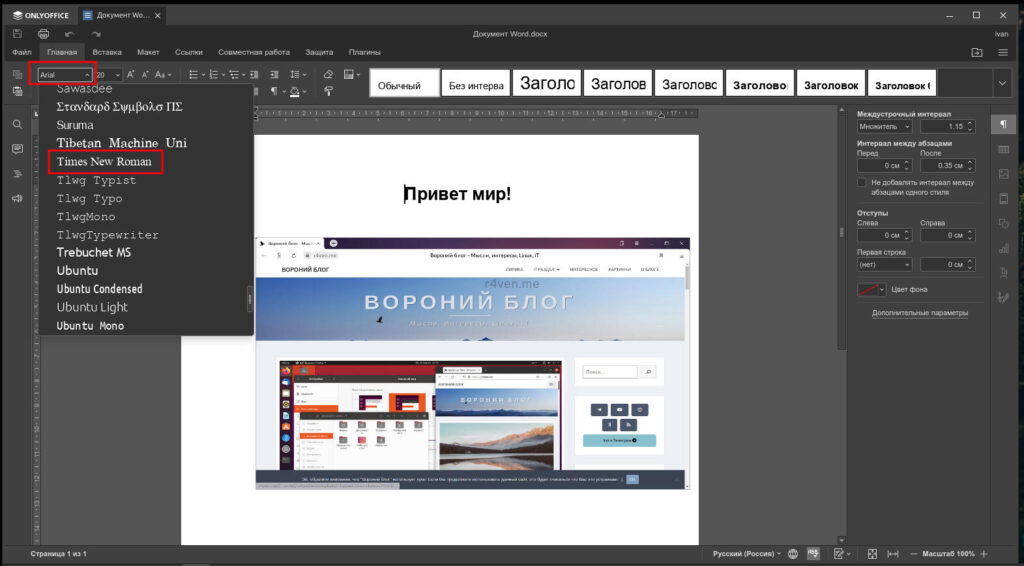
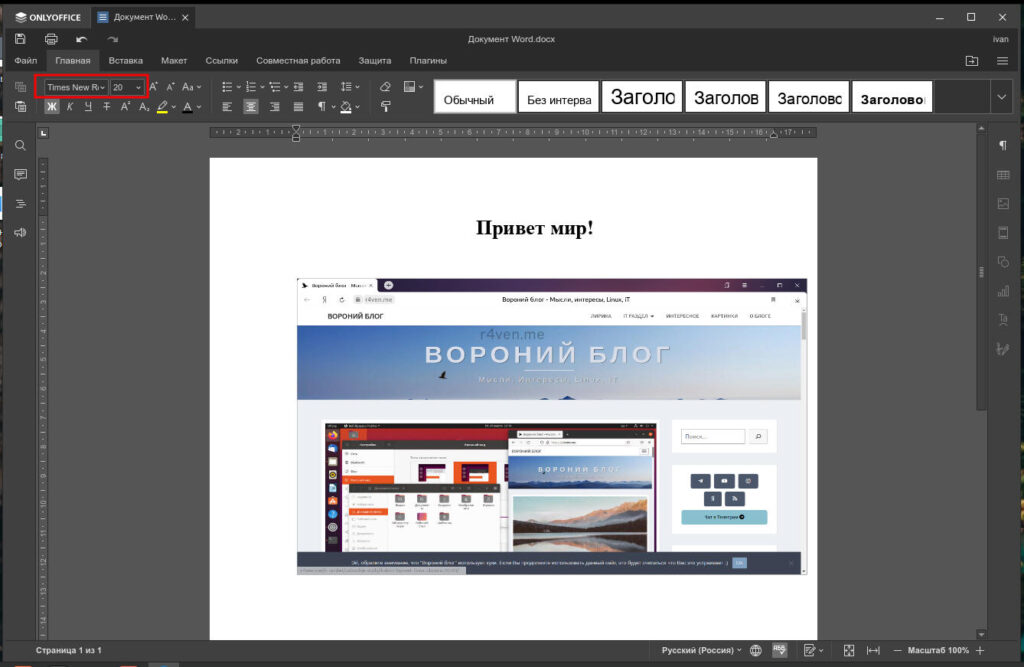
Now let’s restart OnlyOffice, and the font should show up in the list:
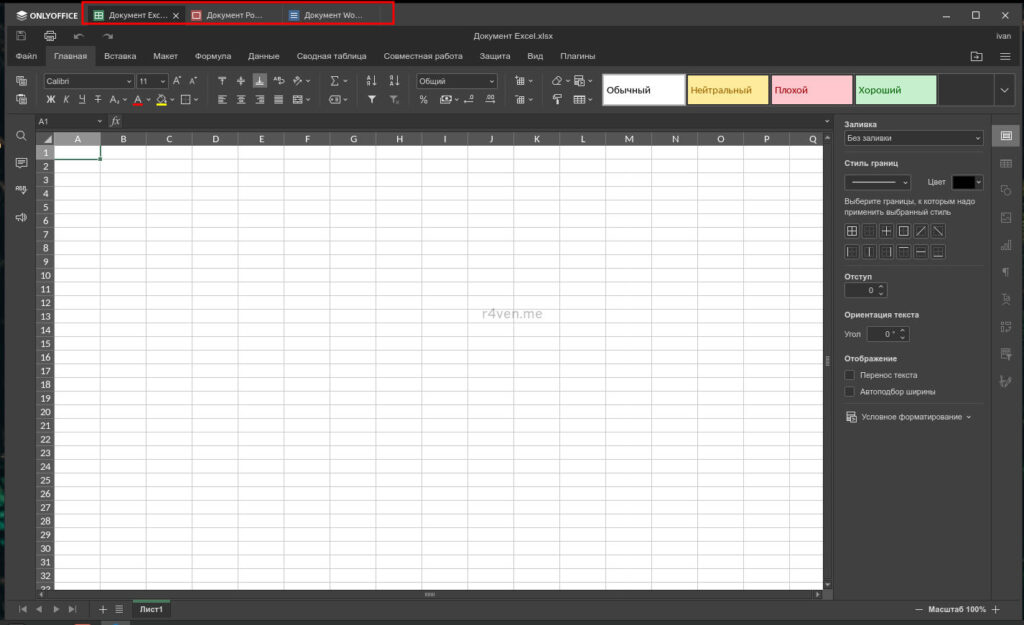
10.5 I love tabs!
Oh by the way, this office suite supports tabs, including for different formats, which I find super convenient! But you can also easily drag them out with your mouse into separate windows:
Step 11. Configuring default applications
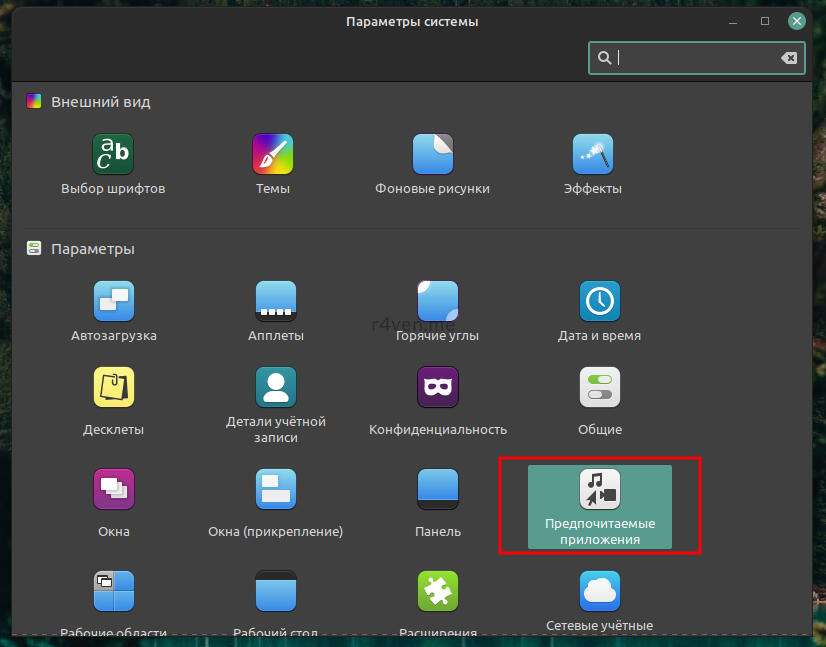
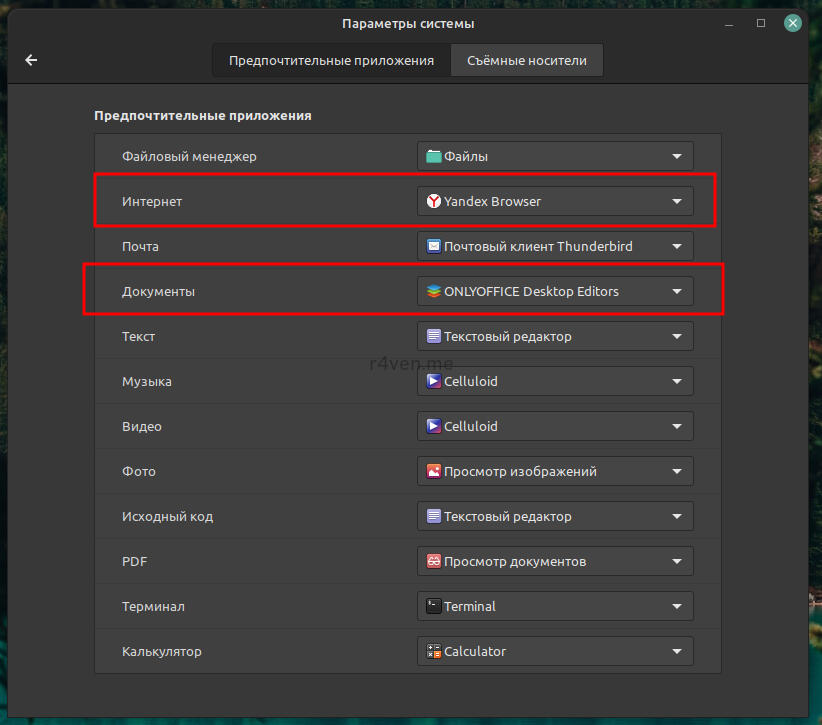
The final touch will be choosing default applications.
There’s a separate item for this in the settings:
Step 12. Displaying the trash bin on the desktop
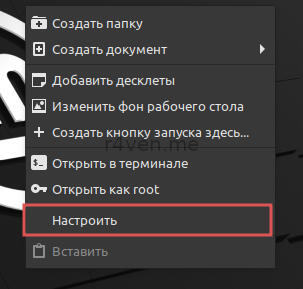
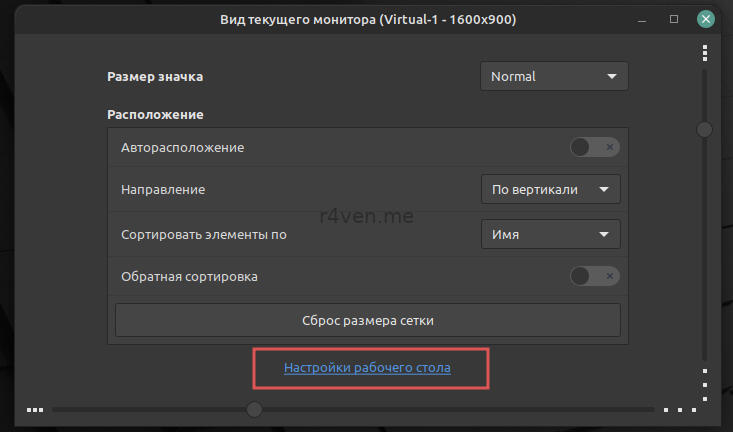
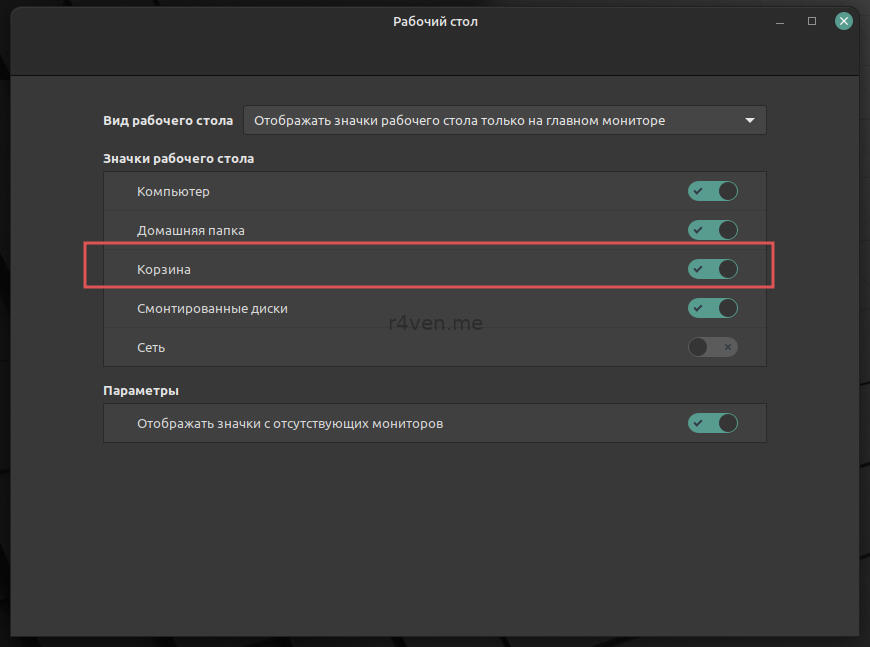
Right-click on the desktop, then “Customize,” then “Desktop settings,” and toggle the corresponding switch.
Installing Windows applications on Linux
A guide in a separate post:
Afterword
This guide isn’t mandatory to follow. It’s only meant to answer some questions at the start of your journey using Linux Mint. In essence, the system is ready to use right after installation, but there are a few spots you might still want to polish up.
Thanks for reading and for your interest. Good luck to everyone 😉
Links:
Comments