
I recently posted a poll on Telegram, and the users of my channel voted in favor)
Today we’ll create a multi-boot flash drive for: installing Linux/Windows locally, installing Linux over the internet + a regular partition for files and + an encrypted partition for sensitive information (mounts natively in both Linux and Windows). So, let’s go.
🖐️Hey!
Subscribe to our Telegram channel @r4ven_me📱, so you don’t miss new posts on the website 😉. If you have questions or just want to chat about the topic, feel free to join the Raven chat at @r4ven_me_chat🧐.
Foreword
What’s the idea. The usb flash drive will have 4 partitions:
- A boot partition for Ventoy (a utility for launching installation ISO images). You can read about what it is here;
- A regular partition for storing ISO images and regular files;
- A boot partition for netboot.xyz, for launching and installing Linux over the internet. I had a separate article about this utility: netboot.xyz – Installing Linux online from a USB flash drive;
- An encrypted bitlocker partition (works on both Linux and Windows) for storing sensitive information. More about Bitlocker here.
As a result, we get a flash drive for any occasion. The larger the flash drive’s capacity, the better. This guide covers setting up a removable drive of 32GB.
Let me warn you right away that everything was tested on systems with UEFI. I didn’t test setup in BIOS Legacy boot mode, since I had no such need.
And yes, in the process of setting up the usb flash drive, all data on it WILL BE ERASED! So back up any important files from it beforehand, if there are any. I’ve warned you :)
All actions in this article were carried out in the environment of Linux Mint 21.
Preparation
First, let’s download all the necessary utilities.
Downloading Ventoy
Go to the official site, to the Ventoy downloads section, and download the version for Linux:
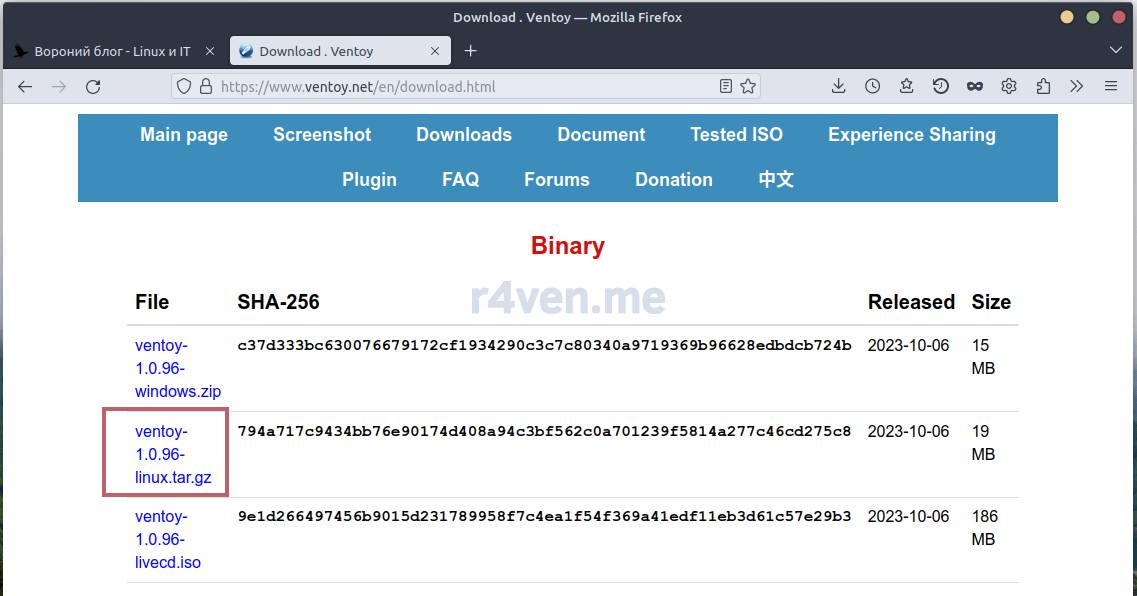
Downloading Ventoy
We’ll be redirected to SourceForge, again choose Linux:
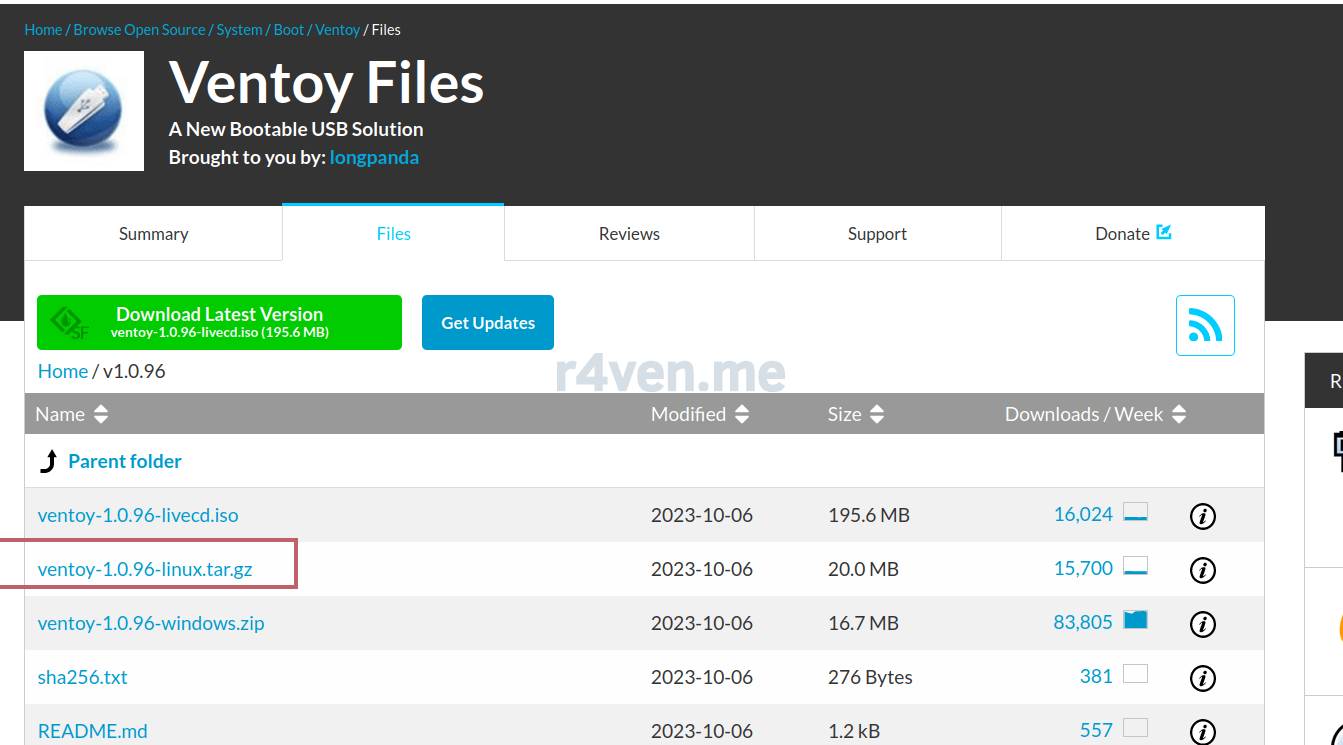
Downloading Ventoy again
Downloading netboot.xyz
Also go to the official site, to the netboot.xyz downloads section, and download the .img image:
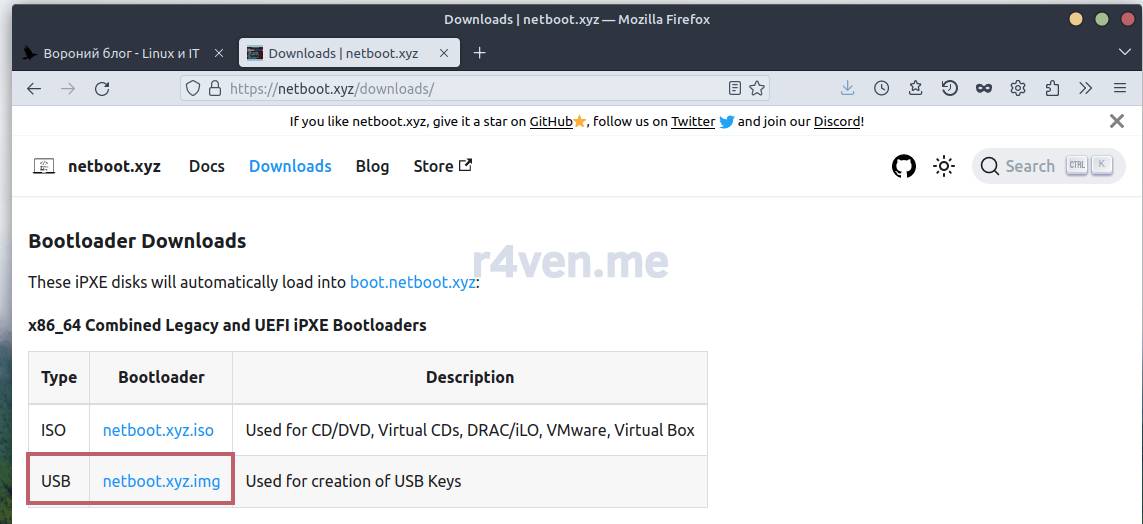
Downloading netboot
Downloading BitLocker Anywhere For Linux
A few words before we continue.
Bitlocker is a proprietary disk encryption technology from Microsoft. Linux also has its own excellent open subsystem for disk encryption — Luks. But since the goal of this article is to get a universal device for various tasks, in order for the encrypted partition to work natively in the Linux file manager and in Windows Explorer, I decided to encrypt this partition using Bitlocker. As is often the case, Linux supports opening Bitlocker-encrypted partitions perfectly well out of the box. Windows, in turn, only supports its own closed Bitlocker, ignoring Linux.
Well, for the sake of universality, a compromise had to be made)
Let’s continue. Bitlocker is only available out of the box in the Pro version of Windows, but there’s an alternative option: use third-party software that has a Linux port — this is BitLocker Anywhere. The program is paid, but with a trial period (which is enough for us). Ah, that proprietary stuff…
Let’s download BitLocker Anywhere from the official site:
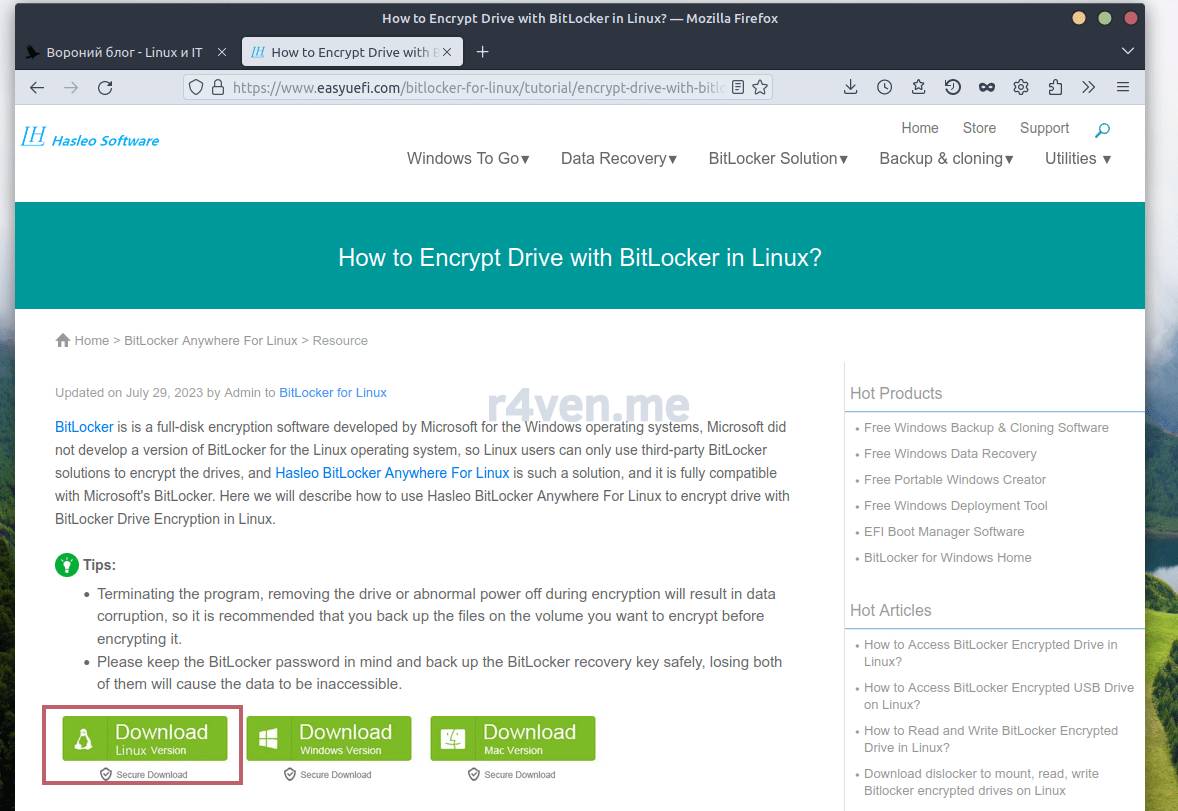
Downloading Bitlocker anywhere
Now all the necessary utilities have been downloaded, all that’s left is to check and identify the block device of the usb flash drive itself in our Linux Mint system.
Checking the removable drive
Open a terminal and run the command to list block devices:
lsblk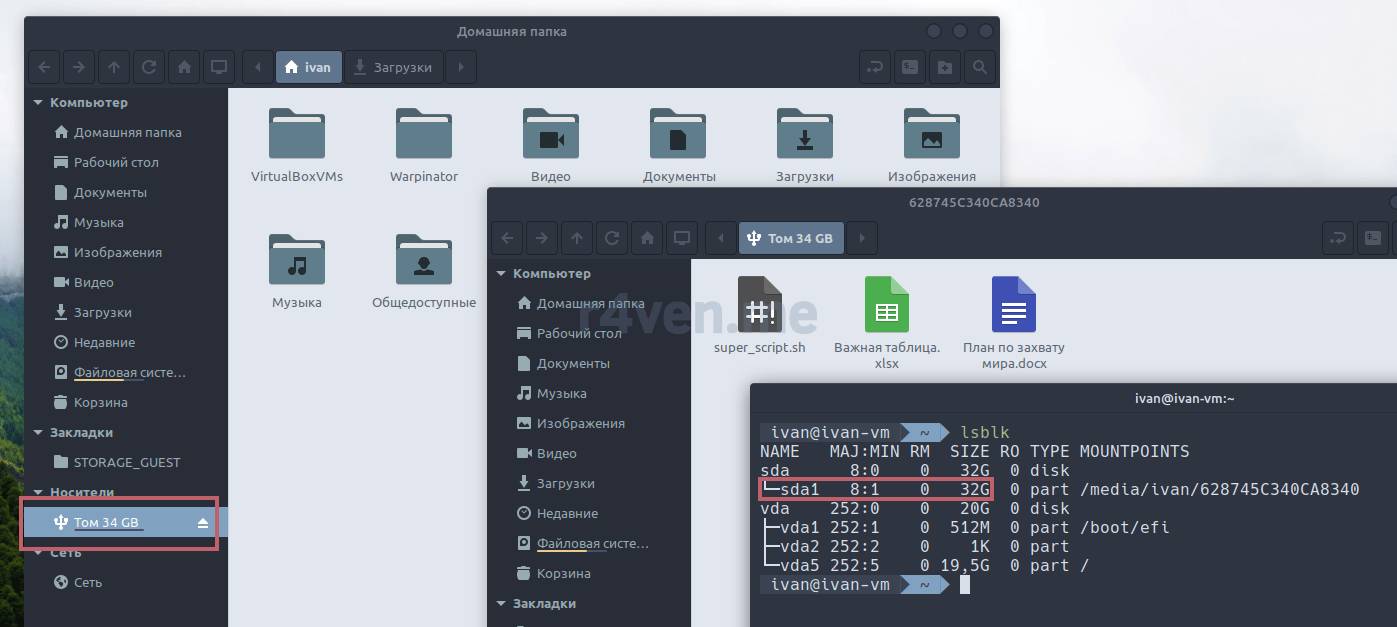
Output of the block device list
In my case it’s /dev/sda1. You’ll most likely have a different name. Compare it with the connected device in the file manager.
Detailed information about the device can be printed using the udisksctl utility. For example, like this:
udisksctl info -b /dev/sdaFor reference, udisksctl is a console utility for managing removable drives in user space.
Let’s proceed with the installation.
Creating the Ventoy partition + a regular partition for files
Let’s extract the Ventoy archive:
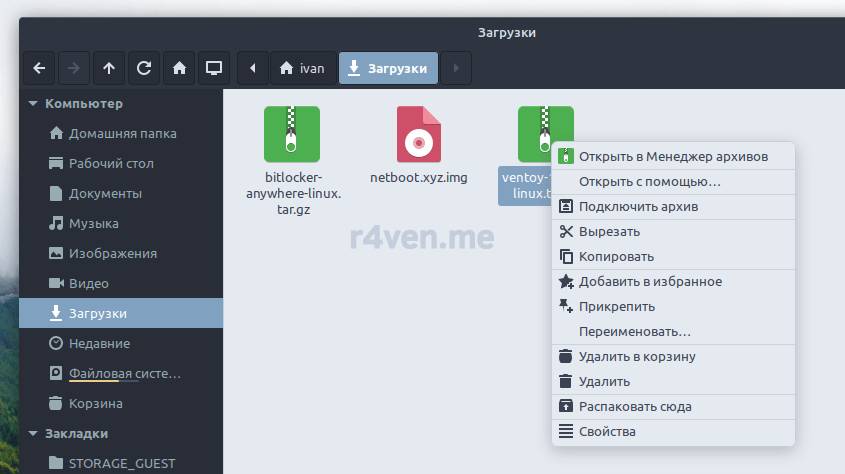
Extracting Ventoy
Go into the extracted directory, right-click — open terminal here. And enter the installation command:
WARNING!
The command below will delete all data on the specified device. Be careful, make sure you specify the correct name of your flash drive. All actions are performed at your own risk.
sudo ./Ventoy2Disk.sh -i /dev/sda -r 10000-i— perform the installation;-r— the amount of space in megabytes that will be reserved (not partitioned) after formatting the flash drive. This space will be used for netboot and the encrypted partition.
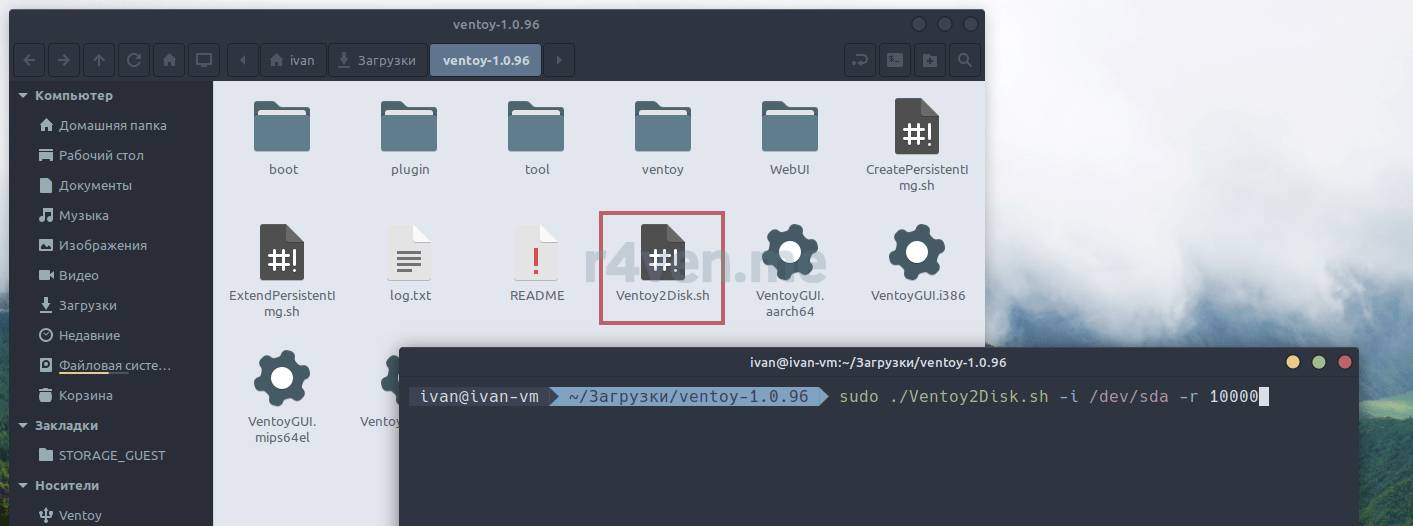
Launching Ventoy
We’ll be asked to confirm twice. Type y:
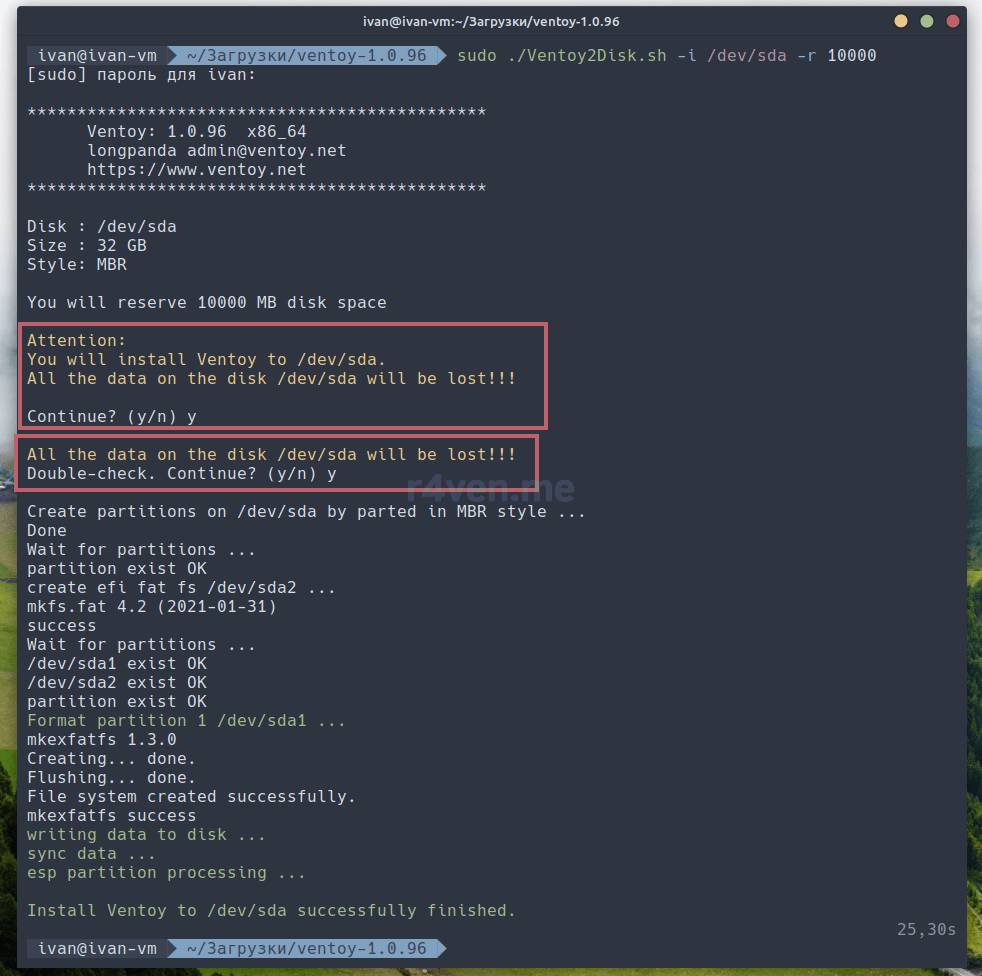
Creating the Ventoy partition
If the result of the command matches my screenshot, congratulations. The Ventoy boot partition and the regular file partition have been created. If not, we’ll talk about that later.

Let’s check:
lsblk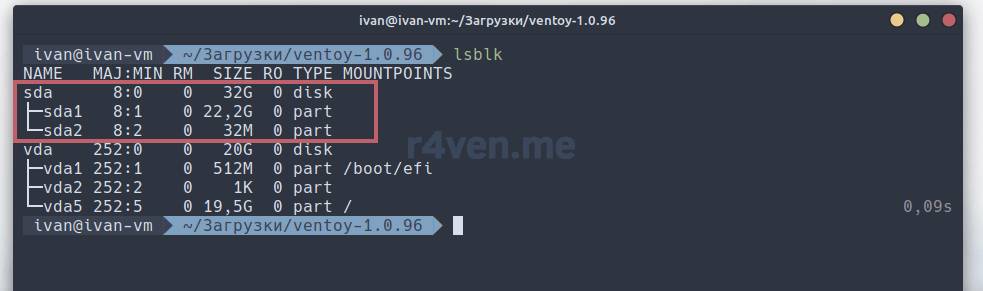
Viewing the changes
Here we see 2 partitions: 32MB and 22GB. The remaining, unpartitioned space isn’t shown. Let’s partition it.
Additional partitioning of the usb drive
We’ll perform the partitioning using the convenient console utility cfdisk. It’s interactive and easy to use. Run the command as superuser:
sudo cfdisk /dev/sdaI really ask you to be careful when specifying the device name. If you get a letter wrong, you might accidentally erase the wrong data. It will probably be possible to recover it, but no one can guarantee that.
Use the down arrow to move the cursor to the “Free space” line. This is the space we reserved using the -r 10000 flag:
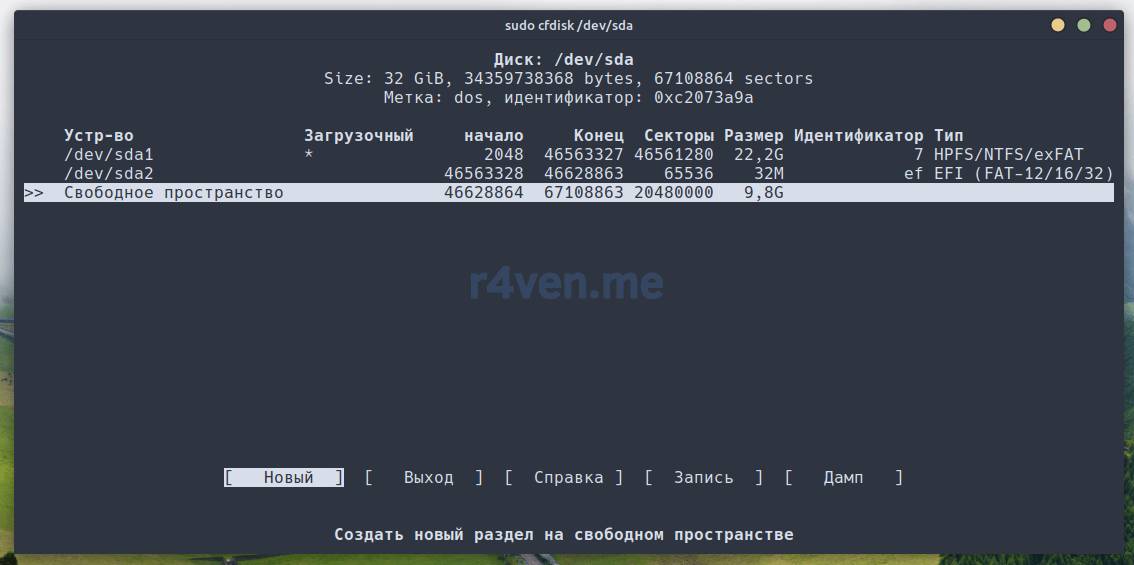
Partitioning the disk with cfdisk
Now use the left arrow to select “New”, press Enter and enter the size. I set the size to match the Ventoy boot partition — 32MB. Type 32M on the keyboard (M — megabytes, G — gigabytes):
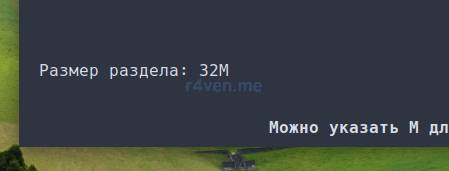
Press Enter again. Select “Primary” and press Enter:
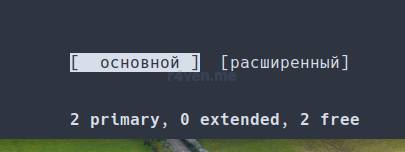
A 3rd partition will appear. Now select “Free space” again and similarly create a partition on the remaining space (it’s set automatically). Press Enter and again select “Primary”:
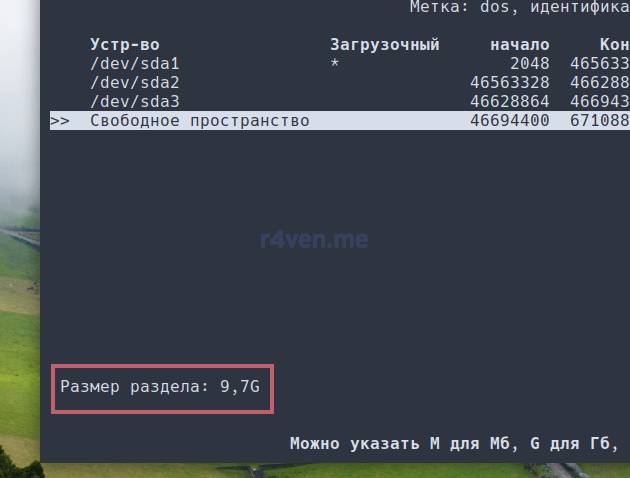
Partitioning the disk with cfdisk
We see 4 partitions. Now we need to change the “Type” of the last, 4th partition, so that Windows automatically detects it in Explorer.
Move the cursor to “Type” and press Enter:
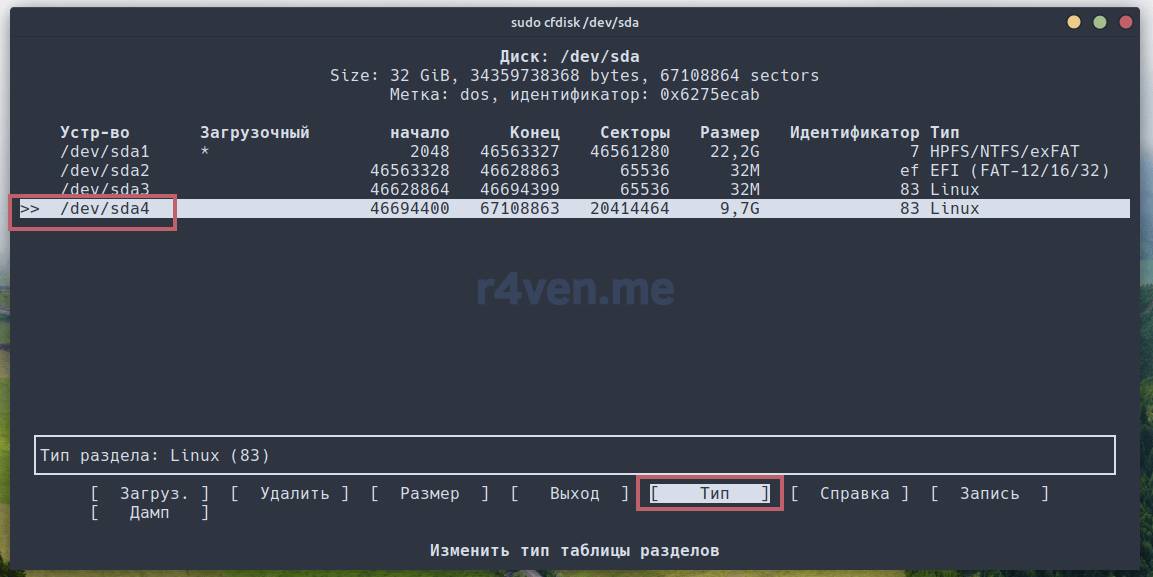
Partitioning the disk with cfdisk
Use the up arrow to scroll to the 7 HPFS/NTFS/exFAT line and press Enter:
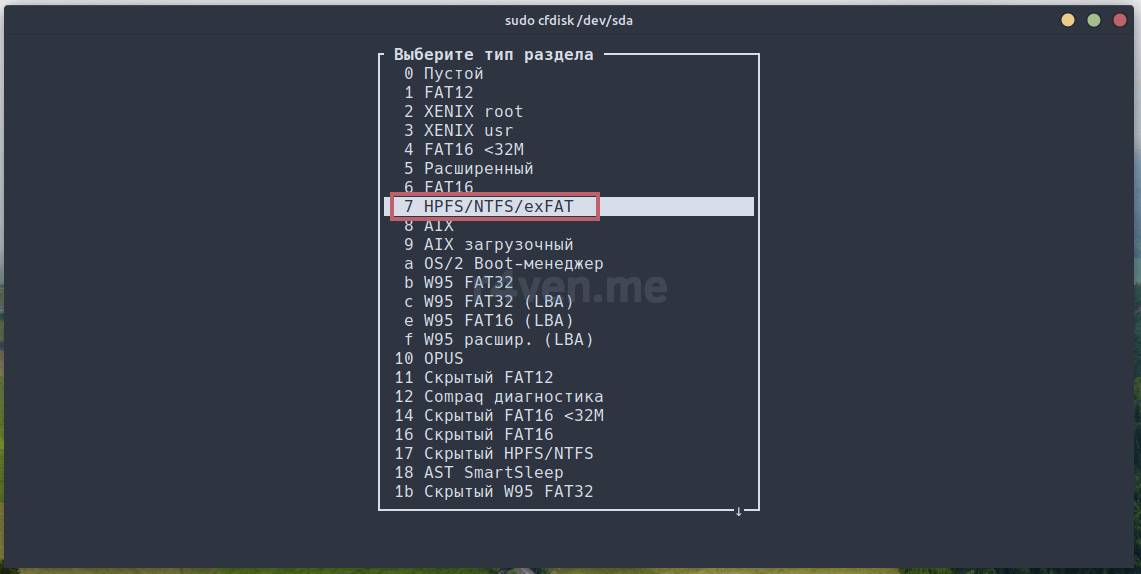
Partitioning the disk with cfdisk
In the main menu we see our changes. The picture should look roughly like mine. Now we need to write the changes to disk. To do this, move the cursor to “Write” and press Enter:
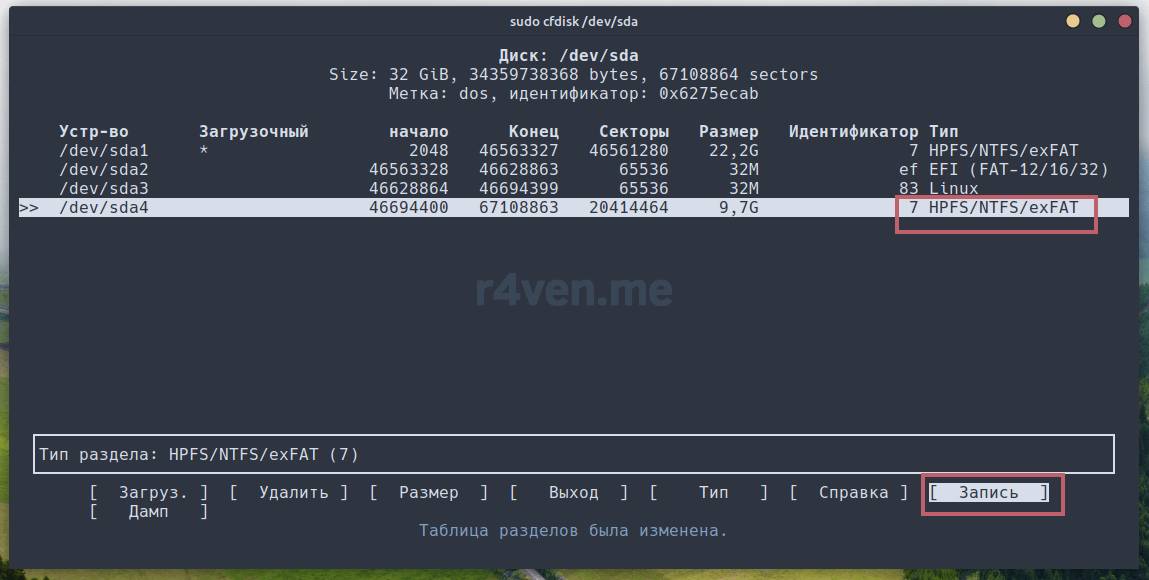
Partitioning the disk with cfdisk
We’ll be asked to confirm the changes being made. Type yes and press Enter:

Note that until you perform “Write”, the changes aren’t made to the device. That is, up until that point you can safely quit by pressing the q key, if you partitioned something incorrectly.
Quit by pressing q and check:
lsblk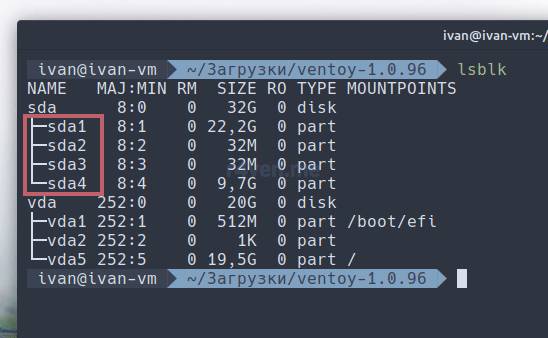
Checking the changes
This is the picture we should end up with.
Now let’s install netboot.
Creating the netboot.xyz partition
In the folder with the netboot.xyz.img image, open a terminal, switch to the root user and write the image to the 3rd partition (the 32MB one) with the command:
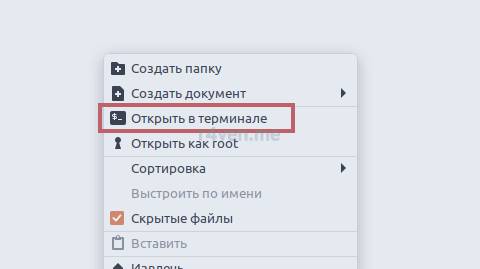
sudo -s

cat netboot.xyz.img > /dev/sda3After this, an IPXE partition should appear in the file manager:
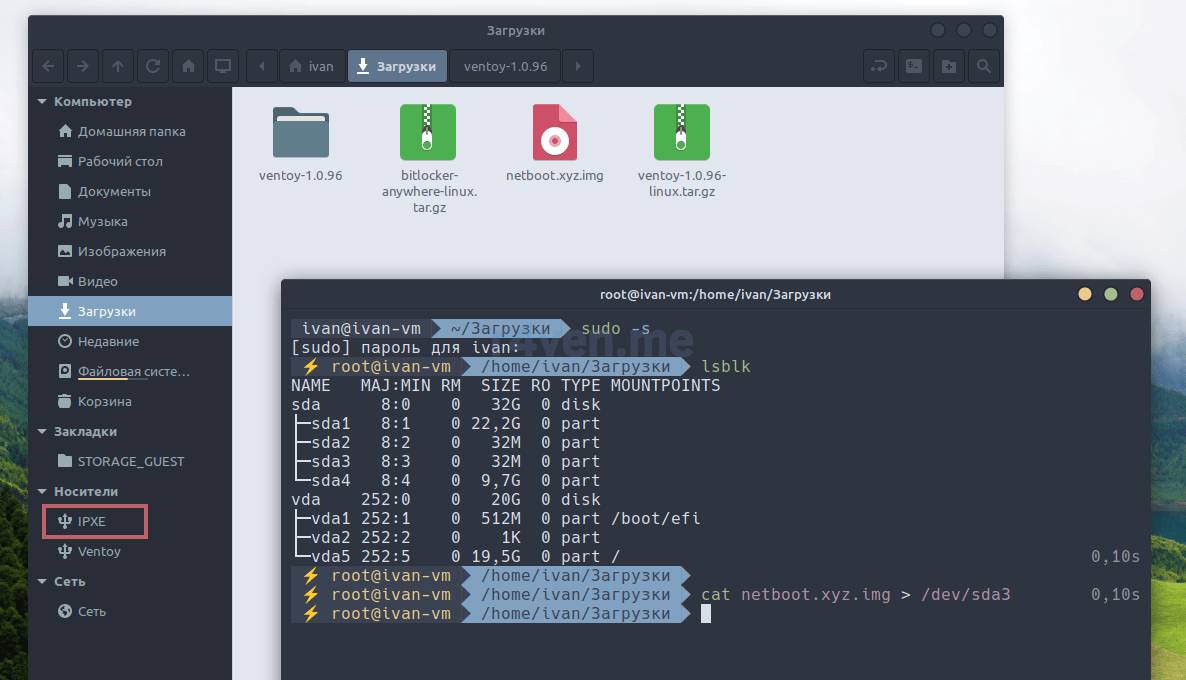
Creating the netboot partition
All that’s left is to create the encrypted partition.
Creating the Bitlocker encrypted partition on Linux
First, let’s format our 4th partition (for me, /dev/sda4) with the FAT filesystem using the mkfs utility:
sudo mkfs.vfat /dev/sda4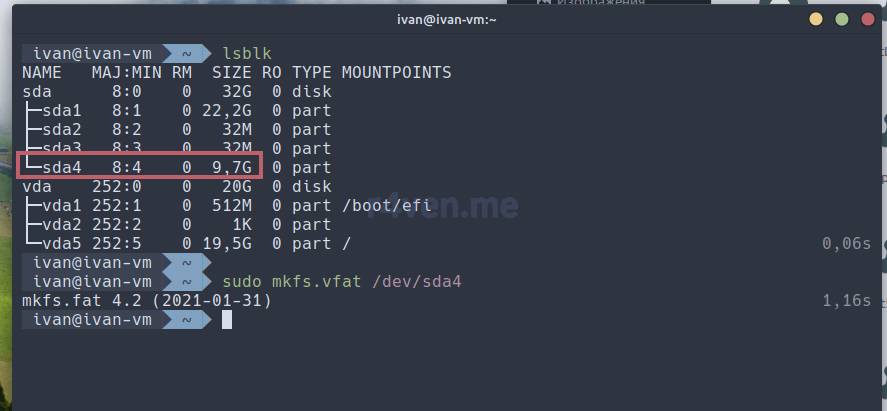
Formatting the 4th partition
Now let’s extract the Bitlocker anywhere archive:
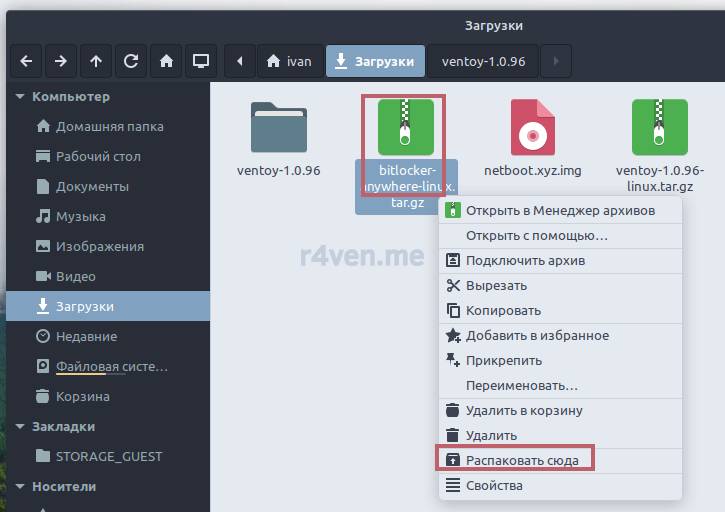
Extracting Bitlocker anywhere
Go into the ~/Downloads/bitlocker-anywhere/bin directory, open a terminal there and run run.sh
./run.sh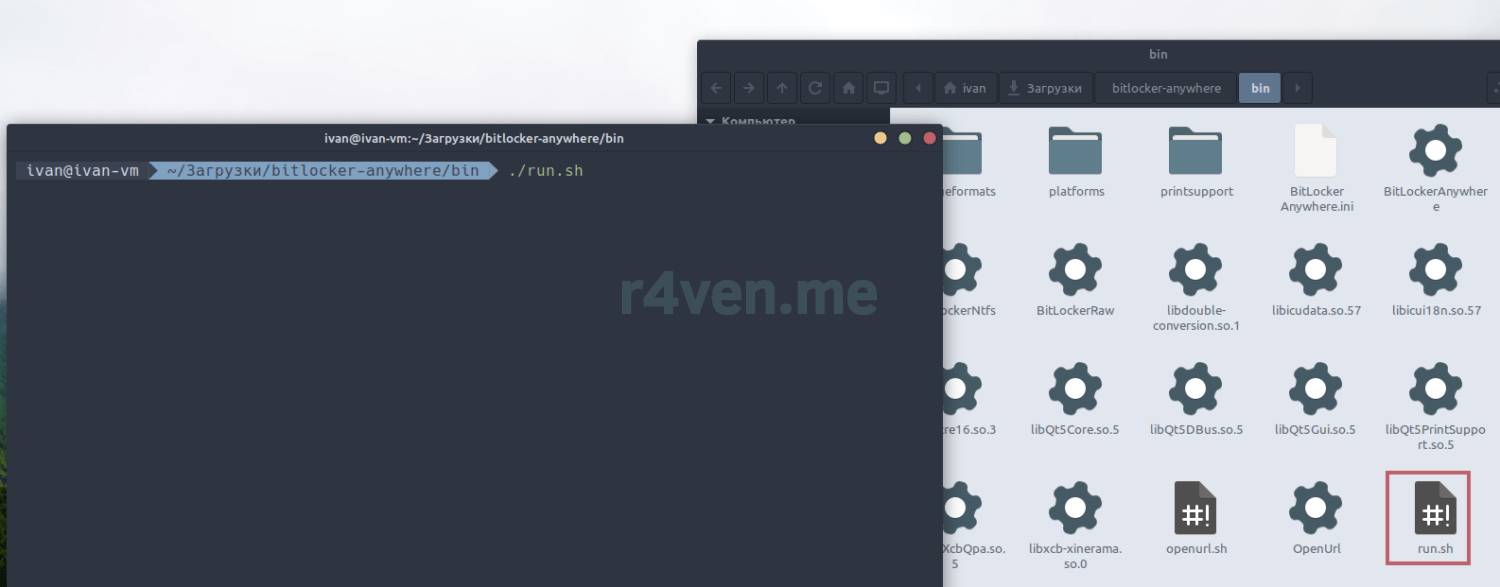
Launching Bitlocker anywhere
The command will ask you to enter the superuser password. After that, the program’s graphical window will open. Right-click on our 4th partition (for me, /dev/sda4) and click “Turn on Bitlocker”:
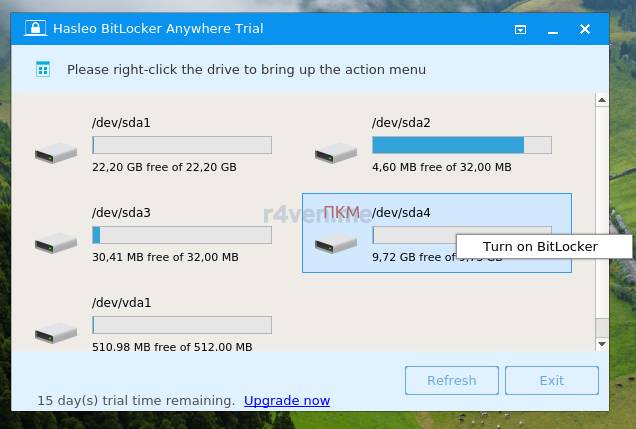
Creating the encrypted partition
Next, enter the password with which the partition will be encrypted (leave the checkboxes as they are):
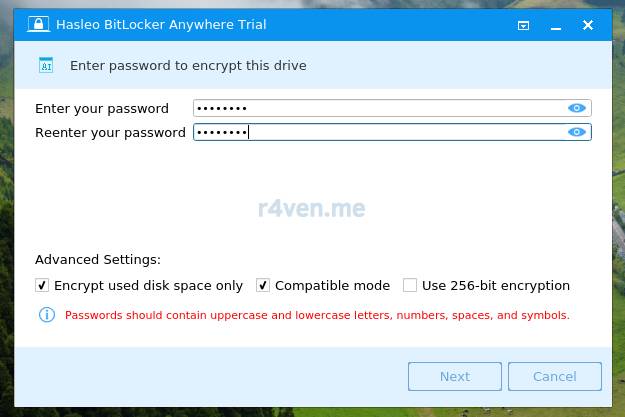
Setting the encryption password
Be sure to remember it or write it down somewhere. For example, in the KeePass password manager, about which I have a separate article: Convenient and reliable password storage – KeePass.
On the next step, we’ll be offered to save a backup recovery key, in case we forget the password. It can be saved to a file — so let’s do that:
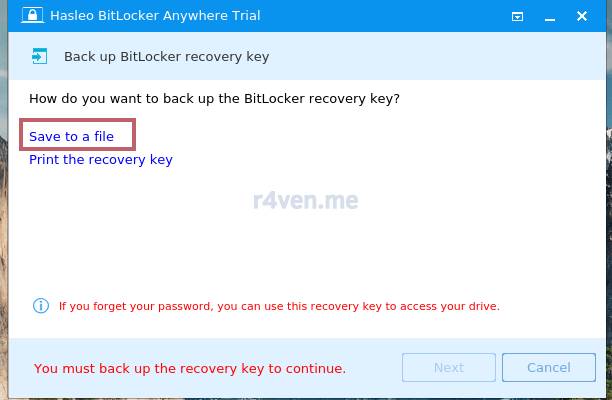
Backing up the recovery key
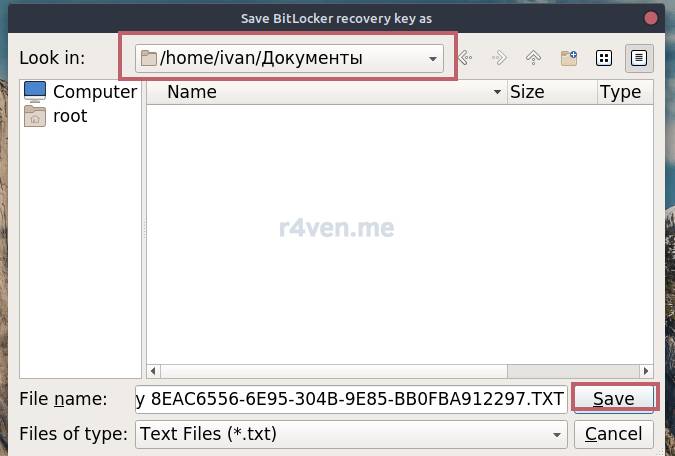
Backing up the recovery key
Click “Next” and wait for it to finish:
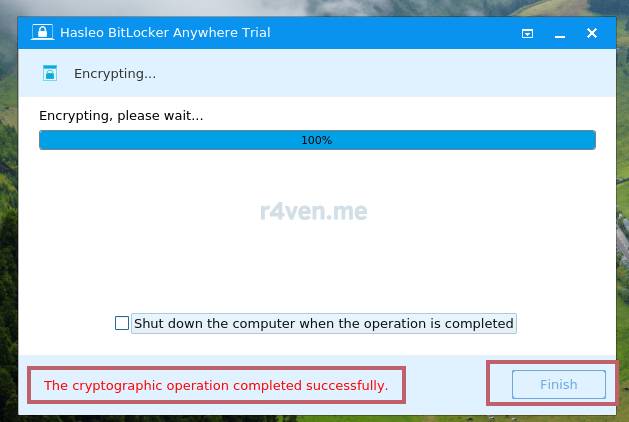
The encrypted partition has been created
Done. On the left in Explorer, we’ll see an “Encrypted volume”. Clicking on it will bring up a window to enter the unlock password:
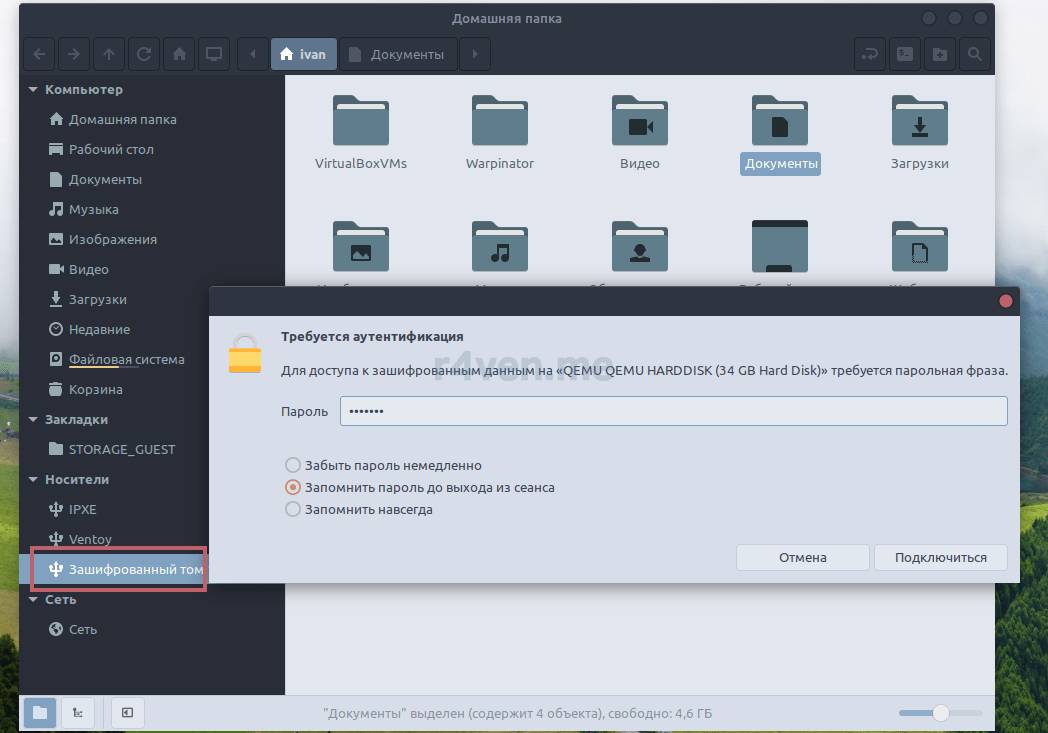
Checking the bitlocker partition works on Linux
After entering it, a regular disk partition will open, where you can save important files:
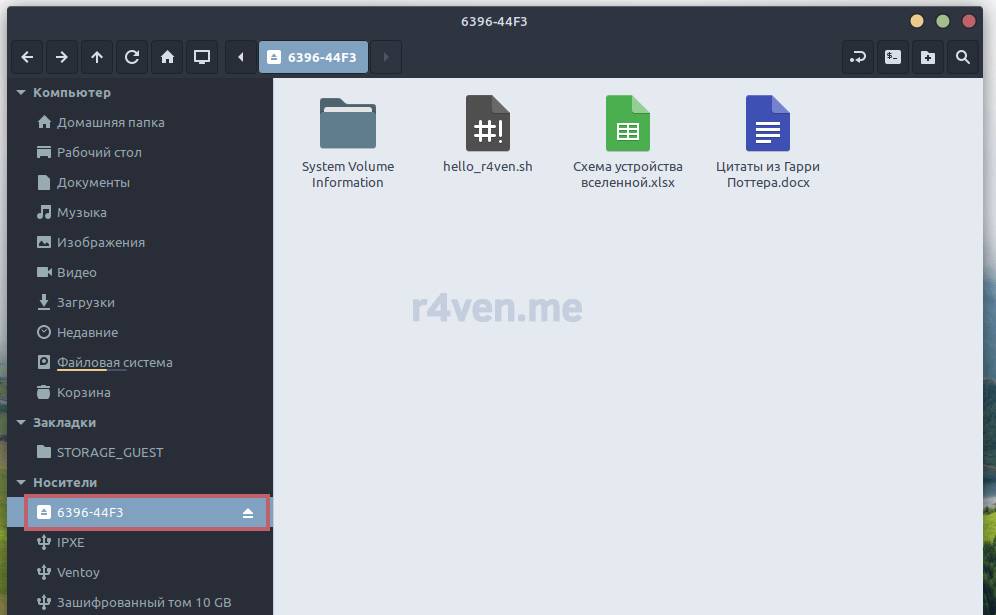
Checking the bitlocker partition works on Linux
For safe shutdown, right-click on the partition and select one of the options:
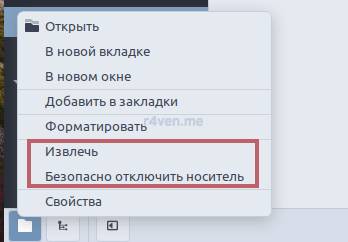
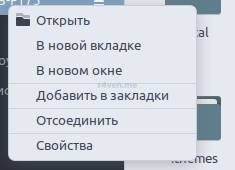
When the flash drive is connected on a Windows system, the encrypted partition will appear in Explorer like this:
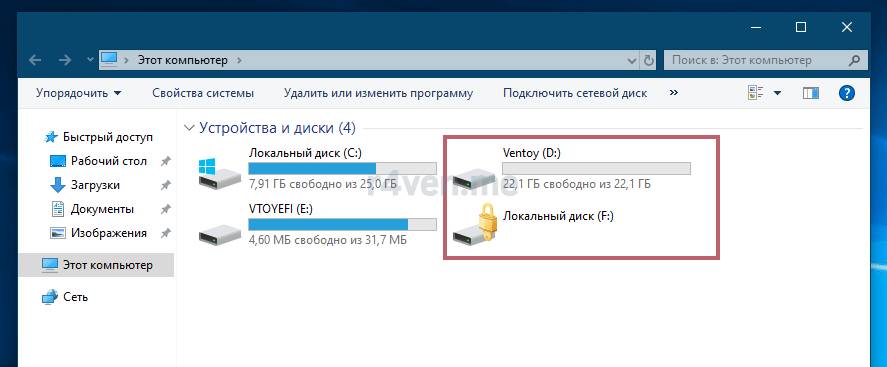
Checking the bitlocker partition works on Windows
When trying to access it, the system will ask us for the password:
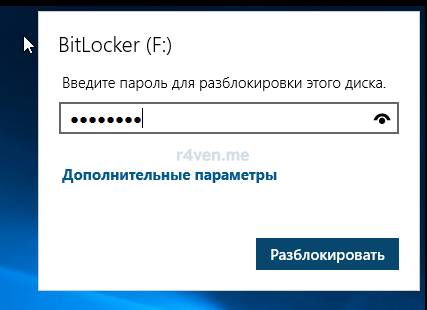
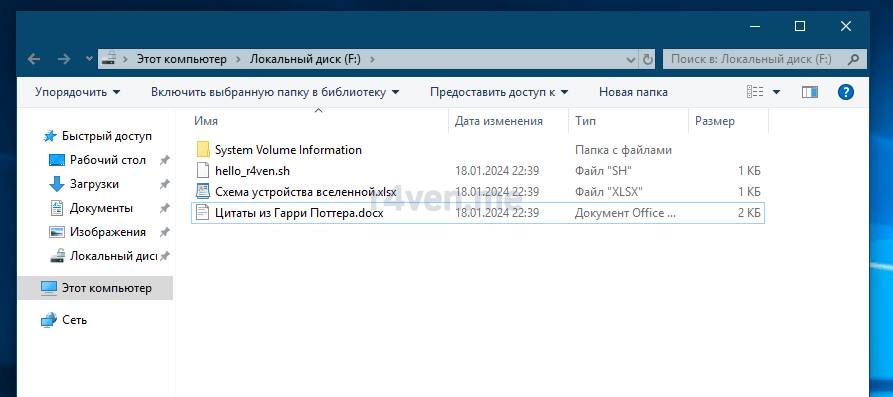
Checking the bitlocker partition works on Windows
I’ll also explain how to mount the encrypted partition via the Linux terminal.
To mount the partition, you need to “open” it (done as root), i.e. unlock it, and then mount it (in this example, in user space). This is done with two commands:
sudo cryptsetup open --type bitlk /dev/sda4 bitlocker

udisksctl mount -b /dev/mapper/bitlocker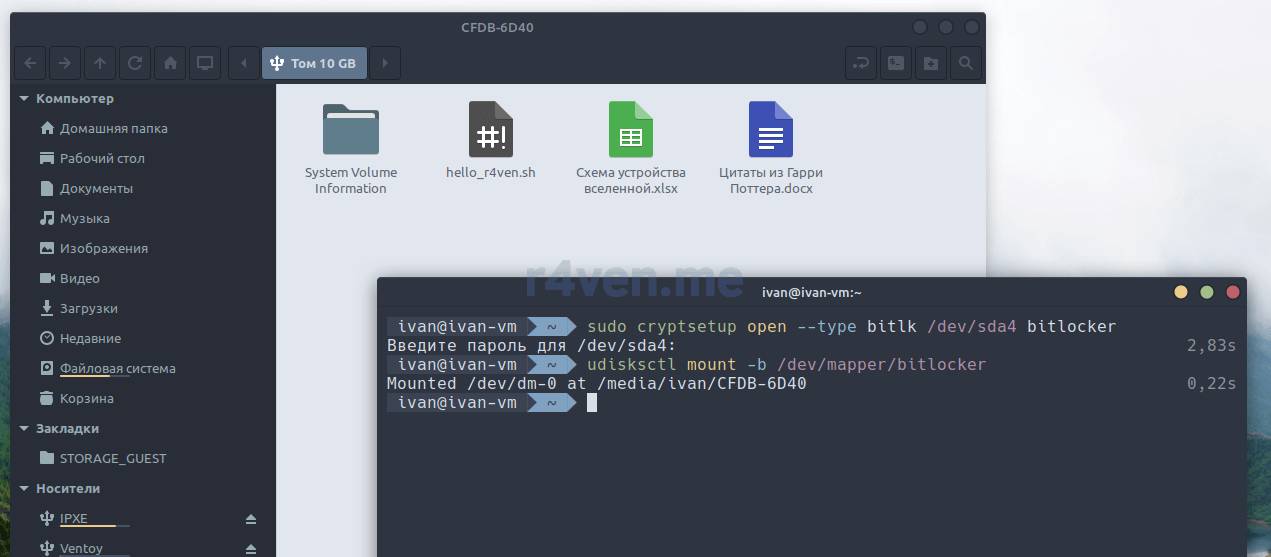
Mounting the bitlocker partition on Linux
Where:
- cryptsetup — a console utility for managing the Luks subsystem;
- –type bitlk — explicitly specifies the partition type as Windows Bitlocker;
- bitlocker (at the end of the command) — this is the label of the encrypted device, and can be arbitrary.
Demonstration of booting from the terminator flash drive
Now let’s test how our multi-boot flash drive works. Let’s restart our computer and boot from the usb flash drive.
I talked about how to boot from a usb drive in my article Installing Linux alongside Windows: Step 4. Booting the system from the installation media.
In the boot menu, among the partitions of our connected USB drive, 2 entries will be available (usually containing the flash drive’s name/manufacturer): the first is Ventoy, the second netboot.xyz.
On a laptop this might look like this:
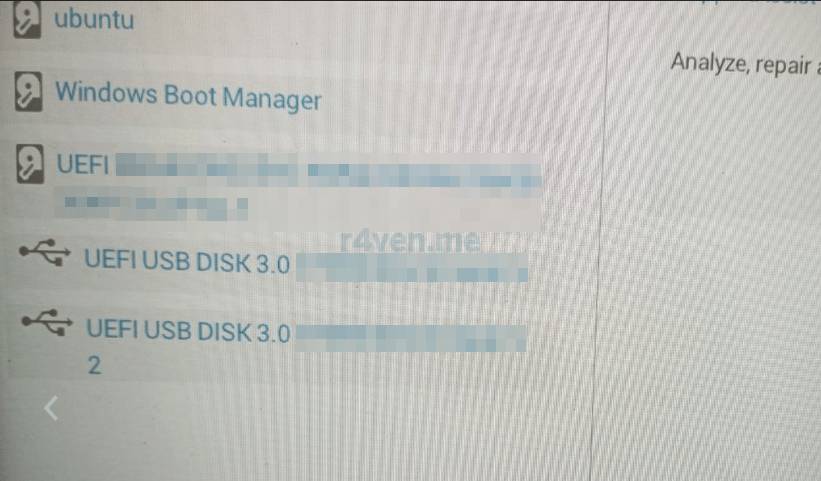
Laptop boot menu
In the case of a QEMU/KVM-based virtual machine, it looks like this:
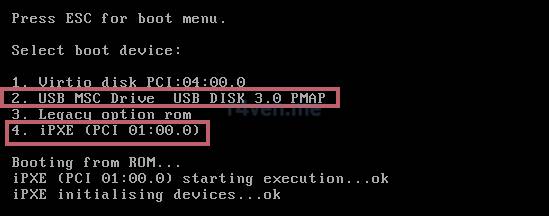
Virtual machine boot menu
To demonstrate Ventoy, I downloaded a tiny image of an interesting OS written in assembly — CalibriOS. The image weighs only 42.5 MB. You can download it from the downloads page on the official site.
Let’s download the archive, extract the system’s iso image onto the regular (ventoy) partition of the flash drive, and boot:
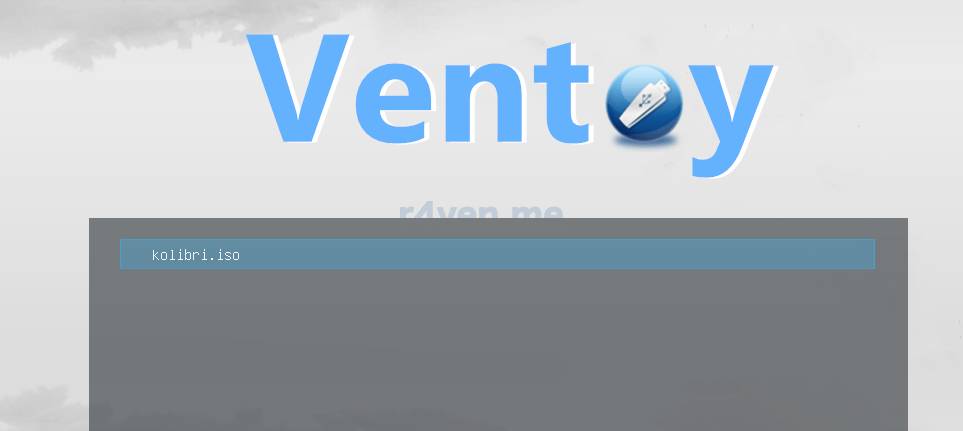
Ventoy
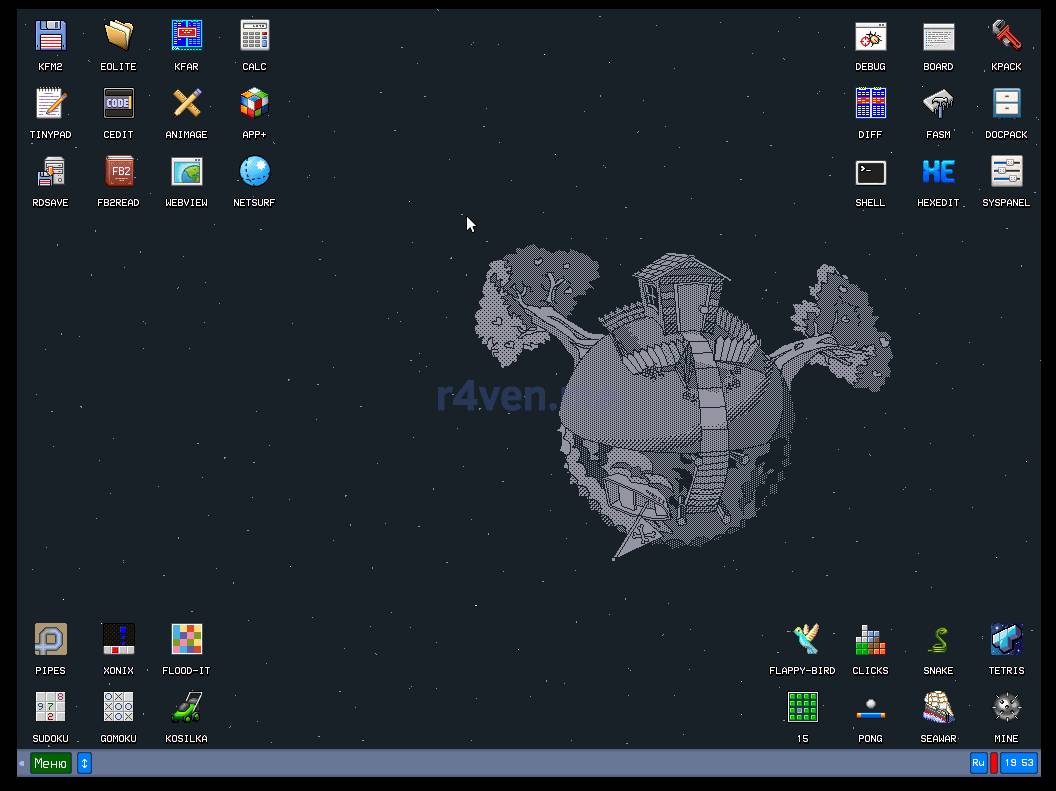
CalibriOS
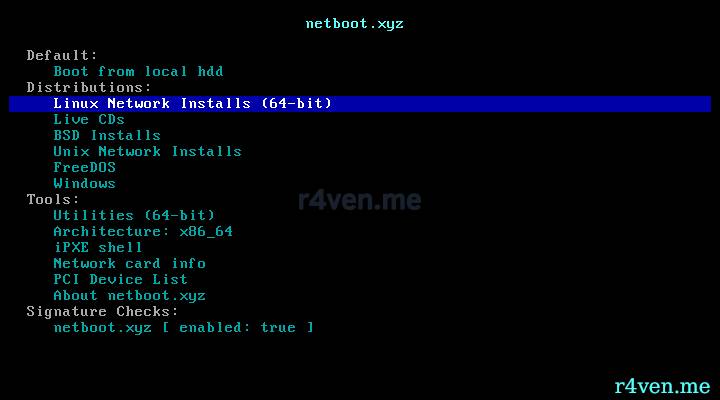
Excellent, everything works. Now let’s boot into Netboot.xyz. Also, everything’s fine:
netboot.xyz
Afterword
Today we created a T-1000 universal boot flash drive, allowing you to launch local iso images as well as install Linux over the internet. We also created two partitions: a regular one and an encrypted one.
If you run into any difficulties, have any questions, or simply want to discuss the topic, feel free to drop by our Telegram chat: @r4ven_me_chat.
Thanks for reading. Good luck with your experiments!
Related materials
- Ventoy — downloads page (EN)
- netboot.xyz — downloads page (EN)
- Bitlocker Anywhere — downloads page + tutorial (EN)
- Luks — Wikipedia
- CalibriOS — downloads page
👨💻And…
Don’t forget about our Telegram channel 📱 and chat
Or maybe you want to become a co-author? Then click here🔗
💬 All the best ✌️
That should be it. If not, check the logs 🙂

Comments