In this note, I will tell you how to set up convenient search, copying, and pasting of long shell commands from a pre-prepared list in Linux using the universal launcher rofi.
📝 rofi - is a versatile and fast utility for Linux that primarily serves as an application launcher and window switcher, but can also be used for executing commands, searching SSH hosts, and much more.
A Small Demo
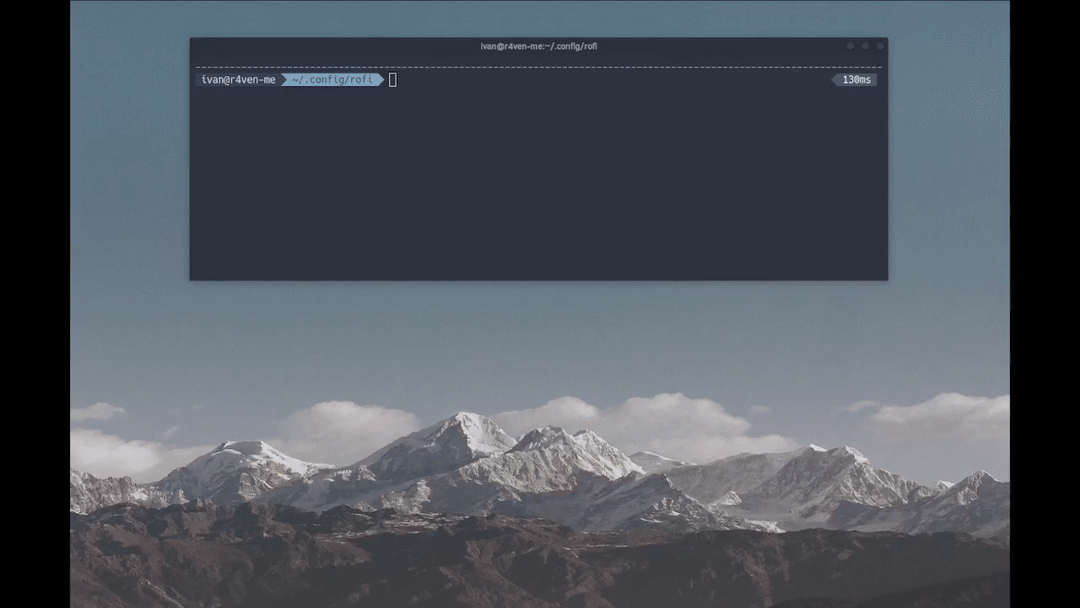
A short GIF demo of the final result:
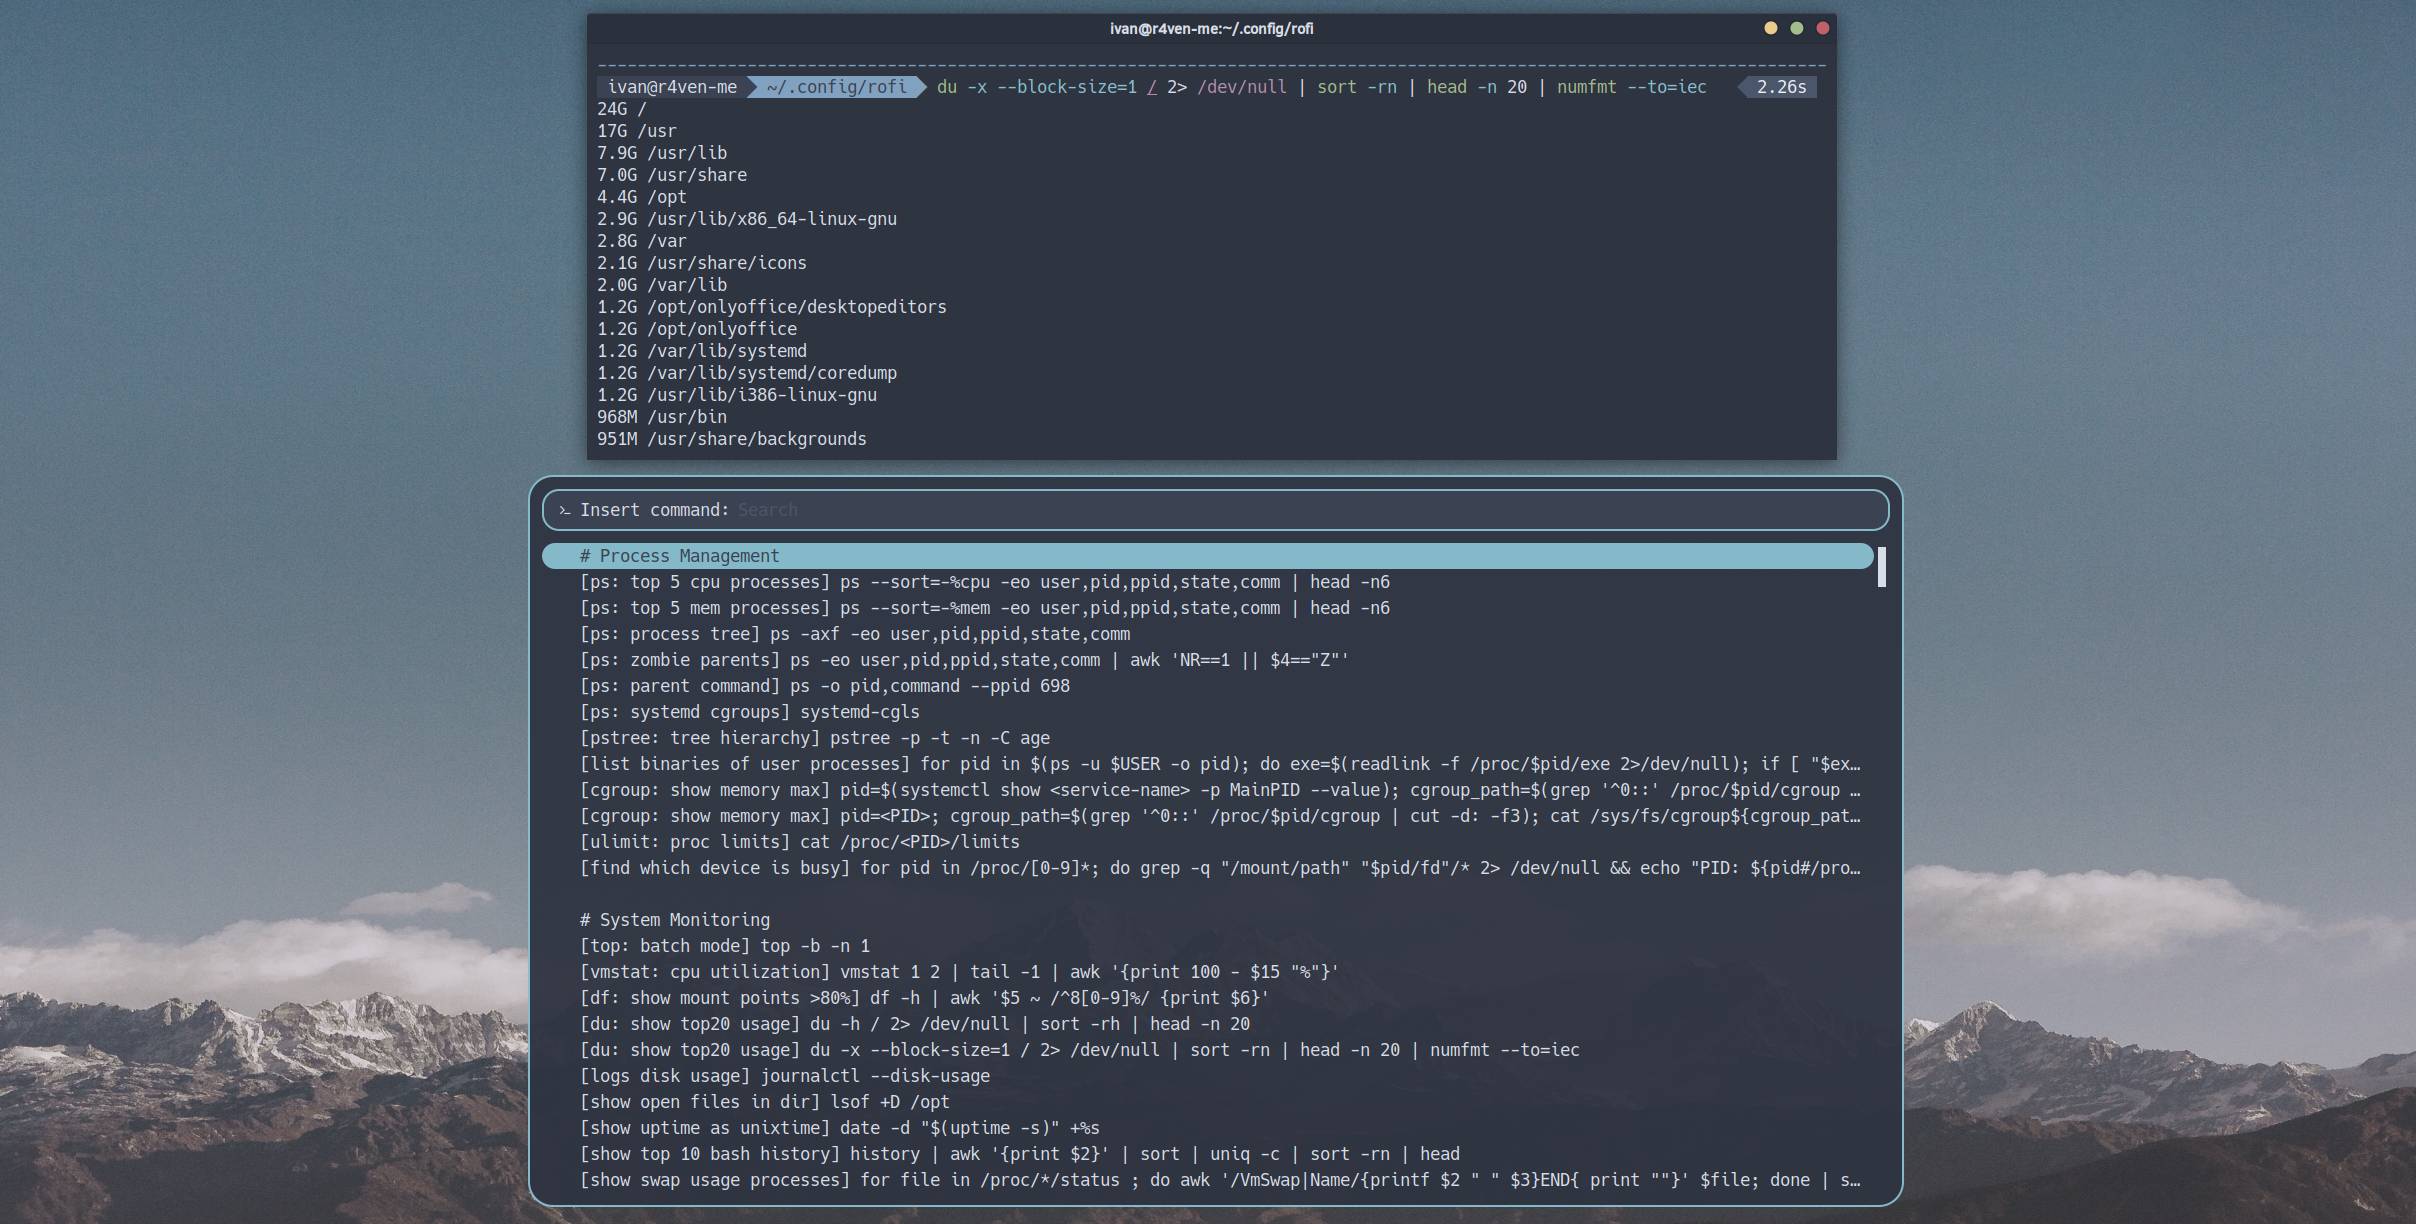
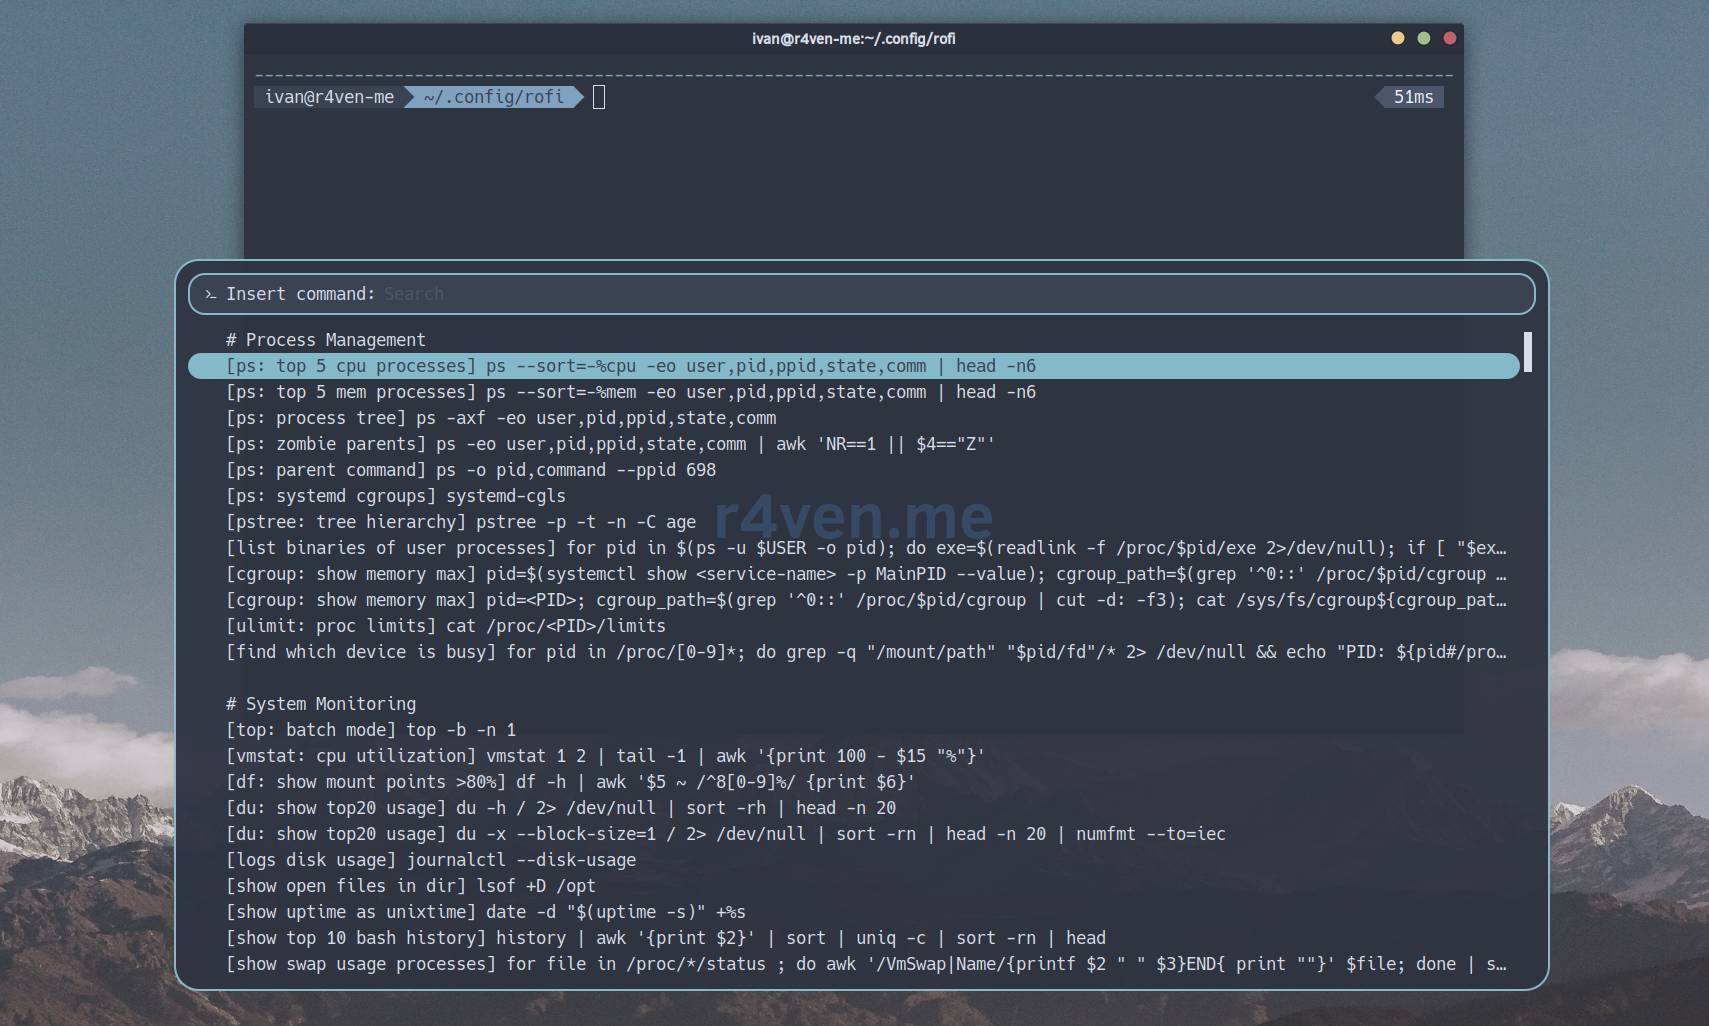
It all works very simply. Call the rofi menu, then search for the desired command:
After pressing Enter, the command is copied to the clipboard and pasted (but not executed) into the current terminal window. After that, it can be executed or edited and executed:
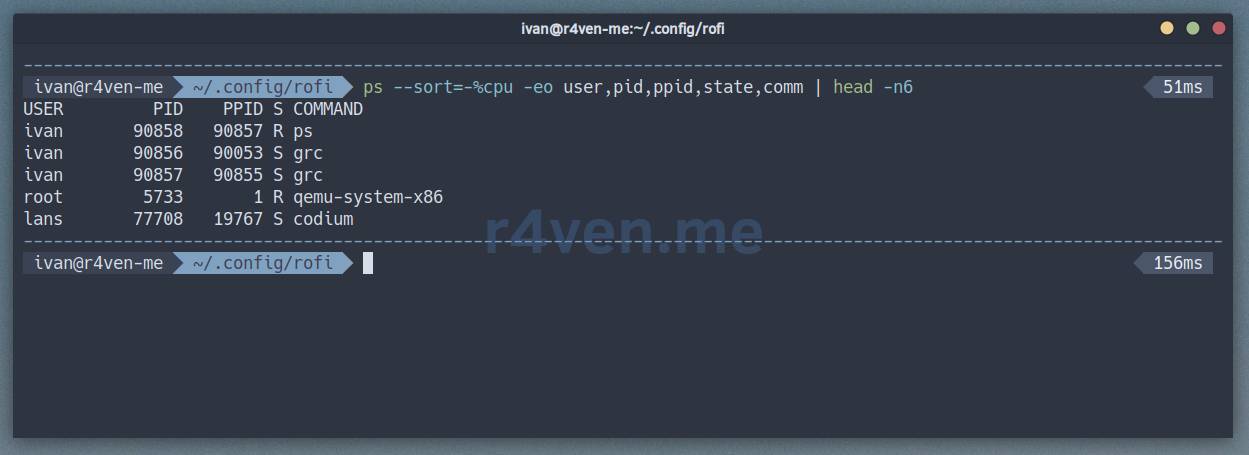
Here, Ctrl+Shift+v is simulated. You can configure any action callable via the shell.
I find this method very convenient for work. It’s often necessary to reuse certain commands while working in the terminal. And digging for them in notes/Google/AI takes time.
Previously, I had already implemented something similar, but at the shell level: Writing a quick access function for complex commands for Zsh and Bash
Or Tmux+fzf (see instructions under the spoiler at the beginning).
Installing rofi
☝️ The configuration example in this article was performed in the LMDE7 (Debian 13) distribution environment.
Before configuring, you need to install rofi itself:
sudo apt update && sudo apt install rofiAdditionally, install utilities for clipboard interaction and sending key press actions for your graphical stack.
For X11:
sudo apt install xclip xdotoolFor Wayland:
sudo apt install wl-copy wtypeCreating the Config
Now, let’s create the rofi configuration directory and the main config file within it:
mkdir -p ~/.config/rofi

vim ~/.config/rofi/config.rasiPopulate it:
/* rofi -dump-config > ~/.config/rofi/config.rasi */
configuration {
line-margin: 10;
display-ssh: "";
display-run: "";
display-drun: "Launch app:";
display-window: "";
display-combi: "";
show-icons: true;
kb-row-up: "Up,Control+p";
kb-row-down: "Down,Control+n";
kb-row-left: "Control+Page_Up";
kb-row-right: "Control+Page_Down";
timeout {
action: "kb-cancel";
delay: 0;
}
filebrowser {
directories-first: true;
sorting-method: "name";
}
show-icons: true;
scroll-method: 1;
}
@theme "~/.config/rofi/nord.rasi"Next, create the theme config (in Nord palette):
vim ~/.config/rofi/nord.rasi/* https://github.com/lr-tech/rofi-themes-collection */
* {
bg0: #2E3440F2;
bg1: #3B4252;
bg2: #4C566A80;
bg3: #88C0D0F2;
fg0: #D8DEE9;
fg1: #ECEFF4;
fg2: #D8DEE9;
fg3: #4C566A;
}
* {
/* font: "Hack Nerd Font Mono 13";*/
background-color: transparent;
text-color: @fg0;
margin: 0px;
padding: 0px;
spacing: 0px;
}
window {
location: north;
y-offset: calc(50% - 176px);
/* width: 480;*/
width: 15%;
border: 2px;
border-color: @bg3;
border-radius: 24px;
background-color: @bg0;
}
mainbox {
padding: 12px;
}
inputbar {
background-color: @bg1;
border-color: @bg3;
border: 2px;
border-radius: 16px;
padding: 8px 16px;
spacing: 8px;
children: [ prompt, entry ];
}
prompt {
text-color: @fg2;
}
entry {
placeholder: "Search";
placeholder-color: @fg3;
}
message {
margin: 12px 0 0;
border-radius: 16px;
border-color: @bg2;
background-color: @bg2;
}
textbox {
padding: 8px 24px;
}
listview {
margin: 12px 0 0;
lines: 15;
columns: 1;
fixed-height: false;
scrollbar: true;
}
scrollbar {
width: 4px ;
border: 2;
handle-color: @fg0;
handle-width: 8px ;
padding: 2;
}
element {
padding: 2px 8px;
spacing: 8px;
border-radius: 16px;
orientation: horizontal;
}
element normal active {
text-color: @bg3;
}
element alternate active {
text-color: @bg3;
}
element selected normal, element selected active {
background-color: @bg3;
}
element-icon {
size: 1em;
vertical-align: 0.5;
}
element-text {
text-color: inherit;
}
element selected {
text-color: @bg1;
}For reference: I use Hack Nerd Font Mono as my Powerline font.
See how to install under the spoiler.
Spoiler
My readers know that I prefer the Hack font ☝️. Here’s a simple example of how to install it:
📝 Note
Note that executing these commands will require sudo privileges. Alternatively, install the fonts only for the current user in the ~/.local/share/fonts directory.
# create font directory
sudo mkdir /usr/share/fonts/Hack

# download font archive
curl -fsSLO \
    $(curl -s https://api.github.com/repos/ryanoasis/nerd-fonts/releases/latest \
    | grep browser_download_url \
    | grep 'Hack.zip' \
    | cut -d  '"' -f 4)

# unpack archive, copy fonts to system
sudo unzip ./Hack.zip -d /usr/share/fonts/Hack/ && rm -f ./Hack.zipPreparing the Command List
Now you need to create a file with a list of our commands, which we will access via rofi:
vim ~/.config/rofi/commands.listThe file format is as follows:
[command description] actual_commandCommand example:
# Process Management
[ps: top 5 cpu processes] ps --sort=-%cpu -eo user,pid,ppid,state,comm | head -n6
[ps: top 5 mem processes] ps --sort=-%mem -eo user,pid,ppid,state,comm | head -n6
[ps: process tree] ps -axf -eo user,pid,ppid,state,comm
[ps: zombie parents] ps -eo user,pid,ppid,state,comm | awk 'NR==1 || $4=="Z"'
[pstree: tree hierarchy] pstree -p -t -n -C age
[vmstat: cpu utilization] vmstat 1 2 | tail -1 | awk '{print 100 - $15 "%"}'
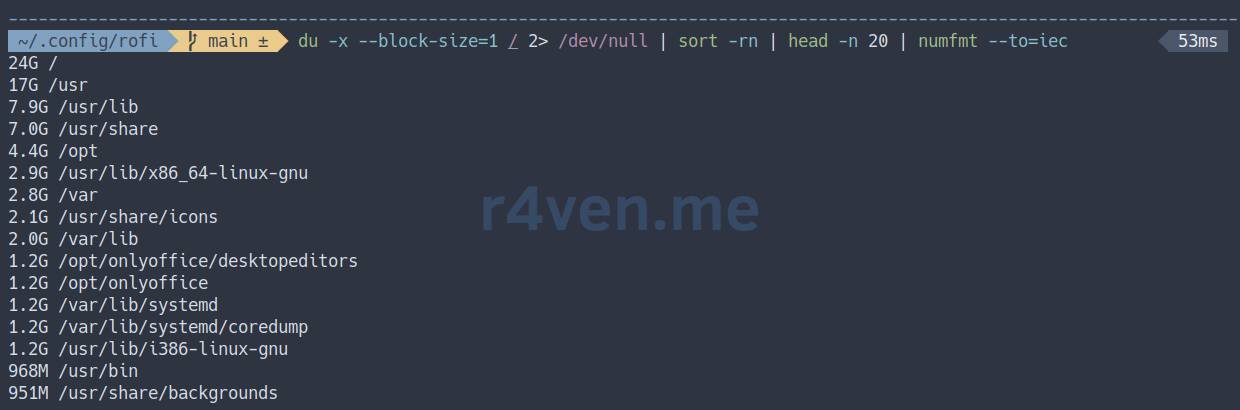
[df: show mount points >80%] df -h | awk '$5 ~ /^8[0-9]%/ {print $6}'
[du: show top20 usage] du -x --block-size=1 / 2> /dev/null | sort -rn | head -n 20 | numfmt --to=iecYou can take my command collection as a base:
curl -fsSL --output ~/.config/rofi/commands.list \
https://raw.githubusercontent.com/r4ven-me/rofi/main/commands.listCreating the Launch Script
Next, we need to create a script that will take commands from the file and pass them to rofi:
vim ~/.config/rofi/cmd.shPopulate it:
#!/usr/bin/env bash
SCRIPT_DIR=$(cd "$(dirname "${BASH_SOURCE[0]}")" &>/dev/null && pwd -P)
COMMANDS_FILE="${SCRIPT_DIR}/commands.list"
cmd=$(
rofi \
-dmenu \
-theme-str '* { font: "Hack Nerd Font Mono 13"; }' \
-theme-str 'window { width: 40%; }' \
-theme-str 'listview { lines: 25; }' \
-p " Insert command:" < "$COMMANDS_FILE" | \
sed 's/^\[[^]]*] *//') && \
if [ -n "$WAYLAND_DISPLAY" ]; then
# Wayland
printf "%s" "$cmd" | wl-copy
wtype -M ctrl -M shift v
else
# X11
printf "%s" "$cmd" | xclip -selection clipboard
# xdotool key --delay 0 "ctrl+shift+v"
xdotool key --delay 0 --clearmodifiers "ctrl+shift+v"
fiThe essence of the script: it allows you to select a command from a list via rofi and then paste it into the active window, simulating Ctrl+Shift+V. You can customize the action taken with the selected command as you wish.
Script Logic Description
SCRIPT_DIRdefines the directory where the script itself is located;COMMANDS_FILEpoints to thecommands.listfile (assumed to be next to the script), which contains the list of commands for selection;- Launches
rofiindmenumode (selection menu); - Configures the appearance of
rofi(font, window width, number of lines); - The contents of
COMMANDS_FILEare used as input forrofi; - The user selects a command from the provided list;
sed 's/^\[[^]]*] *//'removes any prefixes like[tag]from the selected string before saving it to thecmdvariable;if [ -n "$WAYLAND_DISPLAY" ]; then ... else ... fichecks if the Wayland graphical server is used (the$WAYLAND_DISPLAYvariable is set) or X11: this is necessary to use the correct utilities for clipboard interaction and key press simulation;- If Wayland is detected:
printf "%s" "$cmd" | wl-copycopies the selected command ($cmd) to the Wayland clipboard;wtype -M ctrl -M shift vsimulates theCtrl+Shift+Vkey combination to paste the clipboard content into the active window;
- If X11 is detected:
printf "%s" "$cmd" | xclip -selection clipboardcopies the selected command ($cmd) to the X11 clipboard;xdotool key --delay 0 --clearmodifiers "ctrl+shift+v"simulates theCtrl+Shift+Vkey combination to paste the clipboard content into the active window. (--clearmodifiersensures that no other “stuck” modifiers interfere).
Make the script executable:
chmod +x ~/.config/rofi/cmd.shAnd try to call rofi from the console:
~/.config/rofi/cmd.shIt should look like this:

Result of pasting and executing:
You can always find all current source codes on my GitHub:
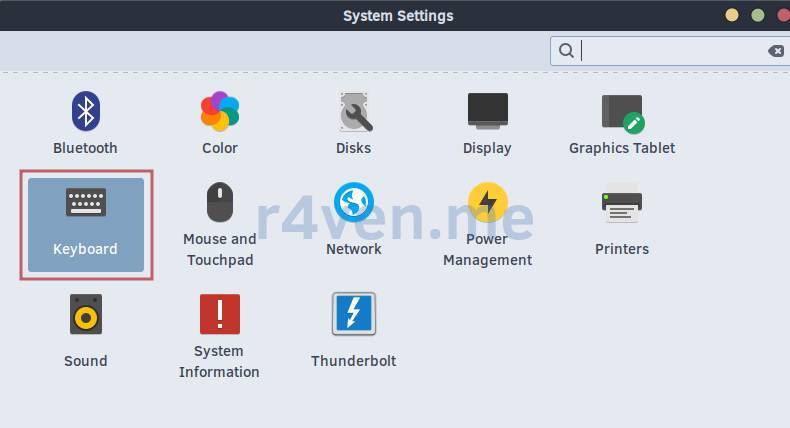
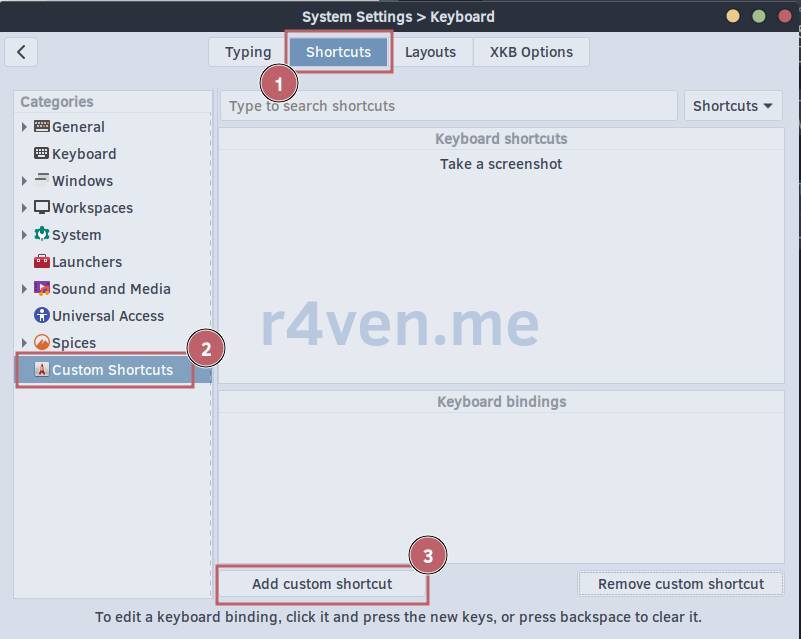
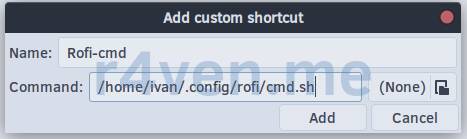
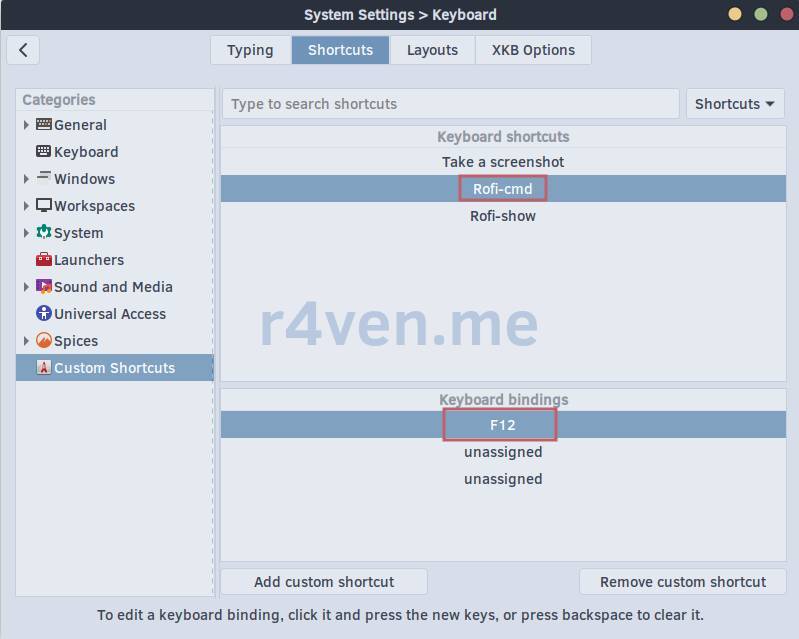
Binding a Key to Launch rofi
For convenient use of this tool, I recommend binding a hotkey, for example, F12 for quick access.
Example for Cinnamon:
Thank you for reading Raven’s Blog. All the best!
👨💻Ну и…
Don’t forget about our Telegram channel 📱 and chat 💬 All the best ✌️
That should be it. If not, check the logs 🙂