
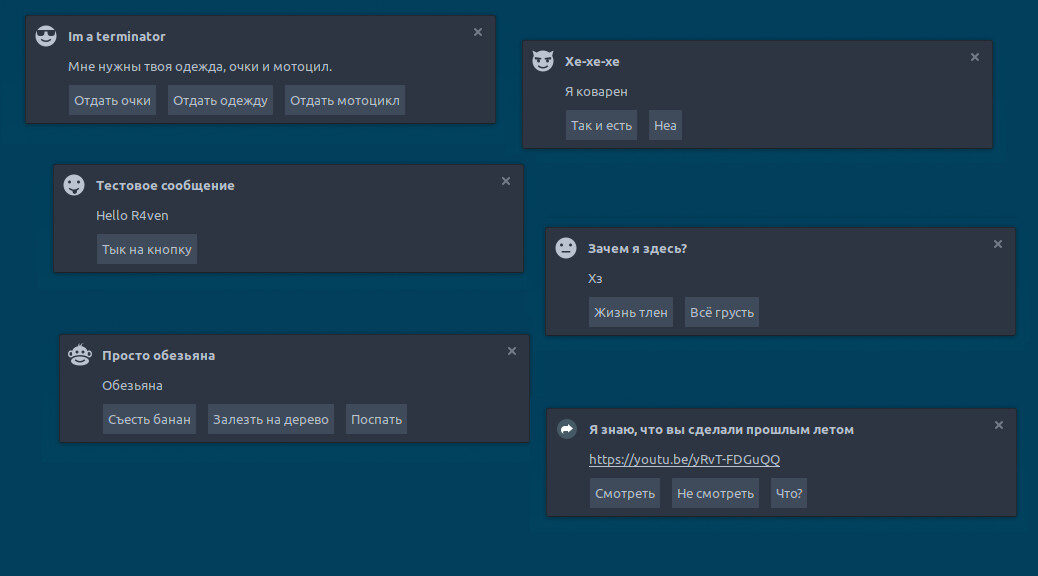
Today I’ll show how to create custom functional desktop notifications using the notify-send console utility. Such notifications support active buttons, can display icons, and clickable web links. As an example, we’ll set up a reminder using a small Bash script and the Cron scheduler to run notifications on a schedule. It’ll be interesting)
🖐️Hey!
Subscribe to our Telegram channel @r4ven_me📱, so you don’t miss new posts on the website 😉. If you have questions or just want to chat about the topic, feel free to join the Raven chat at @r4ven_me_chat🧐.
Prerequisites
To implement our task we need the notify-send utility version 0.8+, since starting with this version it supports active buttons. You can check the version with this command:
notify-send --version
notify-send version
This utility is part of the libnotify-bin package, which depends on the notification library — libnotify4. Accordingly, the version of these packages should also be 0.8 or higher.
You can check the version of these packages with this command:
apt show libnotify4 libnotify-bin | grep VersionThe
apt showcommand displays detailed information about a package.

Library version
If the version of the libnotify-bin and libnotify4 packages on your system is lower than 0.8 (and in Linux Mint 21.3 and Ubuntu 22.04.03 it’s exactly version 0.7.9):
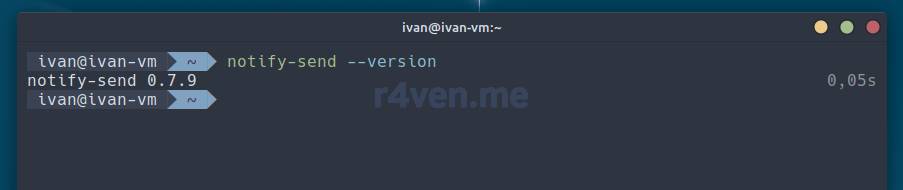
then they need to be updated manually. Instructions on how to do this using Linux Mint as an example are under the spoiler.
It’s worth noting that in Linux Mint based on Debian 12 (LMDE), the version of
libnotify4in the standard repositories is 0.8.1.
The repositories of the intermediate Ubuntu 23.10 distribution have compatible packages of the required version. Let’s go to the download page, download, and install.
Click to view instructions on updating the libnotify4 and libnotify-bin packages to version 0.8.2 in Linux Mint 21.
Let’s download the libnotify4 package: https://packages.ubuntu.com/ru/mantic/amd64/libnotify4/download
When attempting to install, the system will notify us that an older version is already installed from the repositories:
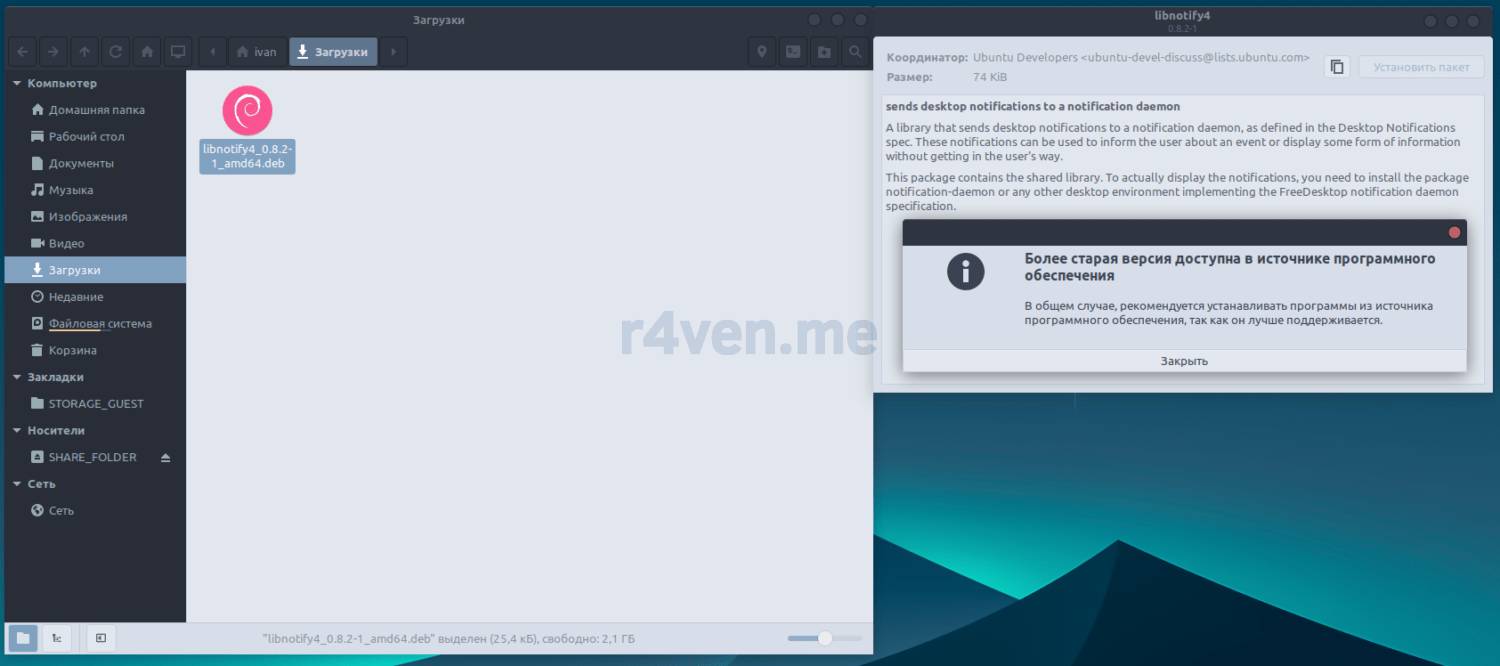
Installing libnotify4
Click close, then “Install Package”:
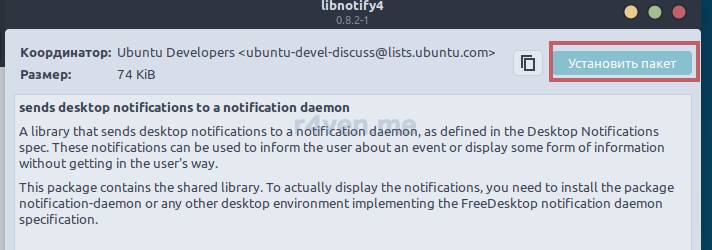
Installing libnotify4
Now let’s download libnotify-bin on the page: https://packages.ubuntu.com/ru/mantic/amd64/libnotify-bin/download
The installation is similar:
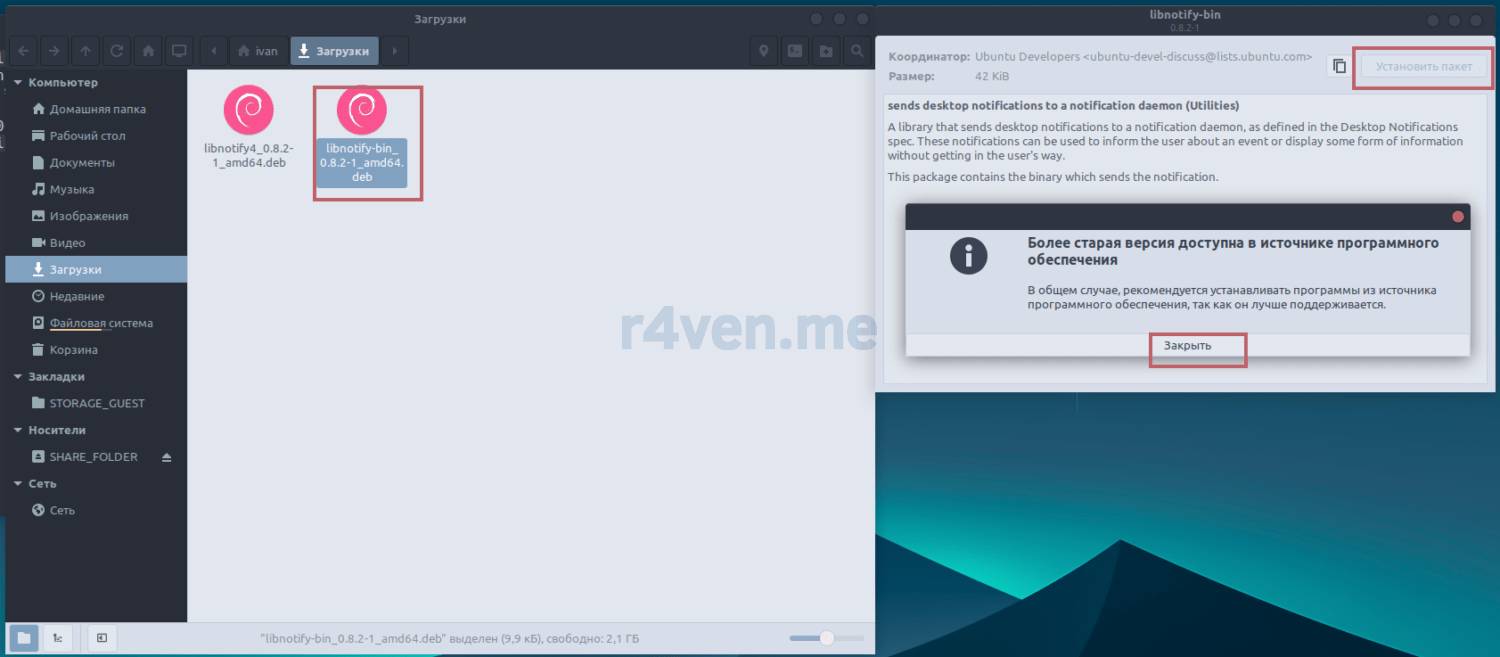
Installing libnotify-bin
If everything installed correctly, let’s check the version:
apt show libnotify4 libnotify-bin | grep Version

notify-send --version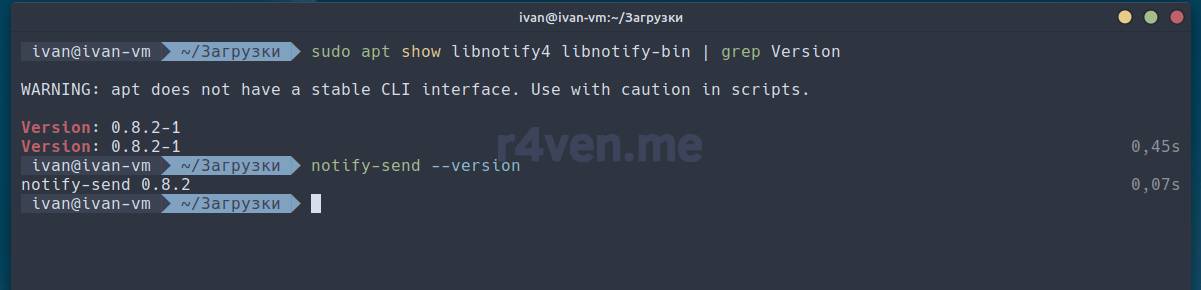
Checking package versions
Great. Now we can proceed to configuring custom notifications.
Example of displaying messages with the notify-send command
The syntax of the notify-send command is as follows:
notify-send [параметры] <заголовок_уведомлений> [тело_сообщения]Remember that square brackets indicate optional parameters)
Let’s try sending a simple text notification:
notify-send 'Тестовое сообщение' 'Hello R4ven'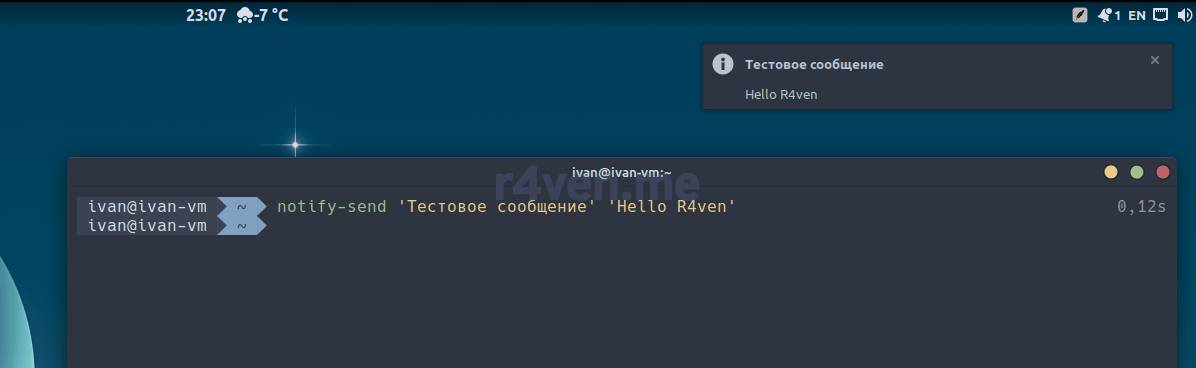
Test notification
Using the --action parameter you can create one or more buttons; when pressed, a response is returned to the process’s standard output (stdout). This approach allows flexible handling of notification button press actions in scripts and commands. An example implementation follows below.
I discussed standard data streams in Linux in a separate article: Linux command line, output and reading content: echo, cat, less commands.
Let’s try displaying a notification with an active button:
notify-send 'Тестовое сообщение' 'Hello R4ven' --action 'pressed=Тык на кнопку'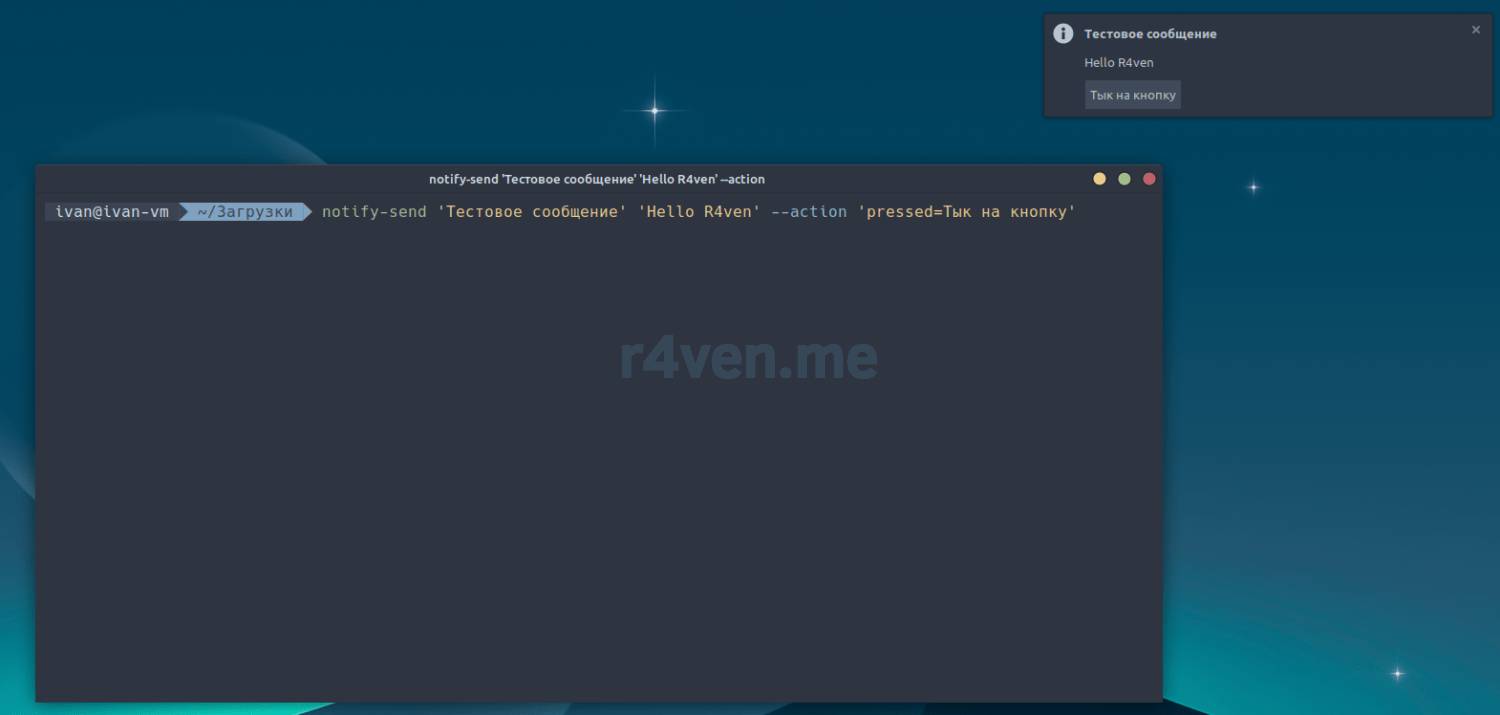
Notification with an active button
In the command above, for the --action parameter we specified the key pressed, which is to be returned to the shell when the button is pressed. That is, when the button is pressed, the word pressed will be printed to the console. If this key is not specified, a zero exit code is returned by default.
Now let’s try displaying a notification with multiple buttons:
notify-send 'Тестовое сообщение' 'Hello R4ven' --action 'pressed=Тык на кнопку' --action 'pressed=Не нажимай на меня'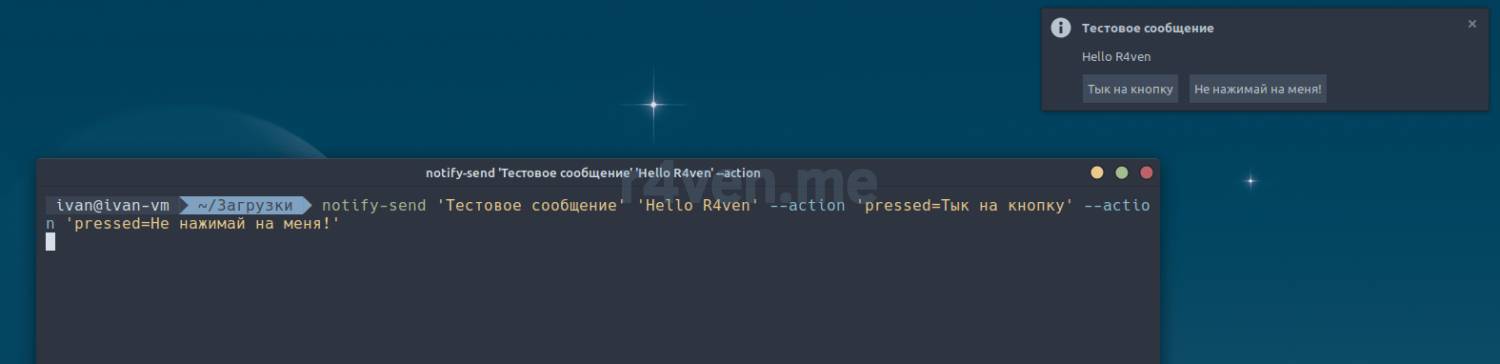
Notification with multiple buttons
Button keys can be set arbitrarily.
Let’s display a notification with system icons by adding the -i parameter and the icon name:
notify-send -i 'face-devilish' 'Тестовое сообщение' 'Hello R4ven' --action 'pressed=Тык на кнопку'Where face-devilish is the icon name.
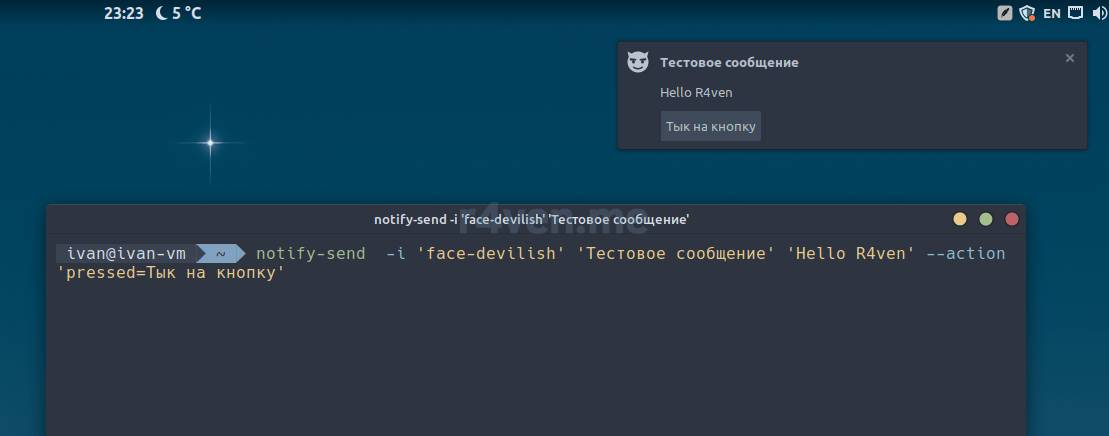
Notification with an icon
To find out the icon names on your system, you can use the graphical utility gtk3-icon-browser. It’s part of the gtk-3-examples package from the standard repositories. To install it, run:
sudo apt install gtk-3-examplesAfter installation, run in the console:
gtk3-icon-browser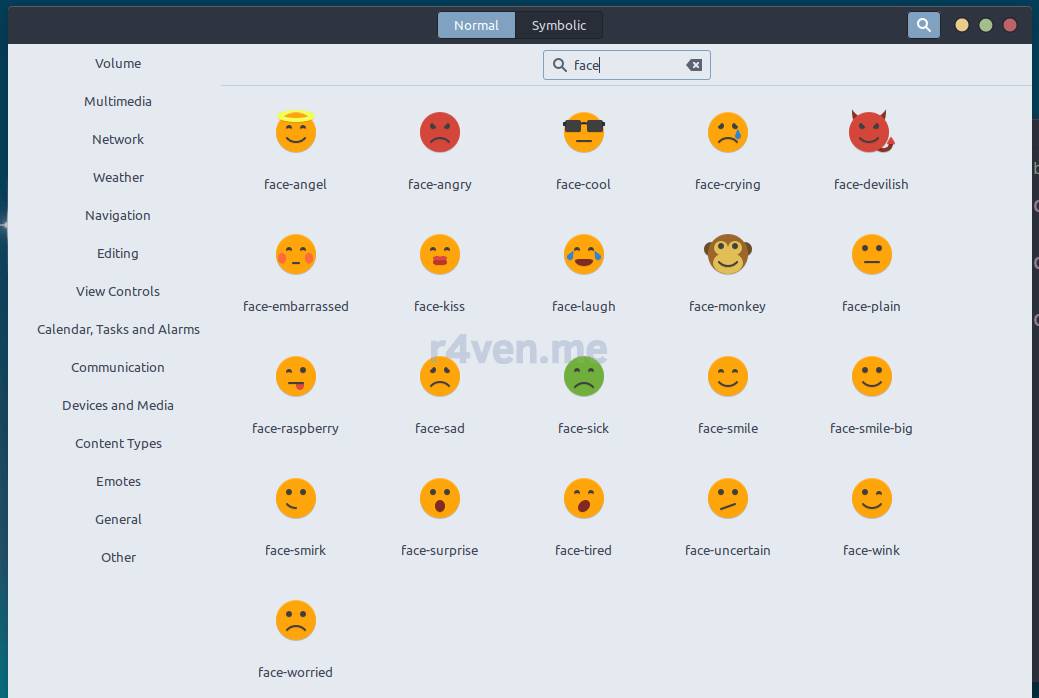
Viewing icons in gtk3-icon-browser
And here’s an example of a notification with a clickable web link:
notify-send -i 'face-devilish' 'Тестовое сообщение' 'https://r4ven.me - вороний блог' --action 'pressed=Тык на кнопку'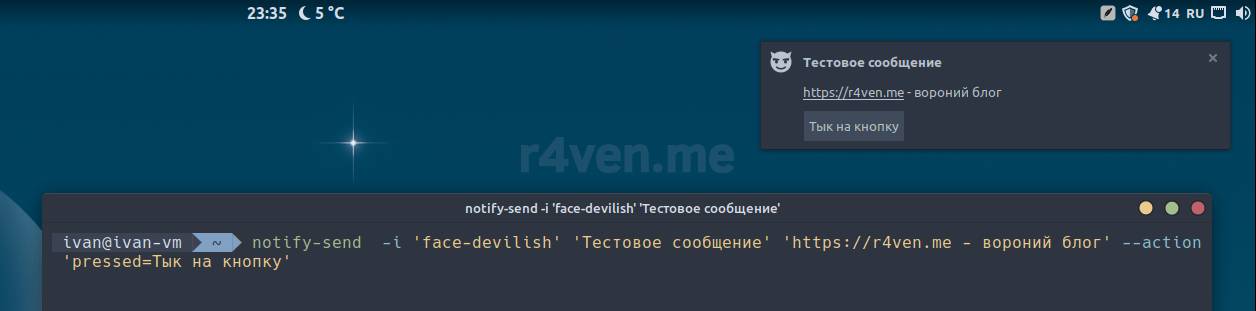
Notification with a web link
Now let’s set up a reminder in the form of a notification containing a message that you need to step away from the monitor screen and do eye exercises following a YouTube video.
Writing a bash script for convenience
Let’s open a new file for editing:
nvim ~/.local/bin/notify.sh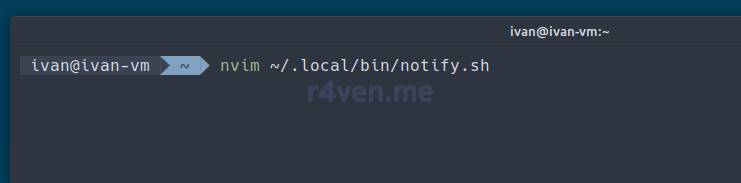
And fill it with this code:
#!/usr/bin/env bash

# set variables
notify_title="Выполни гимнастику для глаз"
notify_messasges="Смотри видео 1 или 2"
notify_icon="face-devilish"
notify_button1="Видео на 1 мин."
notify_button2="Видео на 5 мин."
pressed_button="$(notify-send "$notify_title" "$notify_messasges" -i "$notify_icon" --action "video1=$notify_button1" --action "video2=$notify_button2")"

# build a conditional expression to handle button presses
if [[ "$pressed_button" == "video1" ]]; then
    firefox --new-window https://youtu.be/4ZHVYQX7tx0
elif [[ "$pressed_button" == "video2" ]]; then
    firefox --new-window https://youtu.be/SAU-Smg3tfg
fi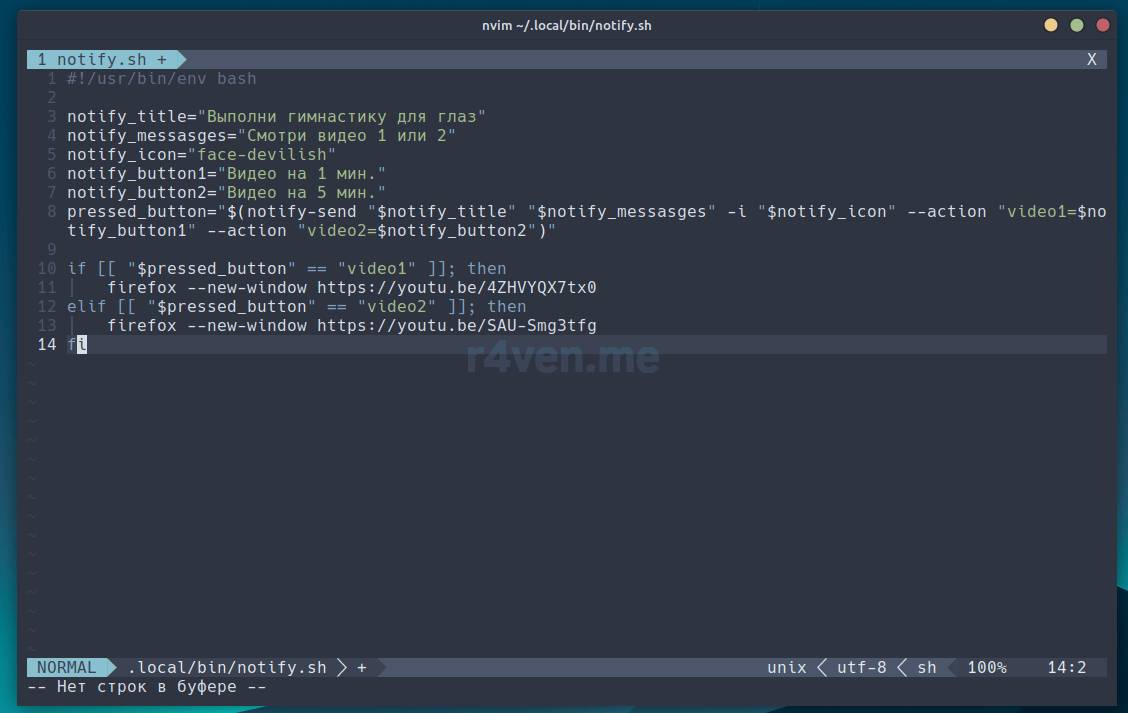
Bash script
The script is also available in the repo on GitHub.
In this little script, we first define variables whose content we will display in the notification. Then we set a separate variable that, using the substitution mechanism, will contain the result of executing the notify-send command. After that, we use conditional expressions to process the resulting output. In this example, a new firefox window opens with a link to an eye-exercise video, chosen depending on which button was pressed. I grabbed the videos from the interwebs.
If you configured Neovim according to , then remember that pressing F5 saves the file and, if it is a script, executes it in a popup window of the editor:
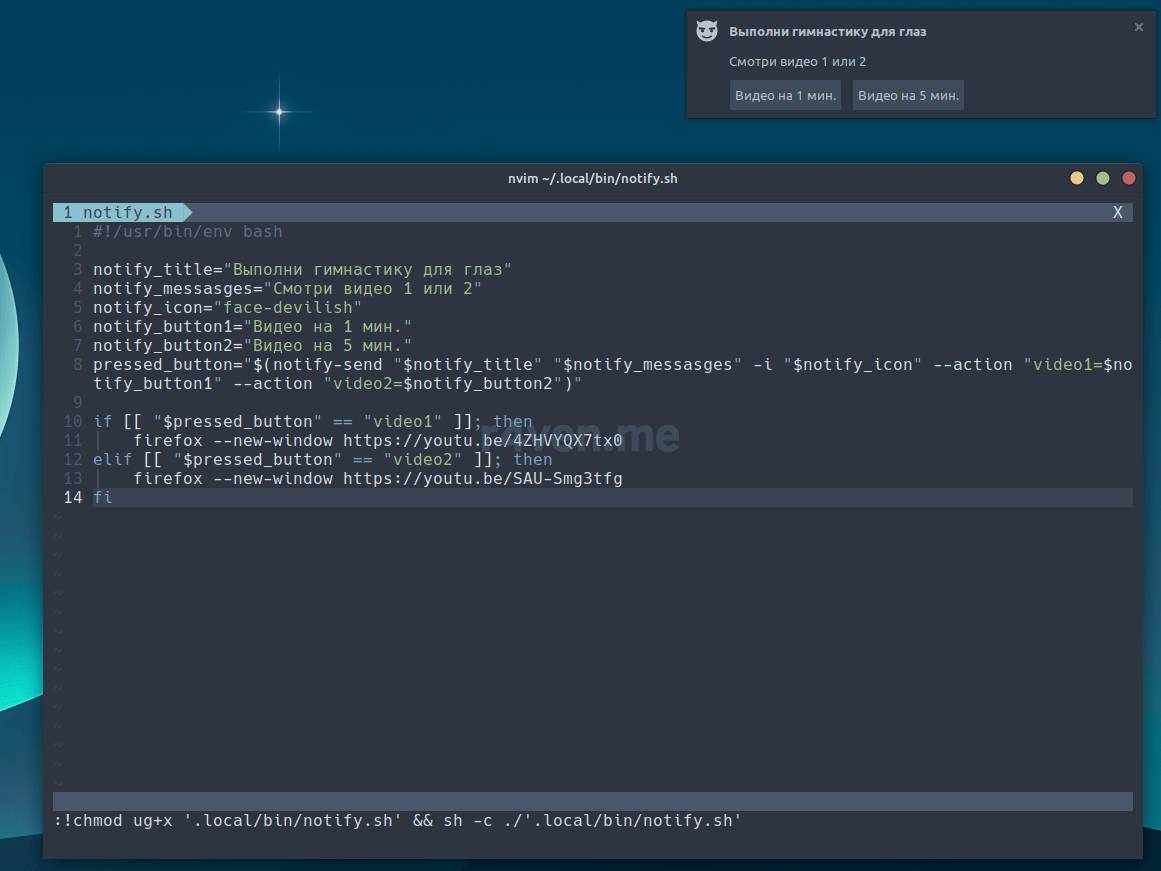
Checking that the script works
To exit, either click the notification or press Ctrl+c in the editor window. As you can see, the script runs)
If you haven’t configured Neovim, just save the file and exit. Then let’s make our script executable with this command:
chmod +x ~/.local/bin/notify.sh
chmodis the command for managing file permissions in Linux, and+xis the parameter that adds the execute flag to the specified file. In the near future there will be a separate post about , where we’ll talk specifically about permissions.
Let’s check the result of the command above:
ls -l ~/.local/bin/notify.sh
Viewing script info
Great. Now, to run the script, we simply specify the path to it in the terminal. With the execute flag (x) present, the shell will understand on its own that you’re running an executable file. Let’s enter this in the terminal:
~/.local/bin/notify.sh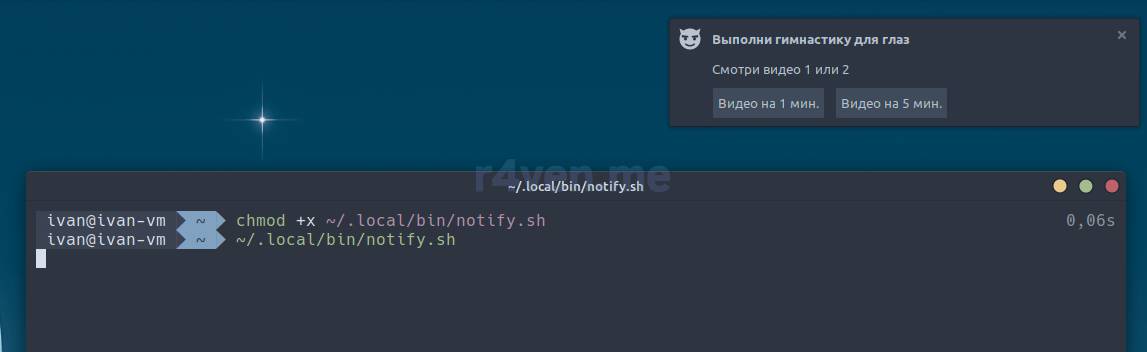
Running the script
Everything works. Now let’s create a job that will run this script every 3 hours.
Adding a job to the Cron scheduler
Linux-based systems come with a standard task scheduler out of the box — Cron. It’s quite simple to use, you just need to understand the schedule syntax.
To set a schedule in Cron for the current user, enter this command in the terminal:
crontab -e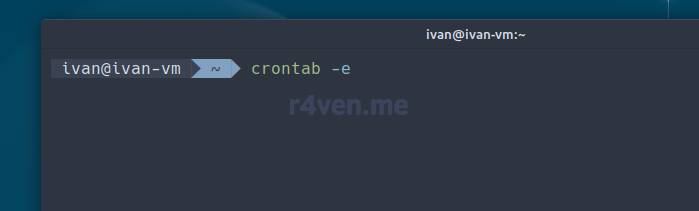
If you’re running this command for the first time, you’ll be prompted to choose a console text editor for editing cron jobs. Naturally, we choose Neovim)
In my case, I select option 2 and press Enter:
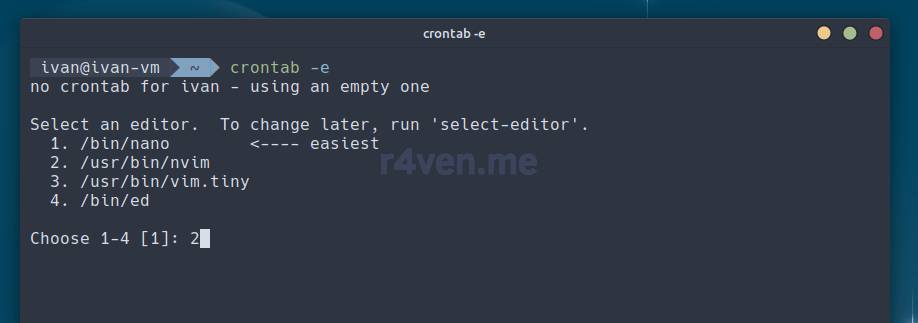
Choosing the editor
By default, the crontab file is already well commented: the syntax is explained and an example task is provided.
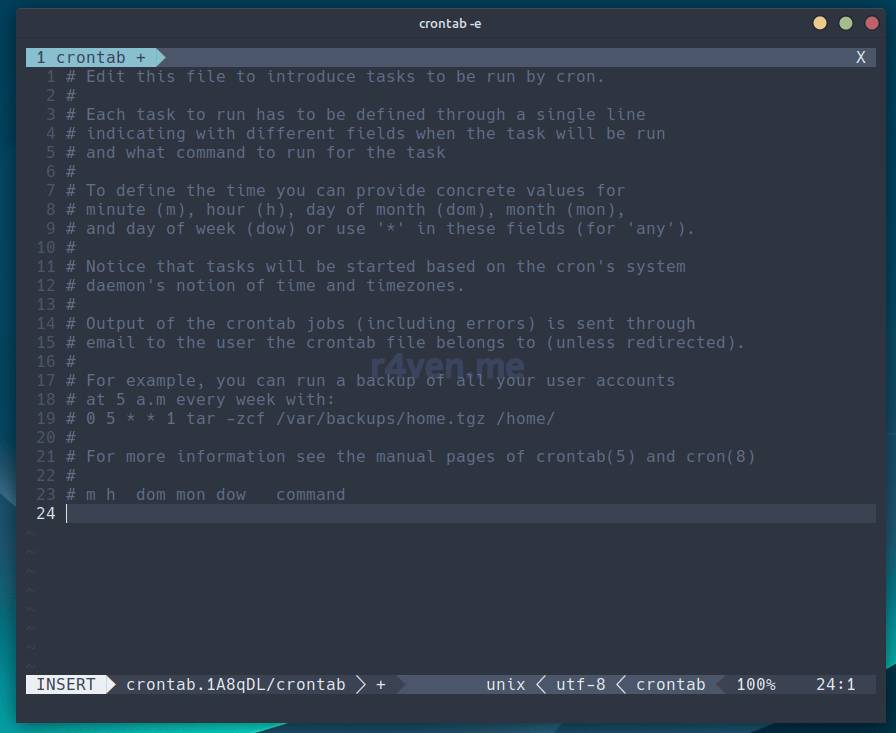
Cron scheduler window
The first 5 space-separated parameters are the schedule values:
- 1 — minutes;
- 2 — hours;
- 3 — day of the month;
- 4 — month;
- 5 — day of the week.
The default values are the characters * * * * *, which mean “every time”, i.e. every minute, every hour, and so on.
A more detailed description + the ability to test the syntax is available on this useful resource: https://crontab.guru (EN).
After opening crontab, add this line to the end of the file:
*/2 * * * * DISPLAY=":0.0" XDG_RUNTIME_DIR="/run/user/$(id -u)" ~/.local/bin/notify.sh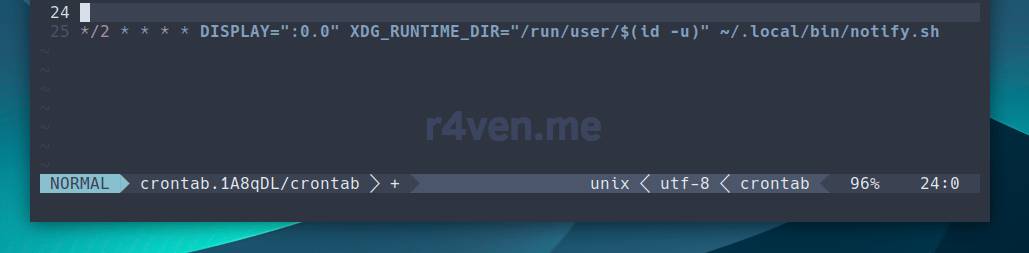
Contents of the line:
*/2— once every 2 minutes (we’ll set this for testing);*— every hour;*— every day;*— every month;*— every day of the week;DISPLAY=":0.0"— an environment variable specifying the display number of the graphical session;XDG_RUNTIME_DIR="/run/user/$(id -u)"— an environment variable defining the runtime directory;~/.local/bin/notify.sh— the path to the script; any other command could go here.
The DISPLAY and XDG_RUNTIME_DIR variables are necessary so that cron understands in which environment to display the notifications. If they aren’t specified, the script will still run, but in the background, and we won’t see any notifications.
Let’s save and close the editor.
Now, our configured notification should appear on the desktop every 2 minutes:
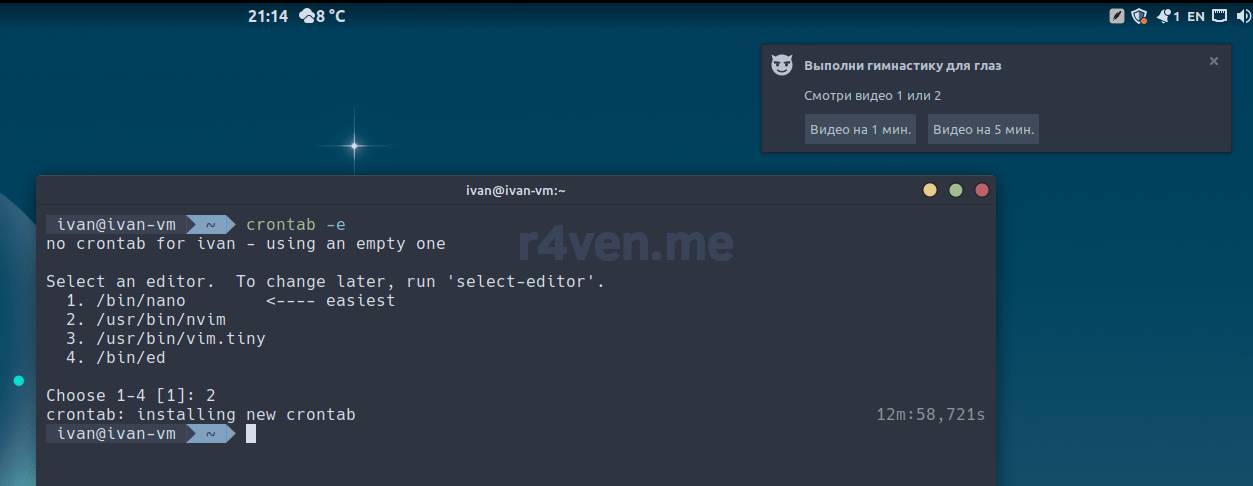
Checking cron
To view the list of jobs installed in crontab, run this command:
crontab -l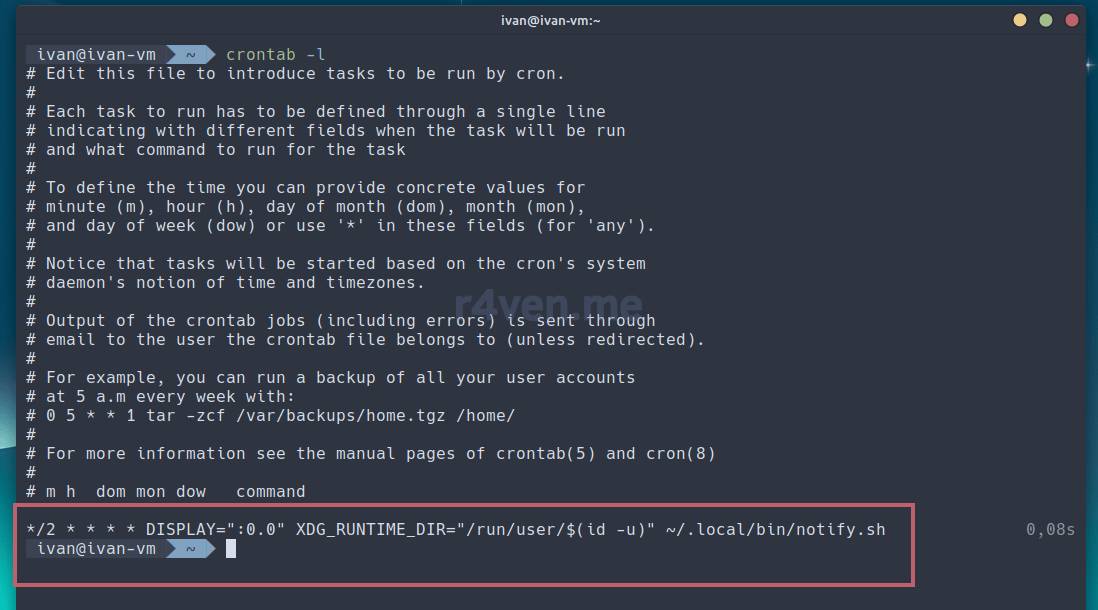
Scheduler job output
After making sure the scheduled job works, let’s edit its timing — set it to every 3 hours. To do this, adjust the task line (at minute 0 of every 3rd hour):
0 */3 * * * DISPLAY=":0.0" XDG_RUNTIME_DIR="/run/user/$(id -u)" ~/.local/bin/notify.sh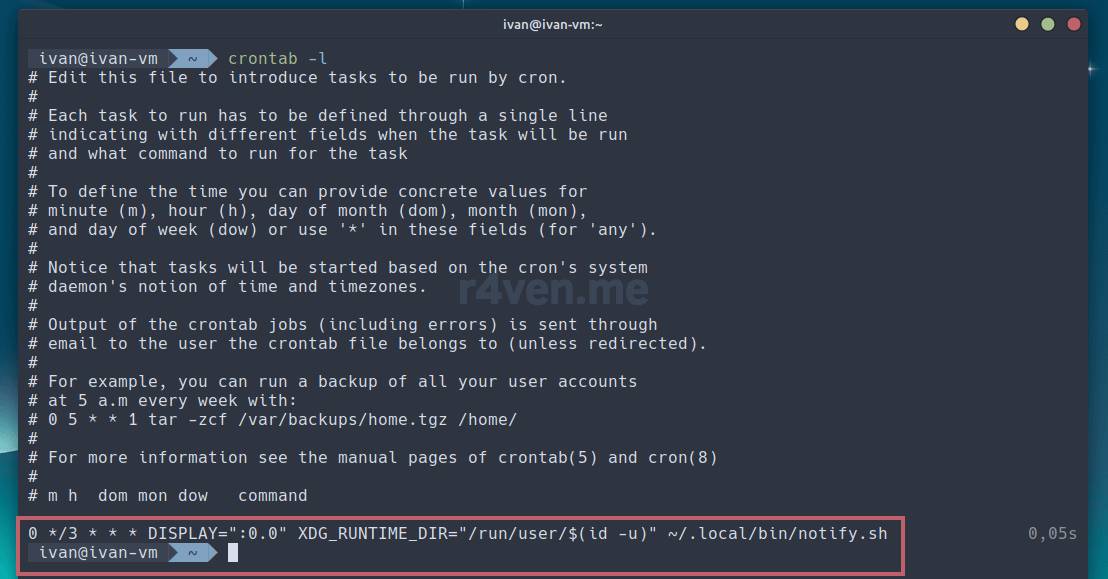
Conclusion
So we’ve learned a bit about Linux desktop notifications: we learned to send them manually from the terminal using the notify-send command, wrote a small Bash script for convenience, and added it to the system task scheduler — Cron.
In the future I’ll definitely write a separate article on detailed Cron scheduler configuration and its capabilities. For now, thanks for reading) Subscribe to our telegram channel @r4ven_me and join the chat @r4ven_me_chat if you have questions or just want to discuss interesting topics from the IT world.
Best of luck!
Useful sources
- Cron — Wikipedia
- Learn or check Cron syntax — crontab.guru (EN)
- Package: libnotify4 (0.8.2-1) — Ubuntu 23.10
- Package: libnotify-bin (0.8.2-1) — Ubuntu 23.10
👨💻And…
Don’t forget about our Telegram channel 📱 and chat
Or maybe you want to become a co-author? Then click here🔗
💬 All the best ✌️
That should be it. If not, check the logs 🙂

Comments