

In this note we will get acquainted with a popular open source configuration management system with the telling name — Ansible 🎻. We’ll perform the installation and configuration 🛠, put together an inventory 📋, learn how to run playbooks 🚀, talk about Ansible facts 🗂, find out what Ansible console 🖥 is, and write a playbook 📝 that fixes the sshd config and copies files to the server. It’s going to be informative 😉!
🖐️Hey!
Subscribe to our Telegram channel @r4ven_me📱, so you don’t miss new posts on the website 😉. If you have questions or just want to chat about the topic, feel free to join the Raven chat at @r4ven_me_chat🧐.
Preface
To get a slightly better understanding of what’s going on, I recommend reading my theoretical note 📝 about configuration management systems (Configuration Management, CM). It describes the term, what types exist, and briefly covers popular implementations of such systems and their differences.
Getting back to Ansible, it lets you automate server configuration by describing the desired state in a convenient yaml format. It’s also worth noting that Ansible operations have the property of idempotence 🙄. This means that if you run a playbook or task multiple times, the system’s state won’t change after the first successful run.
Before we dive deeper, let me list the main entities of this CM 📒:
- Control node — the management server on which Ansible is installed and from which commands and Playbooks are run via SSH;
- Managed nodes — managed servers on which Ansible performs tasks; they do not require Ansible to be installed on them;
- Inventory file — file(s) (usually
inventory.yml) containing a list of managed nodes and their groups for logical grouping. It specifies IP addresses, DNS names, ports, and custom variables; - Configuration file — the Ansible configuration file (by default
ansible.cfg), where settings such as the inventory file path, SSH parameters, and other options that let you tune Ansible’s behavior for specific needs are defined; - Variables — variables that can be used for flexible task and parameter configuration. Variables can be defined at various levels: in the inventory file, playbook, roles, commands, and can be gathered dynamically;
- Playbook — a script file in YAML format describing which tasks need to be performed on which nodes;
- Facts — information about a managed server in the form of system variables (e.g., OS type and version, IP address, package versions, etc.), automatically collected by Ansible. Often used to describe conditions for task execution;
- Task — a single job performed on a managed node. This is an atomic instruction (e.g., installing a package) described using an Ansible module;
- Module — a ready-made module from the Ansible library for performing a specific task, e.g., copying a file, managing services, installing packages, etc.;
- Handler — a task that only runs when a state changes (e.g., restarting a service), invoked from a task via the
notifyparameter; - Template — a template file (in Jinja2 format) that lets you, for example, create dynamic configuration files using variables and constructs typical of programming languages (filters, loops, conditional expressions, etc.) — you can get lost in this;
- Role — a structure of files and directories for conveniently organizing tasks, templates, and variable files for a Playbook. Essentially, it’s a playbook broken up into separate files/folders for greater convenience and clarity;
- Plugins — Ansible add-ons that extend its functionality.
Installing Ansible on Debian / Ubuntu / Linux mint
I’ll demonstrate the installation on a Debian 12 distribution 😎:
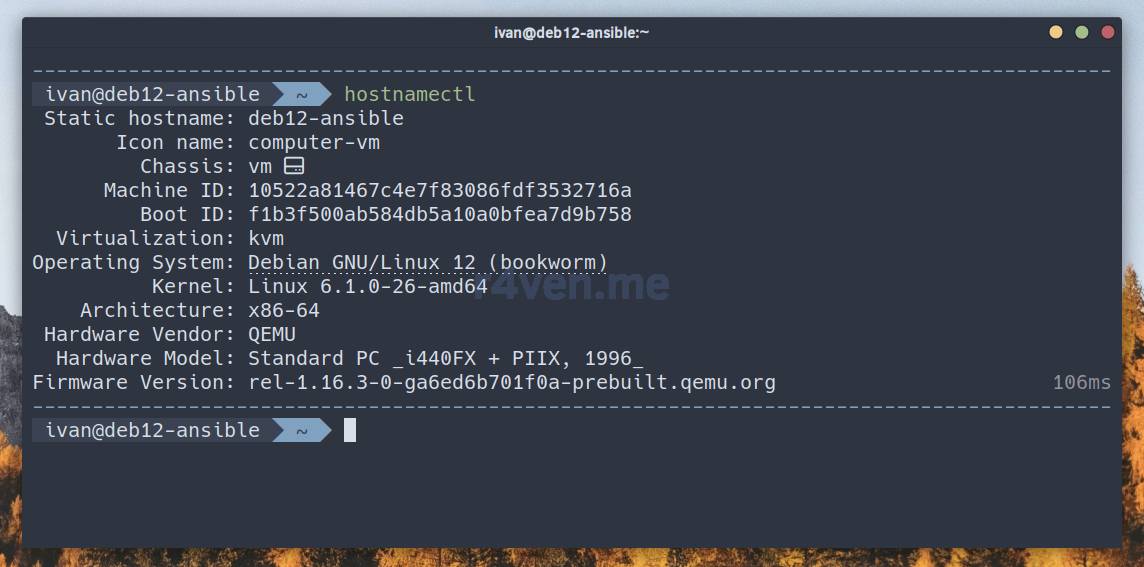
Since Ansible works on a push principle (i.e., all management happens from the administrative server), it needs to be installed on only one machine. On the managed servers, you’ll need Python 🐍 installed and SSH access.
For more details on using and configuring SSH on Linux, including working with keys, see a separate guide: SSH – Secure connection to remote hosts: an introduction.
All the required Ansible packages are in the standard repositories 🗄. So just open a terminal and enter the command:
sudo apt update && sudo apt install -y ansible sshpass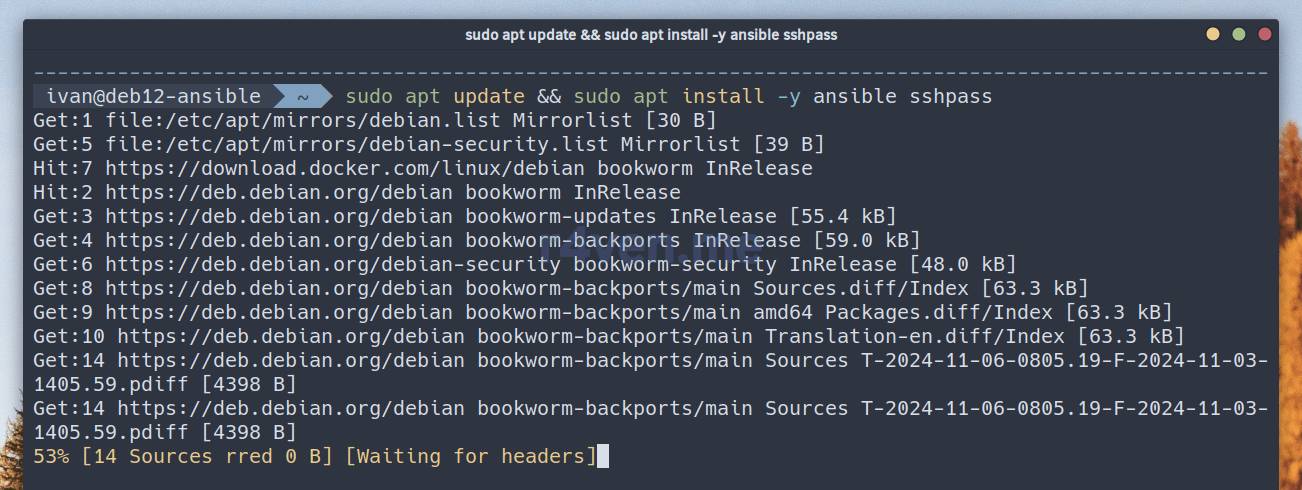
We are also installing the sshpass utility, which will be needed for passing a password during the corresponding SSH authentication, as well as obtaining privileges via sudo 💪.
There are a lot of dependencies, so the installation will take some time ⏳.
Configuring Ansible — the ansible.cfg file
Let’s move on to the initial configuration. To do this, we create the necessary directories and the configuration file. We open it with any text editor (I prefer vim/neovim) 🧑💻:
mkdir -p ~/ansible/{playbooks,roles,tmp}

nvim ~/ansible/ansible.cfg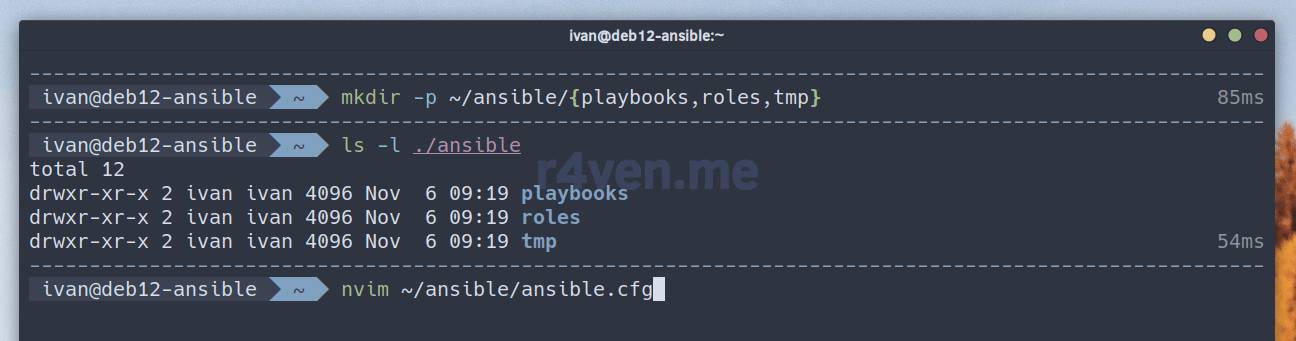
And fill it in:
[defaults]
home = ~/ansible/                    ; main Ansible directory
local_tmp = ~/ansible/tmp/           ; local temporary directory for task execution
inventory = ~/ansible/inventory.yml  ; path to the inventory file with the list of hosts
playbook_dir = ~/ansible/playbooks/  ; directory where playbooks are stored
roles_path = ~/ansible/roles/        ; directory where Ansible looks for roles
remote_user = ivan                   ; user under which Ansible connects to hosts
become_method = sudo                 ; privilege escalation method (sudo, su)
become_user = root                   ; user on whose behalf sudo commands are executed
gather_facts = True                  ; gather facts about the system before executing tasks
private_key_file = ~/ansible/id_ed25519  ; path to the private key for SSH connections
host_key_checking = False            ; disables SSH host key checking
fact_caching = jsonfile              ; caching facts using the json format
fact_caching_connection = ~/ansible/tmp/  ; path for storing cached facts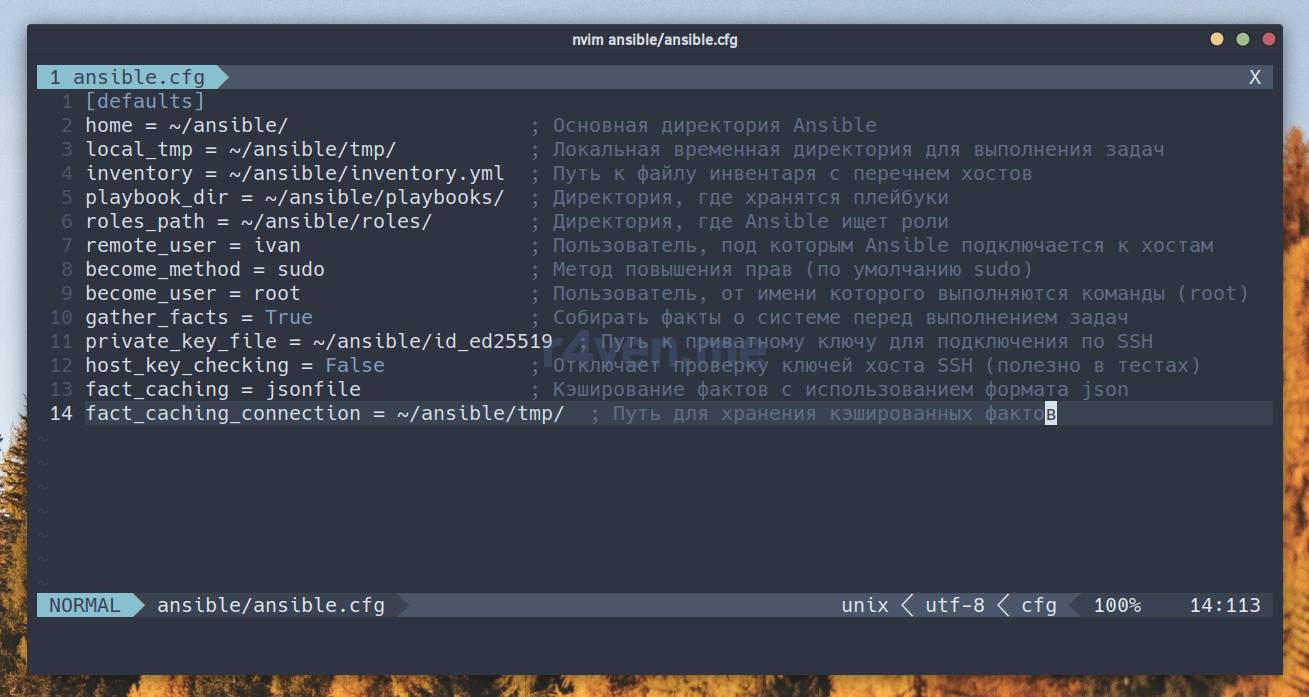
Liked my Neovim config?

You can easily create a similar one by following the article: Neovim — Installing and configuring a code editor with IDE features in just a few commands.
This configuration is enough to start using Ansible 👍. This file defines Ansible’s default behavior, which can be overridden elsewhere: inventory files, playbooks, variable files, commands, or other configs.
If you need to explore all the available configuration file parameters 🤓, you can generate it with this command:
ansible-config init --disabled > ~/ansible/ansible.cfg.exampleThe file is well commented 🧐.
For more details on the configuration process see the official site: Ansible Configuration Settings.
Also, for convenience, I recommend immediately adding an environment variable pointing to our default config file:
export ANSIBLE_CONFIG="$HOME/ansible/ansible.cfg"

# to create the variable on login
echo 'export ANSIBLE_CONFIG="$HOME/ansible/ansible.cfg"' >> ~/.profile
Replace
~/.profilewith your shell’s environment loading file. In my case I use the interactive ZSH shell.
In that case you’ll be able to use Ansible commands from any directory without explicitly specifying the path to the settings file 😌.
See the full list of available environment variables also in the official docs: Environment Variables.
Inventory — the inventory.yml file
Let’s move on to taking inventory of the infrastructure we’ll be managing. To do this, we create the inventory file:
nvim ~/ansible/inventory.yml
And add a list of our servers 📋 that we’ll be managing. In my example there are 5 Linux servers (3 — Debian, 2 — Ubuntu):
## HOSTS
all:
  hosts:
    debian12-vpn:
      ansible_host: 192.168.122.93
      ansible_port: 22
      ansible_user: ivan
      ansible_ssh_private_key_file: ~/.ssh/id_ed25519
      project: vpn
    debian12-dns:
      ansible_host: 192.168.122.201
      ansible_port: 22
      ansible_user: ivan
      ansible_ssh_private_key_file: ~/.ssh/id_ed25519
      project: vpn
    debian12-monitoring:
      ansible_host: 192.168.122.30
      ansible_port: 22
      ansible_user: ivan
      ansible_ssh_private_key_file: ~/.ssh/id_ed25519
      project: monitor
    ubuntu22-storage:
      ansible_host: 192.168.122.5
      ansible_port: 22
      ansible_user: ivan
      ansible_ssh_private_key_file: ~/.ssh/id_ed25519
      # ansible_password: "Pa$$w0rD"
      project: storage
    ubuntu22-backup:
      ansible_host: 192.168.122.249
      ansible_port: 22
      ansible_user: ivan
      ansible_ssh_private_key_file: ~/.ssh/id_ed25519
      # ansible_become_password: "Pa$$w0rD"
      project: storage

## GROUPS
debian:
  hosts:
    debian12-vpn:
    debian12-dns:
    debian12-monitoring:
ubuntu:
  hosts:
    ubuntu22-storage:
ubuntu22-backup:Don’t forget to replace the parameters with your own 😉
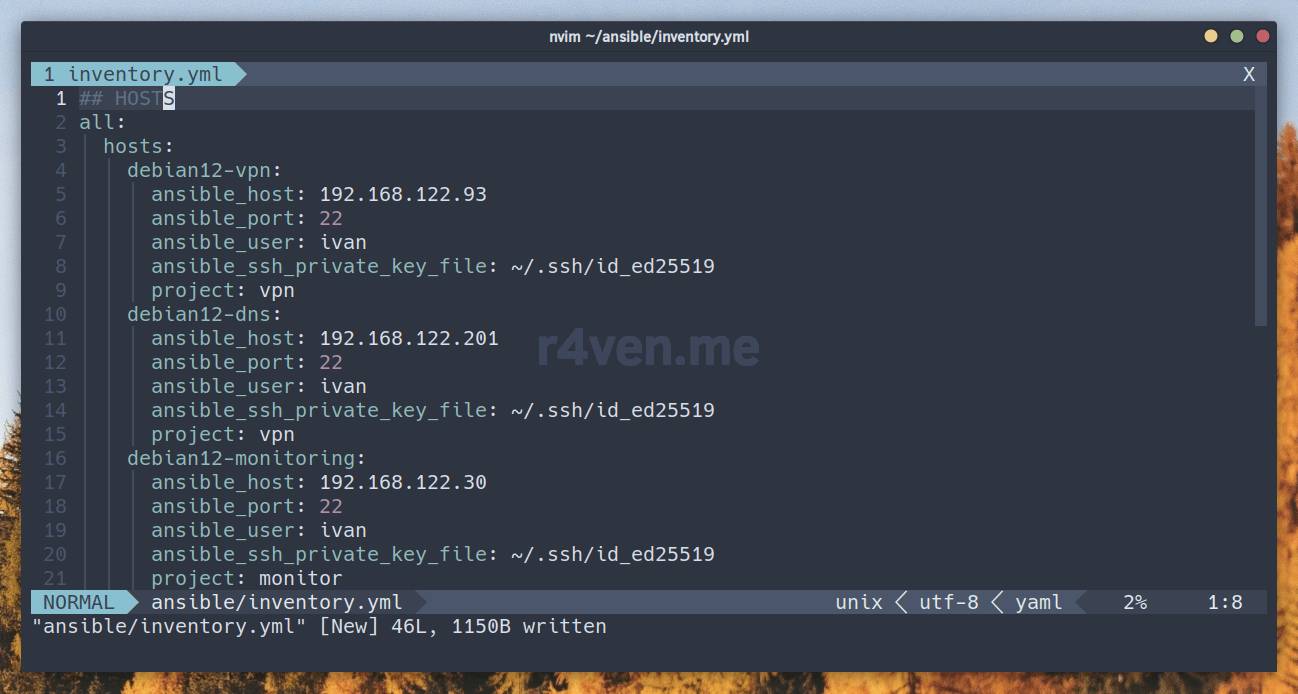
We save, we close.
Keep in mind that the YAML format is indentation-sensitive. This means indentation is part of the syntax, and even a single wrong space will cause an error.
Let me briefly describe the content using the debian12-vpn server as an example:
debian12-vpn— an arbitrary host name in the inventory file;ansible_host: 192.168.122.93— the host’s address (IP or DNS);ansible_port: 22— the SSH connection port;ansible_user: ivan— the SSH user used to make the connection;ansible_ssh_private_key_file: ~/.ssh/id_ed25519— path to the private SSH key (overrides the value fromansible.cfg);- Undesirable alternative:
ansible_password— the SSH connection password;
- Undesirable alternative:
project: vpn— a custom variable for this host.
Also note that after the list of hosts comes the list of groups 🖥🖥:
debianubuntu
which include hosts split by OS (in my case). Groups are also formed arbitrarily, the main thing is to follow the syntax.
See the full list of available connection parameters for the inventory file here: Connecting to hosts: behavioral inventory parameters.
Our inventory file is ready, let’s look at its structure with this command:
ansible-inventory --graph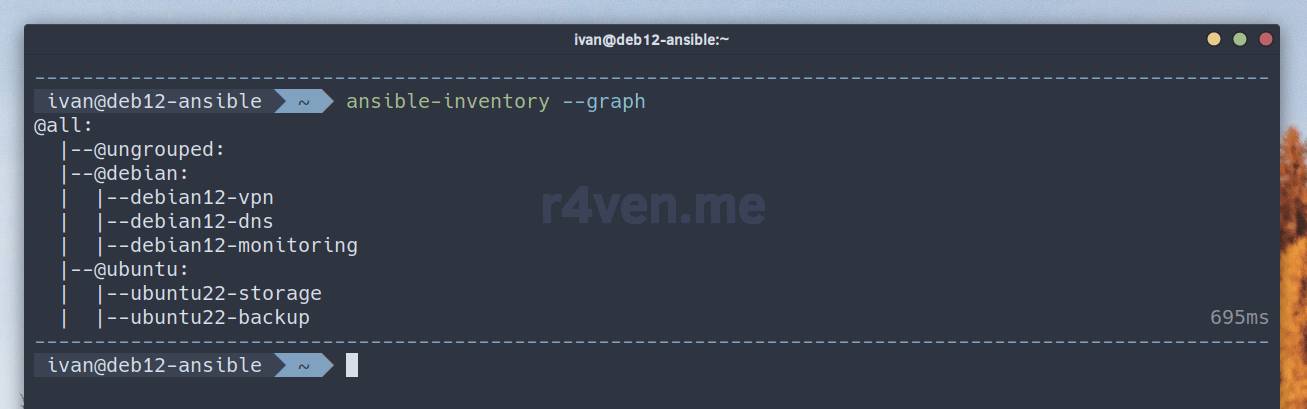
This visualization is especially useful if you have a large infrastructure of hundreds of servers split into groups 📊.
Writing our first playbook: checking server availability with the ping module
In the context of Ansible, the ping module does not perform a ping of the server in the classic sense 🤷♂️. Its job is to connect to the server via SSH, perform some checks (e.g., the presence of a Python interpreter), and return a success/error message 👀.
Let’s create the playbook file in the directory we specified in the configuration file:
nvim ~/ansible/playbooks/ping.yml
In its simplest form, a playbook looks like this:
---

- name: Check connection

  hosts: all
  gather_facts: false
  tasks:
    - name: Ping
      ping: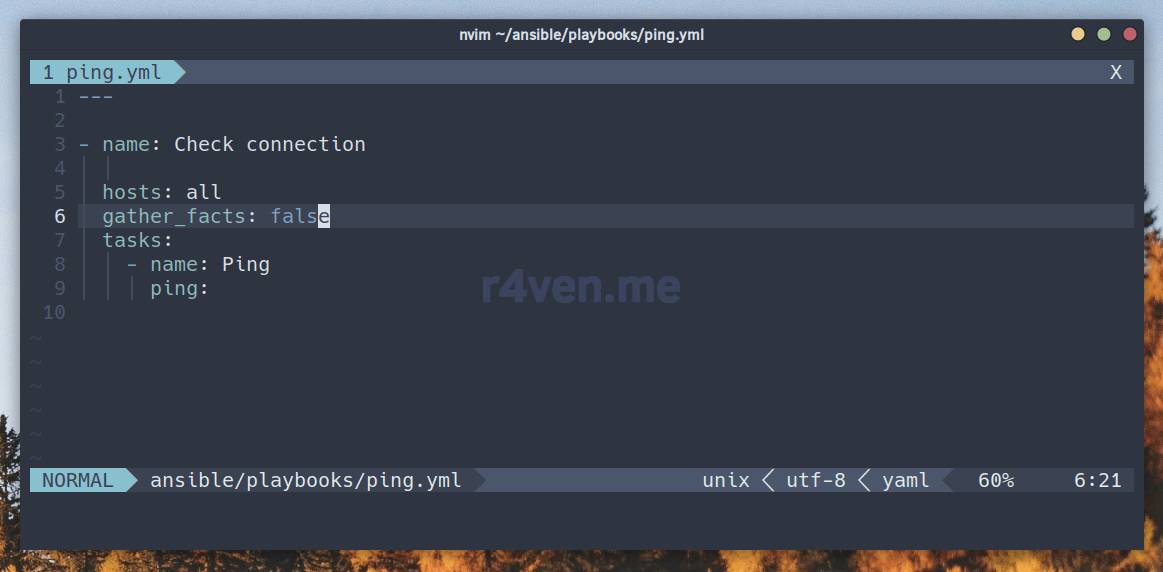
Where:
hosts: all— the list of hosts on which the playbook needs to be run (in this example, all of them);gather_facts: false— disables fact gathering (more on this below);tasks— a block with the list of tasks performed on the managed hosts, in this case a single task:ping.
We save the file and run the playbook:
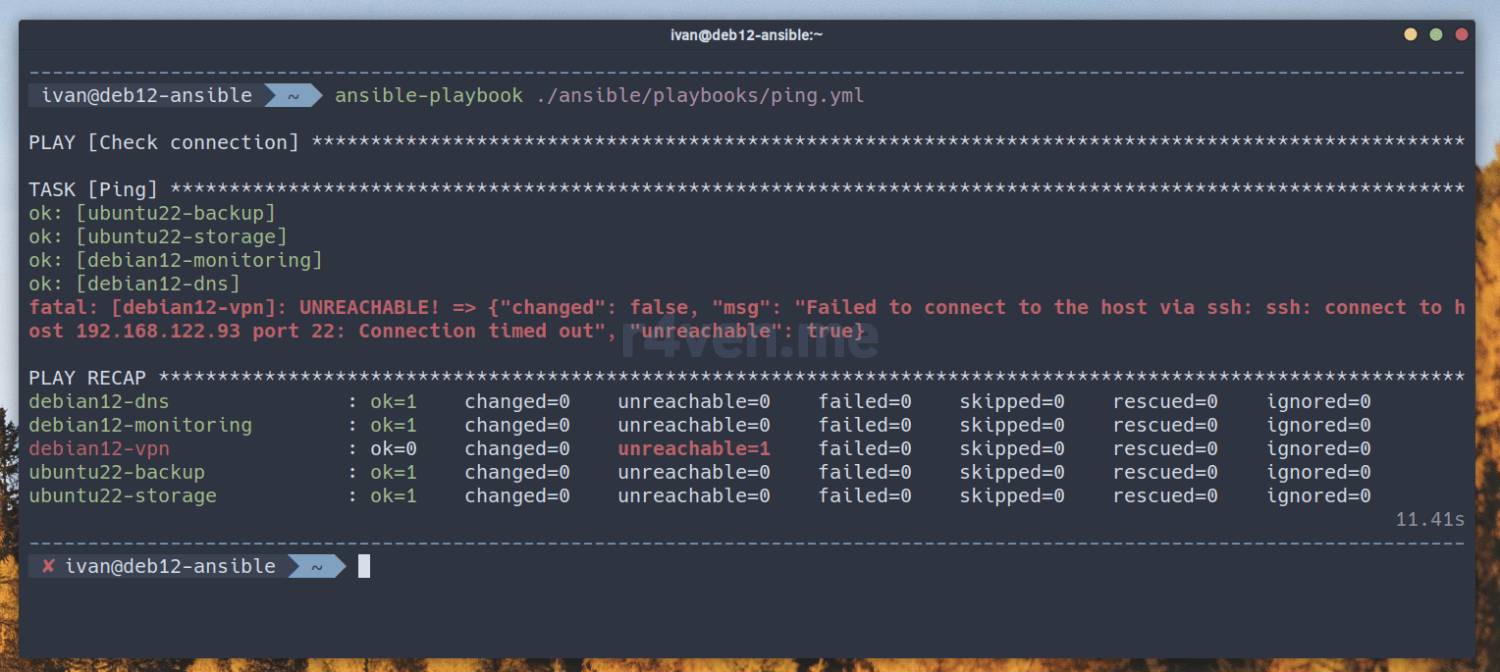
ansible-playbook ./ansible/playbooks/ping.yml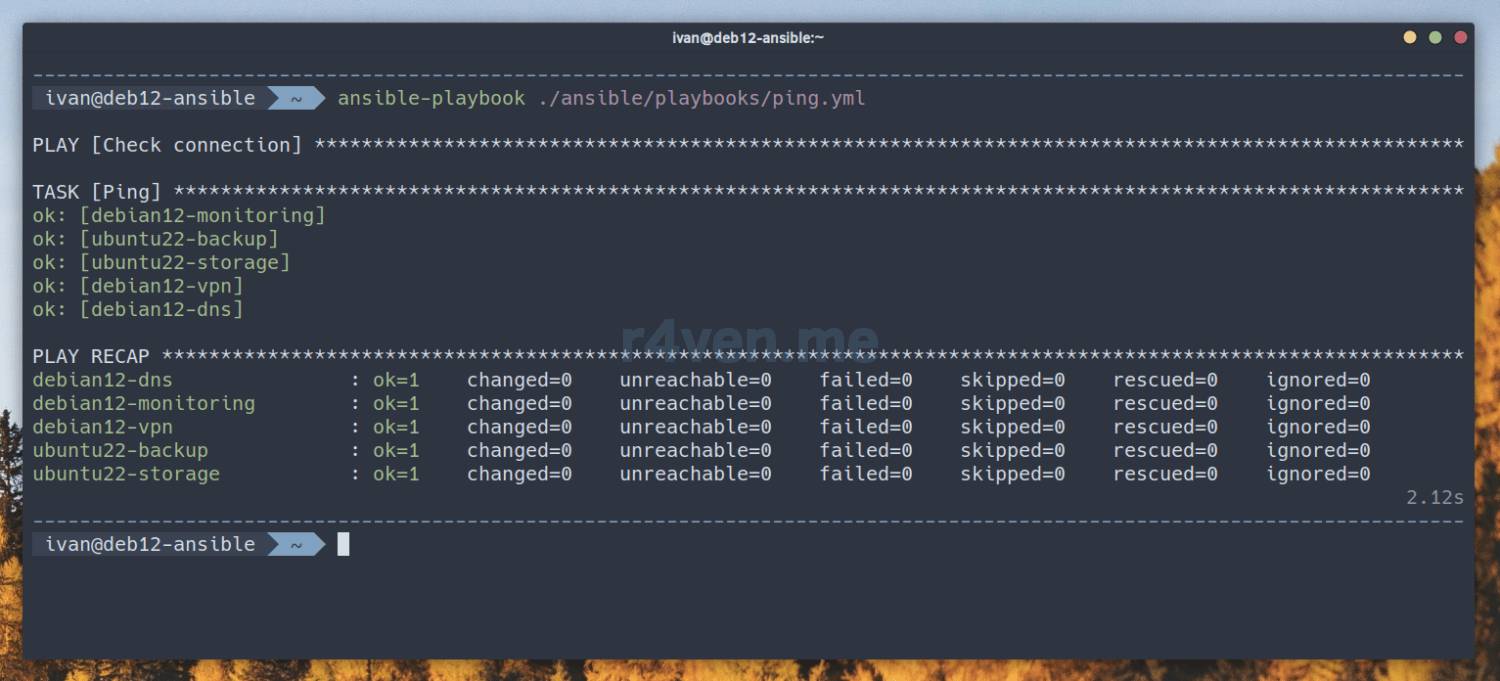
When using the
ansible-playbookcommand, the path to the playbooks needs to be specified explicitly. To avoid doing this every time, for convenience you can create a short function and call it in the console (see further in the article).
In my example, access to the servers is configured via SSH keys. Therefore, the availability check completed successfully 😎.

If you use a password (which is not recommended) 😳 you can set it in the ansible.cfg file (parameter ansible_password) or pass it interactively using the --ask-pass key (that’s what we installed the sshpass package for):
ansible-playbook ./ansible/playbooks/ping.yml --ask-passIn case of any errors, Ansible will output scary-looking red messages ⛔️. For example, if a host is unreachable via SSH, it looks like this:
To run the playbook on a specified group of servers, you can explicitly specify them in the command via the -l (limit) parameter:
ansible-playbook ./ansible/playbooks/ping.yml -l ubuntu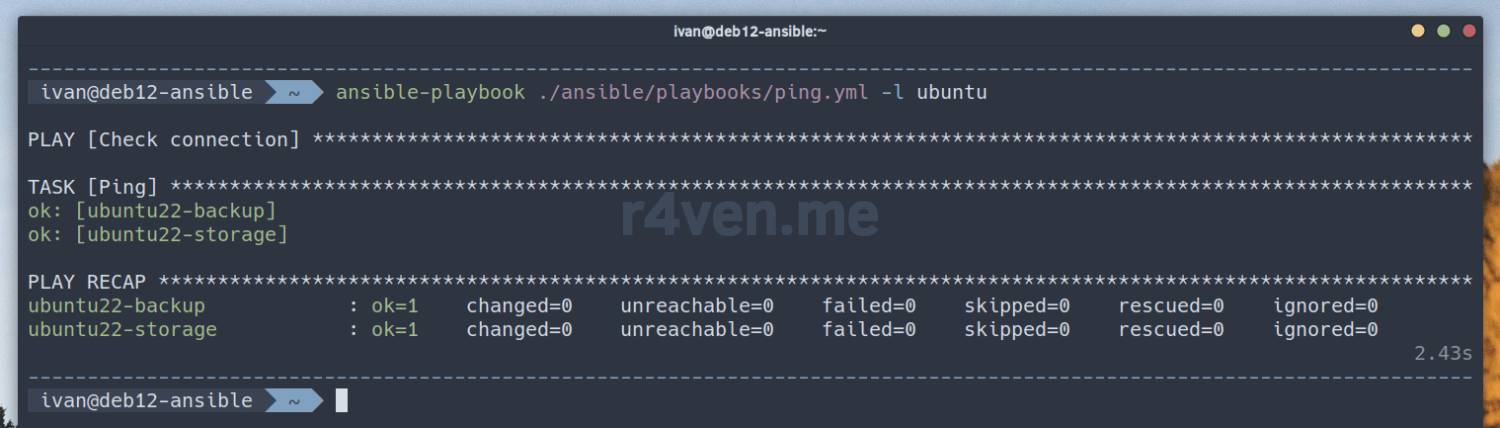

To run the playbook on behalf of a privileged user 💪, add the -b (become) key. In my example, the ping module will run as root:
ansible-playbook ./ansible/playbooks/ping.yml -b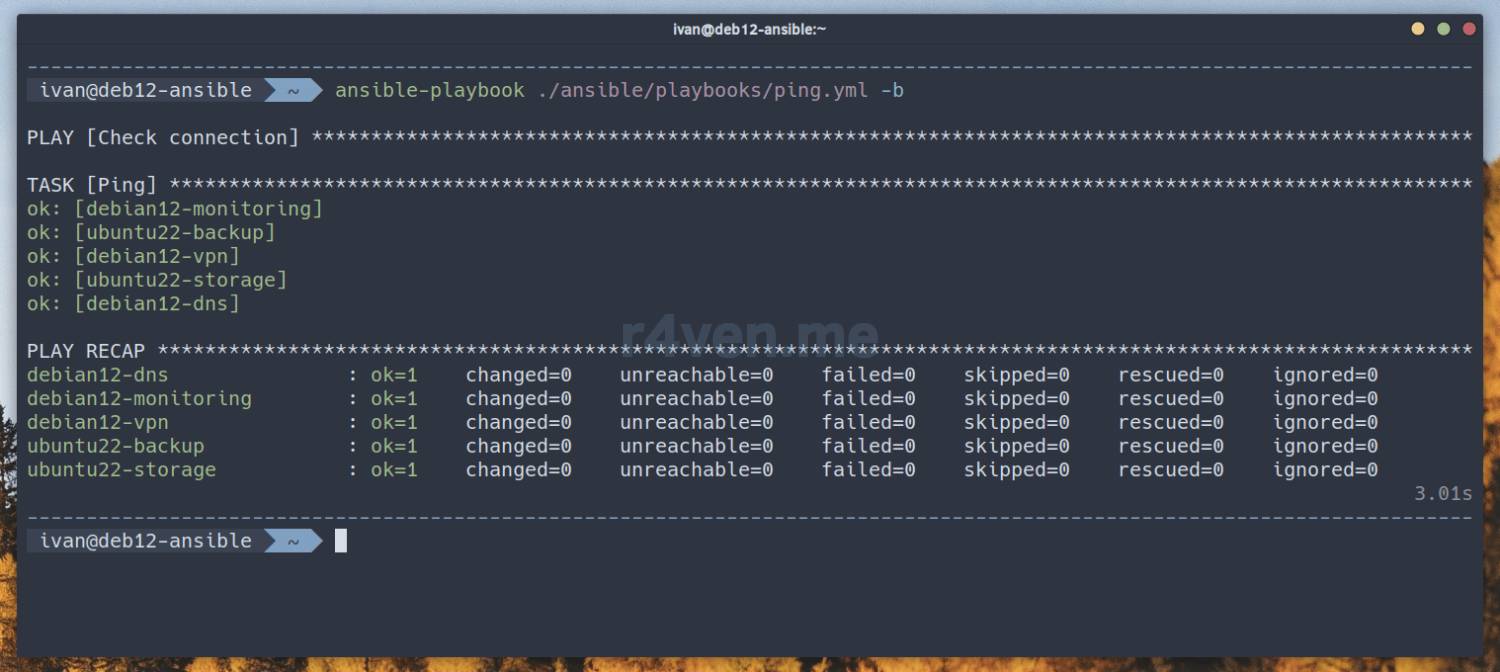
In my server configuration, passwordless access to root via sudo is configured (since this is my test bench 🛠), so everything worked correctly. But if you have password-based access, you can pass it in the ansible.cfg file (parameter ansible_become_password, not recommended) or enter it interactively using the --ask-become-pass key:
ansible-playbook ./ansible/playbooks/ping.yml -b --ask-become-passWell, for securely automating password transfer, encryption via ansible-vault is used, but that’s a topic for a separate article 😉.

Just in case, here’s the documentation for the ping module.
Ansible facts — the setup and debug modules
As already mentioned, Ansible facts are information about a managed server in the form of system variables, such as OS type and version, IP address, package versions, etc., automatically collected by Ansible during playbook and command execution (if the gather_facts flag is enabled) 🤯.
Let’s now gather these facts to see what they look like 👨🏭. For this, the standard setup module is used. Let’s run:
ansible all -m setup
all— here logically represents all the hosts from the inventory file. You can also specify any single host, a comma-separated list of hosts, or a group here.
Depending on the number of hosts, gathering facts may take some time. In the command’s output you’ll see all the collected facts in json format:
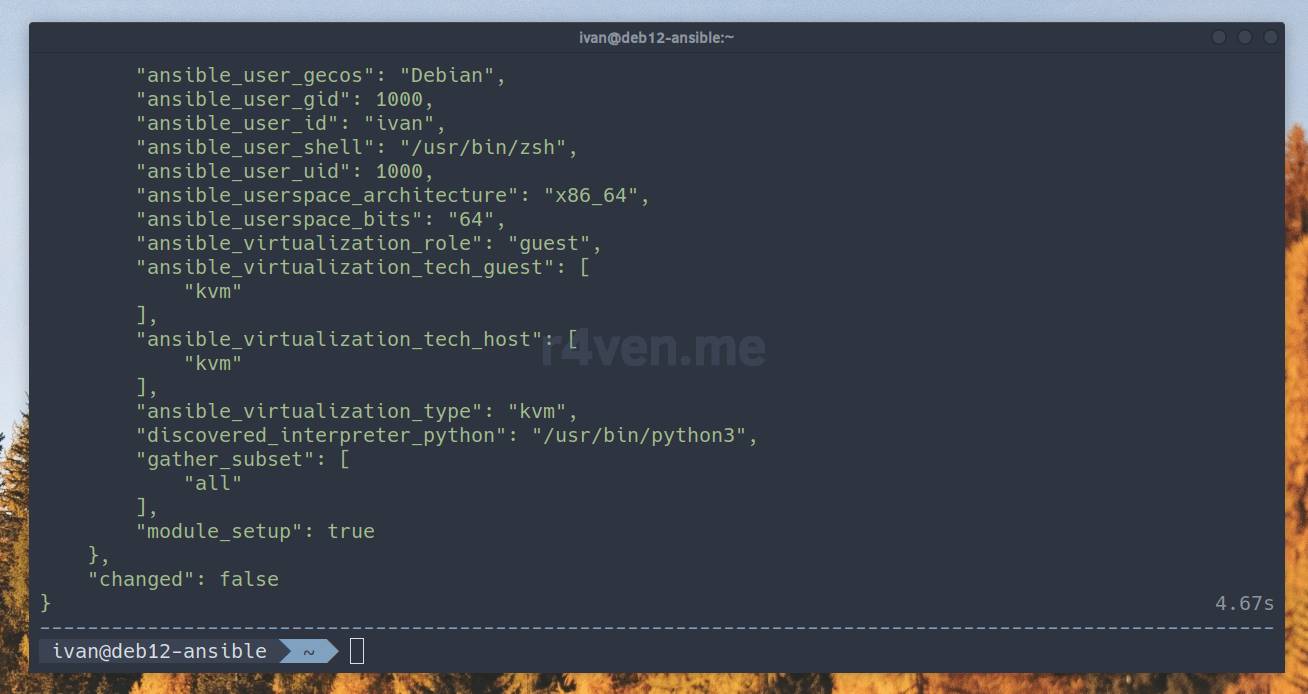
Facts can be filtered, for example like this:
ansible debian12-vpn -m setup -a 'filter=os_family,distribution_version'Earlier, in the ansible.cfg file, we set up fact caching using fact_caching ☝️.
This means the collected facts will be saved as json files in the temporary directory ~/ansible/tmp, which we also specified in the config file:
ls -l ./ansible/tmp/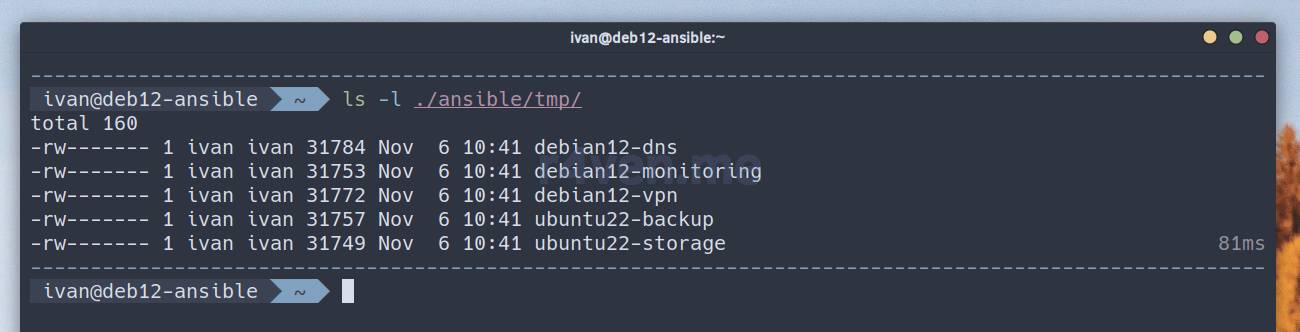
You often need to get the values of only specific facts or variables. This can be done using the debug module 🔨 in playbooks or directly in the terminal.
Here’s an example of getting information about the OS, the size of the /dev/sda1 disk, the project variable, and the output of a shell command on the debian12-vpn server in a playbook:
nvim ./ansible/playbooks/debug.yml---
- name: Debug
hosts: debian12-vpn
gather_facts: true
become: true
tasks:
- name: Debug 1
debug:
msg: "Example to use var: {{ ansible_facts.os_family }}"
- name: Debug 2
debug:
var: ansible_facts.distribution_version
- name: Debug 3
debug:
var: project
- name: Shell 1
shell:
cmd: whoami
register: user_name
- name: Debug 4
debug:
var: user_name.stdoutAnd we run it:
ansible-playbook ./ansible/playbooks/debug.yml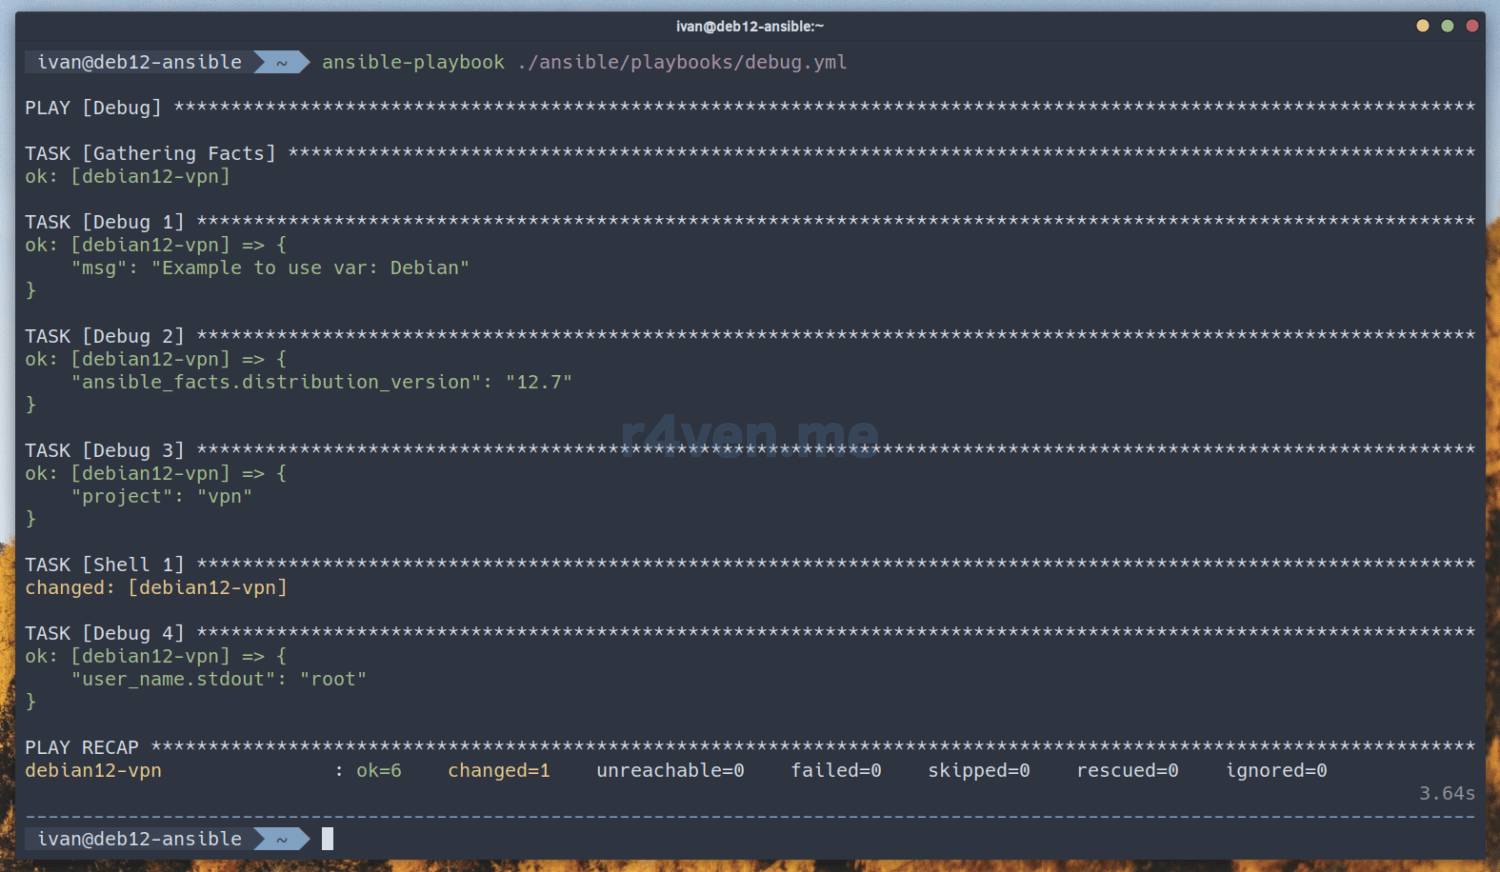
Viewing facts using commands in the terminal:
In this case the facts will be taken from the cache.
ansible debian12-vpn -m debug -a 'var=ansible_facts.os_family,ansible_facts.distribution_version'

ansible debian12-vpn -m debug -a 'var=ansible_facts.devices.keys()'

ansible debian12-vpn -m debug -a 'var=ansible_facts.devices.sda.partitions.sda1.size'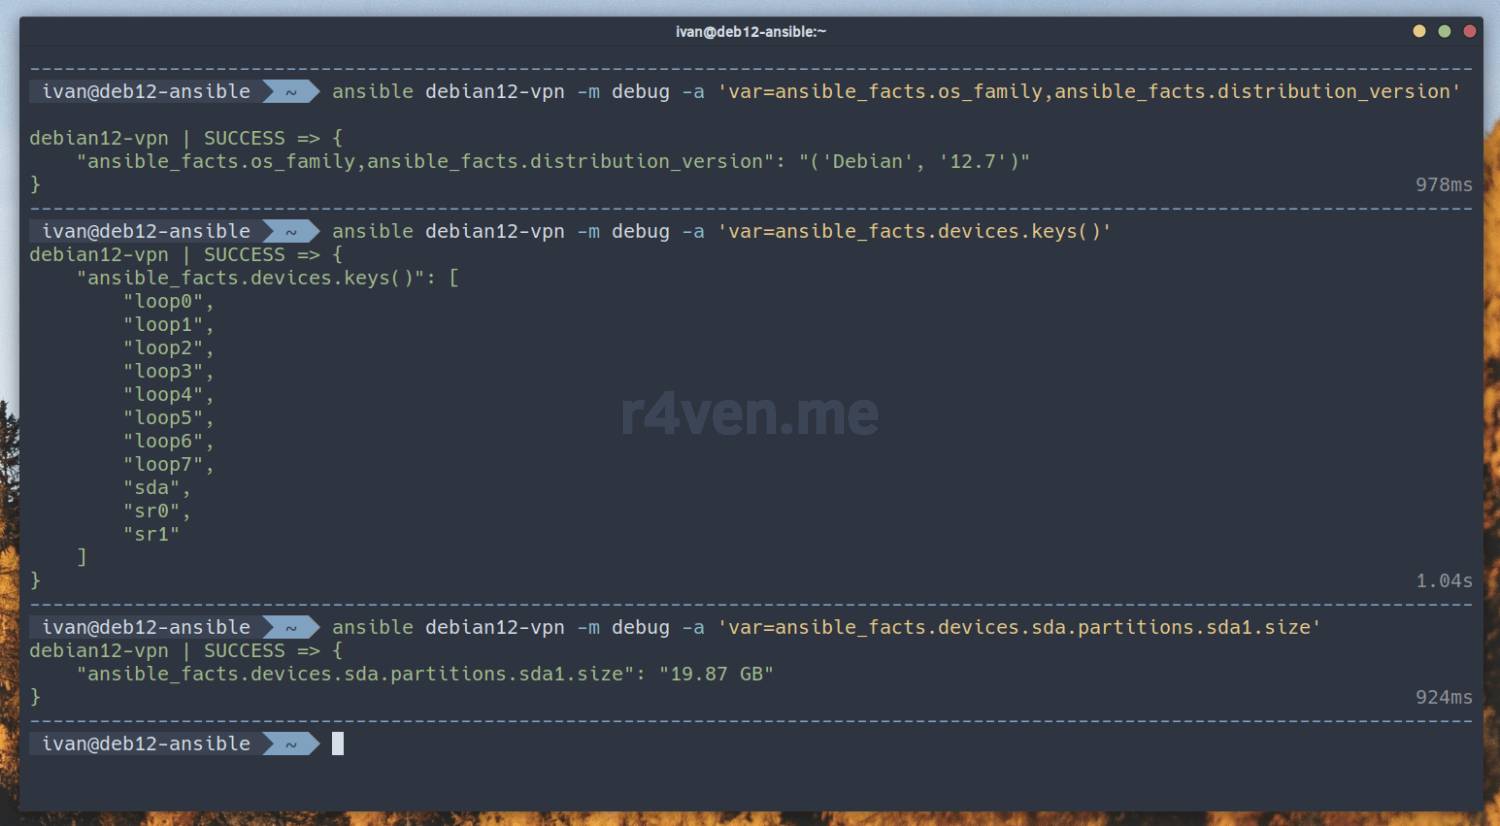
You may have noticed that facts are accessed using dot syntax, as in Python (Ansible is written in this language 👌).
For detailed info on fact gathering also see the official site: Discovering variables: facts and magic variables. Info on the debug module here.
Executing shell commands in the terminal on multiple servers simultaneously
Using Ansible and the standard shell module, you can execute remote commands on multiple servers at once 🧑💻💻💻💻. This is very handy for debugging or performing simple operations.
The remote command is passed in quotes using the -a key. For example, to output the list of network interfaces and their IP addresses:
ansible all -m shell -a 'ip -br a'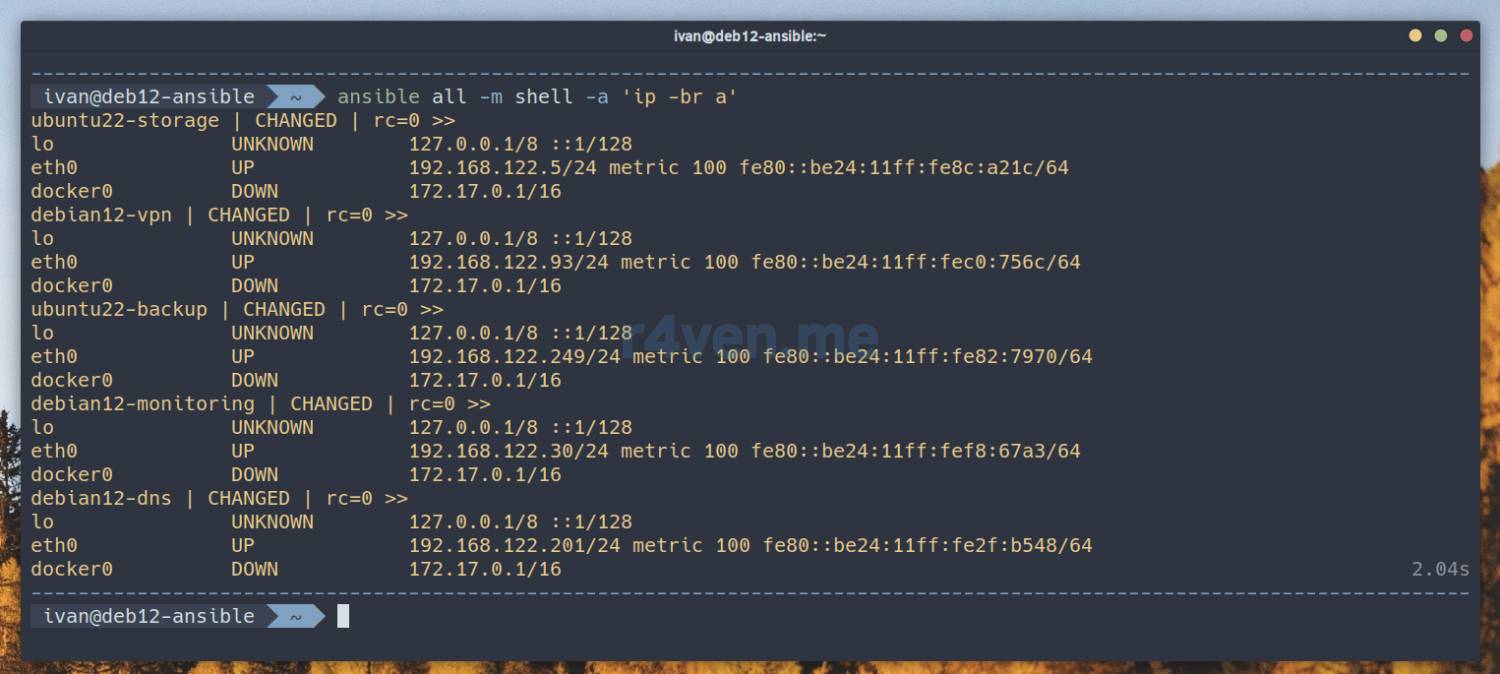
Or run a command from our Linux quiz 🧐, which outputs the server’s uptime in Unix time format:
ansible debian12-vpn,ubuntu22-storage -m shell -a 'date -d "$(uptime -s)" +%s'
To run commands on behalf of a privileged user, -b is also used:
ansible all -m shell -a 'whoami' -b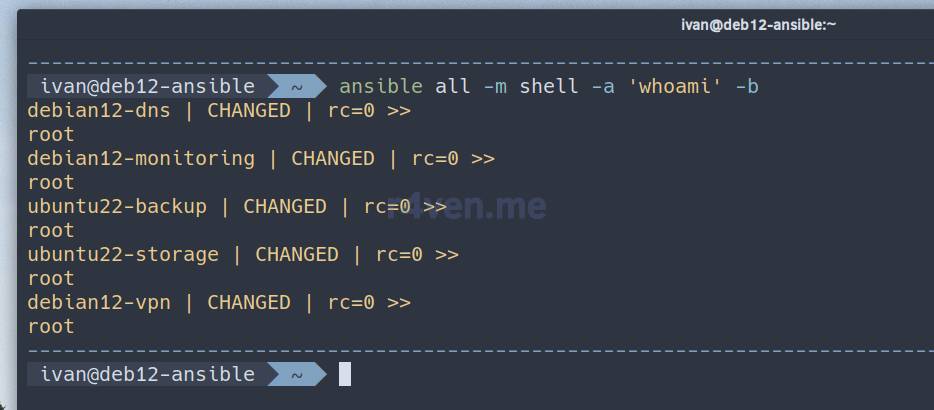
What is Ansible console
Ansible comes bundled with such a useful tool as ansible-console 😏. This is an interactive shell for executing commands on multiple servers. It’s similar to the shell module commands we ran earlier, but the way of interacting is a bit different:
ansible-console

whoami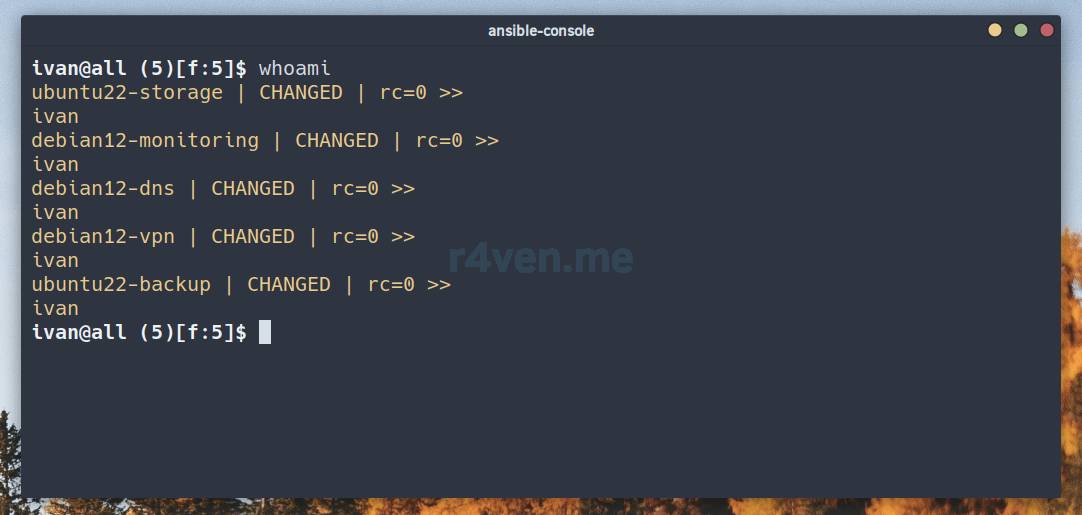
To exit, type
exitor pressCtrl+d.
Example of using the ping module on the debian group:
ansible-console debian

ping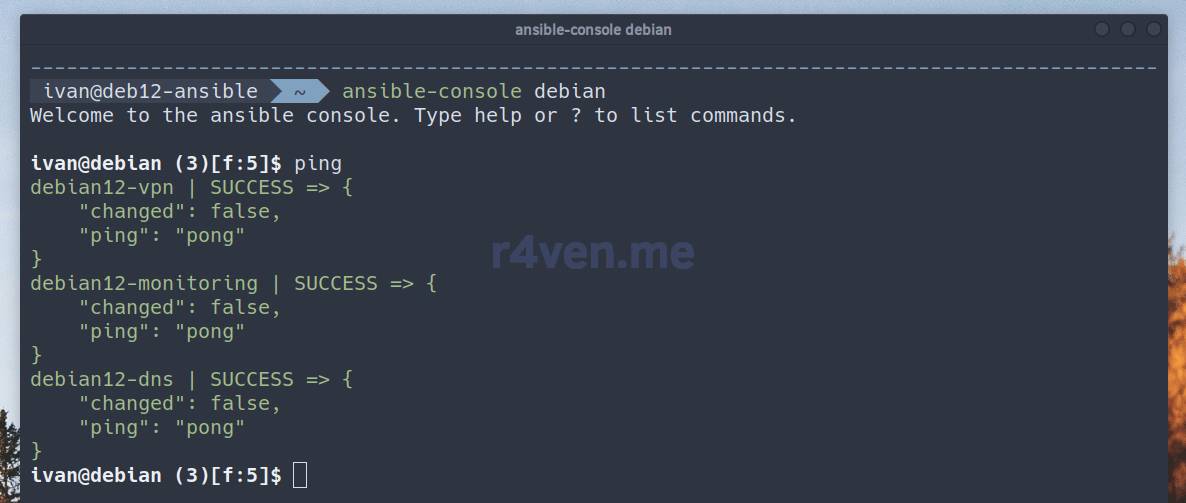
Viewing Ansible facts:
setup filter=ansible_hostname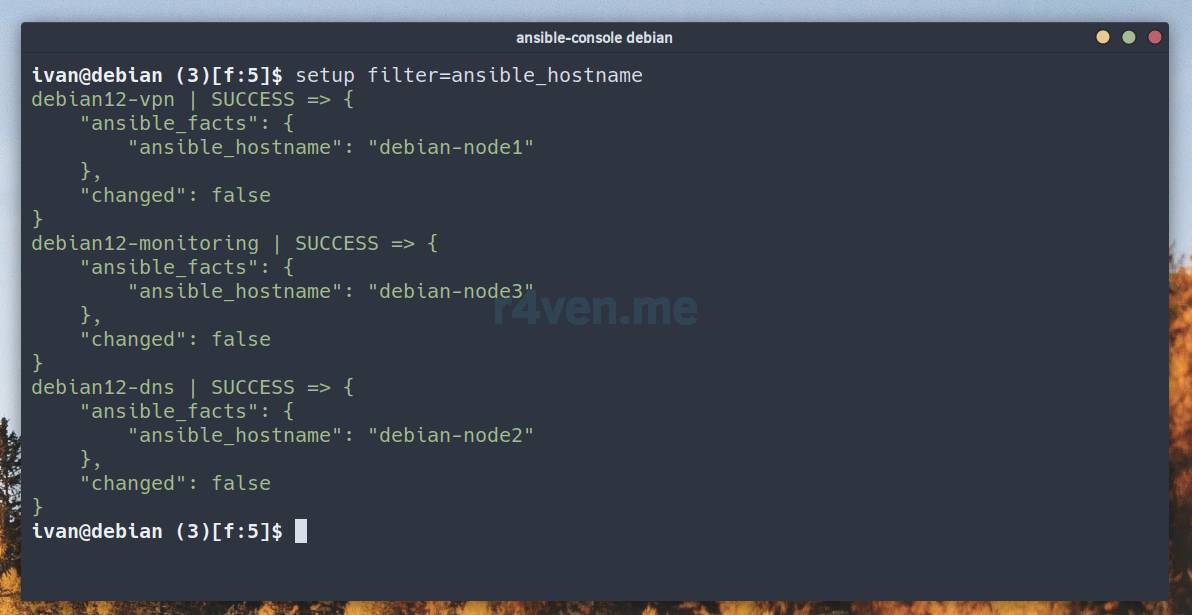
To execute privileged commands, add the -b key (but be careful!):
ansible-console debian -b

whoami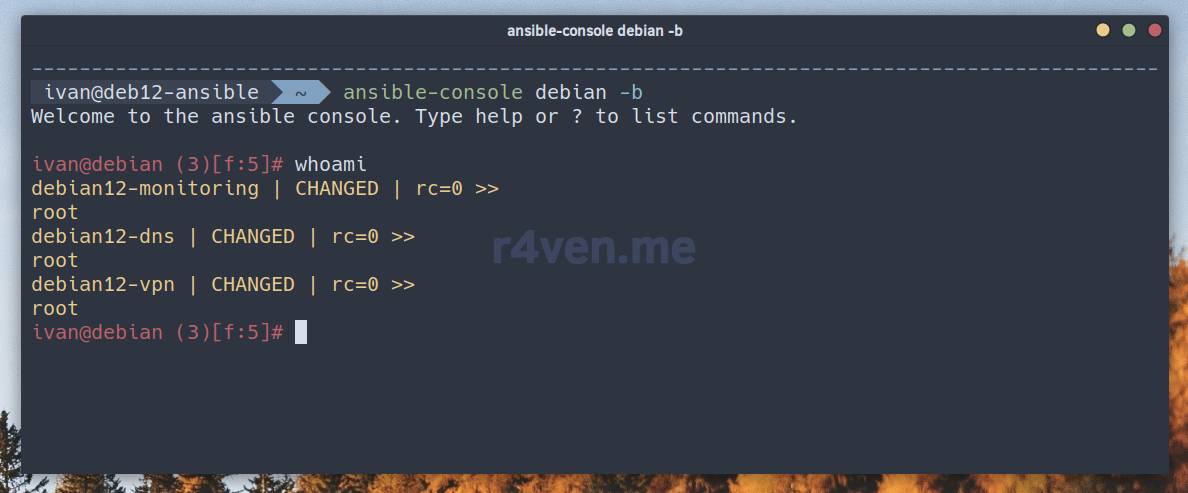
When executing remote commands, ansible-console uses the command module by default ❗️. It calls commands directly, so some shell mechanics won’t work here. To use shell, specify it explicitly:
shell echo $HOME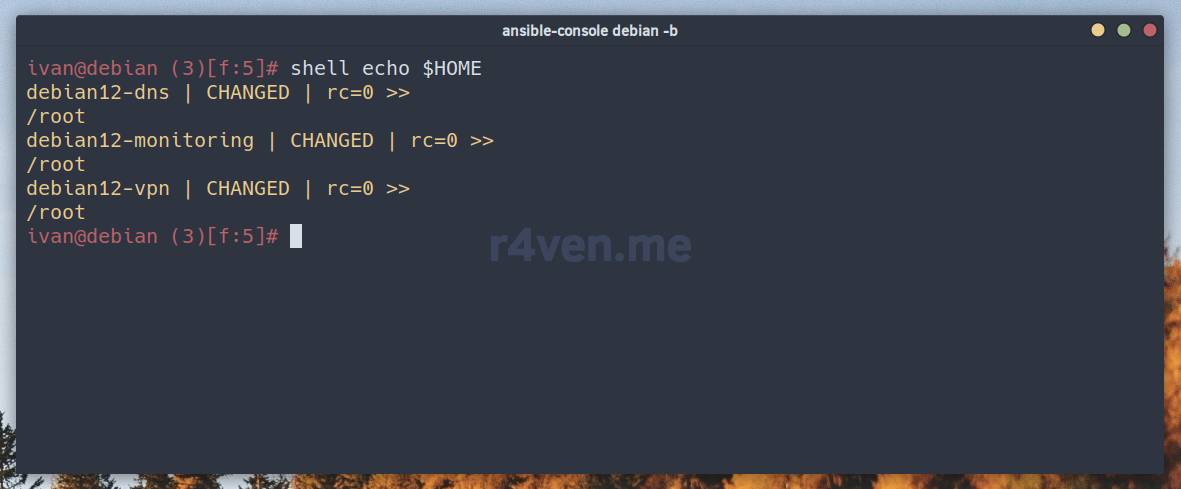
Ansible documentation right in the terminal
Ansible has very good documentation (in English 🙄, though) and it’s available even from the console using the ansible-doc utility. For example, to see the description and usage examples of the systemd module, run:
ansible-doc systemd
You’ll end up in less viewing mode. Usually examples of module usage in playbooks are found at the bottom of the documentation:
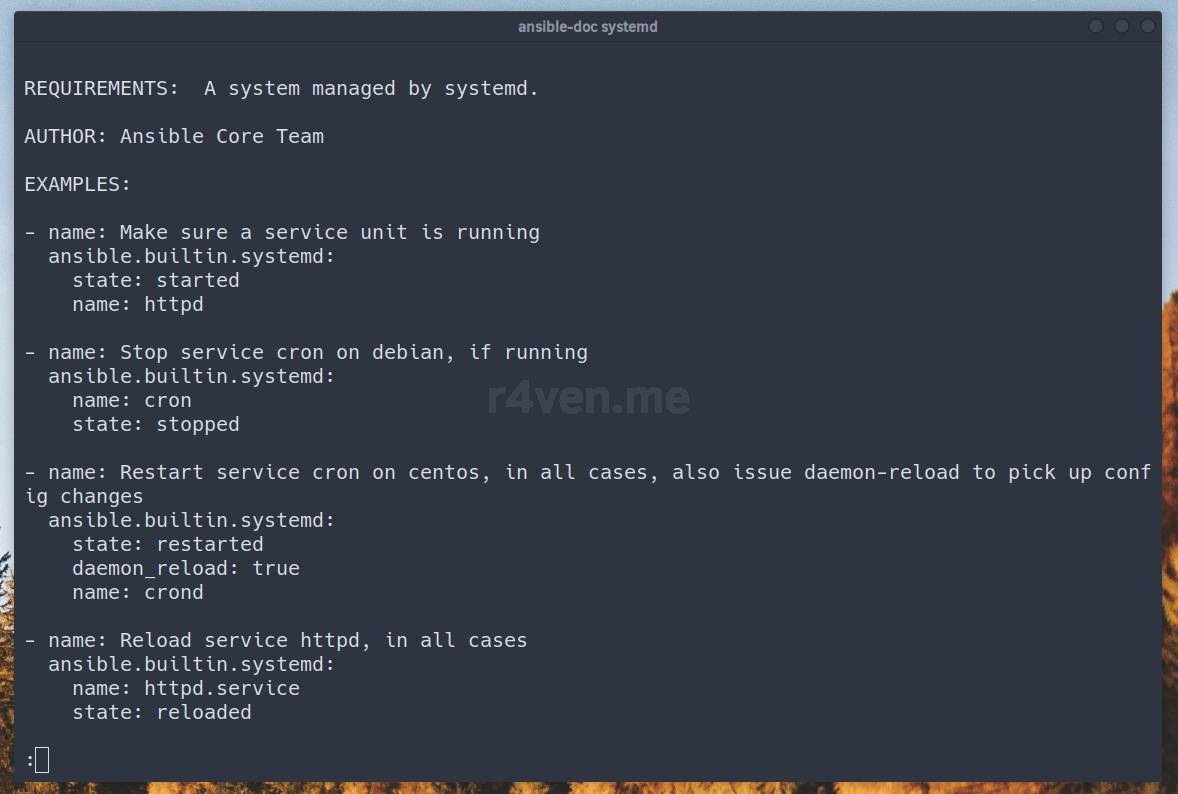
Personally, I find this very convenient!
Example ansible playbook: fixing the sshd config and copying an SSH key
As practice, let’s write a playbook 📝 that:
- on all servers:
- changes the SSH connection port number;
- disables password access to the server via SSH;
- creates the
~/.sshdirectory if it doesn’t exist; - adds a new public ssh key for key-based authorization.
- on servers where the “project” variable equals “vpn”:
- copies the private SSH key file from the local machine to the user’s directory on the remote servers.
Let’s generate a new key:
ssh-keygen -t ed25519 -f ~/ansible/id_ed25519_new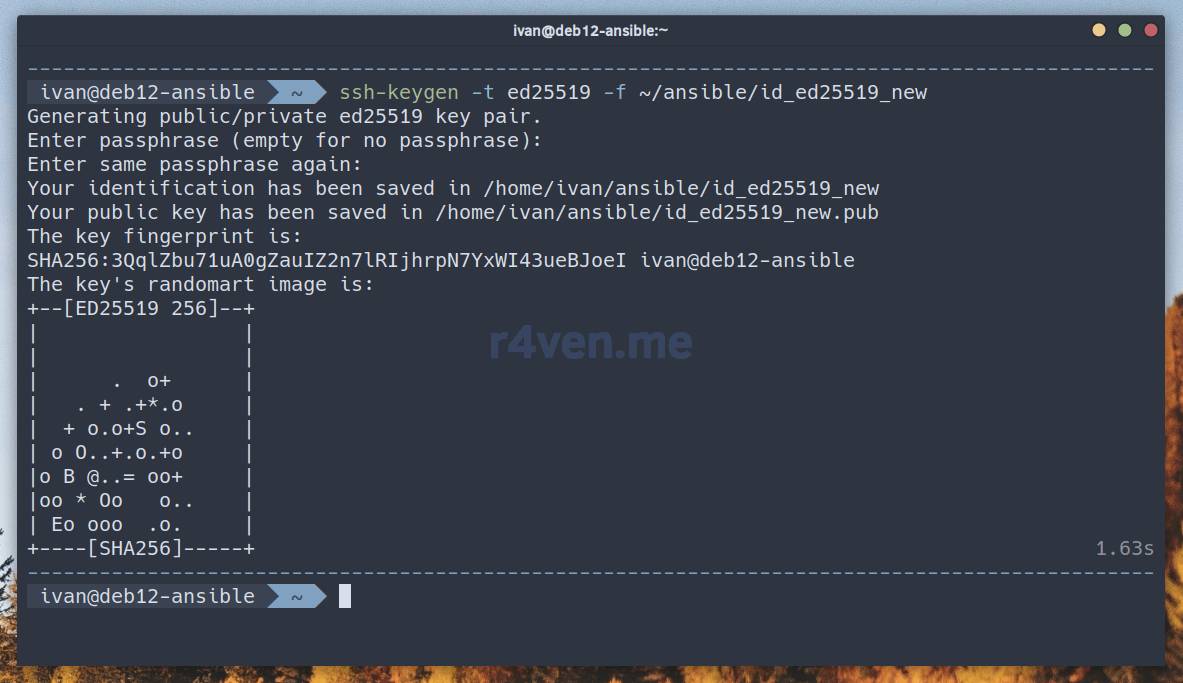
We create the playbook:
nvim ./ansible/playbooks/sshd_config.yml
We fill it in:
---

- name: Config sshd service and copy private key   # playbook name/description
  hosts: all                            # apply to all hosts
  gather_facts: false                   # do not gather facts (speeds up execution)
  become: true                          # execute with privilege escalation (sudo)
  force_handlers: true                  # execute handlers even if an error occurs

  vars:
    - new_ssh_port: 4444                # new SSH port number
    - user_name: "ivan"                 # username for whom we're adding an SSH key
    - user_ssh_privkey: "/home/ivan/ansible/id_ed25519_new" # path to the user's private SSH key
    - user_ssh_pubkey: "/home/ivan/ansible/id_ed25519_new.pub" # path to the user's public SSH key

  tasks:
    - name: Change sshd port number
      lineinfile:
        path: /etc/ssh/sshd_config      # path to the SSH configuration file
        regexp: "^Port"                 # regular expression to find the port line
        line: "Port {{ new_ssh_port }}" # change the port to the value from the variable
        backup: true                    # create a backup of the sshd_config file before changing
      notify:
        - Restart sshd                  # handler for restarting SSH after the change
      tags:
        - ssh_server                      # tag to allow selective task execution

    - name: Disable sshd password auth
      lineinfile:
        path: /etc/ssh/sshd_config      # path to the SSH configuration file
        regexp: '^PasswordAuthentication yes'  # regular expression to find the line
        line: 'PasswordAuthentication no'      # disable password authentication
      notify:
        - Restart sshd                  # handler for restarting SSH
      tags:
        - ssh_server                      # tag for the SSH server task

    - name: Create ssh directory if it does not exist
      file:
        path: "/home/{{ user_name }}/.ssh/"  # path to the .ssh directory for the user
        state: directory               # create the directory if it doesn't exist
        owner: "{{ user_name }}"       # set the owner
        group: "{{ user_name }}"       # set the group
        mode: 0700                     # directory access permissions
      tags:
        - ssh_client                   # tag for SSH client tasks

    - name: Add user ssh public key
      lineinfile:
        path: "/home/{{ user_name }}/.ssh/authorized_keys"  # path to the authorized_keys file
        line: "{{ lookup('file', '{{ user_ssh_pubkey }}') }}"  # use the content of the public key file as the line to add
        owner: "{{ user_name }}"       # set the owner
        group: "{{ user_name }}"       # set the group
        mode: 0600                     # file access permissions
        backup: true                   # create a backup of the file before changing
        create: true                   # create a new file if it doesn't exist
      tags:
        - ssh_client                   # tag for SSH client tasks

    - name: Copy user ssh private key
      copy:
        src: "{{ user_ssh_privkey }}"  # path to the file on the local machine
        dest: "/home/{{ user_name }}/.ssh/"  # path to the directory on the remote server, trailing slash is required
        owner: "{{ user_name }}"       # set the owner
        group: "{{ user_name }}"       # set the group
        mode: 0600                     # file access permissions
        backup: true                   # create a backup of the file before changing
      when: project == "vpn"           # execute only if the host's project variable = "vpn"
      tags:
        - ssh_client                   # tag for SSH client tasks

  handlers:
    - name: Restart sshd
      systemd:
        name: sshd                     # name of the systemd SSH service
state: restarted # restart the serviceAnd run it:

ATTENTION ❗️ This playbook changes the sshd daemon’s port number and disables password access to the server via SSH. It is strongly recommended to run untested playbooks in test environments. You perform all actions at your own risk and responsibility. I warned you)
ansible-playbook ./ansible/playbooks/sshd_config.yml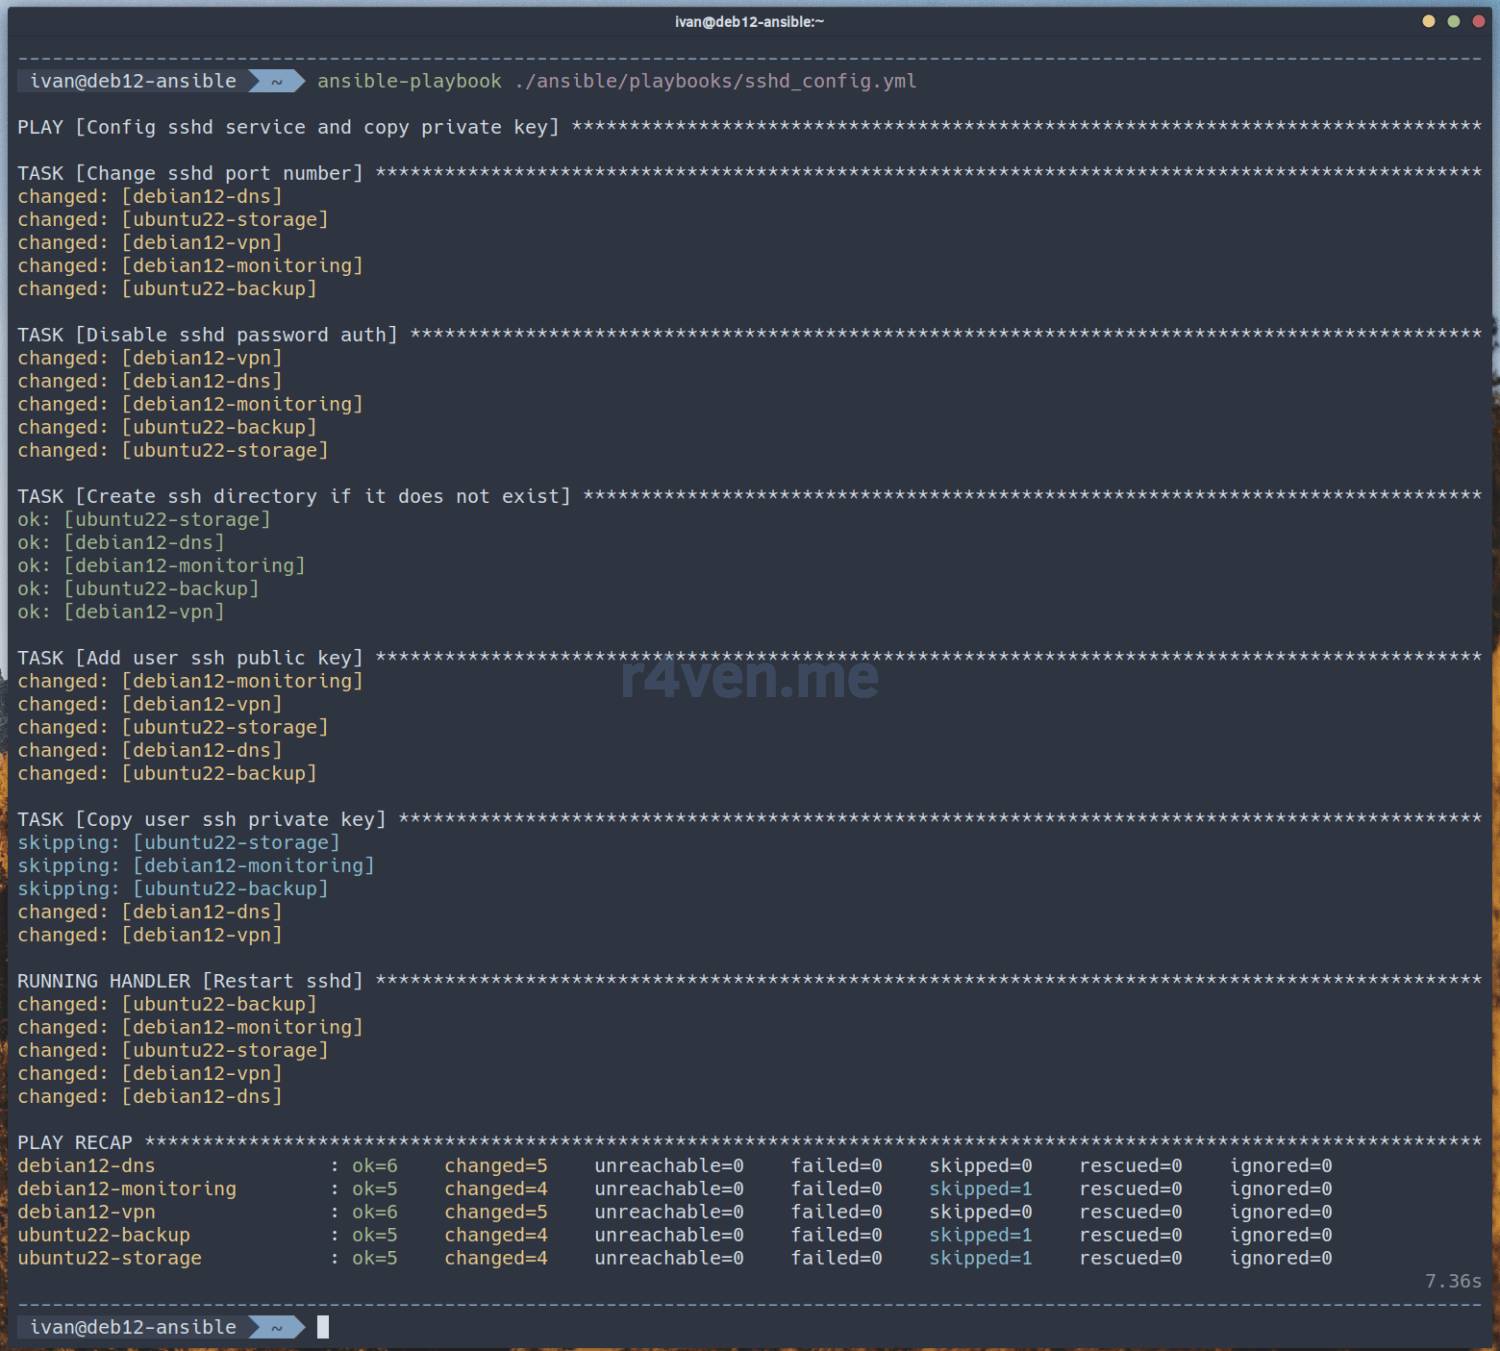
If everything worked correctly, the SSH access port on the remote servers will be changed. Don’t forget to update the port number in the inventory file. Or revert the old port number with a similar command:
ansible-playbook ./ansible/playbooks/sshd_config.yml -e 'ansible_port=4444' -e 'new_ssh_port=22'Here, the ansible_port variable (from the ansible.cfg config), used to connect to the hosts, and the custom new_ssh_port variable (from the sshd_config.yml playbook), which defines the new port number in the playbook, are overridden 😶🌫️.
Just in case, let me repeat that the playbook also adds our new public (~/ansible/id_ed25519_new.pub) key to the servers.
You may have noticed 🧐 that tags 🔖 are used in the playbook. They allow selective execution. For example, run only the tasks tagged ssh_client (key -t or --tags):
ansible-playbook ./ansible/playbooks/sshd_config.yml -t ssh_client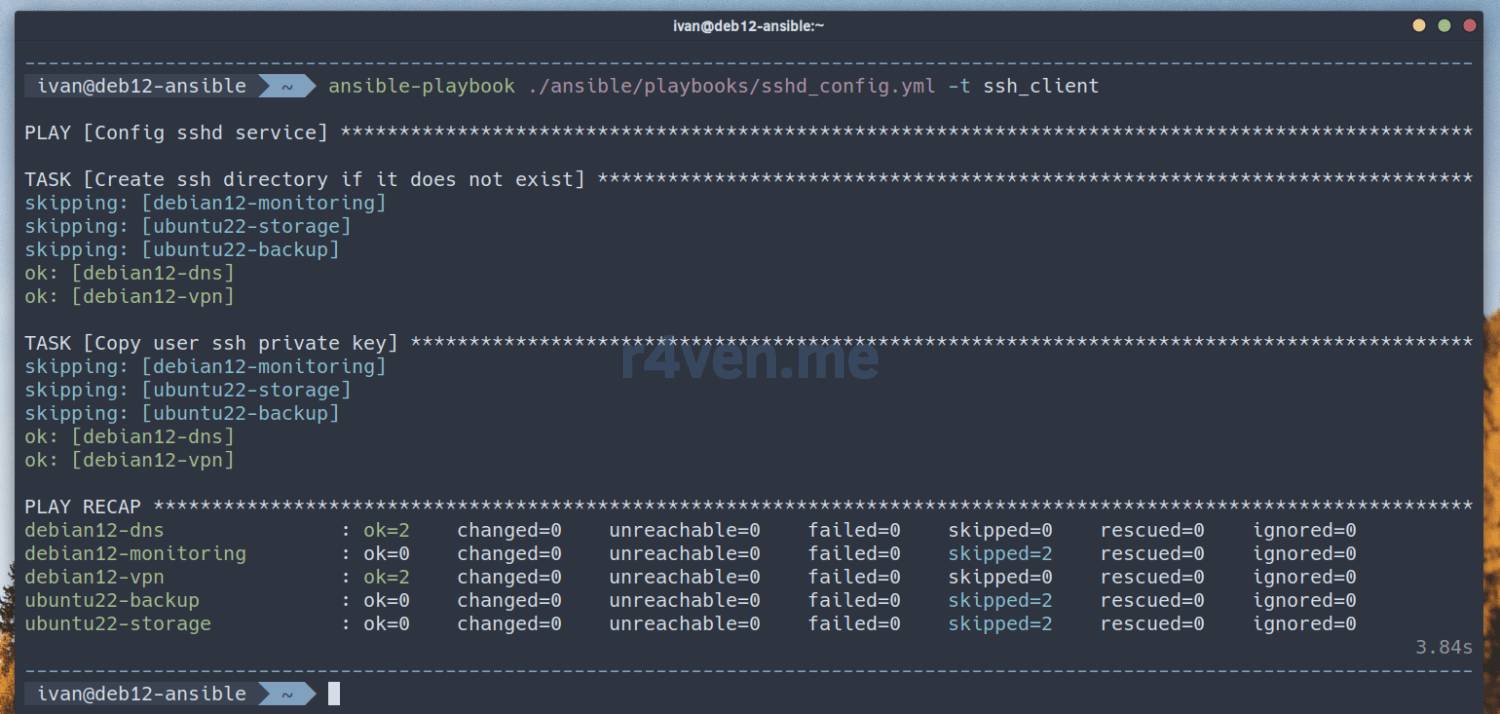
Or, conversely, ignore tasks (--skip-tags):
ansible-playbook ./ansible/playbooks/sshd_config.yml --skip-tags ssh_serverA brief word about Ansible roles
As mentioned at the beginning of the article, an Ansible role is a structure of files and directories for conveniently organizing tasks, templates, and variable files for a Playbook 🚜. You can create a role template with this command:
ansible-galaxy init ./ansible/roles/base-config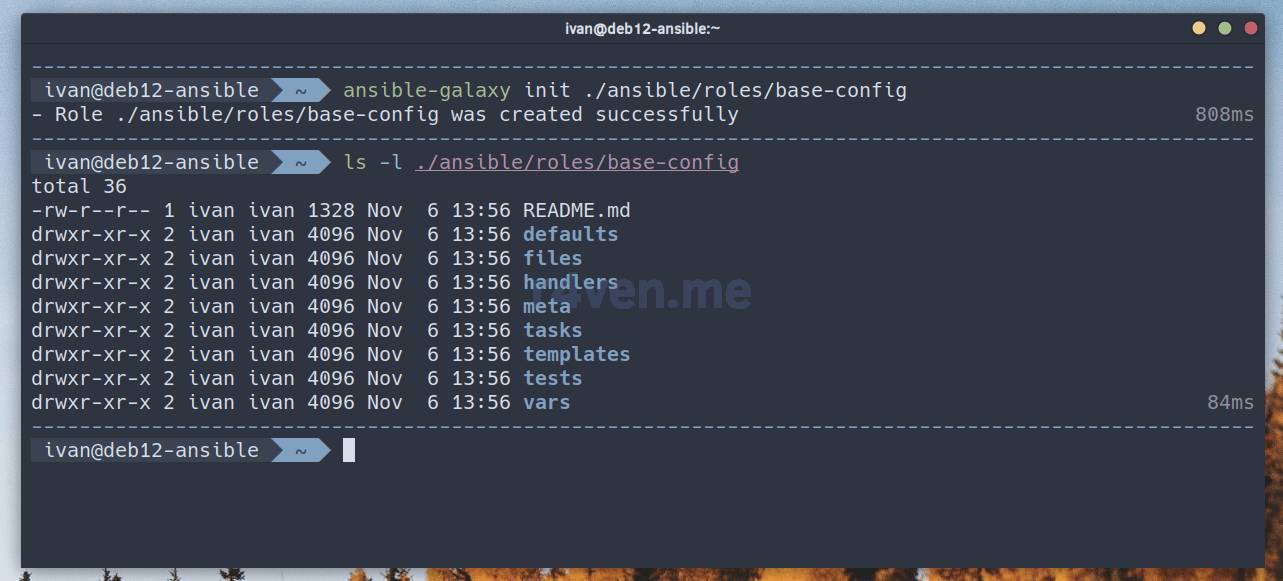
A brief description of the structure:
./ansible/roles/base-config/
├── README.md           # role documentation
├── defaults/           # default variable values (main.yml)
├── files/              # files that will be copied to target hosts
├── handlers/           # handlers for notifications (main.yml)
├── meta/               # role metadata, including dependencies (main.yml)
├── tasks/              # main role tasks (main.yml)
├── templates/          # Jinja2 templates that will be rendered
├── tests/              # tests for the role (inventory, test.yml)
└── vars/ # role variables with higher priority (main.yml)In the future, we’ll definitely be writing Ansible roles for various tasks!
But that’s already a completely different story)
Creating a function for conveniently running playbooks
Earlier I promised a function for conveniently executing playbooks. It’s quite simple, but useful. Let’s run:
echo 'ap() { ansible-playbook ~/ansible/playbooks/"$@"; }' >> ~/.profile

source ~/.profile

which ap
Click to view a description of the commands above
echo— outputs a string (more on text output here);'ap() {ansible-playbook ~/ansible/playbooks/"$@"}'— the string that defines theapfunction:ap()— the declaration of a function namedap(the name is arbitrary);{ansible-playbook ~/ansible/playbooks/"$@"}— the body of the function, which runsansible-playbook, passing it all arguments ("$@"), for example,ap playbook.yml --become;>> ~/.profile— appends the line to the end of the~/.profilefile, so the function is loaded automatically on login (more on stream redirection here).
source ~/.profile— loads the changes from~/.profile, activating theapfunction in the current session;which ap— if the function is defined successfully, this will display it as part of the current shell.
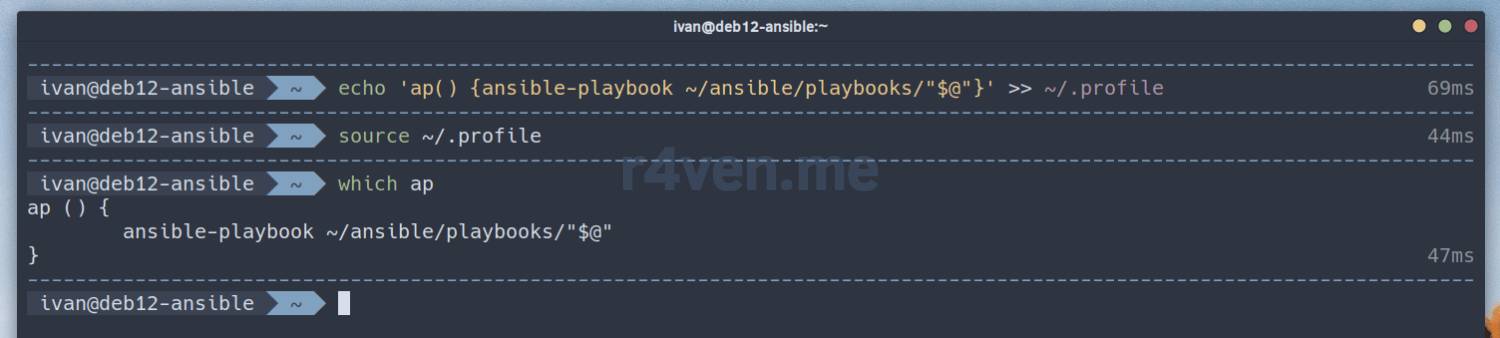
Let’s check that it works:
ap ping.yml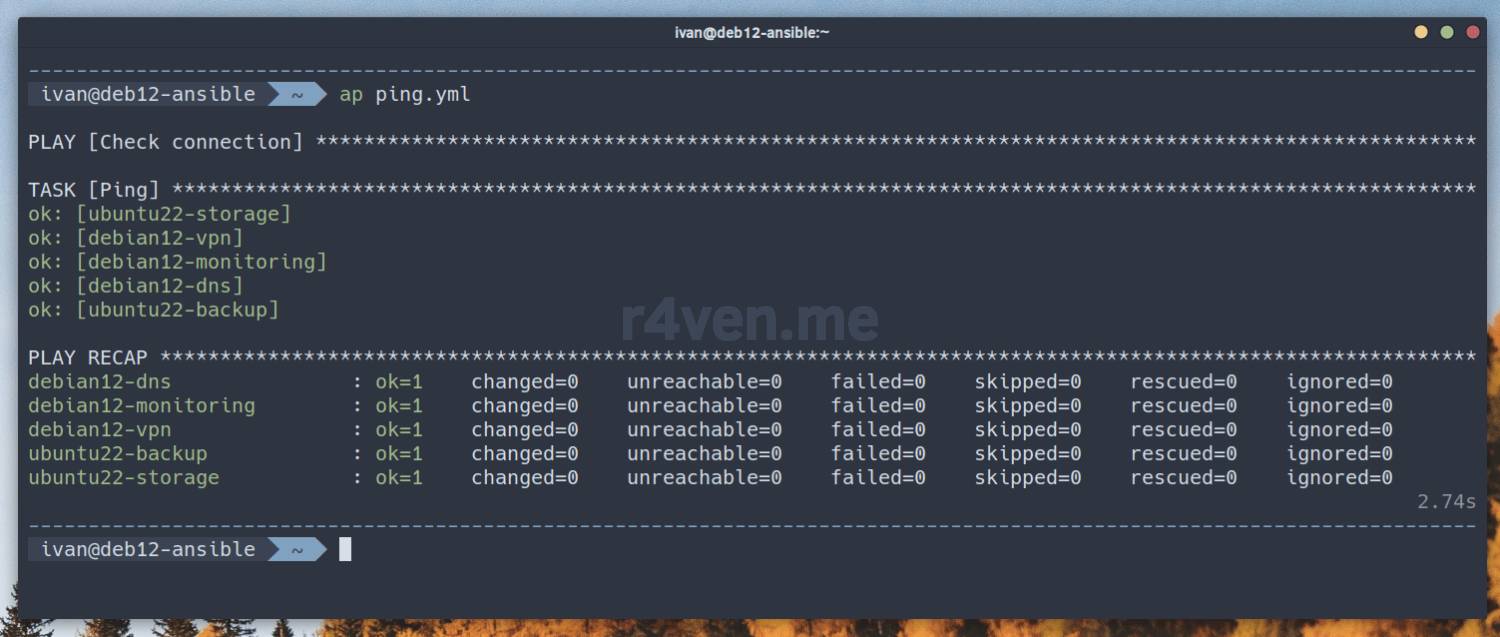
Excellent!
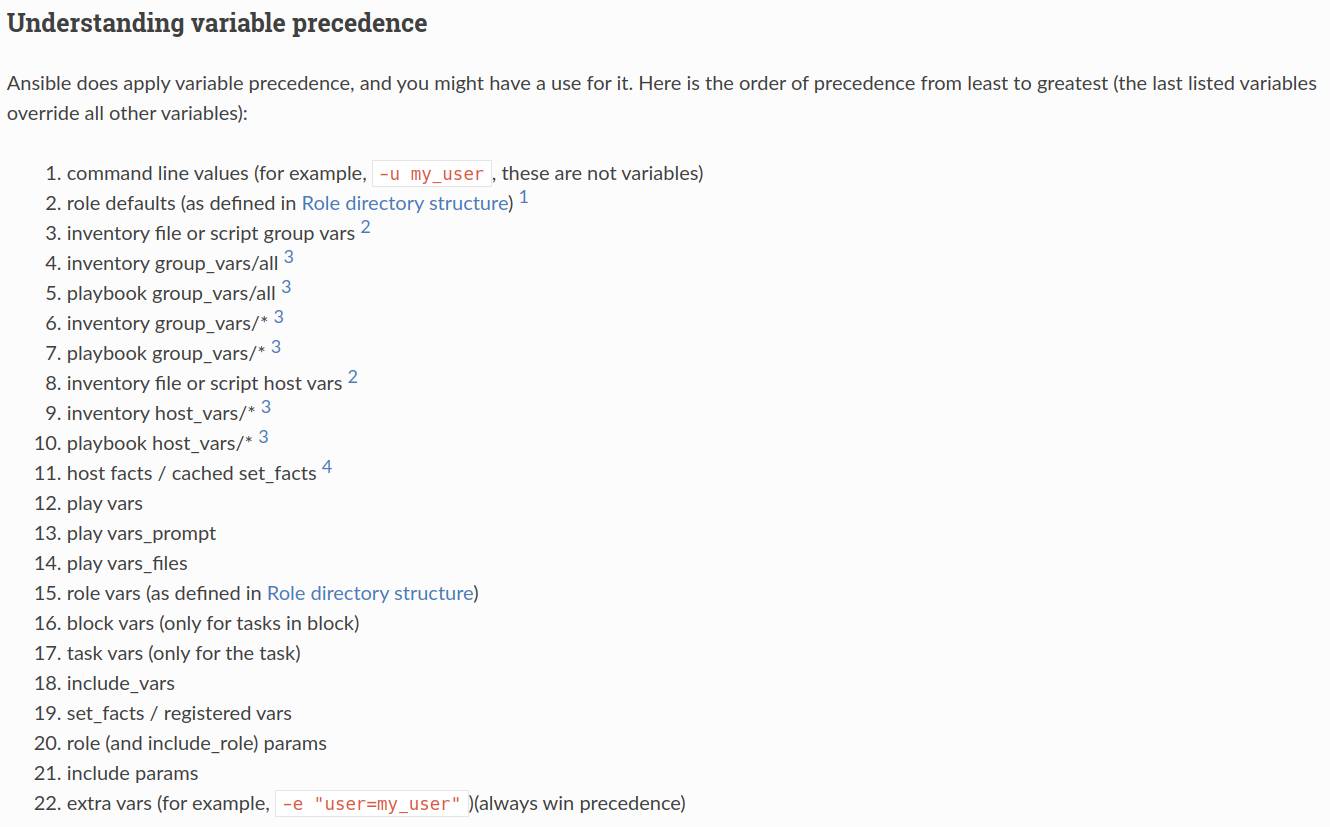
A couple of words about variables
As you’ve understood, variables in Ansible are a separate topic that the official documentation will explain better than I can. I’ll just point out the most problematic spot — variable overriding. In Ansible, there’s a hierarchy for them (lower ones override higher ones):
Afterword
So we’ve gotten acquainted with such a great and useful configuration management tool called Ansible 😎. We have the basic knowledge, now all that’s left is to apply it in practice to solve routine tasks 😌. I’m planning to write a playbook for basic Linux server setup, installing and running various services, installing Arch Linux on encrypted partitions, and much more 🤯.
All the example files are available in my repository on GitHub.
Thanks for taking the time 😊. If you have any questions – I invite you to our friendly Raven chat 🚶♀️🐧🚶🐧🚶♂️🐧 on telegram 😅. Also make sure to subscribe to the main telegram channel: @r4ven_me, notifications about new materials on the site arrive there on the day of publication.
Good luck!
Useful sources
- Example files from the article | GitHub
- Ansible configuration (EN) | docs.ansible.com
- List of Ansible environment variables (EN) | docs.ansible.com
- Building an Ansible inventory | docs.ansible.com
- List of connection parameters for the inventory file | docs.ansible.com
- List of facts (ansible facts) | docs.ansible.com
- Documentation for the debug module | https://docs.ansible.com/
- Documentation for the ping module | https://docs.ansible.com/
- SSH – Secure connection to remote hosts: an introduction | Raven blog
- VIM – Console editor: getting to know it | Raven blog
- ZSH – Interactive shell for Linux + Oh-My-Zsh | Raven blog
👨💻And…
Don’t forget about our Telegram channel 📱 and chat
Or maybe you want to become a co-author? Then click here🔗
💬 All the best ✌️
That should be it. If not, check the logs 🙂

Comments